The Day I Made a Mess That Tasted Amazing
I still laugh at the first time I tried to roll these cheesy taco sticks. I was in a hurry, and I filled the dough way too full. The cheese oozed out like a little yellow river on the baking sheet. My kitchen smelled like a taco truck had crashed into a bakery.
But you know what? The crispy bits that fell off were the best part. My grandson called them “crunchy treasure.” Sometimes the messiest mistakes taste the sweetest. Have you ever burned or broken a snack and still loved eating it?
Why Simple Dough Is Your Best Friend
I love using refrigerated crescent dough for quick snacks. It comes in a little can that pops open with a gentle thump. No kneading, no flour all over your counter. That little tube of dough holds so many possibilities.
Doesn’t that smell amazing when it hits the hot oven? The buttery layers puff up and turn golden brown. Why this matters: A ready-made shortcut lets you spend less time fussing and more time laughing with the people you feed. Simple tools make cooking feel like play, not work.
The Secret to Perfect Seasoning
My friend Maria taught me this trick. After you cook your ground beef, let it cool just a little before you add the taco seasoning. A hot pan can make the powder clump up into sad little balls. You want each crumb of meat to wear a tiny coat of flavor.
I always stir the meat with a wooden spoon and watch it turn that beautiful rusty red. *Fun fact: The original taco seasoning invented in the 1950s was a secret blend of eight spices. Chili powder and cumin are the stars, but a pinch of sugar is the quiet hero.* Why this matters: Good seasoning doesn’t shout. It whispers and holds hands with the other flavors.
The Rolling Trick I Learned the Hard Way
When you roll the dough into sticks, tuck the edges in tight like you are wrapping a small gift. The first batch I made leaked because I left the ends loose. Now I pinch each side three times, like I’m saying a little promise to the snack.
Press the seam gently so it sticks flat to the pan. How do you like your snacks wrapped up tight, or do you like a little messy spill?
What You Dip Reveals Who You Are
My daughter dips hers in extra salsa. My son goes straight for the sour cream until his stick looks like a little white log. I like a mix of both, swirled together in a little puddle on my plate. The cilantro on top is not necessary, but it makes the kitchen look fancy for free.
Why this matters: The dips you choose tell a story about your taste buds. Sour cream cools the heat. Salsa brings the sunshine. Cilantro adds a whisper of green magic. What is your favorite thing to dip a taco stick into?
When to Make These for a Crowd
These cheesy taco sticks disappear fast at birthday parties or after-school hangouts. I made a double batch last Saturday for my grandkids and their friends. The whole plate was empty in eleven minutes. I counted.
You can even prep them the night before. Just roll them up, cover the tray with plastic wrap, and pop them in the fridge. Bake them fresh when everyone arrives. Have you ever made snacks ahead of time for a party? Tell me how it went.
My Last Bite of Advice
Let the sticks cool for at least three minutes after they come out of the oven. I know it is hard to wait. The cheese inside is hotter than a summer sidewalk. Burning your tongue on the first bite is a sad way to start a happy snack.
And don’t forget to lick the extra sour cream off your finger. That is not a recipe step. That is just good living. Does your family sneak bites before the food even hits the table? Mine sure does, and I love it every time.
Ingredients:
| Ingredient | Amount | Notes |
|---|---|---|
| Refrigerated crescent dough | 1 package (10 oz) | |
| Cooked ground beef | 1 cup | |
| Taco seasoning | 1 packet (1 oz) | |
| Shredded cheddar cheese | 1 cup | |
| Salsa | ½ cup | |
| Sour cream | ¼ cup | For dipping |
| Chopped fresh cilantro | ¼ cup | Optional, for garnish |
| Cooking spray | 1 can |
My First Time Making Cheesy Taco Sticks
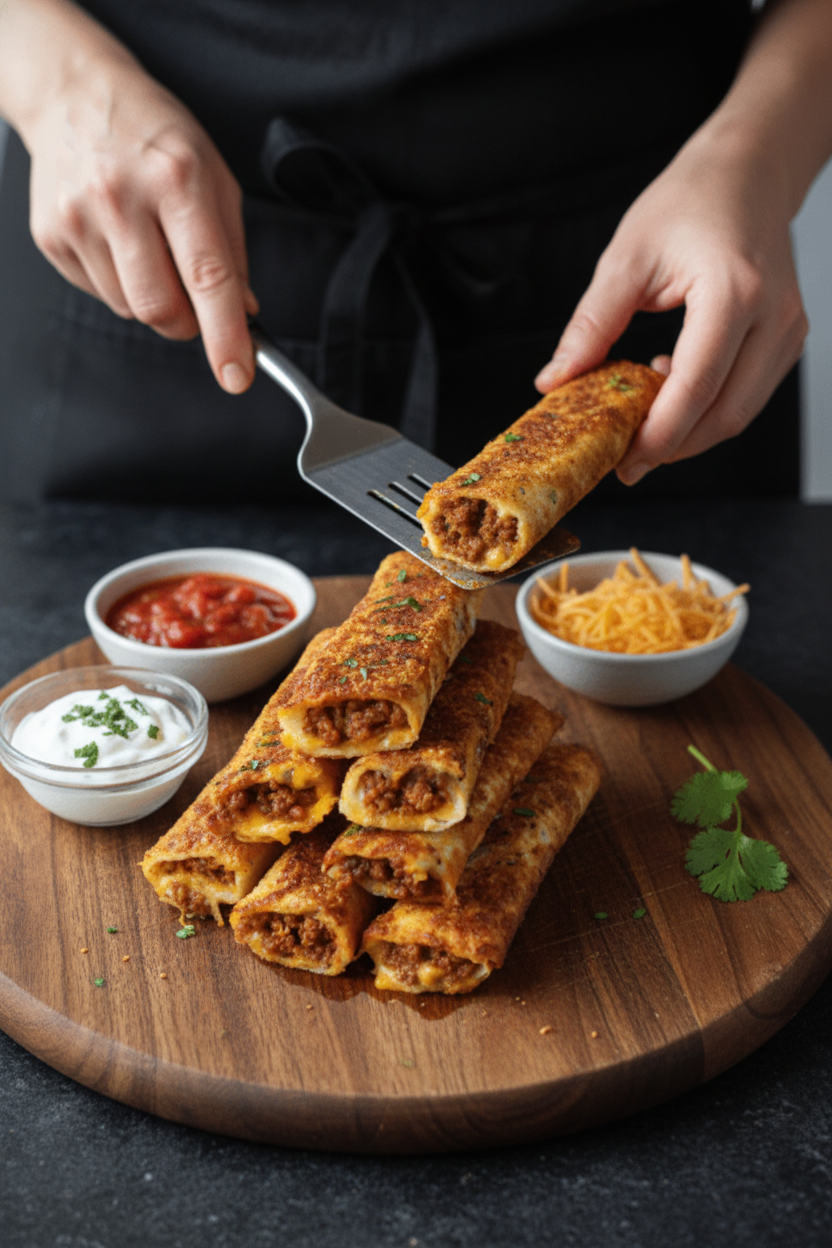
I remember the first time I made these for my grandkids. They came running in from the yard, all muddy and smiling. The smell alone made them stop in their tracks. Doesn’t that smell amazing? It’s like a taco night turned into a finger-food party.
These Cheesy Taco Sticks are perfect for after-school snacks or a quick dinner. The best part is that they use canned crescent dough. That means less work for you and more time for smiles. I still laugh at how simple they are to roll up.
Let’s get started. You will need a package of refrigerated crescent dough, one cup of cooked ground beef, and a packet of taco seasoning. Don’t forget the shredded cheddar cheese, salsa, and sour cream. A little cilantro on top makes it extra special if you like that.
Step 1: Preheat your oven to 375 degrees Fahrenheit. Line a baking sheet with parchment paper. Give it a light spray of cooking oil so nothing sticks. (Hard-learned tip: Always spray the paper, not just the pan. Trust me, I learned that the messy way.)
Step 2: In a bowl, mix your cooked ground beef with the taco seasoning. Use a fork to stir it all together until every bit of meat is coated. This is where the magic starts. The seasoning makes the whole kitchen smell like a fiesta.
Step 3: Unroll the crescent dough onto a clean counter. Separate it into four rectangles by pinching the seams together with your fingers. Imagine you are making little pillows for the filling. Take your time so there are no holes.
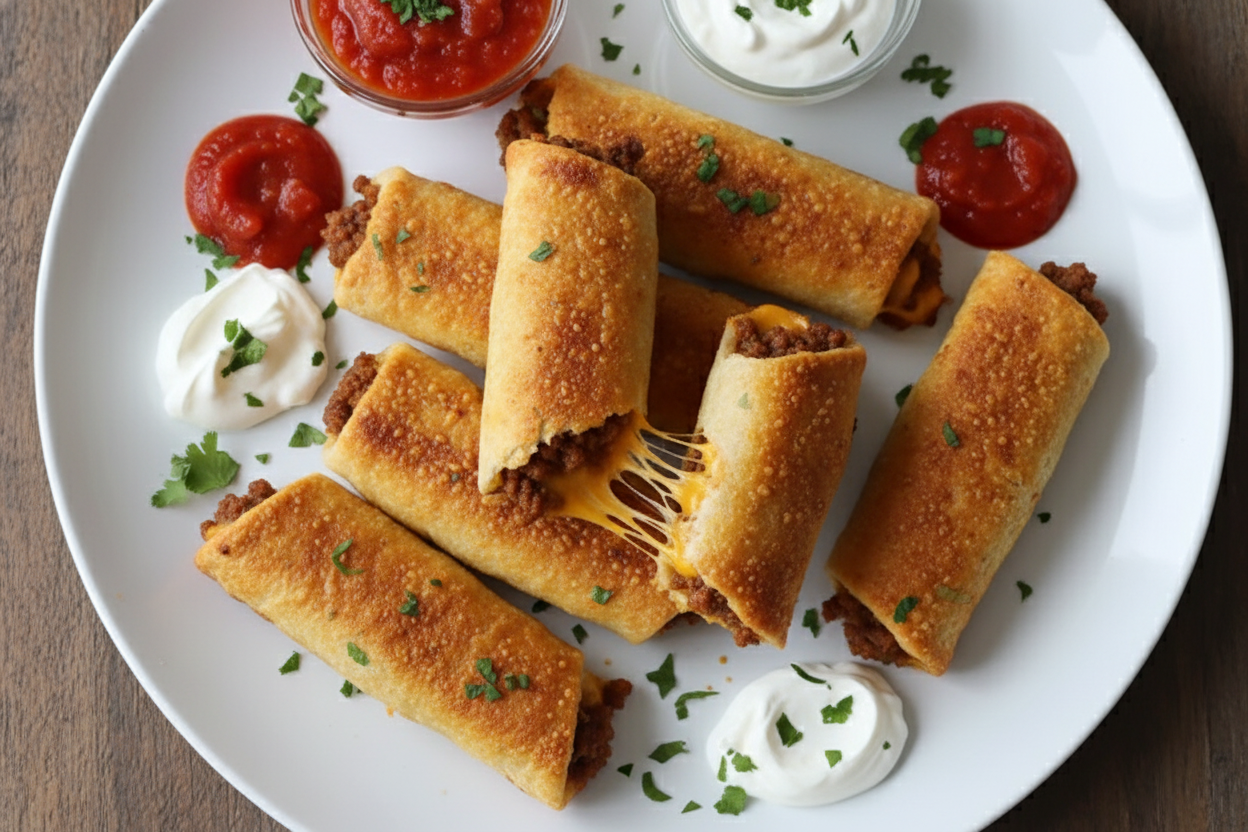
Step 4: Spoon a portion of the seasoned beef onto each rectangle. Spread it evenly, leaving a tiny border around the edges. Sprinkle a quarter cup of cheddar cheese on top of the meat. Doesn’t that cheesy layer look so good already?
Step 5: Roll the dough tightly to form a stick shape. Tuck the edges in as you go, like wrapping a little gift. This keeps all the yummy filling inside where it belongs. Place each stick seam-side down on your prepared baking sheet.
Step 6: Bake for 15 to 20 minutes, until they are golden brown and puffy. Watch them through the oven window if you can. The cheese might bubble out a little, and that is just fine. Let them cool for a few minutes before serving.
Step 7: Serve these warm sticks with a bowl of salsa and a little sour cream for dipping. Sprinkle on some chopped cilantro if you like. Now, here is a fun question for you: What is your favorite thing to dip in salsa? Share below!
Cook Time: 15–20 minutes
Total Time: 25 minutes
Yield: 4 Taco Sticks (serves 2–4 people)
Category: Snack, Quick Dinner
Three Fun Twists to Try
Sometimes I like to change things up a bit. These twists are perfect for when you want something a little different. They are easy to swap in and out of the recipe.
Veggie Lover’s Version: Skip the beef and use a can of black beans, drained and mashed. Add some corn kernels and a pinch of cumin. My neighbor’s daughter calls them “rainbow sticks” and she loves them.
Spicy Fiesta Sticks: Add a tablespoon of chopped jalapeños to the beef mixture. Use pepper jack cheese instead of cheddar for an extra kick. My son always reaches for these first at family gatherings.
Breakfast Taco Sticks: Replace the beef with scrambled eggs and crumbled breakfast sausage. A little shredded hash brown inside makes them extra hearty. I made these for a sleepover once, and they vanished in five minutes. Which one would you try first? Comment below!
How to Serve and What to Sip
These sticks are great on their own, but a little something on the side makes it a meal. I like to serve them with a simple side of tortilla chips and a fresh green salad. A squeeze of lime over the top brightens everything up.
For a fun garnish, try a dollop of guacamole or a sprinkle of crushed tortilla chips on the plate. It adds a little crunch. My grandchildren love to dip them in extra salsa and then laugh with messy fingers.
Now for the drinks. For the adults, a cold Mexican lager or a sparkling margarita pairs beautifully with the taco flavors. For the kids, a tall glass of horchata or even lemon lime soda hits the spot. Which would you choose tonight?
Storing Your Cheesy Taco Sticks Like a Pro
These cheesy taco sticks are perfect for making ahead. I remember the first time I made them for a busy week. I stored them in the fridge and my family snacked on them for days. To reheat, just pop them in a 350°F oven for about 8 minutes. They stay crispy if you don’t use the microwave. For the freezer, wrap each stick tightly in foil. Then place them in a freezer bag. They keep well for up to three months. When you want one, bake from frozen for 15 minutes. This batch-cook trick saves time on hectic evenings. Have you ever tried storing it this way? Share below!
Why does this matter? Storing food properly means less waste and more money saved. You get a warm snack without extra work. It is a win for your wallet and your time.
Three Common Problems and Easy Fixes
Sometimes your taco sticks might turn out soggy. I once left the filling too wet. The salsa leaked out and made the dough mushy. The fix is simple. Drain the cooked ground beef well before mixing. Pat it dry with a paper towel. That keeps the dough crisp.
Another issue is the sticks falling apart while baking. I remember when my grandson helped me roll them. We forgot to tuck the edges tight. The filling spilled right out. Just pinch the seams firmly and roll tightly. That seals everything inside.
Lastly, the cheese might not melt fully. This happens if you use pre-shredded cheese. It has a coating that stops melting. Grate your own cheddar for the best gooey result. Why does this matter? Fixing these problems gives you confidence in the kitchen. Better flavor comes from simple, smart choices. Which of these problems have you run into before?
Your Top 5 Questions Answered
Q: Can I make this gluten-free?
A: Yes. Use gluten-free crescent dough or puff pastry. Check the package labels carefully.
Q: Can I prepare these ahead of time?
A: Absolutely. Assemble the sticks and refrigerate unbaked for up to 24 hours. Bake just before serving.
Q: What can I swap for the ground beef?
A: Try cooked shredded chicken, black beans, or crumbled tofu. Each works great with taco seasoning.
Q: How do I scale the recipe for a crowd?
A: Double or triple everything. Bake in batches on separate sheets. Keep the sticks warm in a low oven.
Q: Any tips for extra flavor?
A: Add a spoonful of diced green chiles or a pinch of cumin. Cilantro on top is lovely. Which tip will you try first?
From My Kitchen to Yours
I hope these cheesy taco sticks bring joy to your table. They are quick, easy, and perfect for little hands. I love hearing how your family enjoys them. Share a photo or tag my blog’s Pinterest handle. Have you tried this recipe? Tag us on Pinterest! I bet your batch looks wonderful. Until next time, keep your apron on and your heart full. Happy cooking!
—Tessa Hammond.
*Fun fact: Crescent dough was first sold in 1965 and is still a favorite shortcut for busy cooks.
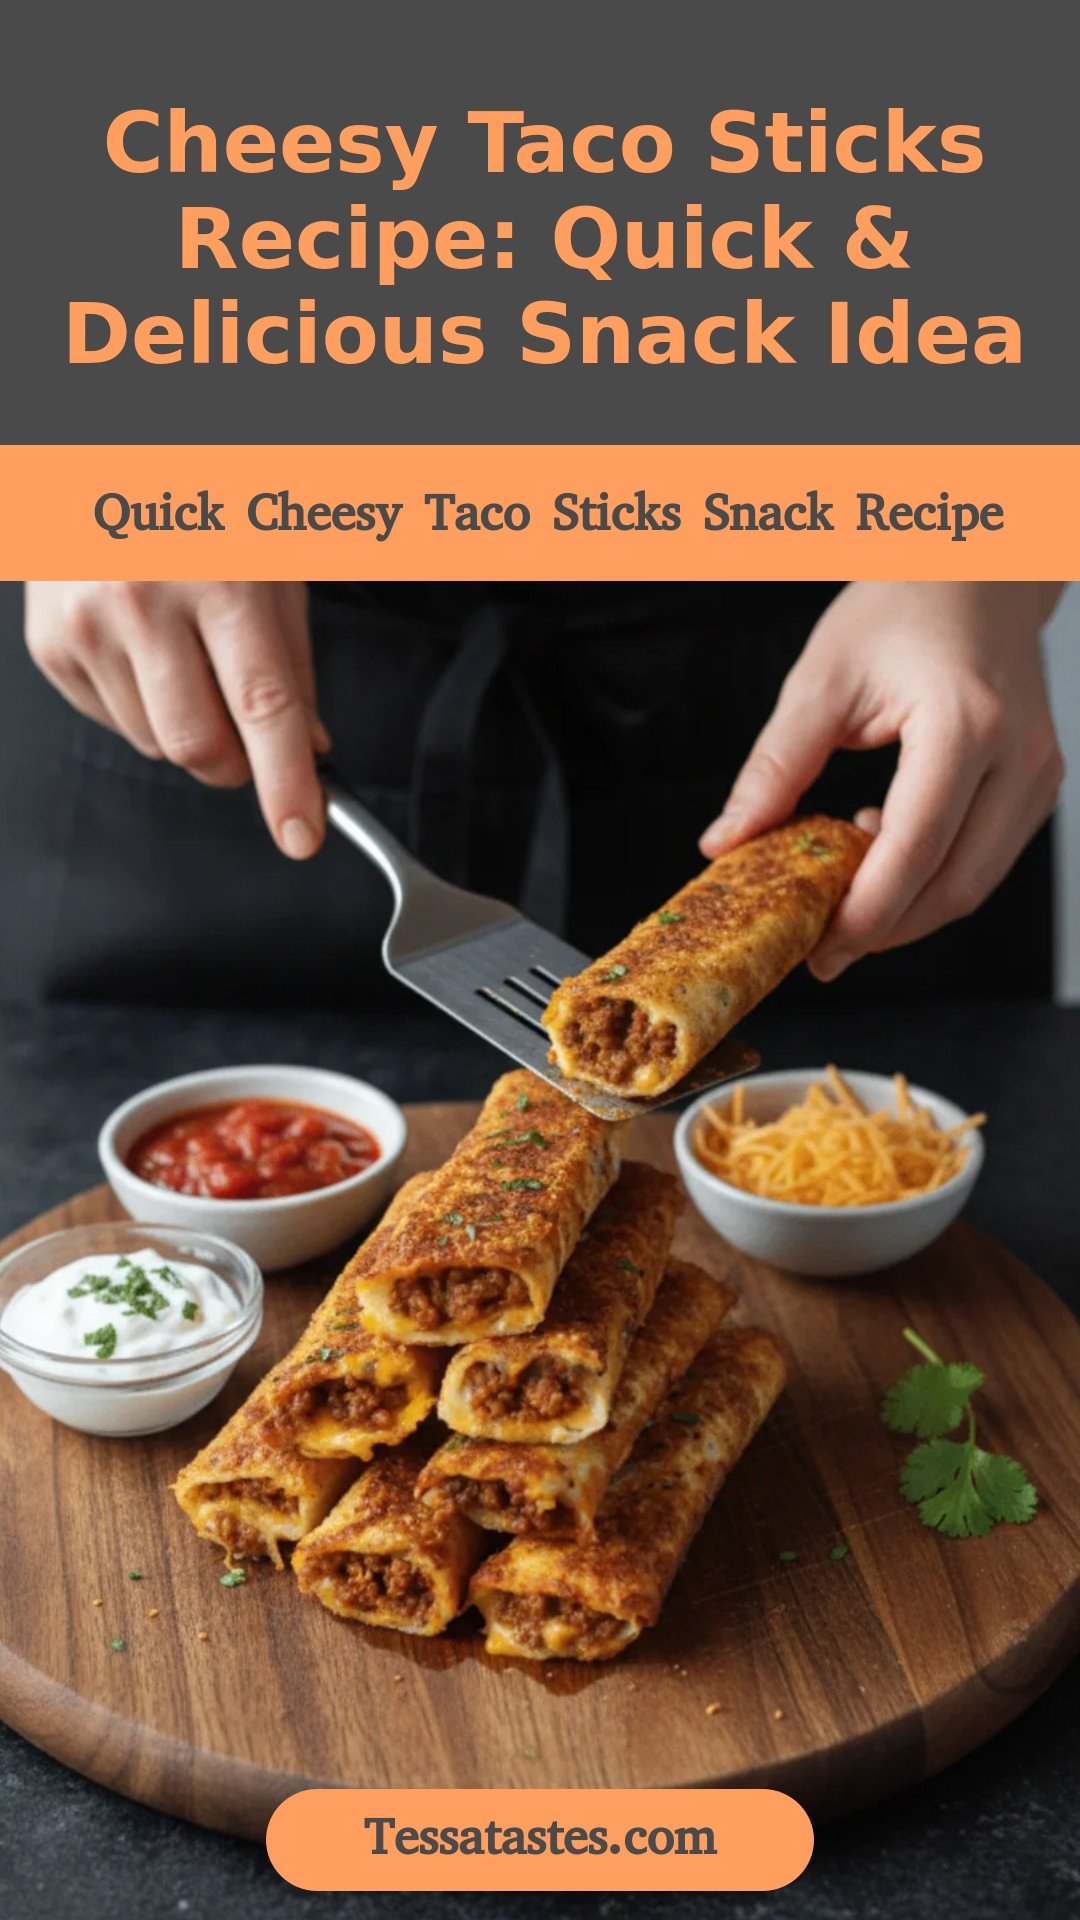
Quick Cheesy Taco Sticks Snack Recipe
Description
Quick and easy cheesy taco sticks made with crescent dough, seasoned ground beef, and cheddar cheese. Perfect for snacking!
Ingredients
Instructions
- Preheat the oven to 375°F (190°C). Line a baking sheet with parchment paper and spray lightly with cooking spray.
- In a mixing bowl, combine the cooked ground beef and taco seasoning. Mix well until the beef is fully coated with seasoning.
- Unroll the crescent dough and separate it into 4 rectangular pieces by pinching the seams together.
- Take a portion of the seasoned beef mix and spread it evenly over each rectangle of dough.
- Sprinkle ¼ cup of shredded cheddar cheese on top of the beef in each rectangle.
- Roll the dough tightly to form sticks, tucking in the edges as you go to seal the filling inside.
- Place the taco sticks seam-side down on the prepared baking sheet.
- Bake in the preheated oven for 15-20 minutes or until golden brown.
- Remove from the oven and let cool for a few minutes. Serve with salsa and sour cream for dipping. Garnish with chopped cilantro if desired.


Leave a Reply