The Magic of a Simple Dough
I love how a few simple things can become something wonderful. Butter, sugar, and flour are like old friends. When they get together, magic happens. This dough is very soft. It feels like playing with clay.
Do not worry if your log looks a little lumpy. Mine always do at first. We will fix it later. The secret is the chilling time. It makes everything better. What is your favorite kitchen smell? Mine is vanilla and butter.
A Little Help from the Fridge
Waiting is the hardest part, I know. But this wait is important. It lets the flavors get to know each other. It also makes the dough firm. That makes it easier to slice later.
I use this time to clean my mixer. Or I just sit with a cup of tea. This matters because good things take a little time. Patience makes a better cookie. Do you find it hard to wait for cookies to bake?
The Sprinkle Roll
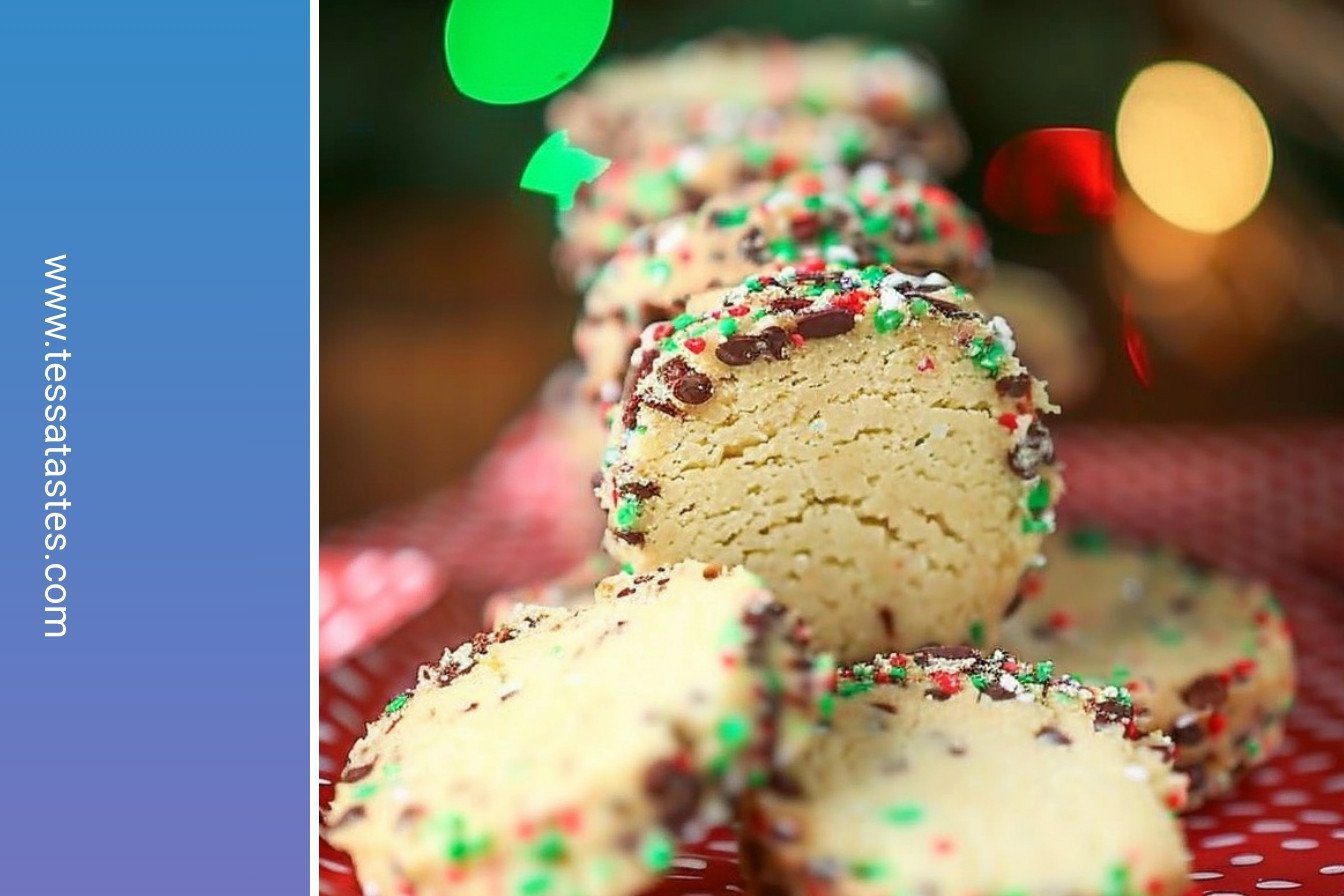
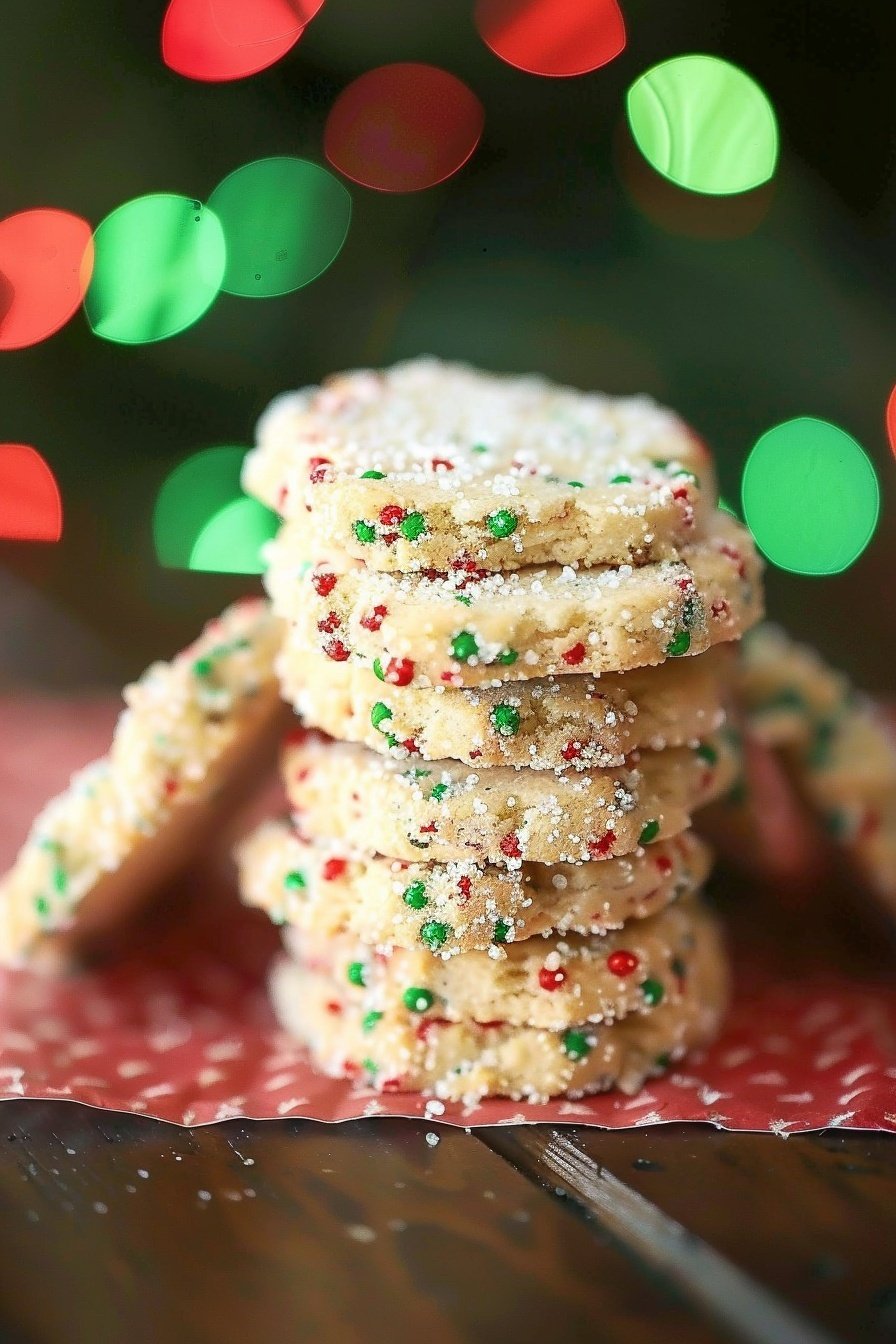
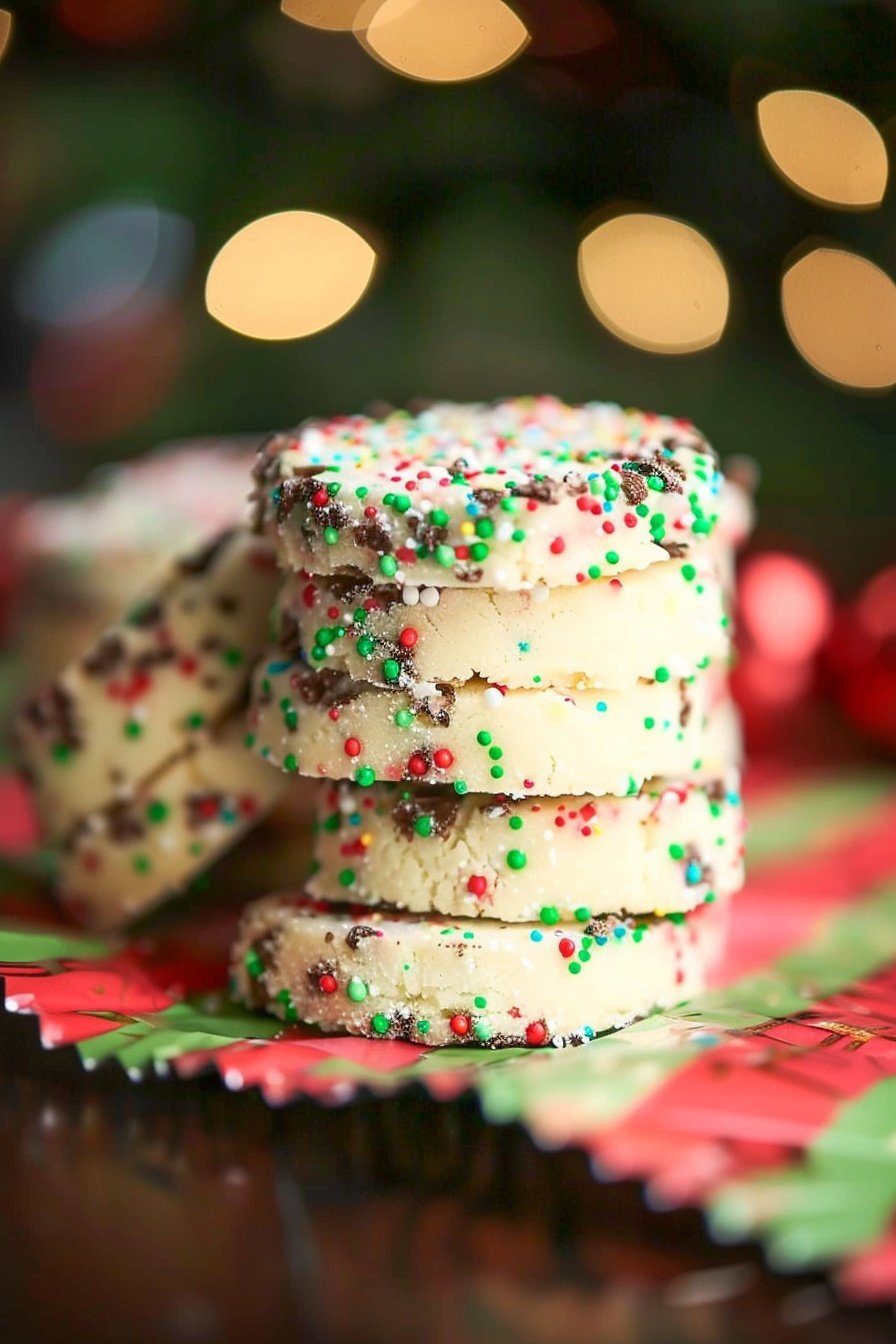
Now for the fun part. Rolling the log in sprinkles is my favorite. It is like giving the cookie a colorful coat. It makes everyone smile before they even take a bite.
Fun fact: The little round sprinkles are called nonpareils. I still laugh at that. I just call them tiny rainbows. You can use any color you like. What color sprinkles would make you happiest today?
My Slicing Secret
Use a gentle sawing motion to slice. Do not press straight down. This keeps the round shape. If a slice is not perfect, you can gently fix it with your fingers.
I learned this the hard way. I once squished a whole log. We baked them anyway. They were delicious, just a bit funny-looking. This matters because cooking is about trying, not being perfect. Have you ever had a kitchen mistake turn out okay?
The Perfect Bake
Watch the edges of the cookies carefully. You want just a hint of gold. I like mine at ten minutes. They stay so soft and melt in your mouth.
Doesn’t that smell amazing? That warm, buttery smell fills the whole house. It tells everyone that something good is coming. Let them cool a bit on the pan. This helps them set up so they do not break. This final step matters because it builds the excitement.
Ingredients:
| Ingredient | Amount | Notes |
|---|---|---|
| unsalted butter | 1 cup | room temperature |
| granulated sugar | 1 1/2 cups | |
| egg | 1 large | |
| vanilla extract or flavoring | 2 teaspoons | |
| almond extract or flavoring | 1 teaspoon | |
| salt | 1/2 teaspoon | |
| all-purpose flour | 2 1/4 cups | |
| sprinkles | for decoration |
Effortless Homemade Cookie Logs
Oh, these cookie logs bring back such sweet memories. My grandson Leo calls them his “magic trick” cookies. He loves how a simple log turns into perfect, swirly circles. The dough is very soft at first. Don’t you worry one bit about that. We let the fridge work its magic. It makes everything so much easier to handle later on. I love the smell of vanilla and almond filling the kitchen. It smells like a happy afternoon.
- Step 1: Let’s start by creaming the butter and sugar together. Use a mixer until it looks smooth and pale. Now, crack in that egg and add your vanilla and almond extracts. Mix it all up until it’s one happy, fragrant family. (A hard-learned tip: Make sure your butter is soft, but not melted. It makes all the difference for a perfect dough.)
- Step 2: Next, add your salt and flour to the bowl. Beat it until you can’t see any white streaks. You might need to stop and scrape the sides down. I always give the bowl one good scrape. This ensures no ingredient is left behind. Now, we divide the dough in half. It doesn’t have to be perfect. Just a rough guess is just fine.
- Step 3: Here is the fun, slightly messy part. Place each dough half on a big piece of plastic wrap. Use the wrap to help you shape it into a log. My first log looked more like a lumpy potato! I still laugh at that. Just get it roughly 2 1/2 inches wide. Wrap it up tight and pop it in the fridge. The chilling time is very important. It needs at least four hours to firm up.
- Step 4: When you’re ready to bake, heat your oven to 350°F. Line your cookie sheet with parchment paper. This keeps the cookies from sticking. Take one log from the fridge. Roll it on the counter while it’s still wrapped up. This helps fix any lumps and makes it a nice, round log. See? I told you we’d fix it later. Do you prefer soft or crispy cookies? Share below!
- Step 5: Now for the sprinkles! Pour them onto a plate. Unwrap your beautiful dough log. Gently roll it in the sprinkles until it’s covered. Then, just slice it into little circles, about 1/4-inch thick. You can place them on your baking sheet. If a circle isn’t perfectly round, you can gently fix it with your fingers. Bake them for 10 to 12 minutes. I like them soft, so I pull them out right at 10 minutes.
- Step 6: Take them out when the edges are just barely golden. Let them cool on the sheet for five minutes. This helps them set. Then, move them to a wire rack. Doesn’t that smell amazing? Once they’re cool, you can store them in a tin. They never last long at my house. Leo always sneaks one while it’s still warm.
Cook Time: 12 minutes
Total Time: 4 hours 37 minutes
Yield: 36 cookies
Category: Dessert, Cookies
Three Fun Twists to Try
This recipe is like a blank canvas. You can dress it up for any season or holiday. I love playing with different flavors and colors. It makes baking feel like a new adventure every single time. Here are a few of my favorite simple twists. They are all so easy and fun.
- Chocolate Chip Swirl: Mix in a half-cup of mini chocolate chips into the dough before you chill it. The chocolate melts so nicely in every bite.
- Lemon Sunshine: Swap the almond extract for lemon extract. Use yellow sanding sugar instead of rainbow sprinkles for a sunny look.
- Peppermint Party: Use peppermint extract instead of almond. Roll the log in crushed candy canes for a festive, wintry treat.
Which one would you try first? Comment below!
Serving Them Up With Style
These cookies are wonderful all on their own. But I think everything is better with a friend. For a real treat, make an ice cream sandwich with two cookies. A scoop of vanilla ice cream in the middle is pure joy. You could also arrange them on a pretty plate with some fresh berries. It looks so lovely for guests.
For a drink, a cold glass of milk is the classic choice. It just feels right. For the grown-ups, a sweet dessert wine or a creamy coffee liqueur pairs beautifully. The flavors just sing together. Which would you choose tonight?
Keeping Your Cookie Logs Perfect
These cookie logs are perfect for making ahead. The dough freezes beautifully for up to three months. Just wrap it tightly in plastic wrap. Then you can have fresh cookies anytime.
I remember my first time freezing the dough. I was so proud of my future self. It saved me when my grandkids visited unexpectedly. We had warm cookies in under twenty minutes.
Store your baked cookies in a tight container. They will stay soft for two weeks. This matters because it makes life simpler. A homemade treat is always within reach.
Have you ever tried storing it this way? Share below!
Easy Fixes for Common Cookie Troubles
Is your dough too soft to roll? Do not worry. This happens to everyone. Just pop it back in the fridge for a bit.
I once tried to rush the chilling time. My log was more of a puddle. Chilling the dough matters. It makes the cookies hold their pretty shape.
Are your sprinkles not sticking? Roll the log while it is still cold. The slight moisture helps them cling. This small step makes your cookies look special.
Are the cookies spreading too much? Your butter might have been too warm. Fixing this builds your cooking confidence. You learn how ingredients work together.
Which of these problems have you run into before?
Your Cookie Log Questions Answered
Q: Can I make these gluten-free? A: Yes, just use your favorite gluten-free flour blend. The results are just as tasty.
Q: How far ahead can I make the dough? A: You can make it up to three days before baking. Keep it wrapped in the fridge.
Q: What can I use instead of almond extract? A: You can use more vanilla. Or try a little lemon extract for a fun change.
Q: Can I make a half batch? A: Of course, just cut all the ingredients in half. It is a great way to test the recipe.
Q: Are the sprinkles optional? A: Yes, but they add such a happy crunch. You could also roll the logs in sugar.
*Fun fact: The first recorded cookie history dates back to 7th century Persia!*
Which tip will you try first?
Bake, Share, and Enjoy
I hope you love baking these cookie logs. They always make my kitchen smell wonderful. Sharing them with family is the best part.
I would love to see your creations. Your kitchen stories bring me so much joy. It feels like we are baking together.
Have you tried this recipe? Tag us on Pinterest! Use our handle @GrandmaTessasKitchen. I cannot wait to see your swirls of color.
Happy cooking!
—Tessa Hammond.

Effortless Homemade Cookie Logs: Irresistibly soft, decadent swirls.: Irresistibly soft, decadent swirls.
Description
Whip up these easy homemade cookie logs! Soft, decadent swirls with minimal effort for a stunning and delicious treat. Perfect for holiday gifting or a cozy bake.
Ingredients
Instructions
- Use a mixer to cream the butter and sugar together until smooth. Add the egg, vanilla, and almond and mix well. Add the salt and flour and beat until fully combined. Scrape the sides of the bowl and mix again.
- Roughly divide the dough in half. Place each half on a large double layer of plastic wrap. Use the plastic wrap to form the dough into a log shape that’s about 2 1/2 inches wide. The dough is soft and this can be a little challenging, but don’t stress too much over it. We’ll fix it later.
- Wrap tightly in the plastic wrap and place in the refrigerator. Allow the dough to chill for at least 4 hours.
- When ready to bake, preheat the oven to 350°F and line a cookie sheet with parchment paper or a silicone baking mat.
- Take one of the cookie dough logs out of the fridge and roll it on the counter (still in the plastic wrap) to better define the round shape.
- If desired, coat the outside of the log with sprinkles or nonpareils. Pour the sprinkles into a shallow tray or plate. Remove the plastic wrap and roll the dough in the sprinkles to get the outside coated.
- Slice the dough into 1/4-inch slices and place on the prepared baking sheet. You can also gently adjust the shape with your fingers at this point, too, if they aren’t round to your liking.
- Bake for 10 to 12 minutes or until the edges of the cookies are just barely starting to turn a light golden brown. (The longer you bake them, the crispier they get. I like them right at 10 minutes.)
- Remove from the oven and allow the cookies to cool on the baking sheet for about 5 minutes before transferring them to a wire rack to cool completely. Store baked cookies in an airtight container at room temperature for up to two weeks or tightly wrapped in the freezer for up to 12 months.


Leave a Reply