
The Magic of Brown Butter
Let’s talk about the secret to these bars. It’s the brown butter. You melt it and let it cook a little longer. It starts to smell like toasted nuts. Doesn’t that smell amazing? That smell is pure magic.
This step changes everything. It turns a simple treat into something special. I learned this from my friend Margie years ago. I still laugh at how she made me smell her butter from across the kitchen. Why does this matter? It teaches us that one small change can make a big difference.
A Sticky Situation
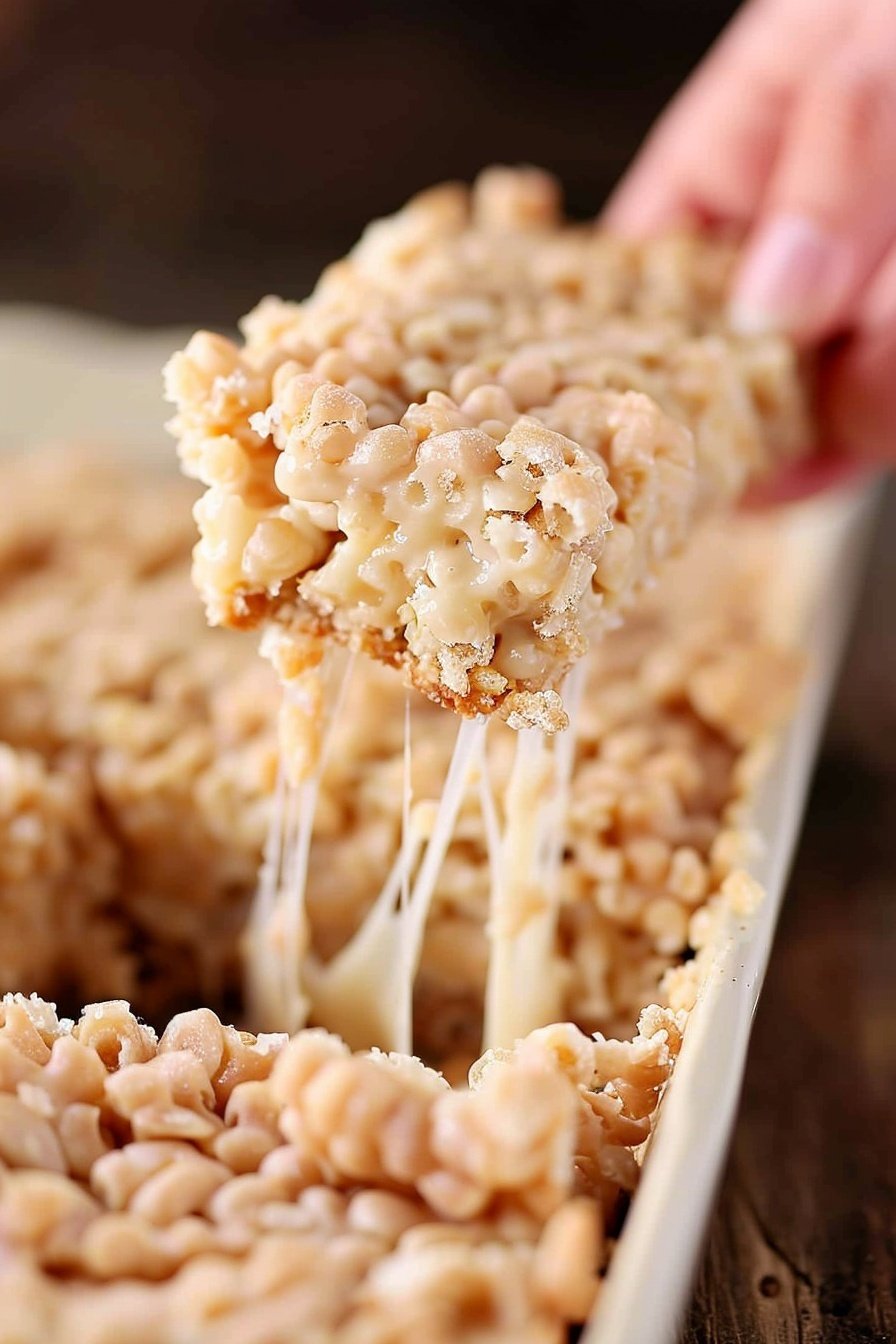
Now for the fun part. You’ll mix the gooey marshmallow with the cereal. It can be a sticky job! My grandson once got it all in his hair. We called him our little marshmallow monster for a week.
Here is my best tip. Spray your spatula with a little cooking spray. This keeps everything from sticking. Don’t press too hard. You want the bars to be light and crispy, not hard. What is your best trick for handling sticky foods? I would love to know.
The Waiting Game
The hardest part is next. You have to let the pan cool. It needs a whole hour. I know, it’s tough to wait. The sweet smell fills your whole kitchen.
But this wait is important. Why does this matter? It gives the bars time to set. If you cut them too soon, they will fall apart. Good things come to those who wait. Do you find it hard to wait for treats to cool?
A Fun Fact for You
Fun fact: Did you know Rice Krispies cereal has been around since 1928? That’s almost 100 years of snap, crackle, and pop! I think that is just wonderful.
It reminds me of making these with my own kids. We would listen for the pops while we mixed. It’s a sound of happiness. What is your favorite sound in the kitchen?
Sharing is the Best Part
Finally, it’s time to slice and share. These bars are perfect for a school party. Or for a happy surprise after homework. They travel so well in a sealed container.
Food always tastes better when you share it. It’s about making memories together. Which friend or family member would you share these with first? Tell me all about them.
Ingredients:
| Ingredient | Amount | Notes |
|---|---|---|
| unsalted butter | ¾ cup (1 ½ sticks) | |
| mini marshmallows | 2 (10-ounce) bags | |
| kosher salt | ¼ teaspoon | |
| marshmallow creme | 1 (7-ounce) jar | |
| Rice Krispies Cereal | 1 (12-ounce) box |
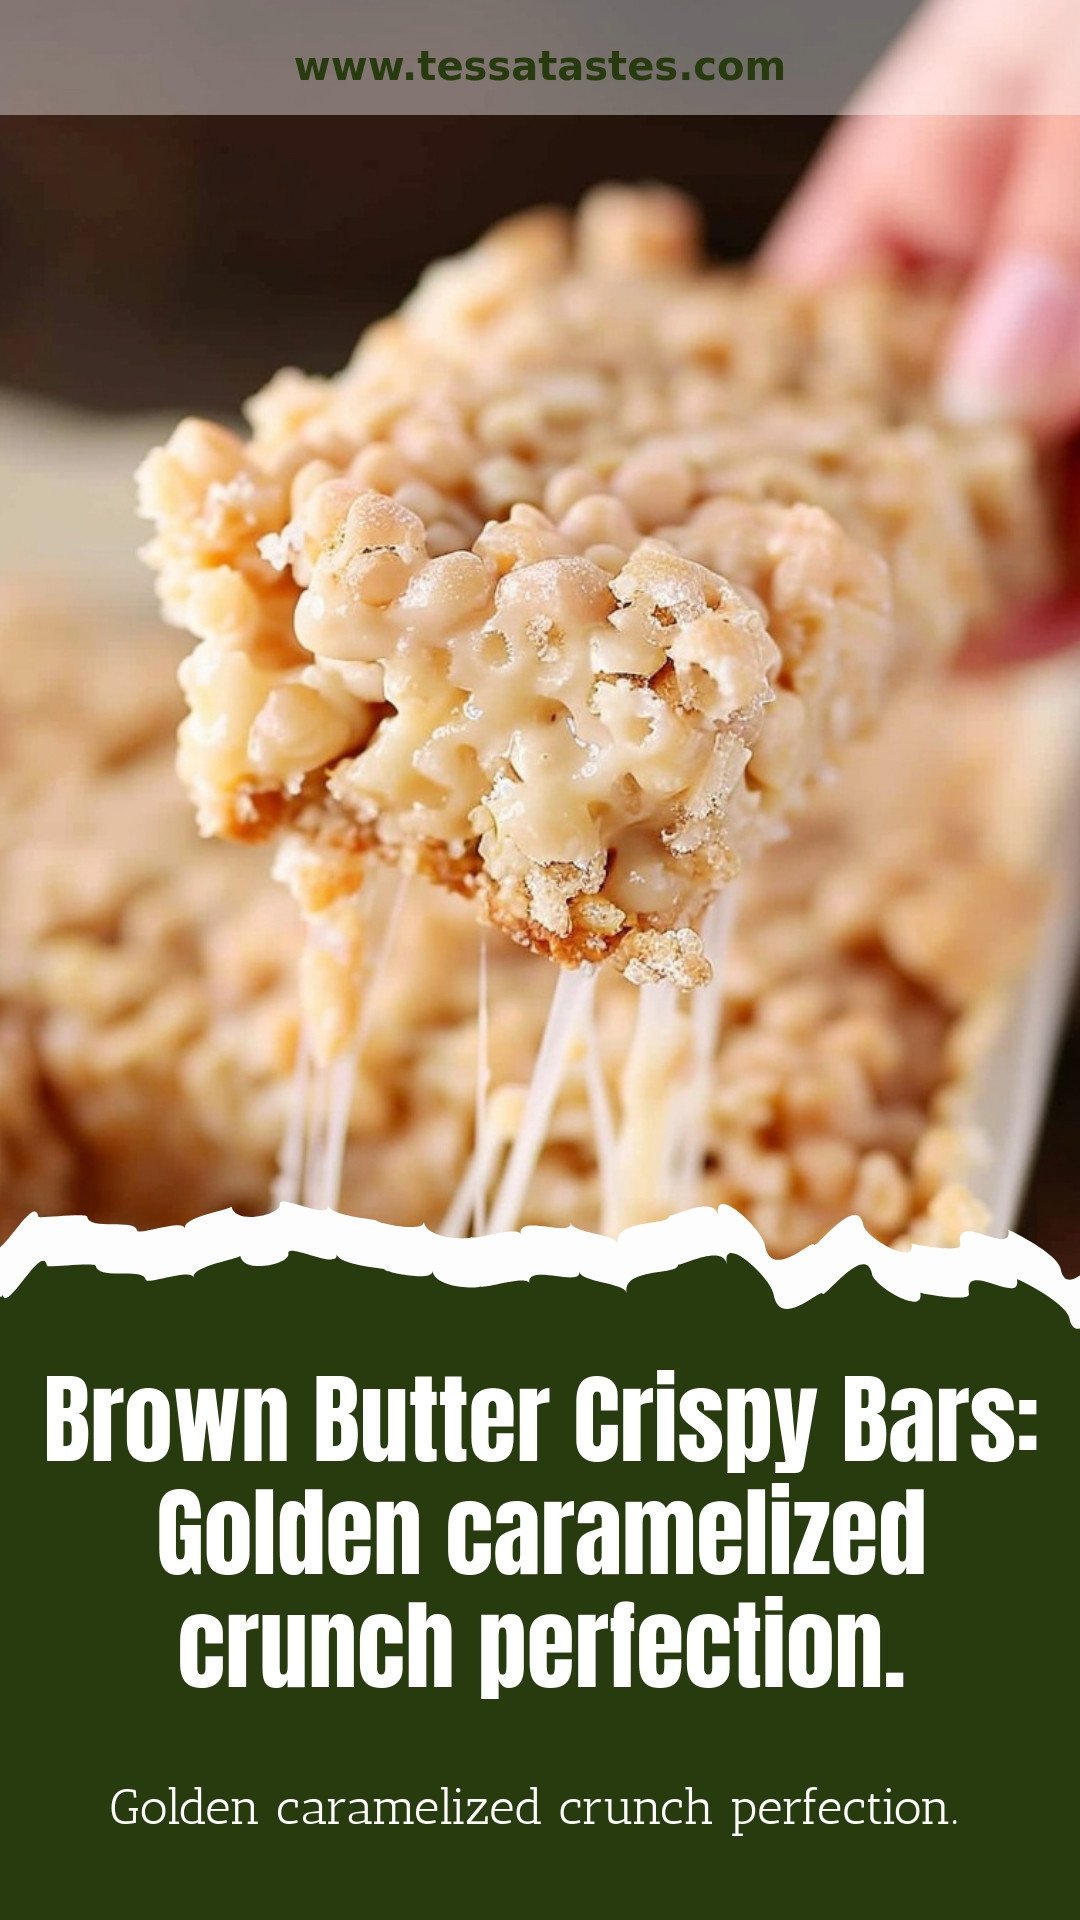
Brown Butter Crispy Bars: A Little Kitchen Magic
Hello, my dear! Come sit with me. Lets make something special today. I want to share my secret for crispy bars. Its all about the butter.
We are going to brown it. This gives a warm, nutty flavor. It reminds me of toasting nuts for Christmas cookies. Doesnt that smell amazing? It makes all the difference. Trust your nose in the kitchen.
Now, lets get our hands busy. Ill walk you through it. Its easier than you think. I still laugh at the first time I made these. My grandson said they tasted like a hug in a pan. Here is how we do it.
Step 1: First, get your pan ready. A light spray keeps everything from sticking. Pour all that crispy cereal into your biggest bowl. I like the sound it makes. Its like a little rain shower.
Step 2: Now, melt your butter. Keep the heat at medium. It will foam and pop a little. Thats okay! Just keep stirring. Watch for little brown bits at the bottom. This is the hard-learned tip: dont walk away! Burnt butter is sad butter.
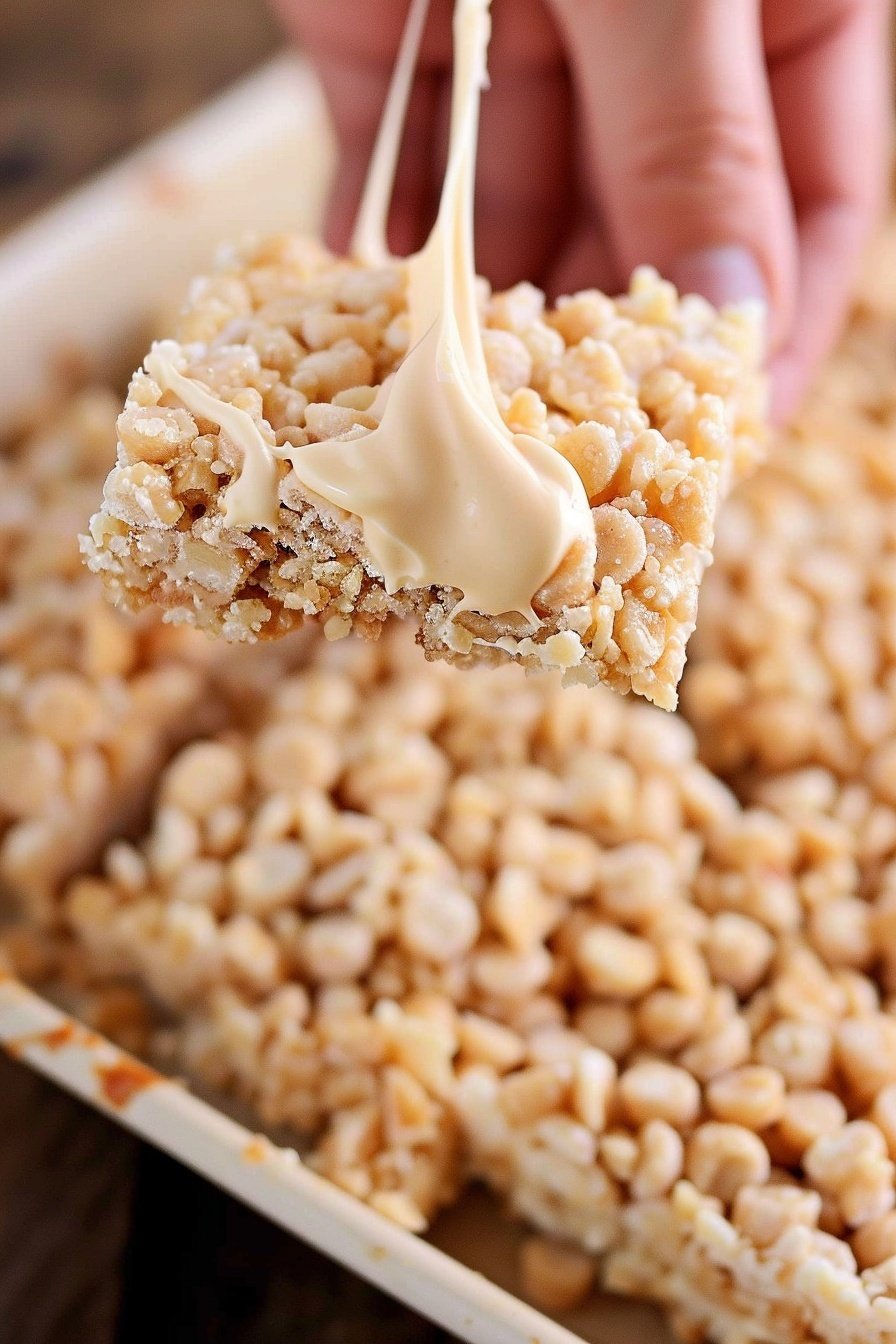
Step 3: Time for the marshmallows. They will melt into a gooey, sweet cloud. Stir in the marshmallow creme and salt. If it looks a bit separated, just keep stirring. It will come together, I promise.
Step 4: Pour that wonderful goo over the cereal. Mix it gently until every piece is coated. Then press it into your pan. Dont press too hard! We want them light and airy. Whats your favorite kitchen smell? Share below!
Cook Time: 10 minutes
Total Time: 1 hour 20 minutes
Yield: 20 bars
Category: Dessert, Snack
Lets Get Creative!
Once you know the basics, you can play. I love adding little twists. It makes each batch a new adventure. Here are a few of my favorite ideas.
Birthday Party Fun: Mix in a handful of rainbow sprinkles. It makes everything more cheerful.
Peanut Butter Lovers Dream: Stir in half a cup of peanut butter with the marshmallow creme. So good!
Chocolate Swirl: After pressing into the pan, melt some chocolate and drizzle it on top. Let it set before you cut.
Which one would you try first? Comment below!
Serving Up Sweet Memories
I love how these bars look on a big plate. For a party, I cut them into small squares. They are perfect for little fingers. You can also pack them in a lunchbox for a sweet surprise.
What to drink? A cold glass of milk is always the best friend for these. For the grown-ups, a cup of dark roast coffee is lovely. The bitter coffee and the sweet bar are a perfect pair. Which would you choose tonight?
Keeping Your Crispy Bars Perfect
These bars are best enjoyed fresh. But you can keep them crunchy. Store them in a sealed container at room temperature for up to two days. For longer storage, I freeze them.
I wrap each bar tightly in plastic wrap. Then I place them all in a freezer bag. This stops them from getting stale or tasting like freezer. I once sent a frozen batch to my grandson at college. He said they tasted just-made weeks later.
You can also double the recipe. Just press the mixture into two pans. This matters because a ready-made treat saves a busy day. Have you ever tried storing it this way? Share below!
Fixes for Common Crispy Bar Troubles
Is your mixture too sticky and hard to stir? Your marshmallows might be too hot. Let the mixture cool for a minute before adding cereal. This makes it much easier to handle.
Are your bars too hard and dense? You are pressing them down too firmly. A gentle press is all you need. I remember when I made my first rock-hard batch. We called them brickle bars!
Did your butter burn? Always use a light-colored pan. This lets you see the butter change color. Getting the butter right matters. It gives the whole treat a wonderful, nutty flavor. Fixing small problems builds your cooking confidence. Which of these problems have you run into before?
Your Crispy Bar Questions Answered
Q: Are these treats gluten-free?
A: Yes, if you use a certified gluten-free rice cereal.
Q: Can I make them ahead?
A: Absolutely. Make them a day before your party.
Q: What can I add for fun?
A: Try mixing in chocolate chips or sprinkles. Fun fact: Adding a pinch of extra salt makes the sweet flavor pop!
Q: Can I halve the recipe?
A: Sure. Just use a 9×9 inch pan instead.
Q: No marshmallow creme?
A: You can use all mini marshmallows. The texture will be a little different. Which tip will you try first?
From My Kitchen to Yours
I hope you love making these brown butter crispy bars. The smell alone fills a kitchen with happiness. It reminds me of my own grandmother’s house.
I would be so thrilled to see your creations. Your family might love them as much as mine does. Have you tried this recipe? Tag us on Pinterest! I always look for your photos.
Happy cooking!
—Tessa Hammond.
Brown Butter Crispy Bars
Description
Indulge in the ultimate treat with these Brown Butter Crispy Bars. A golden, caramelized crunch gives way to a chewy, buttery perfection. Irresistible and easy to make!
Ingredients
Instructions
- Lightly spray a 9×13-inch baking dish with nonstick cooking spray and set it aside. Pour the cereal into a very large bowl and set aside.
- In a medium saucepan, melt the butter over medium heat. Once melted, continue cooking at a low boil, stirring frequently, scraping the bottom of the pan. The butter will foam up, but continue to cook until the milk solids in the butter start to brown and the butter begins to smell nutty – 3 to 5 minutes. Watch carefully as the milk solids can burn easily and become bitter.
- Add the marshmallows and stir to melt – reducing the heat if necessary. You may need to add the marshmallows in increments depending on the size of your pan. Add the salt and marshmallow creme and stir to combine. If you have trouble getting the butter and marshmallow to combine, just keep stirring.
- Remove the marshmallow mixture from the heat and pour over the cereal. Use a rubber or silicone spatula to stir the mixture to get the cereal covered. Pour the mixture into the prepared dish and lightly press flat with clean spatula. If you have trouble with this step, you can spray the spatula or your hands with a little nonstick spray to make it easier. Just don’t press too firmly or your treats will be dense. Allow to cool for at least 1 hour before slicing and serving. Store in a sealed container.


Leave a Reply