A Happy Little Accident
I first made these by mistake. I mixed up my cake mixes. I had a box of orange cake and one of chocolate.
I decided to just go with it. I’m so glad I did. The orange and chocolate are a dream team. It reminds me of those chocolate oranges you get at Christmas.
Why We Heat the Mix
Heating the dry cake mix is very important. It makes the flour safe to eat. We are not baking these little bites.
So this step keeps our tummies happy. Let the mix cool completely. A warm mix will melt the cream cheese. And we want a nice, firm dough to work with.
The Fun Part: Rolling and Dipping
This is where you can get the kids to help. Rolling the dough into balls is so fun. It’s like playing with edible play-dough.
Then comes the dipping. The melted candy coating is so smooth. Doesn’t that smell amazing? Fun fact: The first chocolate candies were made by hand, one by one, just like this!
Making Them Your Own
You do not have to use orange. A lemon cake mix would be just as lovely. Or maybe a strawberry one for a pink treat.
What is your favorite fruit and chocolate combo? I would love to know. It helps me think of new recipes to try.
Why This Matters
This recipe matters because it is about joy. It is about creating a little moment of happiness. Sharing food made with your hands is a special kind of love.
It also shows that mistakes can be delicious. Do you have a kitchen mistake that turned out great? Tell me your story. I still laugh at my cake mix mix-up.
A Sweet Treat for Any Day
You do not need a special reason to make these. A Tuesday is reason enough. They are perfect for a lunchbox surprise.
Or for a sweet end to a long day. Will you be making these for a party or just for you? I often make a batch just for me and my tea.
Ingredients:
| Ingredient | Amount | Notes |
|---|---|---|
| Orange cake mix | 15.25 ounce | I used Duncan Hines Perfectly Moist brand |
| Cream cheese | 8 ounces | Room temperature |
| Orange candy melts | 12 ounces | |
| White vanilla almond bark | 4 ounces |
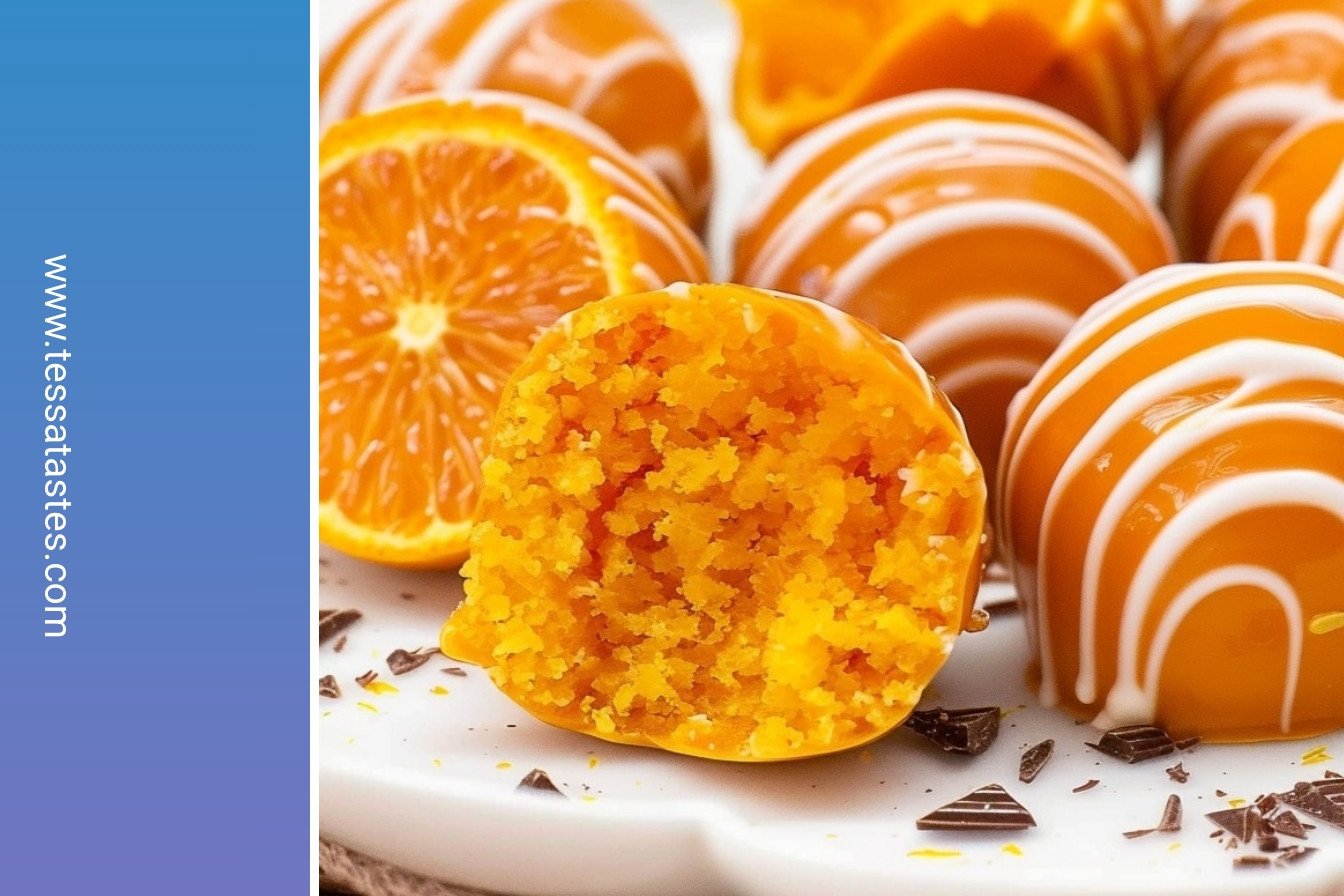
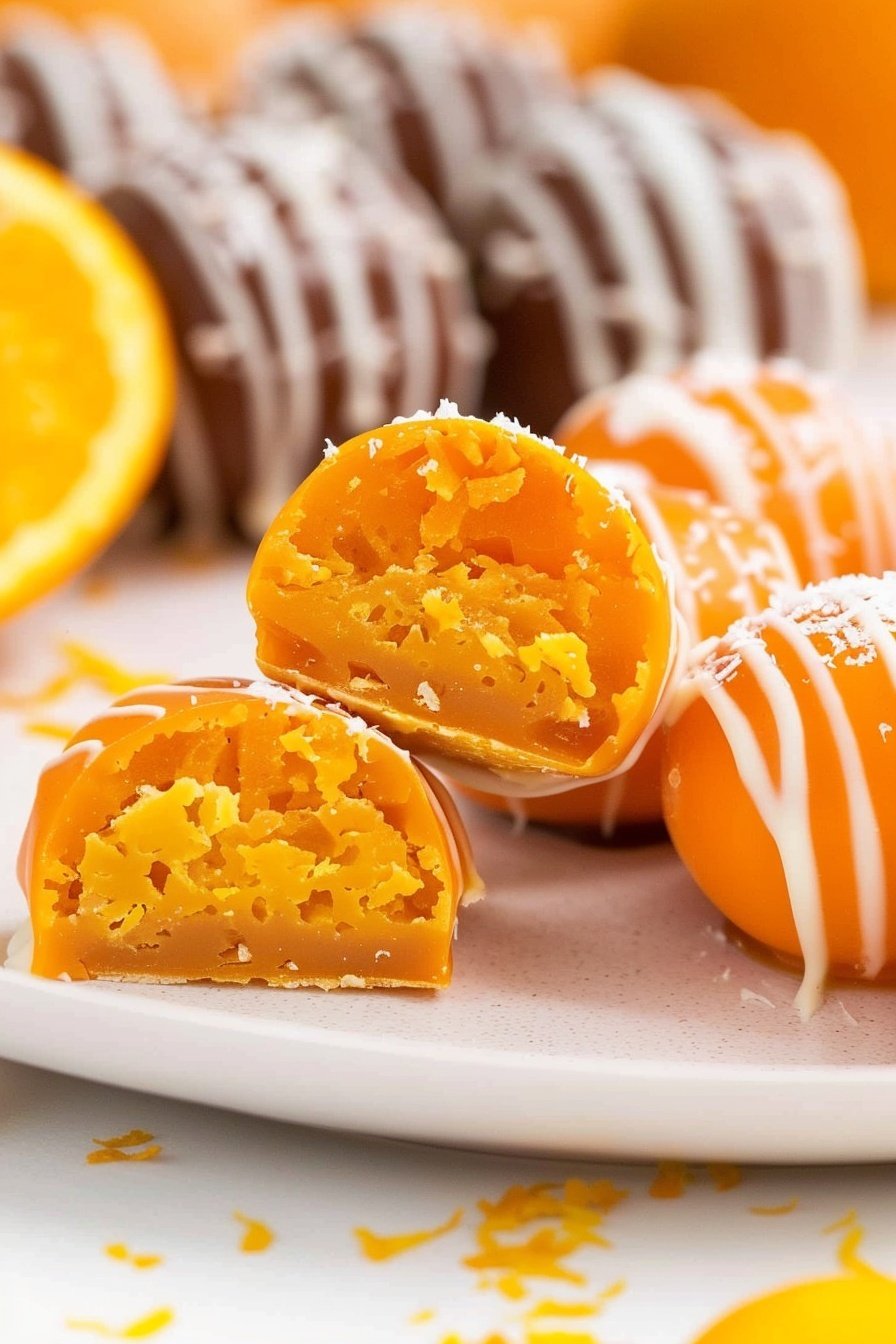
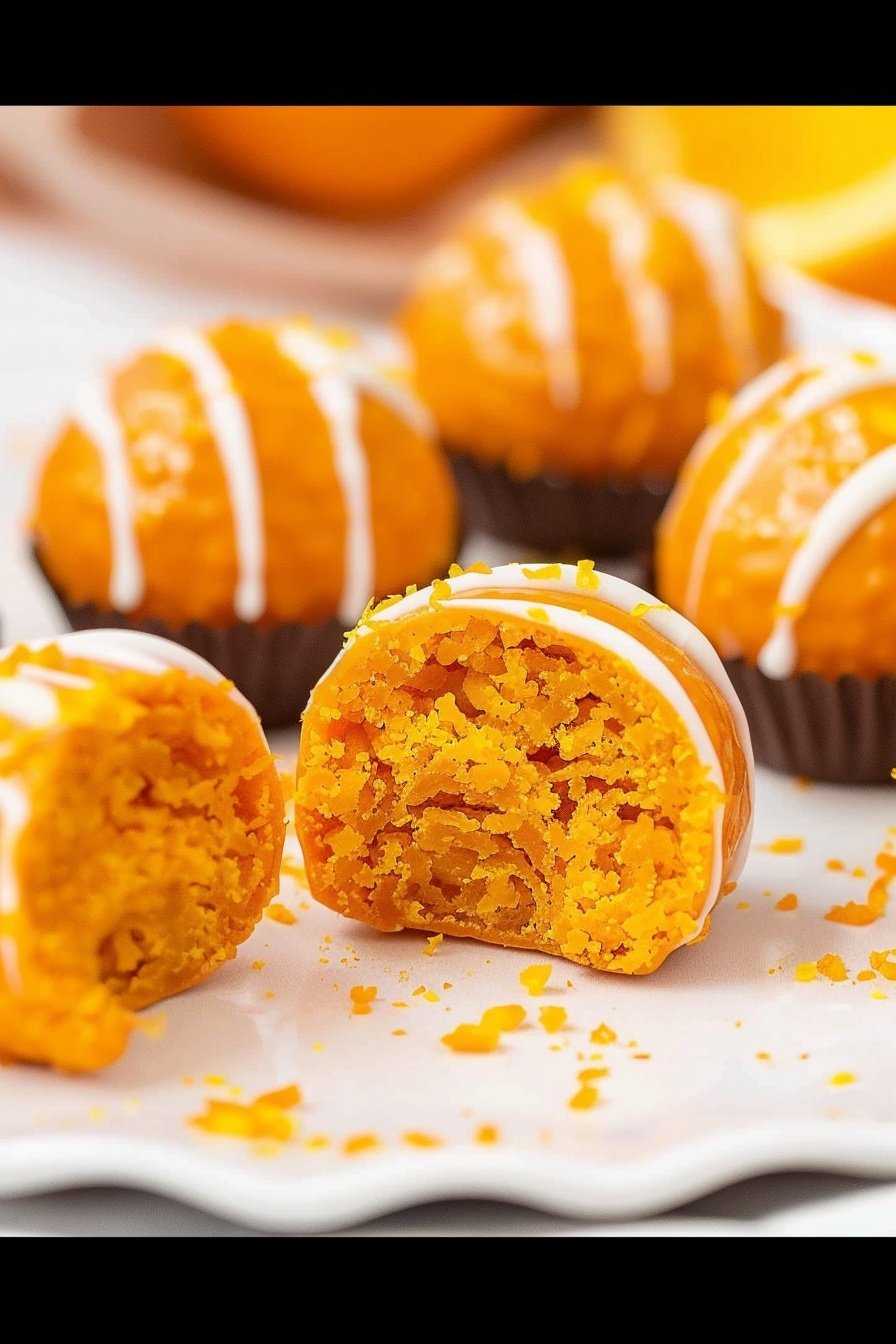
My Zesty Chocolate Dream Bites
Hello, my dear! Let’s make some magic in the kitchen today. These little bites are like sunshine and chocolate had a party. I first made them for my book club years ago. They were gone in a flash! Everyone always asks for the recipe. Doesn’t that smell amazing?
Here is how we make them. Remember, cooking is about joy, not perfection. So let’s have some fun together. I will walk you through each step.
- Step 1: First, we need to heat our dry cake mix. Pour it into a bowl. Microwave it for 30 seconds, stir, and do it once more. Let it cool completely. This keeps everything safe to eat. (A hard-learned tip: Do not skip the cooling step! A warm mix will melt your cream cheese.)
- Step 2: Now, let’s beat the cream cheese. Make sure it’s soft from sitting on the counter. Beat it until it’s super smooth. I love how creamy it looks. It reminds me of whipped clouds.
- Step 3: Sprinkle the cooled cake mix over the cream cheese. Mix it all together just until you see no more dry spots. The dough will be thick and lovely. It smells so citrusy already!
- Step 4: Cover the bowl tightly. We must chill the dough for two hours. This helps it firm up. It makes rolling the balls so much easier. Patience is a secret ingredient, I think.
- Step 5: Line a baking sheet with parchment paper. This prevents sticking. I always keep a roll in my pantry. It makes clean-up a breeze.
- Step 6: Time to make our little balls! Use a tablespoon scoop for this. Roll each scoop between your palms. Place them on your prepared sheet. What’s your favorite kitchen tool? Share below!
- Step 7: Let’s melt our orange candy wafers. Do this in a bowl in the microwave. Use 30-second bursts and stir well each time. Be careful, the bowl might get warm.
- Step 8: Now for the messy, fun part! Roll each ball in the melted candy. Use a fork to lift it out. Tap off the extra coating. I still laugh at my first messy tries.
- Step 9: Place the coated bites back on the sheet. They look so pretty and shiny. Almost like little orange jewels.
- Step 10: Melt the white almond bark just like the candy wafers. Stir it until it’s completely smooth. This will be our fancy drizzle.
- Step 11: Drizzle the white bark over your bites. You can use a spoon or a fork. There is no wrong way to do this. It makes them look so special.
- Step 12: Pop them back in the fridge until you are ready to serve. The hard coating is a wonderful surprise. It cracks so nicely when you bite in.
Cook Time: 0 minutes
Total Time: 2 hours 10 minutes
Yield: 22 servings
Category: Dessert, Snack
Three Fun Twists to Try
You can easily change this recipe. It is like a blank canvas for your ideas. Here are a few of my favorite twists. I hope they inspire you.
- Lemon Sunshine: Use a lemon cake mix and yellow candy melts. It is so bright and cheerful.
- Christmas Mint: Try a chocolate cake mix with mint or dark green coating. Perfect for the holidays.
- Berry Blast: Use a strawberry cake mix and pink candy wafers. My granddaughter adores this version.
Which one would you try first? Comment below!
Serving Your Sweet Creations
These bites are wonderful all on their own. But you can make them extra special. Place them in little paper candy cups. It looks so pretty on a plate. You could also stack them on a cake stand.
For a drink, I love a cold glass of milk with them. It is a classic for a reason. For the grown-ups, a little glass of orange liqueur or a frothy latte is just perfect. The flavors dance together so nicely.
Which would you choose tonight?
Keeping Your Citrus Chocolate Delights Fresh
These little bites are best kept cold. Store them in a sealed container in the fridge. They will stay happy for up to five days. You can also freeze them for a month. Just place them in a single layer on a tray first. Once frozen, pop them into a freezer bag.
I once left a batch out too long. The cream cheese got a bit soft. We learned our lesson that day. Batch cooking is a wonderful time-saver. Making a double batch means you always have a treat ready. This is so helpful for surprise guests or a quick sweet bite.
Having a ready-made treat saves money and stress. It turns a busy day into a special one. Have you ever tried storing it this way? Share below!
Simple Fixes for Common Kitchen Hiccups
Is your cream cheese mixture too sticky? Your hands might be too warm. I remember when my first batch looked messy. Just wash your hands in cold water and dry them. This will make rolling the balls much easier.
Is the candy coating too thick? A tiny bit of coconut oil can thin it. This helps it coat the bites smoothly. Are your bites cracking? The dough was probably not chilled long enough. A firm, cold dough holds its shape best.
Getting the texture right builds your cooking confidence. A smooth bite also tastes much better. Which of these problems have you run into before?
Your Citrus Chocolate Delights Questions
Q: Can I make this gluten-free?
A: Yes, just use a gluten-free orange cake mix. It works just as well.
Q: How far ahead can I make them?
A: You can make them two days before you need them. Keep them chilled.
Q: What can I use instead of almond bark?
A: White chocolate chips will work in a pinch. Melt them slowly.
Q: Can I make a smaller batch?
A: Absolutely, just cut all the ingredients in half. It is very easy.
Q: Is the orange drizzle necessary?
A: No, but it adds a pretty finish. A little beauty makes food taste even sweeter. Which tip will you try first?
Sharing Your Sweet Creations
I hope you love making these zesty dream bites. They always bring a smile to my table. I would be so thrilled to see your version. It makes my day to see your kitchen successes.
Please share a picture of your beautiful treats. Let’s create a gallery of deliciousness together. Have you tried this recipe? Tag us on Pinterest!
Happy cooking!
—Tessa Hammond.

Citrus Chocolate Delights: Zesty cocoa dream bites: Zesty cocoa dream bites
Description
Indulge in the ultimate citrus chocolate treats! These zesty cocoa dream bites are a burst of tangy, sweet flavor. Easy recipe for homemade candy.
Ingredients
Instructions
- Before adding the cake mix, it is important to heat treat the dry cake mix. Pour the dry cake mix into a medium-sized heat-safe bowl. Microwave the cake mix in two 30-second intervals, stirring after each interval. Allow the cake mix to cool completely before mixing it into the cream cheese.
- Using a medium-sized mixing bowl and a handheld mixer on medium-high speed, beat the cream cheese for 2 to 2½ minutes until completely smooth.
- Sprinkle the dry cake mix over the top of the cream cheese. Continue mixing just until the dry cake mix is completely incorporated.
- Tightly cover the cream cheese mixture and chill in the refrigerator for 2 hours.
- Line a baking sheet with parchment paper. Set it aside.
- Using a 1 tablespoon cookie scoop, scoop the cheesecake dough. Roll into a ball and set the cheesecake bites onto the prepared baking sheet. Repeat the steps.
- Using a heat-safe medium-sized mixing bowl, heat the candy wafer melts in 30-second intervals, stirring after each interval, until completely melted.
- Roll the cheesecake bites in the melted candy wafers. Place the coated cheesecake bites on a fork and gently tap any excess coating off. You can also use a spoon to pour the coating over any bare spots on the cheesecake bites. Use a toothpick to remove the excess melted wafer from the bottom of the fork, and then to gently push the ball onto the prepared baking sheet.
- Return the coated cheesecake bites to the prepared baking sheet.
- Using a small heat-safe mixing bowl, microwave the white almond bark in 30-second intervals, stirring well after each interval.
- Using a spoon or small dipper, drizzle thin ribbons of the melted almond bark over the coated cheesecake bites.
- Once all the cheesecake bites are completely coated and drizzled, return them to the refrigerator until ready to serve.
Notes
- Nutrition: Calories: 173kcal | Carbohydrates: 24g | Protein: 1g | Fat: 8g | Saturated Fat: 6g | Polyunsaturated Fat: 0.2g | Monounsaturated Fat: 1g | Trans Fat: 0.1g | Cholesterol: 10mg | Sodium: 177mg | Potassium: 26mg | Fiber: 0.2g | Sugar: 17g | Vitamin A: 138IU | Calcium: 53mg | Iron: 0.4mg


Leave a Reply