My Beach Day Blunder
I once made these for a picnic. The wind blew sand into my lemonade. It gave me a silly idea. Why not make dessert that looks like a beach?
So I created these pudding cups. They remind me of that sunny, sandy day. I still laugh at that. The “sand” is just crushed cookies. Isn’t that fun?
Why We Make Special Treats
This recipe is more than mixing bowls. It is about making a memory. You build layers like building a sandcastle. This matters. It turns eating into a tiny adventure.
Food can be playful. That is the second reason this matters. A drink umbrella makes everyone smile. It says, “This is for fun.” What was the last fun food you made?
Let’s Build Our Beach
First, make your “sand.” Crush those Golden Oreos. You can use a bag and a rolling pin. Fun fact: Golden Oreos were invented in the 1970s!
Then, make the creamy “waves.” Mix the soft cream cheese, butter, and sugar. Fold in the cool whip. Doesn’t that smell amazing? Finally, whisk the pudding and milk. Gently stir it all together.
The Layering Secret
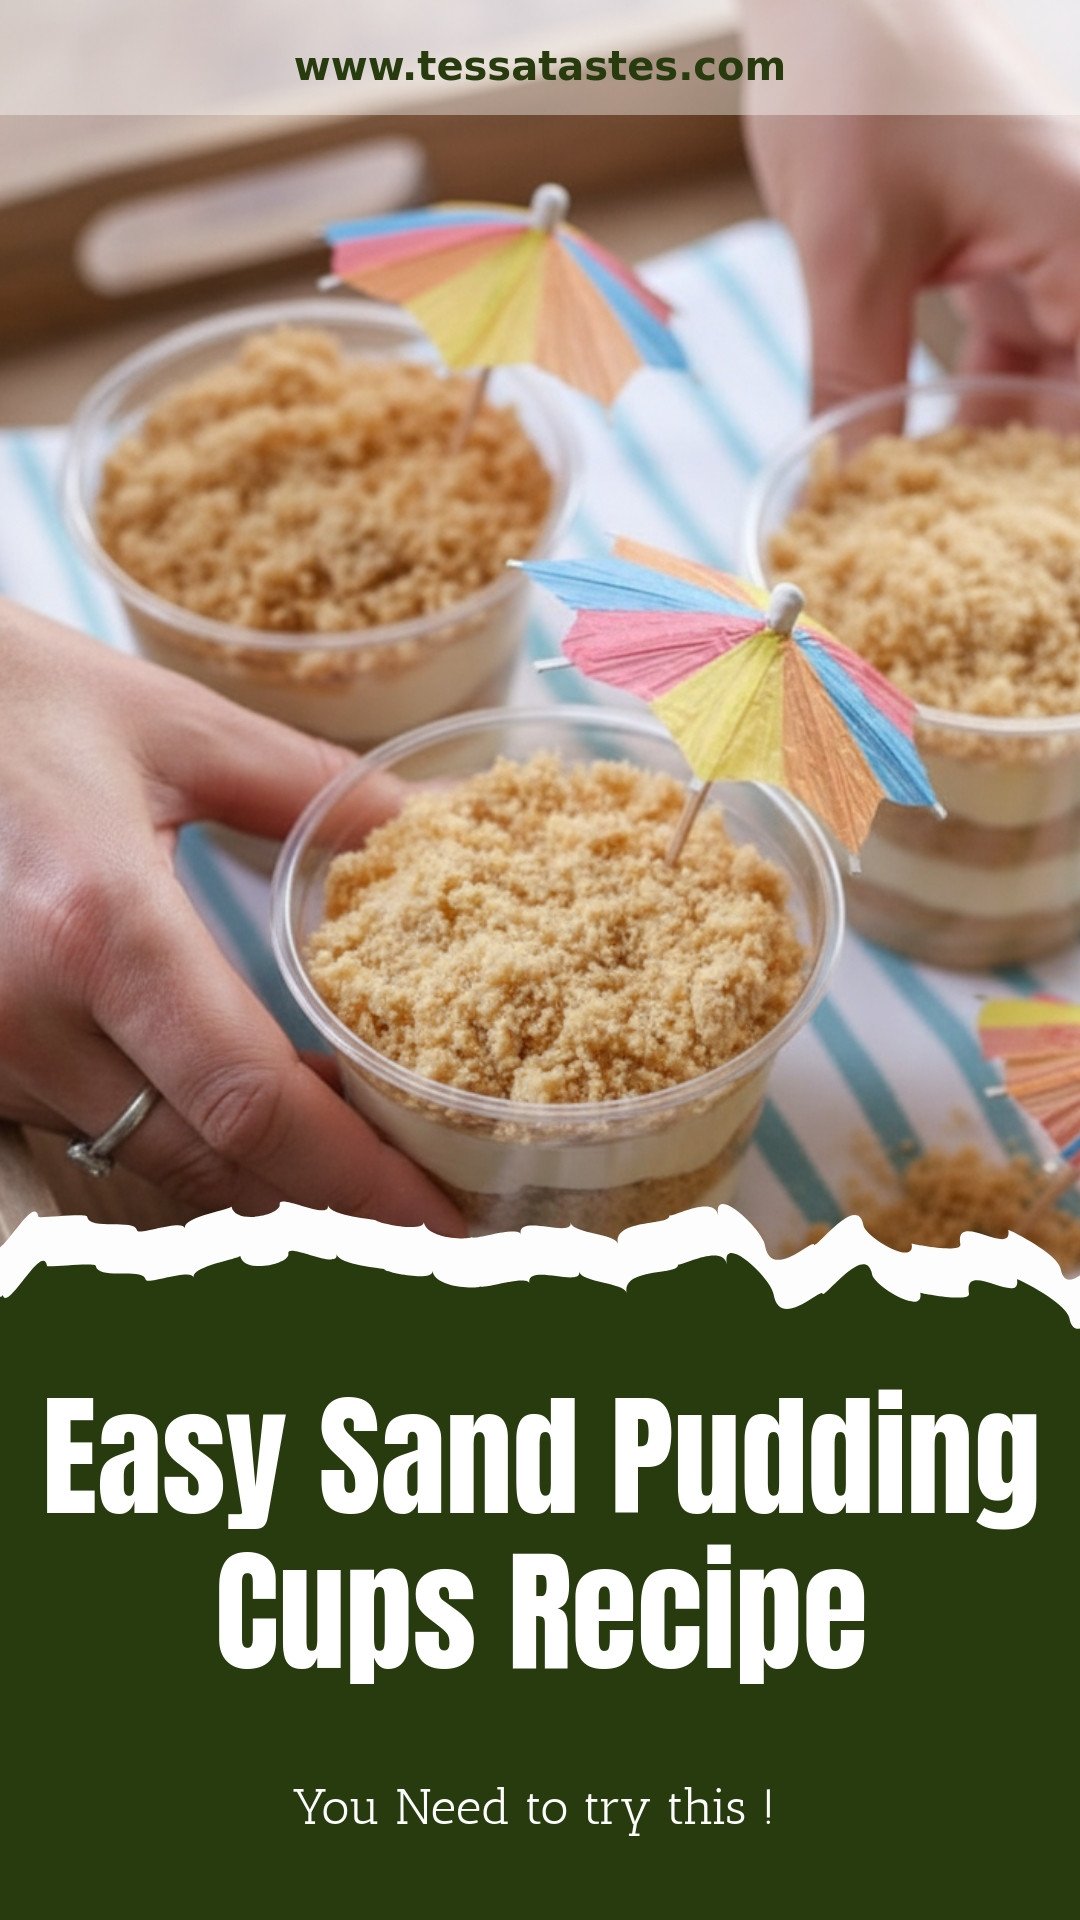
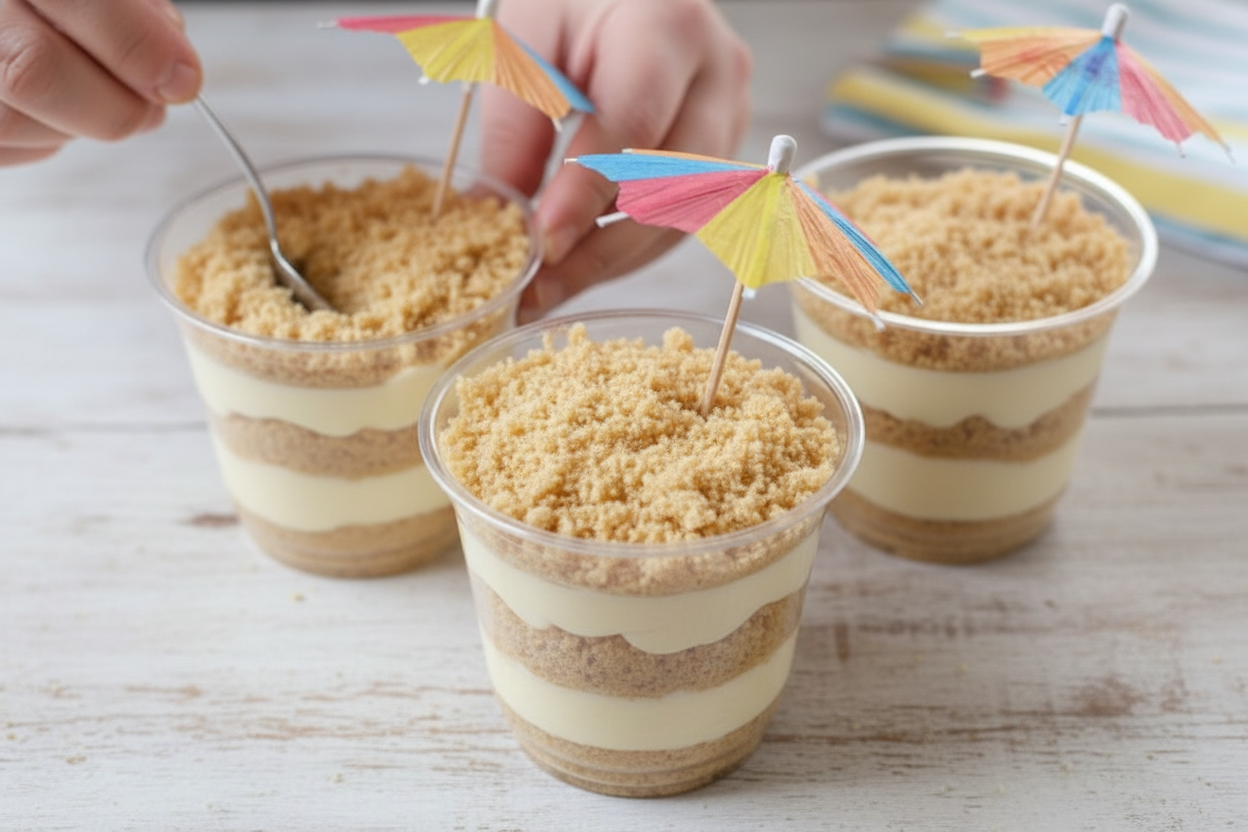
Now for the best part. Start with cookie sand in your cup. Then add creamy waves. I use a plastic bag to pipe it neatly. Tap the cup on the table. This gets the bubbles out.
Add more sand, then more waves. Top it with a final sprinkle. Finish with your drink umbrella. Do you think blue food coloring in the cream would look like ocean water?
Your Turn to Share
Let them chill in the fridge. The wait makes them taste even better. It is like waiting for low tide to find shells.
When you serve them, watch faces light up. That is my favorite part. Tell me, what would you name this dessert? Share your ideas with me. I love hearing from you.
Ingredients:
| Ingredient | Amount | Notes |
|---|---|---|
| Cream cheese | 4 oz | softened |
| Butter | 1/4 cup | softened |
| Powdered sugar | 1/2 cup | |
| Cool whip | 8 oz | |
| Instant white chocolate pudding (or vanilla) | 1 box (3.3 oz) | |
| Milk | 1 1/2 cups | |
| Golden Oreos | 1 package | |
| Drink umbrellas | As needed | for garnish |
Beach Day in a Cup: My Easy Sand Pudding
Hello, dear! Come sit at the table. Let’s make a sweet little treat. It reminds me of building sandcastles with my grandkids. We’ll make edible sand from cookies. The creamy part is like fluffy clouds. Doesn’t that sound fun?
This is my no-bake recipe for Sand Pudding Cups. You just need to mix and layer. It’s perfect for a hot day. I still laugh at the first time I made it. My grandson thought it was real sand! His face was priceless. Let’s begin our kitchen adventure.
Let’s Make Our Beach
Step 1: Make Your Sand
First, make your “sand.” Crush the Golden Oreos into fine crumbs. I use my old food processor. It makes a wonderful whirring sound. You can also put them in a bag and crush them. Use a rolling pin! It’s a great way to get out any little frustrations. Set your beautiful sand aside in a bowl.
Step 2: Make the Creamy Sea Foam
Now, for the creamy sea foam. Mix the soft cream cheese, butter, and powdered sugar. Use a mixer until it’s smooth. Then, gently fold in the Cool Whip. Be gentle, like folding a fluffy blanket. In another bowl, whisk the pudding mix with the milk. (A hard-learned tip: Let the pudding thicken for a minute before the next step.)
Step 3: Combine and Prepare
Combine your two creamy mixtures. Stir them together until just blended. See how it turns a lovely pale color? Doesn’t that smell amazing? Now, get your cups or jars ready. We are going to build our beach layers.
Step 4: Build the Layers
Start with a layer of cookie sand in each cup. Then, add a layer of the cream. I spoon my cream into a plastic bag. I snip the corner to pipe it neatly. Add another sand layer, then more cream. Top it all with a final sprinkle of sand. Gently tap the cup on the table. This settles everything down.
Step 5: The Final Touch
The final touch is my favorite. Poke a drink umbrella right into the top. It looks so cheerful! Now, they must rest in the refrigerator. This helps all the flavors become friends. Wait at least two hours. The waiting is the hardest part, I know!
My Favorite Twists on This Sweet Beach
You can change this recipe so easily. It’s fun to play with flavors. Here are three ideas I love. They make it feel new every time.
Tropical Island: Add crushed pineapple, well-drained, to the cream mixture. Use a coconut pudding mix instead. It tastes like a vacation.
Chocolate Cove: Use chocolate pudding and chocolate sandwich cookies. Add mini chocolate chips between layers. A chocolate lover’s dream!
Berry Beach: Layer in fresh raspberries or sliced strawberries. Use vanilla pudding. The red berries look like beach treasures.
Serving Your Sandy Masterpiece
These puddings are a party all by themselves. But I like to make a theme. Serve them on a blue plate. It looks like the ocean. Scatter a few shell-shaped candies around the base. So pretty!
For drinks, I have two choices. A cold glass of lemonade is always perfect. It’s sweet and tart. For the grown-ups, a fizzy prosecco is nice. It feels very celebratory.

Keeping Your Sand Pudding Perfect
These pudding cups are best kept cold. Pop them in the fridge right away. They will stay good for about two days. Cover them tightly with plastic wrap.
You can freeze them for a longer treat. I once made a big batch for a summer picnic. Freezing them saved the day. Just thaw in the fridge for a few hours before serving.
Batch cooking is a wonderful time-saver. Make the creamy filling and crumbs separately. Store them in containers. Assemble your cups the day you need them. This matters because it gives you more time for fun.
Have you ever tried storing it this way? Share below!
Fixing Common Sand Pudding Troubles
First, your crumbs might be too big. This makes layering hard. I remember when my grandson used a rolling pin. It worked perfectly. Just crush the cookies in a bag.
Second, the creamy mix can be too runny. Make sure your butter and cream cheese are soft. Mix them very well before adding pudding. This matters for a fluffy, dreamy texture.
Third, the layers might mix together. Bang the cup gently on the table. This settles each layer flat. It makes your dessert look beautiful. Fixing small problems builds your cooking confidence.
Which of these problems have you run into before?
Your Sand Pudding Questions Answered
Q: Can I make this gluten-free?
A: Yes! Use gluten-free sandwich cookies. Check your pudding mix label too.
Q: How far ahead can I make it?
A: You can assemble it one day ahead. Keep it covered in the refrigerator.
Q: What can I use instead of Cool Whip?
A: You can use an equal amount of whipped cream. Whip it until it is stiff.
Q: Can I make a giant one for a party?
A: Absolutely. Just layer everything in a big clear bowl. It looks so pretty.
Q: Any other fun topping ideas?
A: Try gummy worms or crushed graham crackers. Fun fact: The first “dirt” desserts used chocolate pudding and oreos!
Which tip will you try first?
Thanks for Baking With Me
I hope you love making these sandy treats. They always bring a smile. Cooking is about sharing joy with others. I would love to see your creations.
Please share a photo of your pudding cups. You can tag my blog on Pinterest. Let’s build a little community of happy bakers.
Have you tried this recipe? Tag us on Pinterest!
Happy cooking!
—Tessa Hammond.
Easy Sand Pudding Cups Recipe
Description
A fun and easy no-bake dessert with layers of creamy pudding and crushed Golden Oreos, served in individual cups and topped with a festive drink umbrella.
Ingredients
Instructions
- Begin by smashing up Oreos. I put mine in my food processor and blended until they were crumbs. Set aside.
- Mix cream cheese, butter, and powdered sugar with mixer in a medium bowl. Fold in cool whip until well blended.
- In a separate bowl mix pudding mix and milk with a whisk. Once combined well, add pudding to cream cheese mixture.
- Place a few tablespoons of oreo crumbs in your cup or small jar. Add some of the creamy mixture (I do this by adding the creamy mixture to a gallon bag and cutting off the corner so it goes in the jar more easily.) Bang down on a wash cloth on the table to get all bubbles out.
- Add a few more tablespoons of oreo Crumbs. Top off with some more cream mixture and sprinkle on a few more crumbs. Top off with more crumbs and a drink umbrella.
- Refrigerate until ready to serve.
Notes
- Nutrition per serving (based on 4 servings): Calories: 1009 kcal, Carbohydrates: 121 g, Protein: 11 g, Fat: 54 g, Saturated Fat: 24 g, Trans Fat: 1 g, Cholesterol: 72 mg, Sodium: 939 mg, Potassium: 324 mg, Fiber: 2 g, Sugar: 78 g, Vitamin A: 925 IU, Calcium: 206 mg, Iron: 3 mg.


Leave a Reply