My First Marshmallow Mess
Let me tell you about my first batch. I was about ten. I tried to stir the hot marshmallow with a tiny spoon. What a sticky disaster! I got it all over my fingers and the table. I still laugh at that.
This recipe is much simpler. You just melt and stir. It is hard to mess up. That matters. Cooking should be fun, not scary. Anyone can make something delicious.
Why We Make Treats Together
I make these with my grandkids now. We stand around the big bowl. Everyone gets a turn to stir. The smell of melting marshmallow and chocolate fills the kitchen. Doesn’t that smell amazing?
Sharing a kitchen creates memories. It is not just about the food. It is about the talking and the laughing. That time together matters most of all. What is your favorite memory of cooking with someone?
The Magic of Melting
Watch the butter and marshmallows in the microwave. They puff up into a fluffy, white cloud. It is like magic.
Stir it slowly. Then pour in those chocolatey Krispies. The sound is a wonderful crunch. You are mixing soft and crisp. That contrast is what makes the treat so good.
The Secret Mini Marshmallows
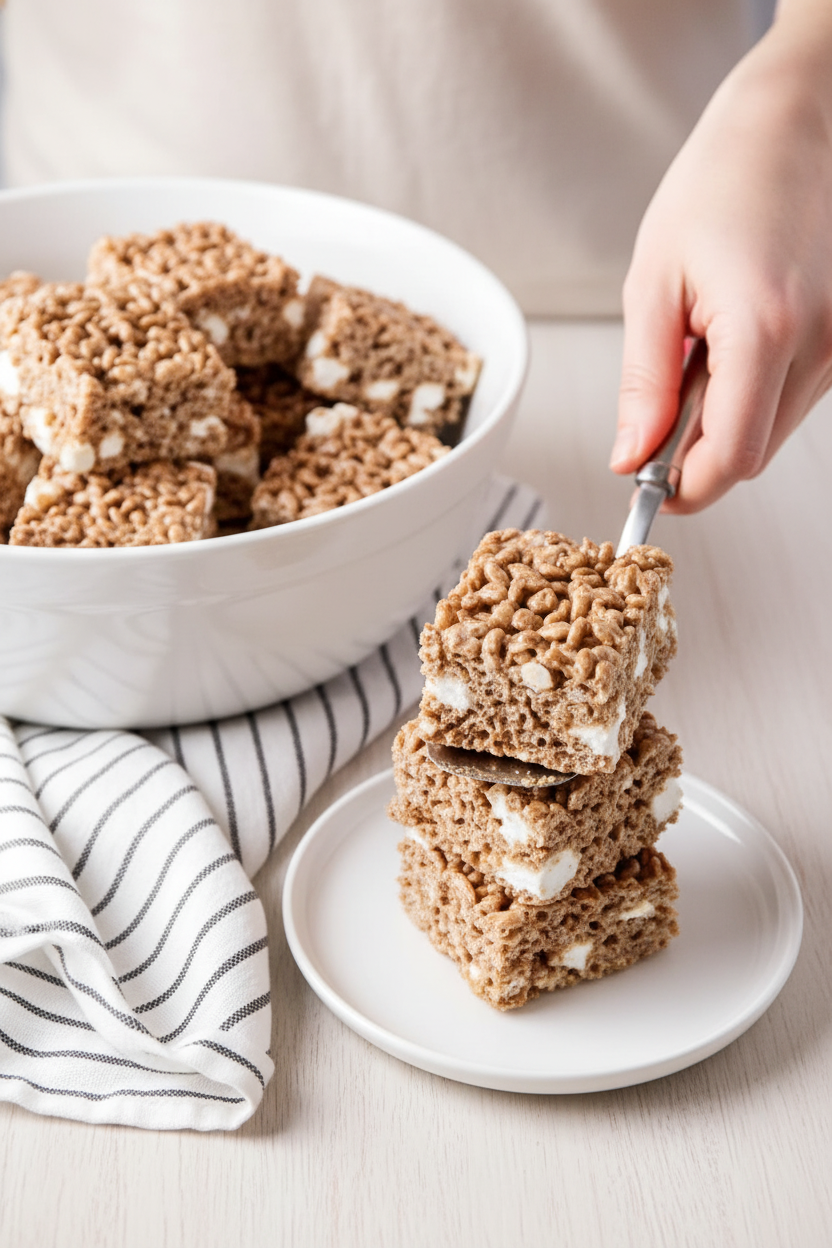
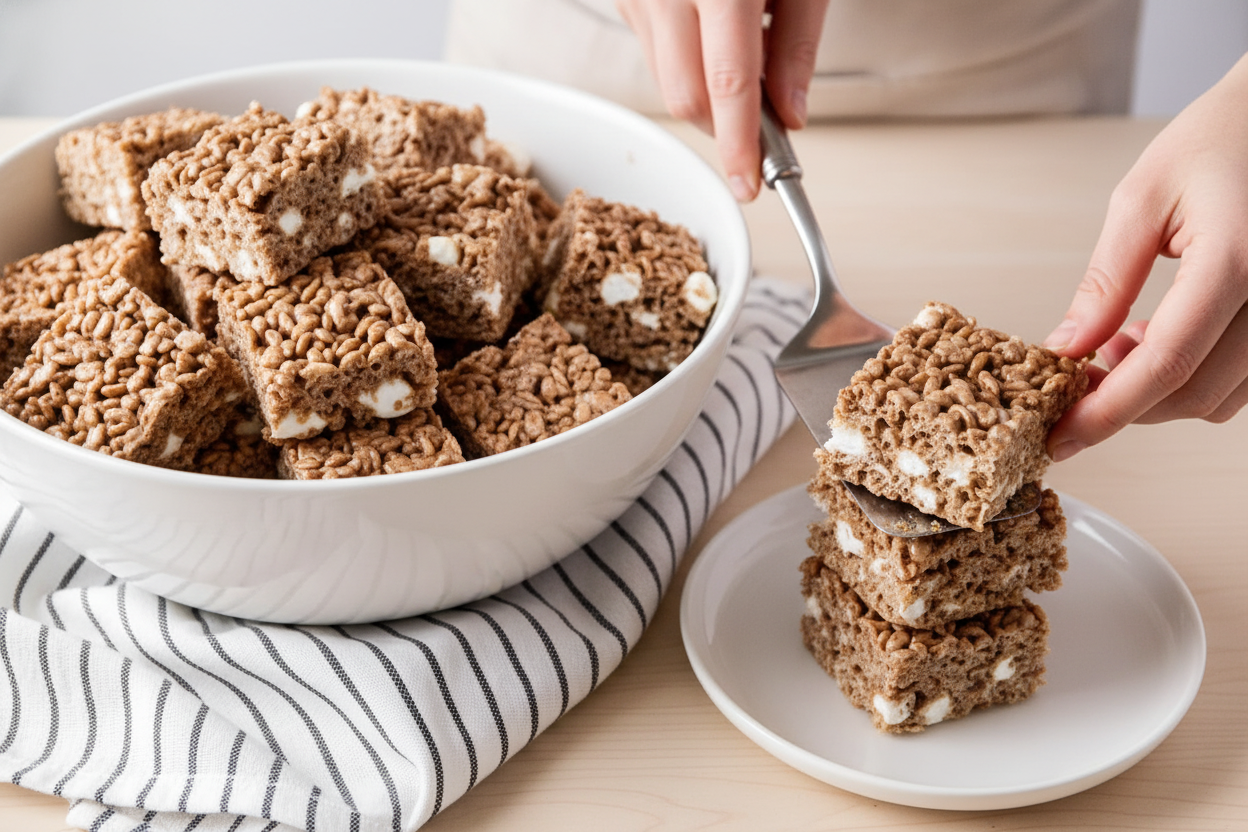
Here is my favorite trick. Toss in those mini marshmallows last. They do not melt all the way. You get little pockets of chewy sweetness in every bite. It is a happy surprise.
Do you like your treats more chewy or more crisp? I like a bit of both. The mini marshmallows give you that. Try it and see what you think.
Letting Them Set is Hard!
You pour the mix into the pan. Now comes the hardest part. You must wait. Let them sit and firm up. It takes about an hour. I always want to sneak a taste early.
But waiting makes it better. The treats hold their shape. They become perfect for cutting into squares. Patience is a cooking lesson, too. What is the hardest part of a recipe for you? Is it the waiting?
Ingredients:
| Ingredient | Amount | Notes |
|---|---|---|
| Butter, melted | 3 tablespoons | |
| Large marshmallows | 12 ounces | |
| Mini marshmallows | 1-2 cups | Optional for extra gooeyness |
| Cocoa Krispies | 7-8 cups |
My Gooey Chocolate Krispie Squares
Hello, dear! Come sit at the counter. Let’s make something fun. These treats remind me of my grandkids. They always ask for them. The kitchen smells like a chocolate dream. Doesn’t that sound lovely? It’s so simple, too. You just need a big bowl and a spoon. I still laugh at that one time. I used a wooden spoon and it got stuck! We had quite the giggle pulling it out.
Now, let’s get our hands busy. Follow these steps with me. Remember, cooking is about joy, not perfection. If you make a little mess, that’s just part of the story. Are you ready? Here we go.
- Step 1: Grab a big microwave-safe bowl. Put your three tablespoons of butter inside. Heat it for about 30 seconds. You just want it melted and bubbly. Be careful, the bowl might be warm. I always use a potholder. It saves my fingers!
- Step 2: Now, add the big marshmallows to the butter. Back into the microwave for 3 minutes. Watch them puff up like little clouds! It’s magical. Take it out and stir it right away. (My hard-learned tip: spray your spoon with cooking spray first. The sticky marshmallow won’t cling!).
- Step 3: Slowly pour in your Cocoa Krispies. Stir, stir, stir! Get all those crispy bits coated in gooey marshmallow. It takes a bit of muscle. This is the fun part. What’s your favorite cereal? Share below!
- Step 4: Time for a surprise. Toss in those mini marshmallows. They will stay soft and chewy inside. It’s like finding a treasure. Pour everything into your greased pan. Press it down gently with your fingers. Let it sit and set for an hour. The waiting is the hardest part!
Cook Time: 1 hour (to set)
Total Time: 1 hour 15 minutes
Yield: 12 squares
Category: Dessert, Snack
Three Tasty Twists to Try
Once you master the basic recipe, you can play! Here are my favorite little changes. They make each batch a new adventure. My grandson loves the peanut butter one.
- Peanut Butter Cup: Stir 1/2 cup of peanut butter into the melted marshmallows. So rich and delicious!
- Birthday Sprinkle: Mix in a handful of rainbow sprinkles with the cereal. It’s pure party joy.
- Midnight Rocky Road: Add a handful of chocolate chips and chopped almonds. It’s extra special.
Which one would you try first? Comment below!
Serving Them Up Sweet
These squares are perfect just as they are. But sometimes, I like to dress them up. For a party, cut them into small pieces. Stick a lollipop stick in each one. Kids adore that. You could also drizzle a little melted chocolate on top. It looks so fancy with zero effort.
What to drink? A cold glass of milk is the classic choice. It just belongs with chocolate. For the grown-ups, a nice cup of coffee with cream pairs beautifully. The bitter coffee tastes great with the sweet treat. Which would you choose tonight?
Keeping Your Krispie Treats Perfect
These treats are best kept at room temperature. Just cover the pan with foil. They stay chewy for about three days. You can freeze them for a month, too. Wrap squares tightly in plastic wrap first.
I love making a double batch. I keep one pan for now. I freeze the other for a surprise treat later. It makes busy weeks so much sweeter.
I once put a warm pan in the fridge. They got hard as a rock! Room temperature is the key. Planning ahead with batch cooking saves time. It also means you always have a little joy ready. Have you ever tried storing it this way? Share below!
Fixing Common Krispie Troubles
First, treats too hard? You cooked the marshmallow mix too long. Melt just until smooth. Second, treats too sticky? You might not have used enough cereal. Add an extra half cup next time.
Third, treats won’t stick together? Press them firmly into the pan. Use your hands with a little butter on them. I remember when mine once crumbled. I didn’t press them down well enough!
Getting the texture right builds your kitchen confidence. It also makes the flavor perfect—chewy, not tough. Which of these problems have you run into before?
Your Questions, My Answers
Q: Can I make these gluten-free? A: Yes! Use a certified gluten-free crispy rice cereal.
Q: Can I make them ahead? A: Absolutely. They are perfect for making a day early.
Q: What can I add? A: Try a handful of chocolate chips or sprinkles. Fun fact: Adding a pinch of salt makes the chocolate taste even richer.
Q: Can I halve the recipe? A: Sure. Use an 8×8 pan for a smaller batch.
Q: Any special tip? A: Grease your spoon and hands. It keeps the sticky mix from clinging. Which tip will you try first?
From My Kitchen to Yours
I hope you love making these chocolaty squares. They always remind me of my grandkids’ smiles. Cooking is about sharing simple, happy moments.
I would be thrilled to see your creations. Share a photo of your finished tray. Have you tried this recipe? Tag us on Pinterest! Let’s spread the sweetness around.
Happy cooking! —Tessa Hammond.
Easy Chocolate Rice Krispie Treats Recipe
Description
A quick and easy no-bake dessert with rich chocolate flavor and a delightful chewy, crispy texture.
Ingredients
Instructions
- In a large bowl, melt butter in the microwave for 30 seconds.
- Add large marshmallows to butter bowl and microwave for 3 minutes.
- Stir well and slowly add Cocoa Krispies.
- When all combined, toss in 1-2 cups mini marshmallows and then pour into a greased 9×13 pan. Let set and enjoy!


Leave a Reply