My First Sausage Fiasco
Let me tell you about my first try. I was so excited. I didn’t chill the meat enough. The kitchen was warm. Oh, what a sticky, soft mess I made. My sausage looked more like sad porridge. I still laugh at that.
That’s why chilling everything matters. Cold meat grinds clean. It keeps the fat from smearing. Your sausage will be juicy, not greasy. Have you ever had a kitchen project go a little wrong? Tell me your story.
Why We Make It Ourselves
Store sausage is fine in a pinch. But homemade? You know every single thing inside. You control the salt. You pick the best meat. It just tastes more honest.
It connects us to old ways, too. People have been doing this for centuries. They used every part of the animal with care. Making sausage honors that. It feels good to keep that skill alive.
The Magic of the Casings
Those casings might seem strange. They come from a natural source.
Soaking them makes them soft and stretchy. Running water through them is the oddest feeling. Does it feel weird or fun to you? You have to be gentle. They are stronger than they look.
The Secret is in the Mix
Grinding the meat is the easy part. The mixing is where the magic happens. You add that ice water. Then you mix by hand. You mix until it gets a little sticky.
Doesn’t that smell amazing? The mustard seed and pepper fill the air. Always fry a tiny patty to taste. This matters because you can fix the seasoning now. You can’t fix it later in the casing!
Stuffing and Shaping with Love
This part takes two hands. One hand feeds the meat. The other hand guides the casing. It should fill firmly, like a snug hug. Don’t rush. Let it be a slow, steady rope.
If you see air bubbles, just poke them. A clean needle works fine. Then you twist your links. Do you prefer short breakfast links or long coiled kielbasa? Seeing your finished links is the best reward. It’s pure pride on a plate.
Ingredients:
| Ingredient | Amount | Notes |
|---|---|---|
| Pork with fat | 2 lbs | 1/4 diced, 3/4 ground |
| Well marbled beef | 2 lbs | 1/4 diced, 3/4 ground |
| Bacon (optional) | 6-12 oz | Use if meats are leaner; can be frozen |
| Sea salt | 3 tsp | |
| Whole yellow mustard seed | 1 Tbsp | |
| Black pepper | 1 tsp | |
| Mrs. Dash or favorite salt free seasoning | 1/2 tsp | |
| Ice cold water | 1 cup | |
| Natural hog casings | 2 (about 10-12 feet total) |
My Grandfather’s Secret Kielbasa
Making sausage is like a kitchen hug. It fills the house with the best smells. My grandfather taught me this recipe when I was small. I still laugh at that. My apron was bigger than I was! It feels special to make food from scratch. Let’s make some memories together.
First, get everything very cold. Put your meats on a tray. Pop them in the freezer for about an hour and a half. Your grinder parts go in the freezer too. A cold bowl waits in the fridge. This keeps the fat nice and firm. It makes everything easier to handle.
Now, let’s wake up the casings. They come packed in salt. Rinse them well under warm water. Then let them soak in a bowl of warm water. They need to get soft and slippery. This takes about an hour.
Time to prepare the meat. Take about one-third of your cold meat out. Dice it into little pieces with a sharp knife. This gives your sausage a wonderful bite. Chop the rest into big chunks for grinding. I like to sing a little song while I chop. It makes the time fly by.
Let’s grind! Set up your cold grinder. Feed your meat chunks and bacon through. Listen to that sound. It’s the sound of promise. Grind everything right into your chilled bowl. See how the colors mix? Doesn’t that look amazing already?
Seasoning time is the best. Sprinkle all your spices over the meat. Now, roll up your sleeves and mix it with your hands. Feel the cold, soft meat. Add the ice water and mix for one full minute. It will start to feel sticky. That’s perfect!
What’s your favorite spice to add? Share below!
The fun part is stuffing. Slide a casing onto your stuffer tube. Leave a little tail hanging off. Fill the hopper with your meat. Use the plunger to push it through. Guide the casing with your other hand. Watch the long, beautiful coil come out. If you see air bubbles, just poke them with a pin.
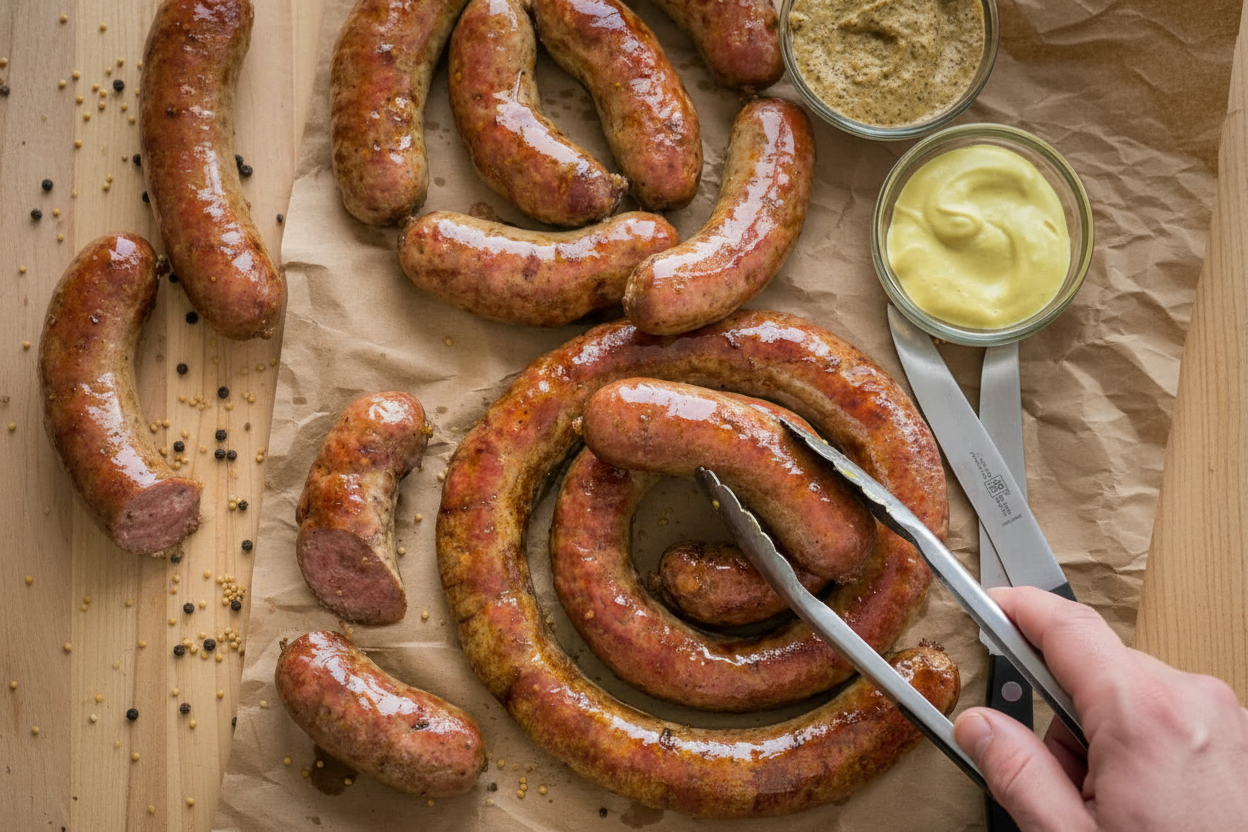
Almost done! Now, pinch and twist to make links. Or coil it like a snake for classic kielbasa. Prick each link a few times with a pin. This stops them from bursting when they cook. You did it! You can cook them now or save them for later. I’m so proud of you.
Cook Time: 15-20 minutes (when cooking)
Total Time: About 4 hours (with soaking and chilling)
Yield: 4 pounds of sausage links
Category: Main Dish, Preserving
Three Tasty Twists to Try
Once you know the basics, you can play! Here are three fun ideas. Change the flavors to match your mood. Cooking should always be an adventure, my dear.
Apple & Sage
Add a grated apple and a tablespoon of dried sage. It tastes like a cozy fall day.
Spicy Firecracker
Mix in two teaspoons of crushed red pepper and a pinch of smoked paprika. It has a real kick!
Garlic Lover’s Dream
Use six minced garlic cloves and a handful of fresh parsley. Your kitchen will smell incredible.
Which one would you try first? Comment below!
The Perfect Plate
A good sausage deserves good friends on the plate. I love serving my kielbasa with simple, happy sides. It makes a meal feel complete. Let’s think about what to serve.
For sides, try buttery mashed potatoes or tangy sauerkraut. A big salad with a sharp vinaigrette is lovely too. It cuts through the richness. For a drink, a cold lager pairs nicely. For the kids, fizzy apple cider is always a winner.
Which would you choose tonight?

Keeping Your Homemade Sausage Perfect
Let’s talk about keeping your sausage tasty. Fresh sausage keeps in the fridge for 3 to 5 days. For longer storage, wrap it tightly and freeze it. It will be good for up to three months.
I like to make a big batch. I shape some into patties for breakfast. Then I coil the rest for dinner later. This saves so much time on busy days.
My first time, I froze links in one big lump. What a mess! Now I freeze them on a tray first. Then I put them in a bag. This way they don’t stick together.
Reheating is simple. Thaw frozen sausage in the fridge overnight. Then cook it low and slow in a pan. This keeps it juicy and prevents burning.
Batch cooking matters. It means a homemade meal is always ready. It turns cooking from a chore into a gift for your future self. Have you ever tried storing it this way? Share below!
Simple Fixes for Sausage Troubles
Even grandmas have kitchen troubles. Here are three common ones. First, the meat mixture feels too warm and sticky. This means your meat or tools weren’t cold enough.
I remember my first batch was a sticky mess. I learned to chill everything well. Cold meat grinds cleaner and binds better. This matters for perfect texture.
Second, your casings keep tearing. They might be too dry. Soak them in warm water until they are very soft and slick. Handle them gently when threading.
Third, the seasoning tastes bland. Always test a small patty first! Fry it in a pan and taste. You can always add more salt and spice to the big bowl.
Testing seasoning builds your cooking confidence. You learn to trust your own taste. Getting the texture right means a juicy bite every time. Which of these problems have you run into before?
Your Sausage Questions, Answered
Q: Is this recipe gluten-free? A: Yes, it is! Just check your seasoning blend to be sure.
Q: Can I make it ahead? A: Absolutely. Follow the storage tips above. It freezes beautifully.
Q: What if I don’t have hog casings? A: No problem! Just form the meat into patties or a log. You can still use all the same flavors.
Q: Can I make a smaller batch? A: You can cut all the ingredients in half. It works just fine.
Q: Is the bacon optional? A: Yes. It adds flavor and fat. Use it if your pork and beef seem lean. *Fun fact: The word “kielbasa” just means “sausage” in Polish!* Which tip will you try first?
From My Kitchen to Yours
I hope you feel inspired to try this recipe. Making sausage is a wonderful kitchen adventure. It connects us to old traditions.
I would love to see what you create. Share a picture of your coiled kielbasa or sizzling patties. It makes my day to see your kitchen wins.
Remember, cooking is about joy, not perfection. Have fun with it! Have you tried this recipe? Tag us on Pinterest!
Happy cooking!
—Tessa Hammond.

Homemade Sausage Recipe Video Tutorial
Description
Learn to make authentic homemade Kielbasa sausage with this detailed video tutorial, featuring a blend of pork, beef, and traditional seasonings.
Ingredients
Instructions
- Place meats on a baking sheet, cover with plastic wrap and freeze 1 1/2 hours. Should be very firm, not frozen solid. Place all meat grinder parts in freezer and refrigerate mixing bowl at least 30 min prior to using.
- Rinse casing well to remove salt and run warm water all the way through the casing. Let casing soak in warm water (90˚F water) for at least 1 hour or until soft and slick. Keep casings in water until ready to use.
- Remove 1/3 of meat from the freezer, dice into 1/4 thick pieces with a sharp knife and transfer to your chilled mixing bowl. Chop remaining meat into 2″ pieces so that it can easily go through the meat grinder. Set up your meat grinder (if using KitchenAid mixer, set to speed 4 using the large holes grinding plate) and grind meat into chilled bowl then grind bacon.
- Sprinkle seasonings over meat and toss by hand 30 seconds to distribute then add 1 cup water and mix meat by hand for 1 minute (or with paddle attachment on speed 1 for 1 minute), just until a light film forms on the outside of the bowl and the mixture binds to itself and can hold a patty shape. Cover and refrigerate your sausage mixture while you clean your grinder and set up your sausage maker attachment. Seasoning Tip: To test your meat for seasoning, form a small patty and saute it on a skillet to sample.
- Lightly oil the outside of your sausage tube attachment and thread 1 sausage casing over the tube leaving a 6″ tail hanging off the end. Do not tie the end – you want the initial air that comes through to escape.
- Remove ground meat from refrigerator, set mixer to speed 4 and add meat into hopper, pushing down with the plunger and adding more as you go. Use one hand to stuff the meat through and one hand to guide the filled casings. Fill firmly but do not overstuff, especially if making sausage links. Take care not to let big gaps of air into the tube. If you get air bubbles – no problem – you can poke the sausage casing with sausage pricker as you go. Let the sausage come out in one long coil until about 6″ of casing remains at the end then start with the new sausage casing.
- Pinch, twist and spin to make small sausage links or coil the sausage for the classic kielbasa look. Tie off the ends or tie with kitchen string if desired. Prick with sausage poker about every 2 inches, especially where you see air pockets, to prevent the sausage from bursting. Sausage can be baked, grilled or sautéed right away or can be refrigerated or frozen for later. Keeps well in refrigerator for 3-5 days or frozen up to 3 months.
Notes
- Full Nutrition Label: Servings: 4 lbs of sausage links


Leave a Reply