My First Cookie Bar Mess
I tried making these bars for my grandson’s birthday. I was in a big hurry. I forgot to spray the pan first. What a sticky mess we had to eat with spoons! I still laugh at that.
So please, spray that pan well. It matters because it saves your treat. It lets you share neat squares with everyone. Do you have a funny kitchen mistake story? I’d love to hear it.
Why The Butter Matters
You will melt the butter. This is my favorite part. It makes the batter so smooth and easy to stir. Doesn’t that smell amazing? It reminds me of my own grandma’s kitchen.
Melted butter makes the bars chewy and rich. This matters. It gives them that cozy, homemade taste. It’s a simple step that does a big job.
The Colorful Topping
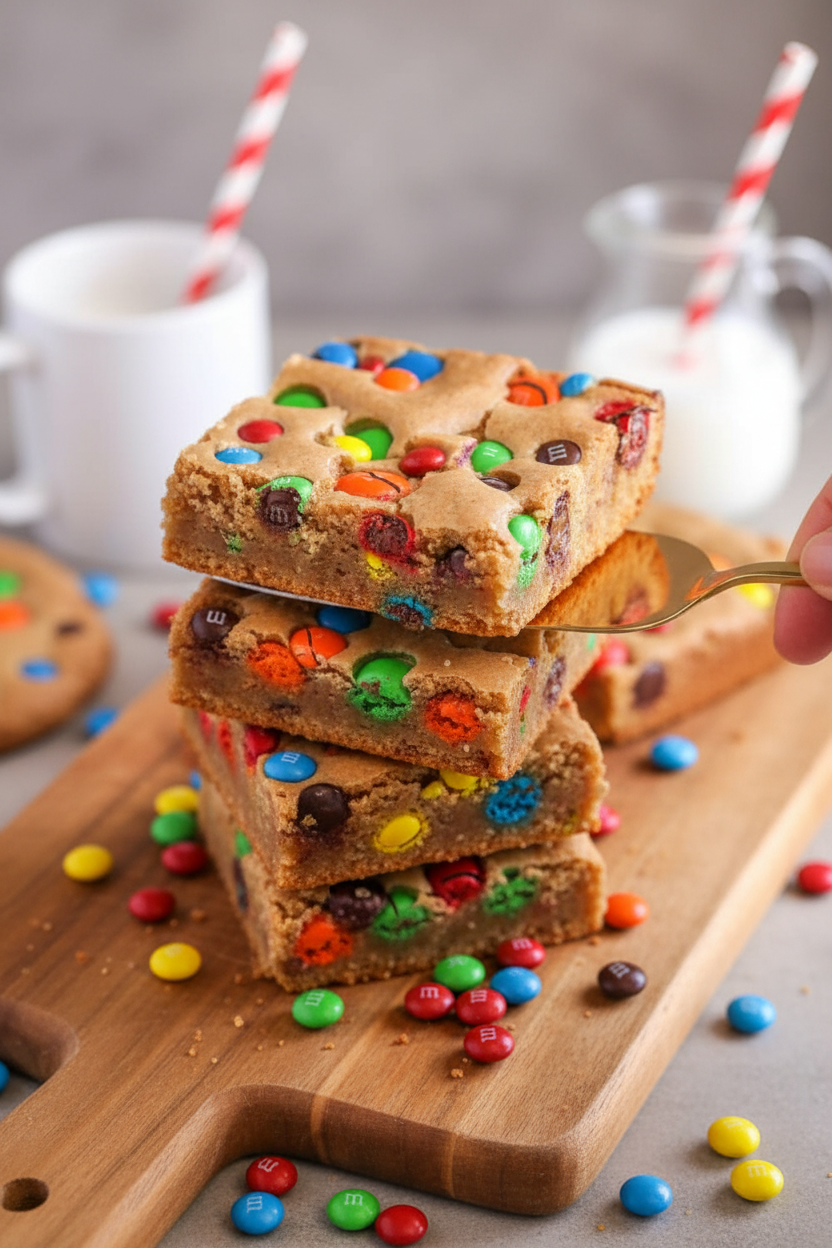
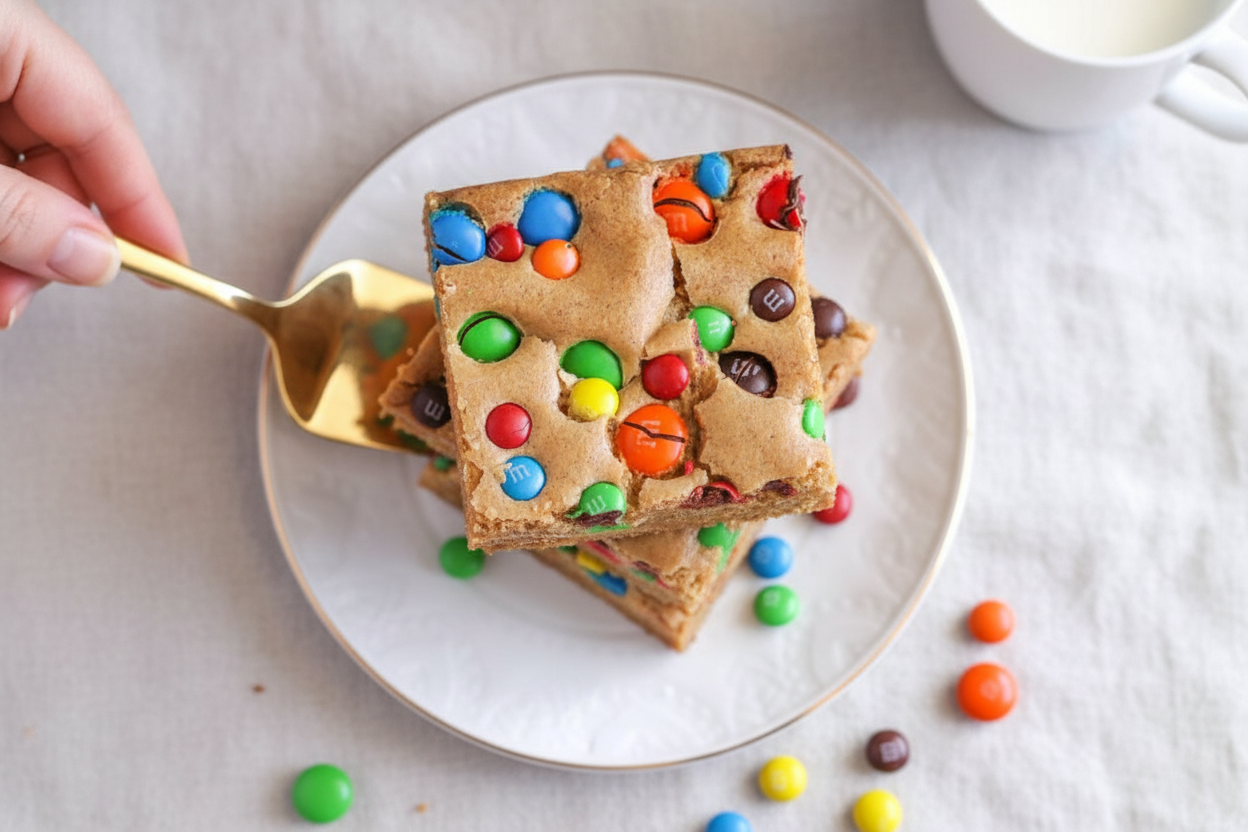
Now for the fun! You get to cover the top with M&M’s. Use both kinds. The regular ones and the mini ones. Press them in gently before baking.
This makes every bite full of color and crunch.
Knowing When They’re Done
Bake them for 20 to 25 minutes. Do not wait for them to look totally firm. They will keep cooking in the hot pan after you take them out.
The edges should be just golden. The middle might look a little soft. This matters because it gives you a perfect, soft cookie bar. No one likes a dry dessert!
Let’s Share The Sweetness
Let the pan cool on the counter. This is the hard part! Waiting makes them easier to cut. Then you can share.
Sharing food is sharing love. That is the best lesson my kitchen ever taught me. Who will you make these for? Tell me about them. I think baking for others is the sweetest ingredient of all.
Ingredients:
| Ingredient | Amount | Notes |
|---|---|---|
| Butter | 1/2 cup | |
| Brown sugar | 1 cup | |
| Egg | 1 | |
| Vanilla extract | 1 teaspoon | |
| All-purpose flour | 1 cup | sifted |
| Baking powder | 1/2 teaspoon | |
| Salt | 1/2 teaspoon | |
| Baking soda | 1/8 teaspoon | |
| Regular M&M’s | 1 cup | |
| Mini M&M’s | 1/2 cup |
My Favorite M&M Cookie Bars
Hello, dear! It’s Tessa. Let’s bake something cheerful today. These M&M bars are my go-to for a quick treat. They remind me of my grandson’s soccer team. I used to make these for them after every game. Those boys would gobble them up in seconds! I still laugh at that. The recipe is wonderfully simple. You just mix, pour, and bake. Doesn’t that sound lovely? The best part is the colorful M&Ms on top. They make the whole kitchen smile. Let’s get our bowls ready.
Steps
Step 1: First, warm your oven to 350°F. Grab your 9×9 pan. Give it a quick spray with cooking oil. This keeps our bars from sticking. I learned that the hard way once! Now, take your butter. Melt it in a little microwave-safe bowl. It just needs to be liquid and warm. Be careful, the bowl might be hot. I always use a potholder.
Step 2: Pour that melted butter into a mixing bowl. Add the soft brown sugar next. Doesn’t that smell amazing? It’s like caramel. Crack in one egg. Then add a teaspoon of vanilla. Mix it all together until it’s smooth. It will look like a lovely, glossy paste. My arm gets a little workout here.
Step 3: Time for the dry team! You already sifted your flour, right? Good. Add it to the bowl. Then add baking powder, salt, and that pinch of baking soda. Mix it gently until no white streaks remain. The dough will be thick and cozy.
What does sifting flour do? Share below!
Step 4: Spread this dough into your prepared pan. Use a spoon to push it into the corners. Now, the magic! Sprinkle all those M&Ms over the top. Press them in lightly. Use both the regular and mini ones. The colors just pop! I like to save a few for my mouth, too.
Step 5: Slide the pan into your hot oven. Bake for 20 to 25 minutes. You’ll know it’s done when the edges are golden. The middle might look a little soft. That’s perfect! Let it cool in the pan. This is the hardest part—waiting. But it’s worth it for clean slices.
Three Fun Ways to Mix It Up
Once you master the basic recipe, try a twist! It’s fun to play with flavors. Here are three ideas my family loves. They are all so easy. You just switch one little thing.
Birthday Cake Blast: Use rainbow sprinkles instead of half the M&Ms. It’s a party in a pan!
Peanut Butter Dream: Add a big spoonful of peanut butter to the wet mix. Then use peanut M&Ms on top. So good.
Seasonal Sparkle: Use holiday M&Ms. Red and green for Christmas, pastels for Easter. It makes any day special.
Which one would you try first? Comment below!
Serving with a Smile
These bars are fantastic all on their own. But you can make them extra special. For a party, cut them into small squares. Serve them on a bright plate. They look so cheerful. A little scoop of vanilla ice cream on the side is heavenly. The warm bar and cold cream are perfect together.
What to drink? For the grown-ups, a cold glass of milk or a hot coffee is lovely. The coffee cuts the sweetness just right. For the kids, a frosty glass of cold milk is classic. Or try a sparkling apple cider. It feels like a celebration. Which would you choose tonight?
Keeping Your Cookie Bars Fresh and Tasty
Let’s talk about keeping these bars yummy. First, cool them completely. Then store them in a tight container. They last about 4 days on the counter.
You can freeze them for later, too. Wrap each bar tightly in plastic wrap. Pop them all in a freezer bag. They will keep for 2 months. Thaw on the counter when you’re ready.
I once reheated a frozen bar in the microwave. Ten seconds made it warm and gooey again. It was like a fresh-baked hug. Batch cooking matters because it saves future-you time. A sweet treat is always close by. Have you ever tried storing it this way? Share below!
Simple Fixes for Common Cookie Bar Hiccups
Even grandmas have kitchen troubles sometimes. Here are easy fixes. First, if your bars are too cakey, you may have over-mixed. Just mix until the flour disappears. This matters for a perfect, chewy texture.
Second, if the M&M’s sink, toss them in a little flour first. I remember when all my candies vanished to the bottom. A light flour coat helps them stay put. This makes every bite colorful and fun.
Third, if the edges get too dark, use a glass or light-colored pan. Dark pans bake hotter and faster. Getting this right builds your cooking confidence. You learn how your oven works. Which of these problems have you run into before?
Your Quick Cookie Bar Questions, Answered
Q: Can I make these gluten-free? A: Yes! Use a good gluten-free flour blend. The results are just as tasty.
Q: Can I make the dough ahead? A: You can mix it, cover, and fridge it for a day. Bake when you’re ready.
Q: What can I swap for M&M’s? A: Chocolate chips or chopped nuts work wonderfully. Use what you love.
Q: Can I double the recipe? A: Absolutely. Use a 9×13 inch pan. Just watch the baking time.
Q: Any optional tips? A: A pinch of cinnamon is my secret. Fun fact: I learned that from my own grandma. Which tip will you try first?
Bake, Share, and Enjoy!
I hope you love baking these cheerful bars. They always make my kitchen feel happy. I would love to see your creations.
Share a picture of your finished tray. It brings me so much joy to see them. Have you tried this recipe? Tag us on Pinterest! Thank you for baking with me today.
Happy cooking!
—Tessa Hammond.

M&M Cookie Bars Recipe Easy Dessert
Description
These easy M&M Cookie Bars are a fun and colorful dessert, packed with M&M’s and perfect for any occasion.
Ingredients
Instructions
- Preheat the oven to 350°F and spray a 9×9 inch baking pan.
- Melt the butter in a microwave safe bowl.
- Then add the butter to a mixing bowl along with the brown sugar, egg and vanilla. Mix well.
- Add the dry ingredients to the bowl and mix well. Then, pour the mixture into the baking pan.
- Evenly top with the M&M’s. Bake for 20-25 minutes.
Notes
- Let the bars cool completely in the pan before cutting for cleaner slices.


Leave a Reply