My First Dutch Apple Pie
I made my first Dutch apple pie at 19. I was so nervous. I thought I had ruined the crust.
But it came out golden and sweet. My grandpa ate two slices. He said it was better than the bakery’s. I still laugh at that memory.
Why This Crust Works
Grating cold butter is my secret. It makes little flakes. Those flakes make the crust flaky and tender.
Handling the dough too much makes it tough. So work it gently. This matters because a good crust should melt in your mouth.
Do you have a pie crust trick? I would love to hear it.
The Heart of the Pie
Let’s talk apples. Granny Smiths are my favorite here. They are tart and firm. They hold their shape while baking.
Tossing them in lemon juice is important. It keeps them from turning brown. It also adds a little zing. Doesn’t that smell amazing?
Fun fact: The streusel topping is what makes it “Dutch” style, not a top crust!
That Magic Streusel
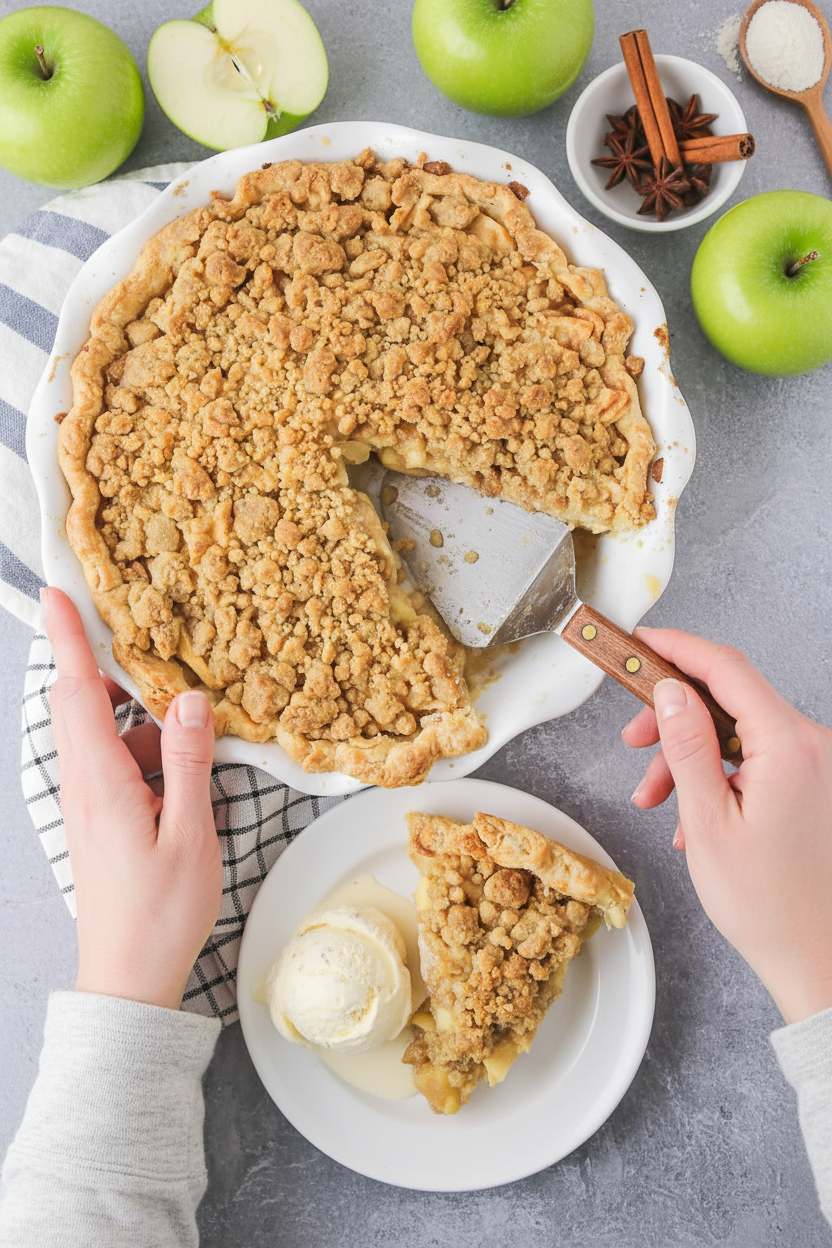
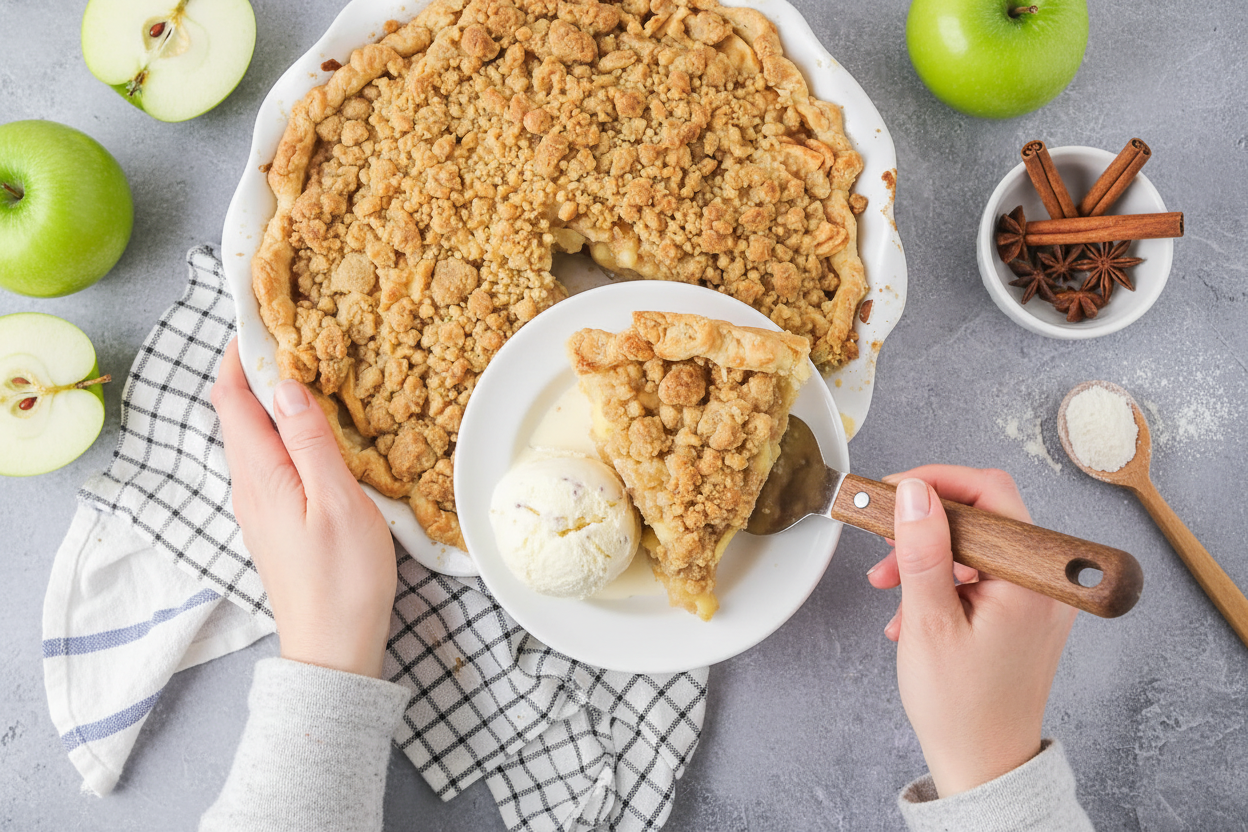
The streusel is the best part. It’s buttery, cinnamony, and crunchy. It sits right on top of the soft apples.
Use your fingers to mix it. Feel the crumbs form. This matters because cooking with your hands connects you to the food.
Do you like your streusel chunky or fine? Tell me your preference.
Patience is a Virtue
The hardest step is the last one. You must let the pie cool. I know, it’s so hard to wait.
But if you cut it too soon, the filling will run. Letting it set makes every slice perfect. It’s worth the wait, I promise.
What’s your favorite thing to eat with warm apple pie? Vanilla ice cream? Whipped cream? Let me know!
Ingredients:
| Ingredient | Amount | Notes |
|---|---|---|
| Flour | 1 cup | For the crust |
| Salt | ½ teaspoon | For the crust |
| Cold butter | ½ cup | For the crust |
| Buttermilk or milk plus vinegar | ¼ cup + splash | For the crust |
| Melted butter | 2 tablespoons | For the filling |
| Lemon juice | 1 tablespoon | For the filling |
| Sugar | ½ cup | For the filling |
| Flour | ¼ cup | For the filling |
| Cinnamon | 1 teaspoon | For the filling |
| Granny Smith apples | 2 pounds | For the filling; peeled, cored, thinly sliced |
| Flour | ½ cup | For the streusel |
| Sugar | 3 tablespoons | For the streusel |
| Brown sugar | 3 tablespoons | For the streusel |
| Cinnamon | 1 teaspoon | For the streusel |
| Melted butter | 4 tablespoons | For the streusel |
My Cozy Dutch Apple Pie Story
Hello, dear! I’m Tessa. Let’s bake my favorite apple pie. It’s the one my Oma taught me. We’d bake it every fall. I still laugh at that. She always used a big yellow bowl.
The secret is in the layers. You have a flaky crust first. Then sweet, tart apples in the middle. Finally, a buttery, crumbly streusel on top. Doesn’t that smell amazing? It fills the whole house with warmth. Let me walk you through it.
Step 1: Start with the crust. Mix your flour and salt in a big bowl. Grate your cold butter right into the flour. This makes little butter bits. They make the crust flaky. (A hard-learned tip: handle the dough as little as possible. Warm hands make a tough crust!).
Step 2: Now, add your buttermilk. Mix it just until it sticks together. Turn it onto a floured counter. Gently press it into a ball. Then wrap it up and let it rest in the fridge. This chills the butter again. It makes rolling so much easier.
Step 3: Time for the filling! Whisk everything but the apples together. This makes a sweet, cinnamony sauce. Peel and slice your apples thinly. Toss them in the bowl. Coat every slice. What’s the best apple for baking? Share below!
Step 4: Make the streusel topping. Just mix the dry things in a bowl. Drizzle in the melted butter. Stir with a fork until it looks like crumbs. Pop this in the fridge too. It helps the streusel stay nice and crumbly on the pie.
Step 5: Let’s put it all together. Roll your dough out gently. Fit it into your pie dish. Pour in the apple filling. Press it down a bit. Then sprinkle that cold streusel all over the top. Bake it until it’s golden and bubbly. The waiting is the hardest part!
Cook Time: 55–60 minutes
Total Time: About 1 hour 45 minutes
Yield: 8 servings
Category: Dessert, Pie
Three Tasty Twists on the Classic
This pie is wonderful as is. But sometimes, it’s fun to play. Here are three little twists I’ve tried over the years.
The Nutty Crunch: Add a handful of chopped pecans to your streusel. It gives a wonderful crunch.
The Autumn Spice: Mix a pinch of ginger and nutmeg with the cinnamon. It smells like a cozy sweater.
The Berry Surprise: Toss a cup of fresh cranberries with the apples. It’s a lovely tart little pop.
Which one would you try first? Comment below!
Serving Your Masterpiece
Let the pie cool completely before slicing. I know, it’s a test of patience! A scoop of vanilla ice cream is perfect on top. The cold cream melts into the warm pie. Whipped cream is also a classic choice. My grandson loves a little extra cinnamon sprinkled on his.
For a drink, a hot cup of black tea pairs beautifully. It cuts the sweetness just right. For a special evening, a small glass of sweet dessert wine is lovely. It tastes like apples and honey. Which would you choose tonight?
Keeping Your Pie Perfect for Later
Let’s talk about keeping your pie tasty. A cooled pie can stay on the counter for two days. Just cover it with a cloth. For longer storage, the fridge is your friend. It will keep for about four days there.
You can also freeze this pie. Wrap the whole pie or slices tightly. Use plastic wrap and foil. It will be good for up to three months. Thaw it in the fridge overnight when you are ready.
To reheat, warm a slice in the oven. I use 300 degrees for 10 minutes. This brings back the crispy crust. The microwave makes it soggy, so I avoid it.
I once baked two pies for a big family visit. Freezing one was a lifesaver. It meant fresh pie with no last-minute stress. Batch cooking like this gives you more time with people. That is what matters most.
Have you ever tried storing it this way? Share below!
Fixing Common Apple Pie Hiccups
Sometimes our baking has little problems. Do not worry. They are easy to fix. A soggy bottom crust is common. I remember when my first pie was wet underneath.
Bake your pie on the oven’s lowest rack. This helps the bottom cook fully. Also, make sure your filling is not too wet. Tossing the apples in flour helps soak up juice.
Is your streusel topping sinking into the filling? Your apple slices might be too thick. Try slicing them thinner. Press the apples down gently in the crust before adding topping.
What if the crust edges burn before the pie is done? Use a pie shield or foil. Just wrap the crust edge halfway through baking. Fixing these small issues builds your confidence. It also makes sure every bite is delicious.
Which of these problems have you run into before?
Your Apple Pie Questions, Answered
Q: Can I make this gluten-free?
A: Yes. Use your favorite gluten-free flour blend. It works well for both the crust and streusel.
Q: Can I make parts ahead?
A: Absolutely. Make the dough and streusel two days ahead. Keep them chilled in the fridge.
Q: What if I don’t have buttermilk?
A: Mix regular milk with a teaspoon of vinegar. Let it sit for five minutes. It works just fine.
Q: Can I double the recipe?
A: You can. Just use two pie pans. Baking time might be a little longer.
Q: Any optional add-ins?
A: A handful of chopped walnuts in the streusel is lovely. It adds a nice crunch. *Fun fact: Dutch apple pie often has a crumb topping, not a top crust!*
Which tip will you try first?
Bake, Share, and Enjoy
I hope you love making this cozy pie. The smell of baking apples is pure happiness. It fills your kitchen with warmth and love.
I would love to see your creation. Sharing food stories connects us all. Your pie might become a new family favorite.
Have you tried this recipe? Tag us on Pinterest! You can find me at @TessasKitchen. I always look for your photos. Thank you for baking with me today.
Happy cooking!
—Tessa Hammond.

Dutch Apple Pie Recipe for a Perfect Dessert
Description
Experience the delightful contrast of textures and flavors with this classic Dutch Apple Pie, featuring a buttery crust, spiced apple filling, and a sweet cinnamon streusel topping.
Ingredients
For the Crust
For the Filling
For the Streusel
Instructions
- TO MAKE THE CRUST: In a large bowl or the bowl of a stand mixer, mix together the flour and salt. Grate the cold butter into the flour mixture, and mix in using a pastry blender or the paddle attachment, until the pieces of butter are no larger than pea-sized. Add the buttermilk, and mix until the dough just starts to come together. Turn out onto a floured surface and gently work into a ball, handling as little as possible. Divide the dough in half and shape into discs. Wrap in plastic wrap and refrigerate at least twenty minutes, or until ready to use.
- TO MAKE THE FILLING: In a medium bowl whisk together the butter, lemon juice, sugar, flour, and cinnamon. Add the sliced apples to the bowl and toss to coat the apples completely with the mixture.
- TO MAKE THE STREUSEL: Whisk the flour, sugar, brown sugar, and cinnamon together with a fork in a small bowl. Drizzle in the melted butter and whisk until the butter is blended in and the mixture is crumbly. Refrigerate until ready to use.
- TO ASSEMBLE AND BAKE THE PIE: Preheat the oven to 350°F. Roll the dough out on a lightly floured surface to fit your pie pan. Gently press the dough into the pie dish and roll or pinch the edges to form the crust. Pour the filling into the pie crust, spreading evenly and pressing down gently with your hands to fit all of the apples. Sprinkle the streusel over the top in an even layer. Bake 55-60 minutes, or until the crust is golden brown, the streusel is browned, and the filling is bubbling and thick. Let cool completely before slicing and serving.
Notes
- Nutrition per serving: Calories: 424kcal, Carbohydrates: 59g, Protein: 4g, Fat: 21g, Saturated Fat: 13g, Polyunsaturated Fat: 1g, Monounsaturated Fat: 5g, Trans Fat: 1g, Cholesterol: 54mg, Sodium: 315mg, Potassium: 177mg, Fiber: 4g, Sugar: 34g, Vitamin A: 692IU, Vitamin C: 6mg, Calcium: 35mg, Iron: 1mg


Leave a Reply