My First Cheesecake Fiasco
My first cheesecake was a disaster. I was about fourteen. I forgot the sugar. It was so sour! I still laugh at that.
That’s why I love this recipe. No oven means no stress. You just mix, chill, and dream. What was your first kitchen mistake? I bet it was funny too.
Why a Crust Matters
The crust is the foundation. It holds everything together. Press it firmly into the pan.
This matters because a good crust gives a nice crunch. It balances the creamy filling. Doesn’t that sound perfect? Put it in the freezer to get firm.
The Magic of Gelatin
Gelatin is our secret helper. It comes from animal collagen.
We mix it with water first. Then we heat it gently. This wakes it up. It will set our filling perfectly in the fridge. No baking needed.
Making the Dreamy Filling
Room temperature cream cheese is key. It mixes smoothly. No lumps! Add the sugar, vanilla, and sour cream.
Then fold in the whipped cream. This matters. It makes the filling light and fluffy. Like a sweet cloud. Doesn’t that smell amazing?
The Final Chill
Patience is the last ingredient. You must chill it for four hours. I know, waiting is hard.
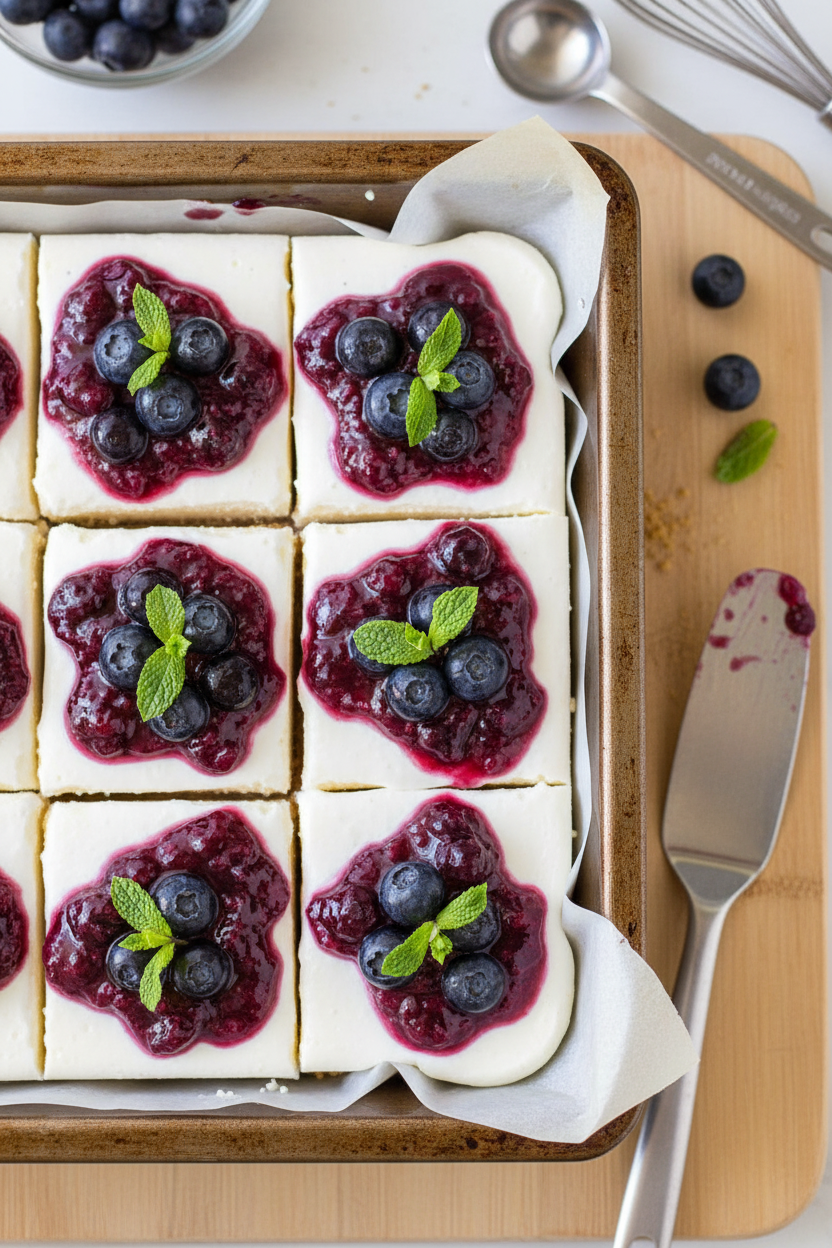
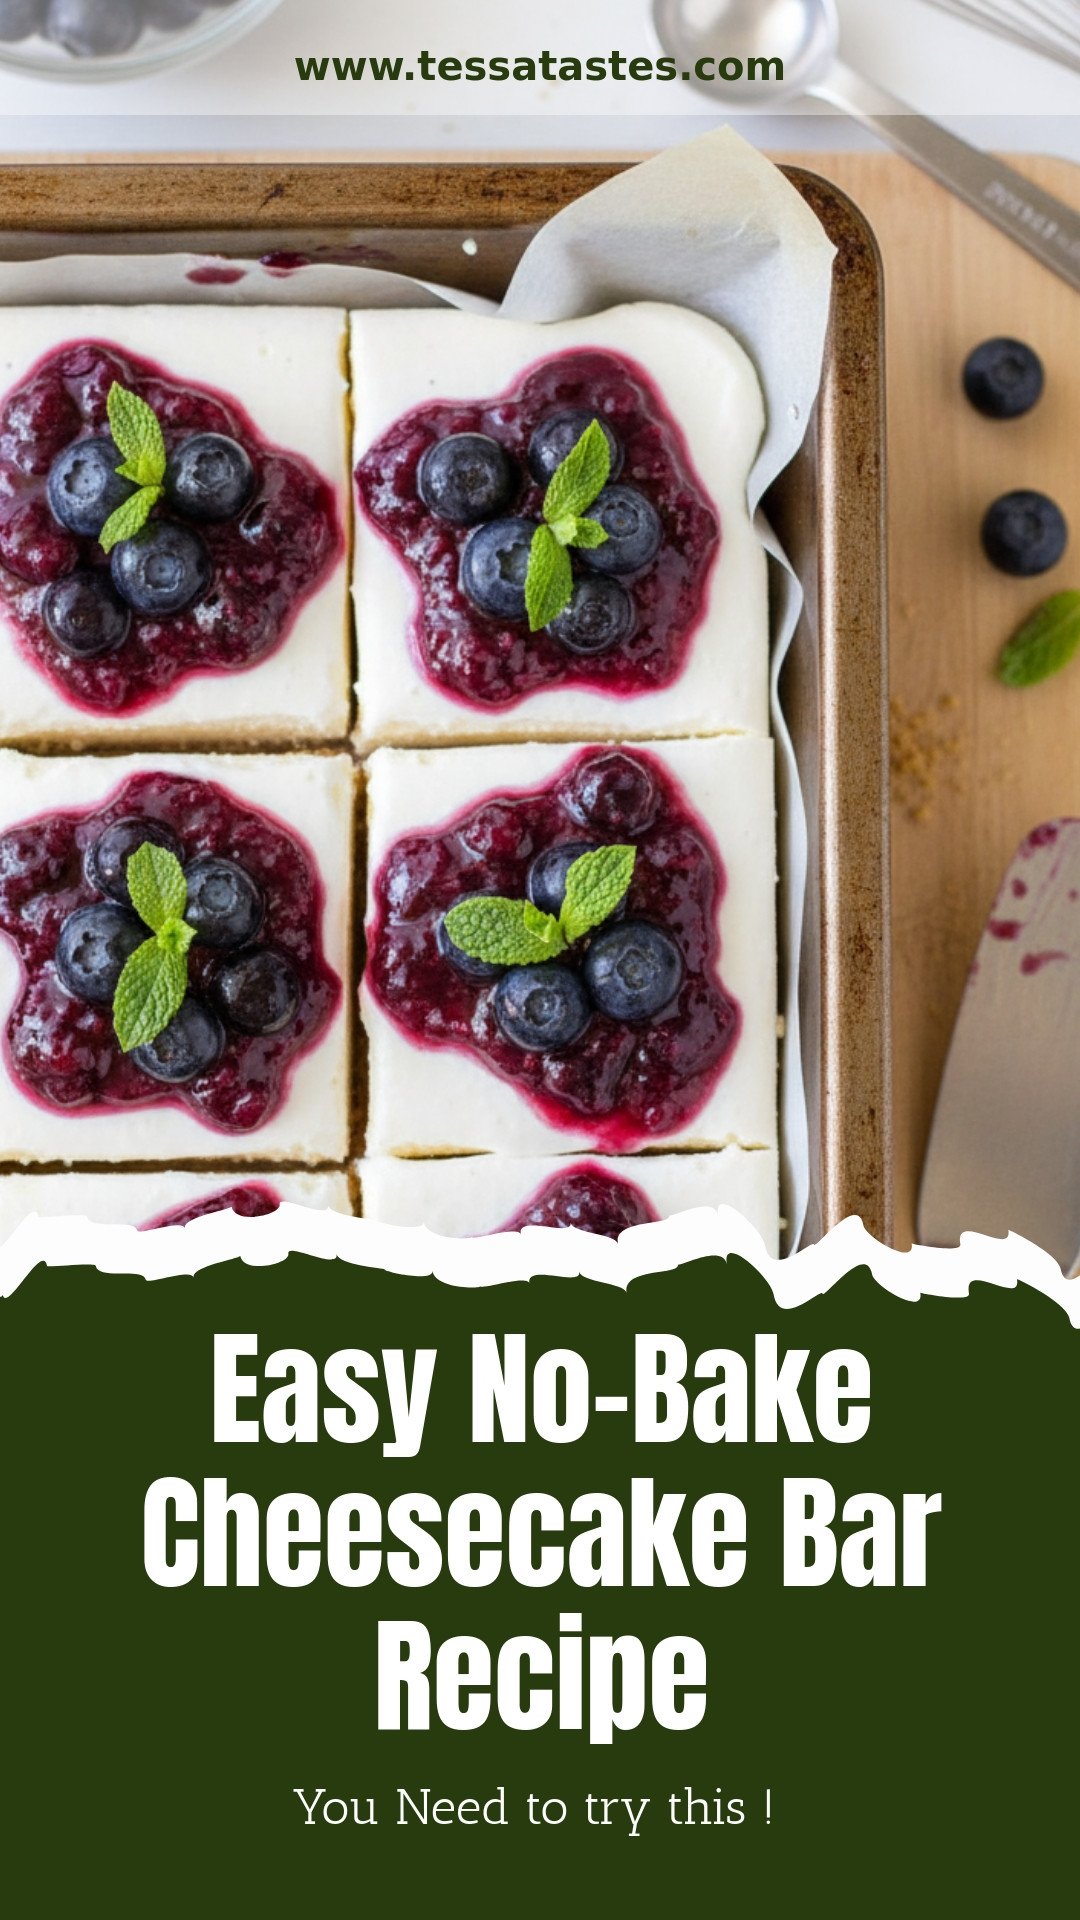
But it’s worth it. The chill lets all the flavors become friends. It makes the slice neat and pretty. What topping do you like best? Fresh berries, chocolate drizzle, or just plain?
Sharing is the Best Part
Food tastes better shared. I made these for my grandson’s birthday. His smile was my reward.
This matters more than the recipe. Cooking is about making memories. It’s about love. Will you make these for a special person? Tell me who it is.
Ingredients:
| Ingredient | Amount | Notes |
|---|---|---|
| Graham cracker crumbs | 1 cup | from about 8 sleeves |
| Granulated sugar | 1 1/2 tablespoons | for crust |
| Salt | 1/4 teaspoon | for crust |
| Unsalted butter | 5 tablespoons | melted |
| Cold water | 2 tablespoons | for filling |
| Plain powdered gelatin | 1 1/2 teaspoons | for filling |
| Original cream cheese | 16 ounces | room temperature |
| Powdered sugar | 3/4 cup | for filling |
| Sour cream | 1/3 cup | room temperature, for filling |
| Vanilla extract | 2 teaspoons | for filling |
| Salt | pinch | for filling |
| Heavy whipping cream | 3/4 cup | for filling |
| Sour cream | 3/4 cup | for optional topping |
| Powdered sugar | 3 tablespoons | for optional topping |
| Vanilla bean paste or extract | 1/2 teaspoon | for optional topping |
Easy No-Bake Cheesecake Bars: A Sweet, Simple Treat
Hello, dear! It’s Tessa. Come sit a spell. Today, we’re making magic without even turning on the oven. These creamy cheesecake bars are pure happiness. They remind me of summer picnics with my grandkids. Doesn’t that smell amazing? Let’s begin.
Ingredients
- Graham crackers (for crust)
- Sugar
- Salt
- Butter, melted
- Plain gelatin
- Cold water
- Cream cheese, room temperature
- Powdered sugar
- Sour cream
- Vanilla extract
- Heavy cream
Instructions
Step 1: First, make your crust. Crush those graham crackers until they’re fine crumbs. Mix them with the sugar and salt. Pour your melted butter right over the top. Stir it all until it feels like wet sand. Now, press it firmly into your pan. I use my fingers. It goes into the freezer to get nice and firm.
Step 2: Let’s bloom the gelatin. Whisk the plain gelatin into cold water in a little bowl. Just set it aside for now. It will look lumpy, but that’s perfect. This little step is our secret. It makes the filling set up beautifully. (Hard-learned tip: Always use cold water for this. Hot water makes clumps I can’t fix!).
Step 3: Time for the filling! Beat your room-temperature cream cheese until it’s smooth. No lumps, please. Add the powdered sugar, sour cream, vanilla, and that pinch of salt. Mix it just until it’s all combined. Over-mixing makes it too thin. See how creamy it looks? I still laugh at the time I used salted butter here. What a salty surprise that was!
Step 4: Heat your gelatin bowl for 25 seconds. Whisk it for a full minute after. Let it cool for two minutes. Then, with your mixer on low, slowly pour it into the cream cheese. This part is like making a science potion. It will come together smoothly. What’s your favorite no-bake dessert? Share below!
Step 5: In a separate bowl, whip the heavy cream until it forms stiff peaks. This means it holds its shape. Now, gently fold it into your cream cheese mixture. Use a big spatula and be gentle. This makes the filling light and dreamy. Carefully spread it over your cold crust.
Step 6: For the topping, just stir the ingredients together. Spread it over the filling. Now, the hardest part. Pop it in the fridge. You must wait at least four hours. I know, it’s tough! But it’s worth the wait. The filling sets up perfectly.
Cook Time: 4–6 hours (chilling)
Total Time: 4 hours 25 minutes
Yield: 9 generous bars
Category: Dessert, No-Bake
Three Fun Twists to Try
Once you master the basic recipe, you can play! Here are three of my favorite twists. They make it feel like a whole new dessert. My grandson loves the lemon idea.
- Berry Swirl: Swirl a few spoonfuls of raspberry jam into the filling before chilling.
- Lemon Sunshine: Add two tablespoons of fresh lemon juice and a bit of zest to the filling.
- Cookie Crust: Use crushed chocolate sandwich cookies instead of graham crackers. Leave out the extra sugar.
Which one would you try first? Comment below!
Serving Your Sweet Creation
These bars are wonderful all on their own. But a little extra love makes them special. Try a few fresh berries on the side. A drizzle of chocolate sauce is always a hit. For a pretty plate, dust the top with a little extra powdered sugar. It looks like a light snowfall.
For drinks, a cup of hot coffee pairs beautifully. The bitterness is nice with the sweet. For a fun treat, a glass of cold milk is classic. Grown-ups might like a sweet dessert wine. It sips nicely with each creamy bite. Which would you choose tonight?
Keeping Your Cheesecake Bars Happy
Let’s talk about storing these sweet treats. They must stay in the fridge. Cover the pan tightly with plastic wrap. They will be good for about four days. You can also freeze them for a month. Just wrap each bar in plastic, then foil. Thaw them in the fridge overnight.
I once left a whole pan out by mistake. I was chatting with my neighbor! The filling got much too soft. We had to eat it with spoons like pudding. It was still tasty, but messy. Batch cooking is a wonderful trick. You can make a double batch of crust. Press half into a pan for now. Save the other half in a bag in the freezer. Next time, you are halfway done! This matters because it saves precious time. You can make joy for your family faster.
Have you ever tried storing it this way? Share below!
Easy Fixes for Common Hiccups
Sometimes our cooking needs a little help. First, a crumbly crust that won’t stick. You did not add enough butter. Just add one more melted tablespoon and mix. Press it very firmly into the pan. Second, lumpy cream cheese filling. Your cream cheese was too cold. Let it sit on the counter for an hour. Soft cheese mixes smoothly. This matters for a silky, dreamy texture.
Third, runny filling that won’t set. The gelatin may not have bloomed right. Or you did not whip the cream enough. Make sure your cream forms stiff peaks. I remember when my first cheesecake was soup! I was in a hurry. Patience makes perfect here. Getting these steps right builds your confidence. You learn that small fixes make big differences.
Which of these problems have you run into before?
Your Cheesecake Bar Questions, Answered
Q: Can I make this gluten-free? A: Yes! Use gluten-free graham crackers. Crush them just the same way.
Q: How far ahead can I make it? A: It’s perfect for making ahead. Make it the day before you need it.
Q: What can I use instead of sour cream? A: Plain Greek yogurt works well. It gives a similar little tang.
Q: Can I double the recipe? A: Absolutely. Use a 9×13 inch pan. Chill time is still the same.
Q: Is the topping needed? A: It’s optional but lovely. It adds a creamy, slightly tart finish. *Fun fact: The sour cream topping helps keep the top looking fresh and smooth!*
Which tip will you try first?
From My Kitchen to Yours
I hope you love making these bars. I love knowing families are baking together. Food is about sharing stories and smiles. If you give this recipe a try, I would love to see. Show me your beautiful creation. Your version might give me a new idea!
Have you tried this recipe? Tag us on Pinterest! You can find me at @TessasKitchenTable. I always look at your photos. They make my day so bright. Thank you for cooking with me today.
Happy cooking!
—Tessa Hammond.

Easy No-Bake Cheesecake Bar Recipe
Description
This easy no-bake cheesecake bar recipe features a buttery graham cracker crust and a creamy, perfectly set filling, topped with an optional tangy sour cream layer.
Ingredients
Crust
Filling
Sour Cream Topping (Optional)
Instructions
- To make the crust, in a medium size mixing bowl combine the graham cracker crumbs, granulated sugar and salt. Pour the melted butter over top and stir until a soft wet mixture forms. Firmly press into a 8×8 or 9×9 inch pan. Place in the freezer to chill while preparing the filling.
- In a small microwave-safe mixing bowl, whisk together the water and gelatin. Set aside.
- In the bowl of a stand mixer (or a large mixing bowl) beat the cream cheese until smooth and creamy. Add the sugar, salt, vanilla and sour cream, beat just until combined.
- Place the gelatin mixture in microwave and heat for 25 seconds on HIGH. Remove and whisk for 1 minute. Allow to cool for 2 minutes, then with mixing speed on low, slowly add the gelatin to the cream cheese, mixing until combined.
- Using a hand mixer (or if you have another bowl for your mixer, use that), in a medium bowl, whip the heavy cream until stiff peaks form. Using a rubber spatula, fold in the whipped cream into the mixture. The whipped cream will loosen the filling up a bit and make it slightly more spreadable.
- Carefully spread the filling into the chilled crust. Spread into a smooth, even layer.
- Prepare the topping by combining all of the ingredients in a mixing bowl and stirring together until smooth. Using a spatula, spread over the top of the cheesecake.
- Place in the refrigerator and chill for at least 4 hours before slicing and serving.
Notes
- Nutrition per serving: Calories: 250kcal | Carbohydrates: 13g | Protein: 2g | Fat: 21g | Saturated Fat: 12g | Cholesterol: 64mg | Sodium: 143mg | Potassium: 78mg | Sugar: 9g | Vitamin A: 755IU | Vitamin C: 0.2mg | Calcium: 57mg | Iron: 0.3mg


Leave a Reply