My First Spooky Kitchen Helper
Let me tell you about my grandson, Leo. He helped me make these last year. He was so careful with the little skeletons. I still laugh at that. He gave each one a name before it went into the pudding.
This matters because cooking together makes memories. It’s not just about the food. It’s about the silly stories you tell while making it. Do you have a favorite helper in your kitchen?
How to Build Your Pudding Cup
First, clean your toy skeletons. A little soap and warm water does the trick. Dry them well. Then, gently bend their arms and legs. Make them look like they’re crawling out!
Crush the Oreos. I use a bag and a rolling pin. The crunching sound is so satisfying. Layer the crumbs in a clear cup. Doesn’t that look like dirt? Then add your smooth chocolate pudding.
Why The Layers Work
This matters more than you think. The crunchy cookie and soft pudding are best friends. Each bite has two different feels. It keeps your mouth happy and surprised.
Fun fact: The first pudding was a meat soup! I’m glad we use chocolate now. The skeleton peeking through is the best part. It’s a silly surprise that makes everyone smile. What’s your favorite texture in a dessert?
A Treat Without The Fuss
You don’t need to bake anything. Just mix and layer. This is perfect for a busy week. Or when you want something fun fast. The boxed pudding is our secret helper.
I love recipes like this. They leave you time to decorate. Or to just sit and talk. Will you use Halloween Oreos or the regular chocolate ones for your cups?
Make It Your Own
This is your creation. You are the artist. Try vanilla pudding instead. Use gummy worms instead of a skeleton. The orange filling in the cookies makes it extra festive.
That’s the real lesson here. Recipes are just a starting point. Your kitchen should be a place for fun experiments. What other spooky toppings would you add?
Ingredients:
| Ingredient | Amount | Notes |
|---|---|---|
| Chocolate Pudding Mix | 1 box | Prepared as directed on the package |
| Halloween Oreos | 1 package |
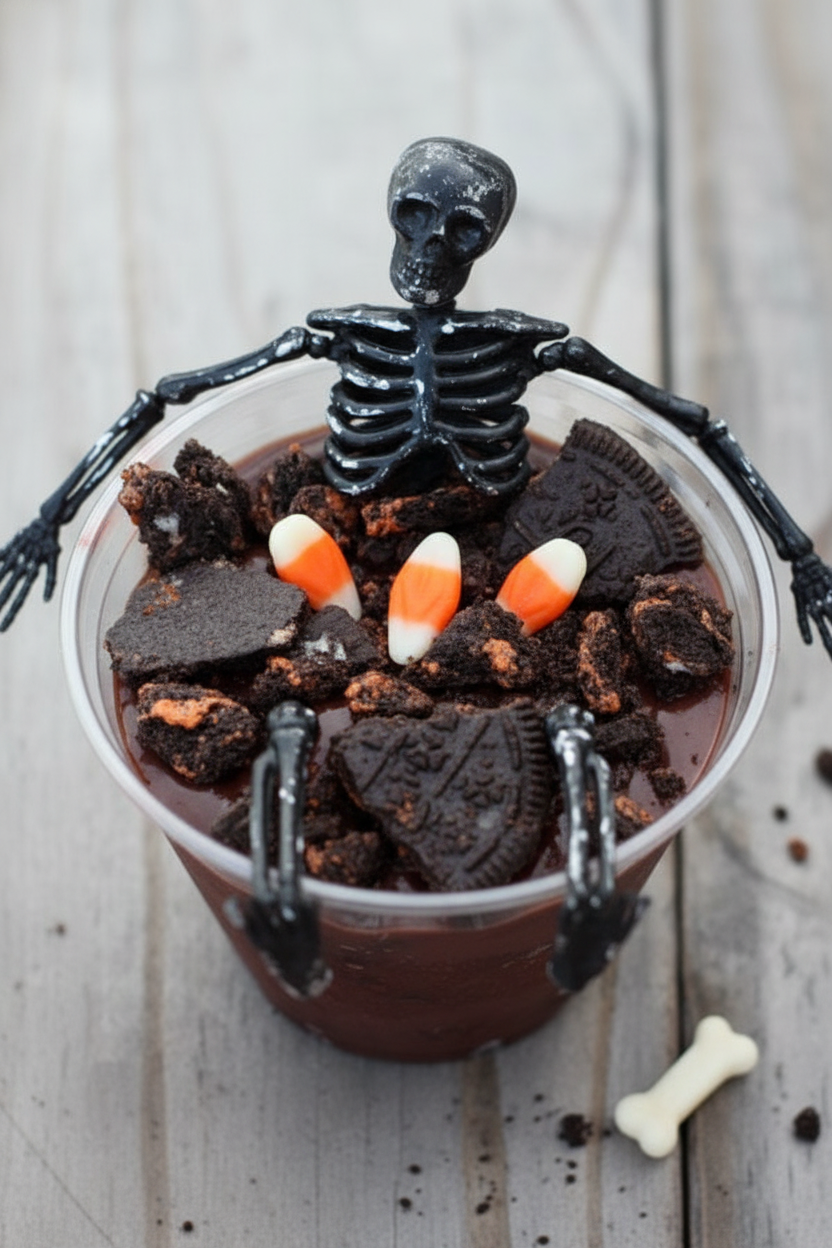
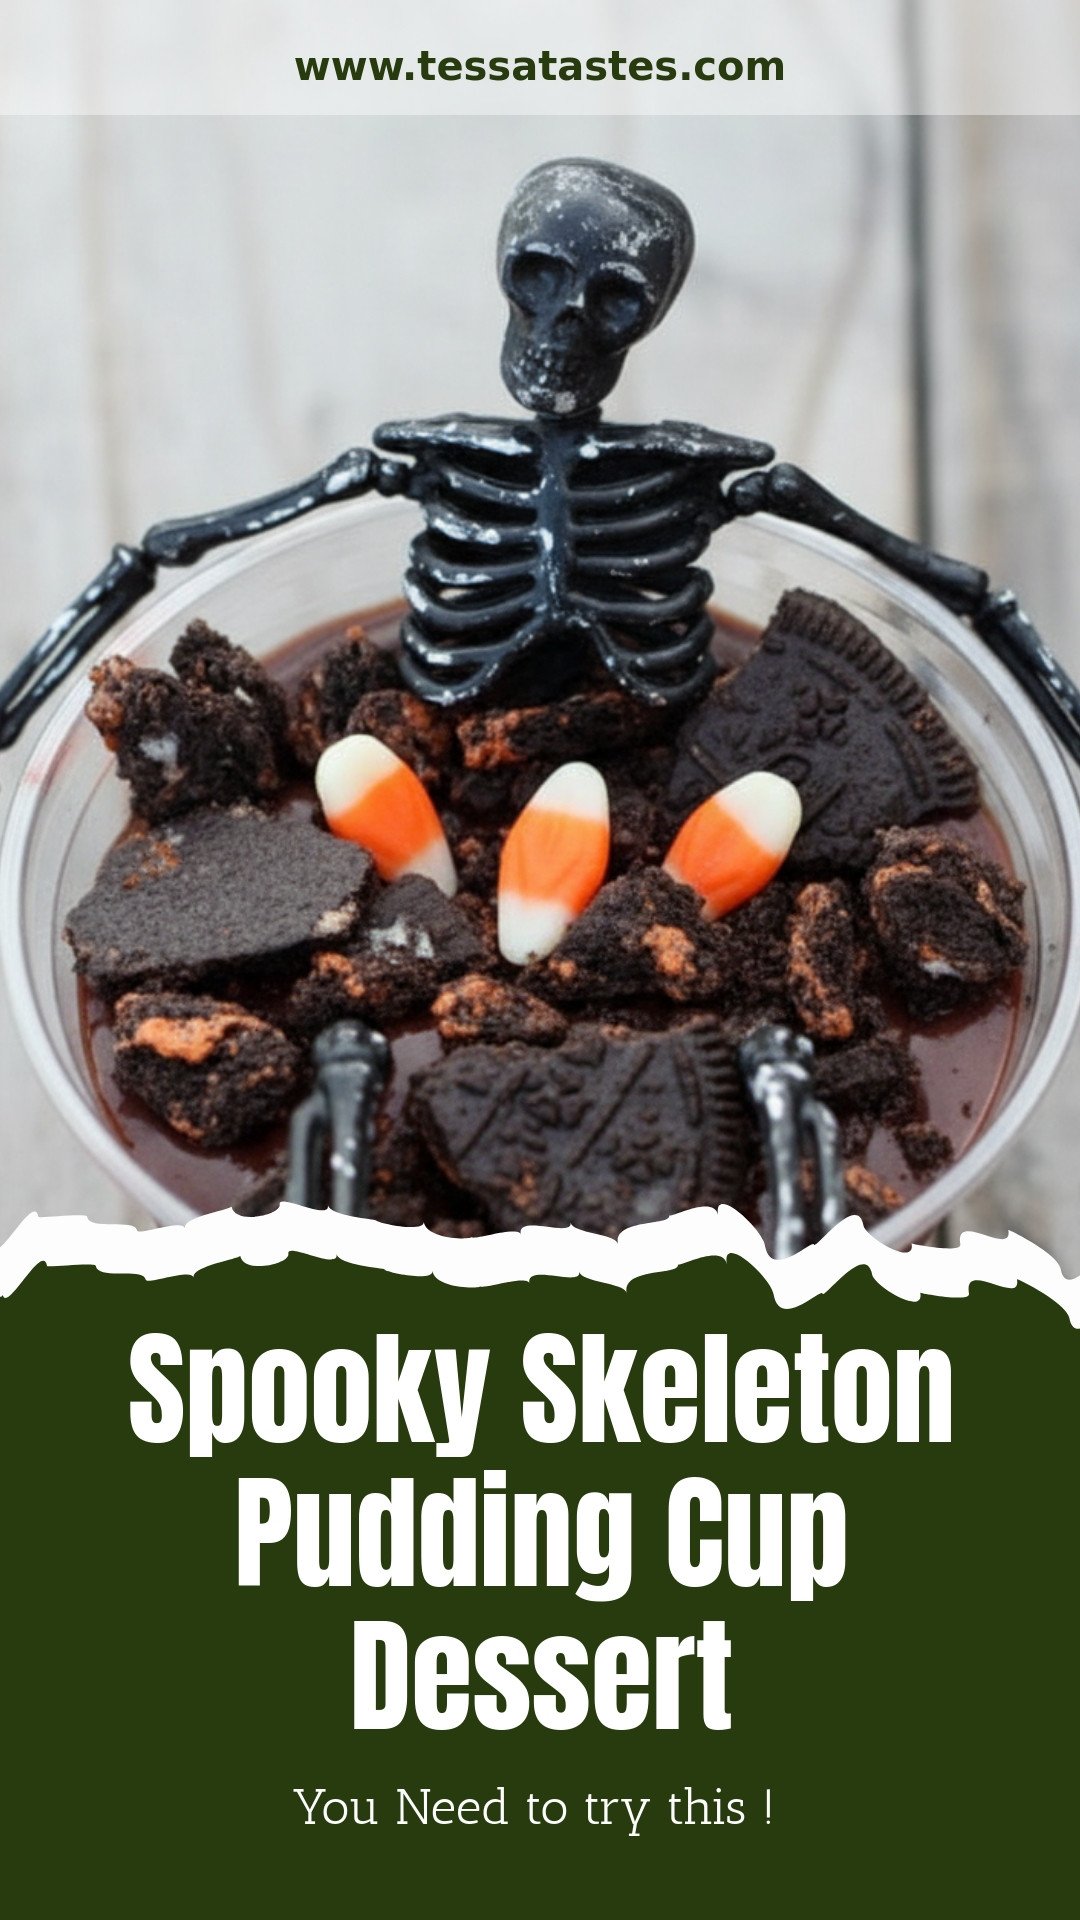
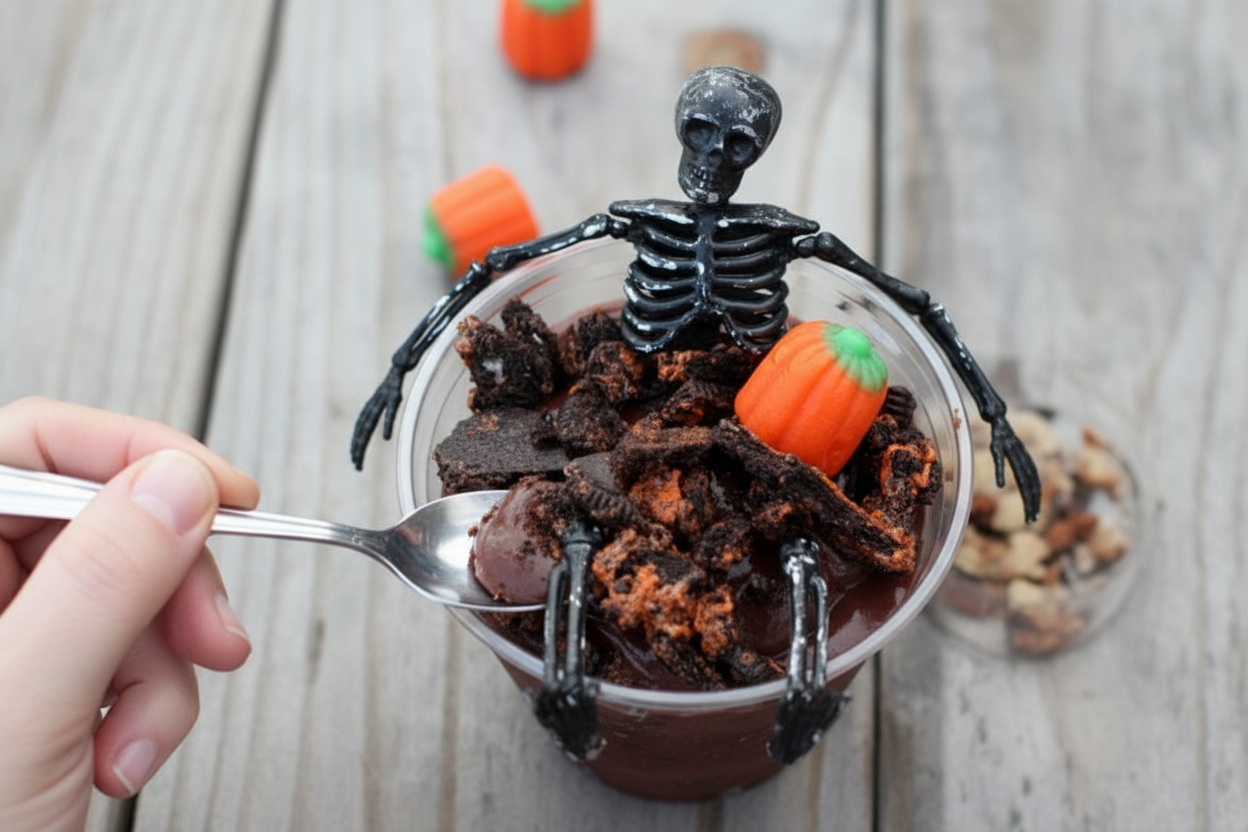
Spooky Skeleton Pudding Cups
Hello, my dear! Come sit at the counter. Let’s make a silly Halloween treat. It’s perfect for a party or a giggly night in. I love how the skeleton peeks out of the pudding. It reminds me of my grandson’s first costume. He was a wobbly little ghost! This dessert is no-bake and so simple. We just need pudding, cookies, and a toy skeleton. Doesn’t that sound like fun?
We’ll make it together, step-by-step. I’ll tell you a little story as we go. (My hard-learned tip: always wash those toy skeletons first!). Are you ready? Let’s begin.
Steps
First, we must prepare our spooky friend. Find your plastic skeleton. I got mine from the craft store. Give it a bath in warm, soapy water. Rinse it well and let it dry. This is very important, trust your grandma! Now, gently bend its arms and legs. Make it look like it’s climbing out of the cup. Don’t force it, or a limb might pop off. I learned that the hard way once!
Next, let’s make the “dirt.” Take your Halloween Oreos. Put them in a bag. Now, gently crush them with a rolling pin. You want some big chunks and some fine crumbs. It looks like dark, crumbly soil. I still laugh at how my dog always comes running. He thinks the crinkling bag means treats for him!
Now, make the chocolate pudding. Follow the directions on the box. Just whisk the mix with cold milk. Keep whisking until it’s nice and thick. Doesn’t that smell amazing? It reminds me of making pies with my own grandma. Let it sit for a few minutes to set.
Time to build our graveyard! Get four clear plastic cups. Put a spoonful of cookie crumbs in each. Then, add a layer of chocolate pudding. Stop when the cup is about half full. Carefully place your skeleton in the pudding. Press it down just a little. Now, cover it with more pudding and cookie crumbs. Leave its head poking out, looking spooky!
The final touch! Top your cup with a marshmallow pumpkin if you have one. You could also use a gummy worm. It looks like it’s crawling out of the grave! Now, chill the cups for about an hour. This helps everything get nice and firm.
What other creepy crawler would be fun on top? Share below!
Three Fun Twists to Try
This recipe is like a little black dress. You can dress it up for any occasion! Here are some of my favorite ways to change it. My book club loved the mint version last winter.
Polar Explorer: Use vanilla pudding and crushed vanilla wafers. Your skeleton is climbing out of a snow drift!
Mud Monster: Use chocolate pudding but add a spoon of peanut butter. Mix it in while you whisk. So rich and delicious.
Zombie Green: Use pistachio pudding mix. It makes a wonderfully weird green “swamp.” Perfect for a monster bash.
Which one would you try first? Comment below!
Serving Your Spooky Sweet
Presentation is part of the fun. Place the cups on a dark plate. Scatter a few extra cookie crumbs around them. You could even add some plastic spiders. For a party, line them up on a tray with dry ice fog. It always gets a great reaction.
What to drink? For grown-ups, a dark rum and cola feels festive. It matches the chocolate. For everyone, I love cold apple cider. Its sweet, tangy taste cuts through the rich pudding. It tastes like a crisp autumn night.
Which would you choose tonight?
Keeping Your Spooky Treats Fresh
These pudding cups are best eaten right away. The Oreos get soft and lovely. But you can make them ahead.
Just cover the cups tightly with plastic wrap. Keep them in the fridge for up to one day. I once made them for a party a day early. It saved me so much time.
You cannot freeze them. The pudding will get watery and grainy. Batch cooking is easy though. Just prepare the pudding and crush the cookies in advance.
Store them separately. Assemble your cups just before serving. This keeps the textures perfect. Have you ever tried storing it this way? Share below!
Getting ready ahead matters. It lets you enjoy your own party. You won’t be stuck in the kitchen.
Simple Fixes for Common Spooky Problems
First, soggy cookies. Your pudding might be too warm. Let it cool in the fridge first. Then layer it with the Oreos.
Second, broken skeleton limbs. Be gentle when you bend them. I remember when my grandson bent one too fast. It popped right off! We used it as a “spare rib.”
Third, pudding that won’t set. Always follow the box directions exactly. Use very cold milk. Whisk it for the full two minutes.
Getting the texture right builds your confidence. A perfect set means a delicious, creamy bite. Which of these problems have you run into before?
Your Spooky Skeleton Questions, Answered
Q: Can I make this gluten-free? A: Yes! Use gluten-free chocolate pudding and cookies.
Q: Can I make it ahead? A: Prep parts separately. Assemble cups just one hour before.
Q: What if I don’t have Halloween Oreos? A: Regular chocolate Oreos work great. Their dark filling looks like dirt!
Q: Can I double the recipe? A: Absolutely. Just use two boxes of pudding mix.
Q: Any extra fun tips? A: Try gummy worms in the “dirt.” *Fun fact: The first pudding was a savory meat dish!* Which tip will you try first?
Share Your Spooky Creations!
I hope you have fun making these. Cooking should be joyful and a little messy. I love seeing your kitchen adventures.
Please show me what you create. Share a picture of your skeleton scene. It makes my day to see them.
Have you tried this recipe? Tag us on Pinterest! You can find me at @TessasKitchen. I can’t wait to see your spooky treats.
Happy cooking!
—Tessa Hammond.
Spooky Skeleton Pudding Cup Dessert
Description
A fun and spooky Halloween dessert featuring chocolate pudding, crushed Oreos, and a gummy skeleton in a cup.
Ingredients
Instructions
- Clean the gummy skeletons by soaking them in hot, soapy water. Gently scrub them, then bend at the joints to pose them. Be careful not to use too much force.
- Crush the Halloween Oreos. Place a few tablespoons of the crushed cookies into the bottom of each of 4 plastic cups.
- Prepare the chocolate pudding mix as directed on the box. One large box of instant pudding is perfect for 4 servings.
- Layer the cups: Add a layer of crushed Oreos, then chocolate pudding until the cup is about half full. Place a posed skeleton in the center of each cup.
- Fill the cups with more pudding and top with the remaining crushed Oreos. Add a mallow pumpkin on top for the perfect Halloween touch.
Notes
- You can use regular chocolate-filled Oreos if Halloween ones are not available. Ensure skeletons are food-safe and clean before using.


Leave a Reply