The Magic in the Bowl
Let’s start with the yeast. It’s alive, you know! I add it to warm milk and sugar. Then I watch it wake up. It gets all foamy and bubbly. It smells a bit like bread already. Doesn’t that smell amazing?
This is where the magic happens. That foam means your yeast is happy. Happy yeast makes light, fluffy rolls. If it doesn’t foam, your milk was too hot or cold. That’s why checking the temperature matters. It makes all the difference.
A Little Patience Goes a Long Way
Now, we let the dough rise. I cover the bowl with plastic wrap. I find a warm spot, like near the oven. Then I walk away. This is the hard part! You must be patient.
I use this time to clean up. Or I sit with a cup of tea. Waiting lets the dough grow. It becomes soft and puffy. This slow rise builds flavor and texture. Rushing here gives you tough rolls. Good things take time, my dear.
The Joy of Shaping
Punching down the dough is fun. Then you cut and shape it into balls. My grandson calls them “dough puppies.” I still laugh at that. Rolling them in your hands is soothing.
You line them up in your dish. They should be cozy, touching each other. This helps them rise up, not out. They become pull-apart soft. Do you like shaping dough, or is the waiting easier for you?
The Best Part
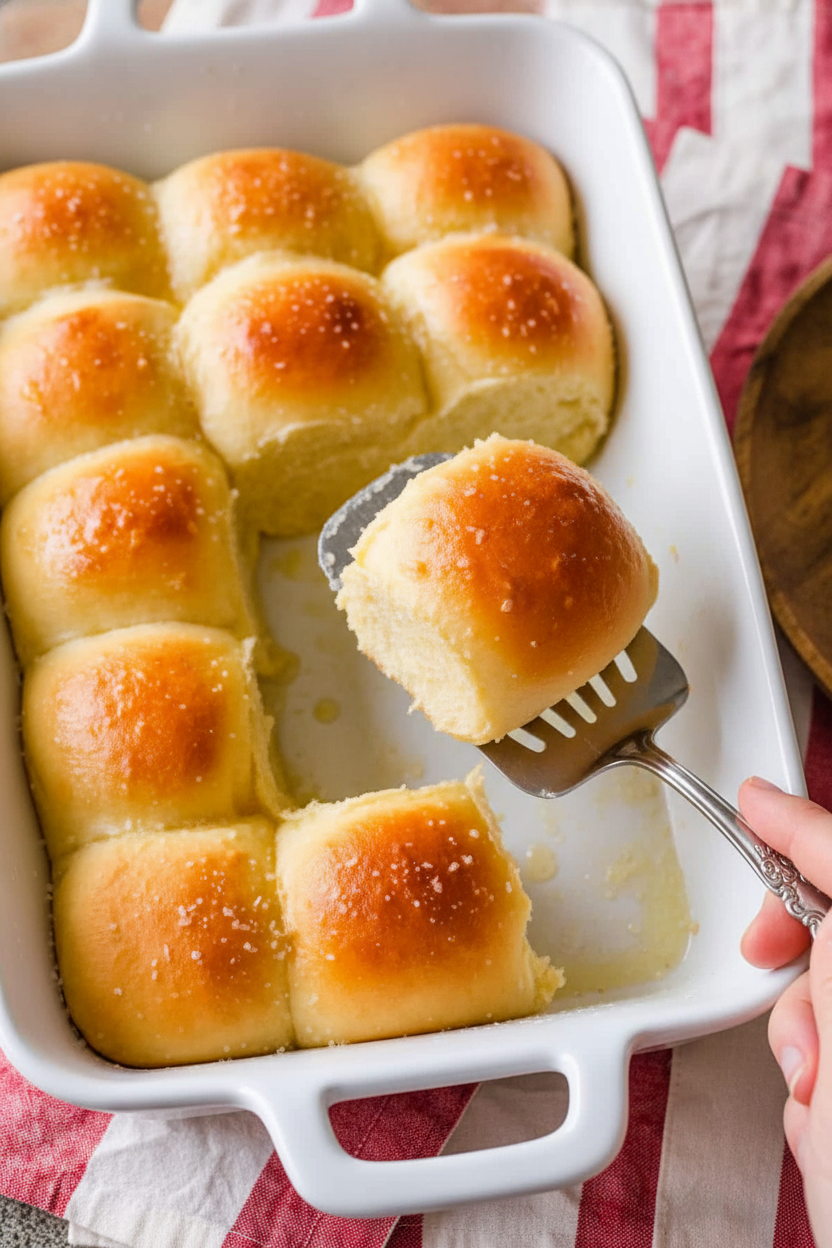
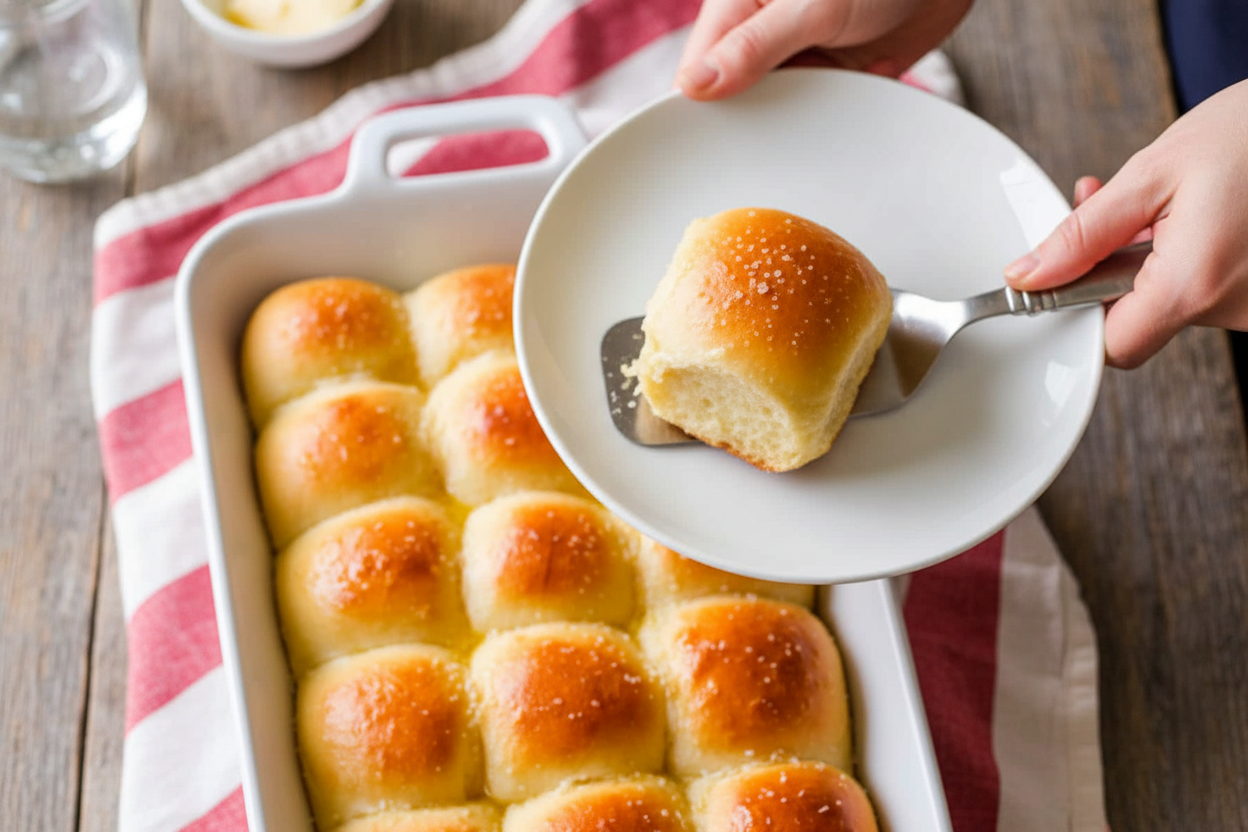
The baking smell fills the whole house. It is the best welcome home smell. You bake until they are golden brown. Then comes my favorite step. You brush the hot tops with melted butter.
That butter makes them shiny and soft. It adds a rich, yummy flavor.
You must let them cool a bit. But I always sneak one warm roll. It’s a cook’s reward!
More Than Just Bread
These rolls are not just food. They are a warm hug on a plate. Sharing them brings people together. That matters more than a perfect shape. It’s about the love you mix in.
What meal do you love to serve these with? Tell me your favorite. For me, it’s Sunday soup. Nothing beats a soft roll dipped in broth. Making them teaches you patience and care. Both are important life skills, I think.
Ingredients:
| Ingredient | Amount | Notes |
|---|---|---|
| whole milk | 1 1/2 cup | warmed to 110°F |
| unsalted butter | 4 Tbsp | melted |
| active dry yeast | 1 Tbsp | |
| granulated sugar | 1/3 cup | |
| fine sea salt | 1 1/4 tsp | |
| all-purpose flour | 4 cups | minus 1 to 3 Tbsp |
| unsalted butter (for brushing) | 1 Tbsp | melted |
| kosher salt (for sprinkling) | 1/2 tsp |
My Softest Dinner Rolls, Just Like Grandma Made
Hello, my dear! Come sit. Let’s make my famous soft dinner rolls. They are little clouds of happiness. I learned this recipe from my own grandma. The kitchen always smelled like warm butter and yeast. I still smile thinking about it. Making bread is a little bit of magic. You mix simple things. Then you wait. It grows! Doesn’t that smell amazing? Let’s begin our baking story together.
Step 1: Wake Up the Yeast
First, we wake up the yeast. Whisk the warm milk and one tablespoon of sugar in your mixer’s bowl. Sprinkle the yeast on top. Let it sit for one minute. Now, whisk it all together. Let it sit for five minutes. You will see it get foamy. That means our yeast is happy and awake! (A hard-learned tip: If your milk is too hot, it will hurt the yeast. Think of a nice warm bath, not a hot one.)
Step 2: Mix the Dough
Now, add the melted butter, the rest of the sugar, and the salt. Give it a quick stir. Start adding the flour, half a cup at a time. Keep mixing with the whisk. The dough will get thick. That’s your sign to switch to the dough hook. My grandson loves to watch the mixer work. He says it looks like a dancing cloud!
Step 3: Knead & First Rise
Keep mixing with the dough hook for two minutes. Or, you can knead by hand for ten. I love kneading by hand. It feels wonderful. The dough should feel a little sticky. But it shouldn’t stick to your clean, dry fingers. What does “tacky” dough feel like to you? Share below! Then, put the dough in an oiled bowl. Cover it with plastic wrap. Let it rise in a warm spot for two hours. It will get big and puffy!
Step 4: Shape & Second Rise
Time to make our rolls! Gently punch the dough down. Turn it out onto a floured surface. Cut it into 15 to 24 even pieces. Roll each piece into a smooth ball. Place them close together in your oiled baking dish. Cover them again. Let them rise for another 30 to 60 minutes. They will get all puffed up and friendly.
Step 5: Bake & Butter
Bake your rolls at 375°F for about 23 minutes. They will turn a beautiful golden brown. As soon as they come out, brush the tops with melted butter. This gives them that gorgeous shine. I still laugh at how fast they disappear from the table. Let them cool just a bit before you pull them apart. That buttery smell is the best part of my day.
| Cook Time: | 25 minutes |
| Total Time: | About 3 hours 30 minutes |
| Yield: | 15-24 rolls |
| Category: | Bread, Side Dish |
Three Fun Twists for Your Rolls
Once you master the basic roll, try a little twist! It’s so much fun. You can make them different every time. Here are three of my favorite simple ideas. They always surprise my family.
- Garlic & Herb: Mix a little garlic powder and dried parsley into the dough. So savory!
- Cinnamon Sugar Swirl: Roll the dough flat, brush with butter, and sprinkle cinnamon sugar. Roll it up and slice.
- Everything Bagel: Brush with butter after baking. Then sprinkle with everything bagel seasoning. Yum!
Which one would you try first? Comment below!
How to Serve Your Beautiful Rolls
These rolls make any meal special. They are perfect for sopping up soup or gravy. I love them with a big bowl of potato soup. You can also slice them in half for tiny sandwiches. For a holiday, I put them in a pretty basket with a cloth napkin. It feels so fancy!
For drinks, a cold glass of milk is my classic choice. It’s just right. For the grown-ups, a light, crisp apple cider is lovely. It tastes like fall. Which would you choose tonight?
Keeping Your Rolls Soft and Happy
Fresh rolls are a treat. But what about leftovers? Let’s keep them soft. Once cooled, store them in a plastic bag at room temperature for two days. For longer, freeze them. I wrap each roll tightly in plastic wrap first. Then I pop them all into a freezer bag.
To reheat, wrap a frozen roll in foil. Warm it in a 300°F oven for 15 minutes. This brings back that fresh-baked feel. My first time, I used the microwave. It made the rolls tough and chewy. I learned my lesson the hard way!
Batch cooking these rolls saves so much time. You can have fresh bread anytime. It matters because good food should be easy to share. A warm roll can turn a simple soup into a feast. Have you ever tried storing it this way? Share below!
Roll Rescue: Fixing Common Troubles
Sometimes baking doesn’t go as planned. Let’s fix that. First, if your yeast doesn’t foam, your liquid was likely too hot or cold. It should feel like warm bath water, not hot. I once killed my yeast with steaming milk. My dough never rose!
Second, if your rolls are dense, you may have added too much flour. The dough should feel tacky, not dry. Trust the recipe. Third, if the tops brown too fast, tent the pan with foil. This lets the inside cook without burning.
Getting this right builds your kitchen confidence. It also makes your food taste its very best. A light, fluffy roll is a small victory. It makes everyone at the table smile. Which of these problems have you run into before?
Your Quick Bread Questions, Answered
Q: Can I make these gluten-free? A: I don’t recommend it. The flour type is key for the soft texture.
Q: Can I make the dough ahead? A: Yes! After the first rise, punch it down. Keep it covered in the fridge overnight.
Q: What can I use instead of milk? A: Warm water works in a pinch. But milk makes them extra tender and rich.
Q: Can I double the recipe? A: Absolutely. Just use a very large bowl for mixing.
Q: Any optional tips? A: A fun fact: brushing with butter right after baking gives a gorgeous, soft crust. Which tip will you try first?
From My Kitchen to Yours
I hope you love making these rolls. There is nothing like the smell of baking bread. It fills a home with love and warmth. I would be so thrilled to see your creations.
Please share your baking journey with me. Show me your golden-brown rolls on a busy weeknight. Have you tried this recipe? Tag us on Pinterest! I look at every single photo.
Thank you for spending time in the kitchen with me. Happy cooking!
—Tessa Hammond.

Soft Dinner Rolls Recipe Video Tutorial
Description
Learn to make incredibly soft, fluffy, and buttery homemade dinner rolls with this easy-to-follow recipe and video tutorial.
Ingredients
Instructions
- In the bowl of your mixer, whisk together warm milk (about 110F) and 1 Tbsp sugar. Sprinkle the top with 1 Tbsp yeast and let sit 1 minute. Whisk together and let it sit for about 5 minutes until yeast looks foamy. Add 4 Tbsp melted butter, remaining sugar and salt.
- Add flour half a cup at a time until the dough whisking to incorporate. Once the dough gets too thick, switch to the dough hook attachment and mix on speed 2 (you can also continue mixing by hand with a stiff spatula). Add about 4 cups of flour, adding the last 1 to 3 Tbsp of flour only if needed. The dough should feel sticky and tacky but should not stick to clean/dry finger tips.
- Knead the dough with the dough hook in a stand mixer for 2 minutes or knead by hand (10 min), then place dough in an oiled bowl. Cover it with plastic wrap and let it rise about 2 hours in a warm place or until doubled in size.
- Once the dough rises, turn it out onto a lightly floured surface and cut it into 15-24 even pieces depending on the shape of your baking dish. Roll each piece of dough into a ball and place them onto an oiled 9×13 casserole dish or baking sheet.
- Cover the dinner rolls with plastic wrap and let them rise another 30-60 minutes in a warm place or until puffed (do not over-proof). Bake at 375F for about 23-25 minutes or until the tops are golden brown.
- Immediately brush tops of dinner rolls with melted butter and set aside to cool to room temperature before serving.
Notes
- Nutrition Per Serving: Calories: 190, Total Fat: 5g, Saturated Fat: 3g, Cholesterol: 13mg, Sodium: 290mg, Potassium: 76mg, Total Carbohydrates: 31g, Dietary Fiber: 1g, Sugars: 6g, Protein: 5g, Vitamin A: 158IU, Calcium: 33mg, Iron: 2mg


Leave a Reply