My Kitchen Helper
My grandson Leo helped me make these last week. He mashed the bananas with such focus. His little face was so serious. I still laugh at that.
This recipe is a perfect helper recipe. Little hands can mash and stir. It matters because cooking together makes sweet memories. It’s about more than just the food.
Why These Bars Work
You know those sad, spotty bananas on your counter? They are the secret. The spottier, the sweeter. They make these bars taste like dessert.
The oats and peanut butter keep you full. The chocolate chips? Well, they just make you happy. It’s a snack that loves you back. What’s your favorite way to use up ripe bananas? Tell me in the comments.
Let’s Make Them Together
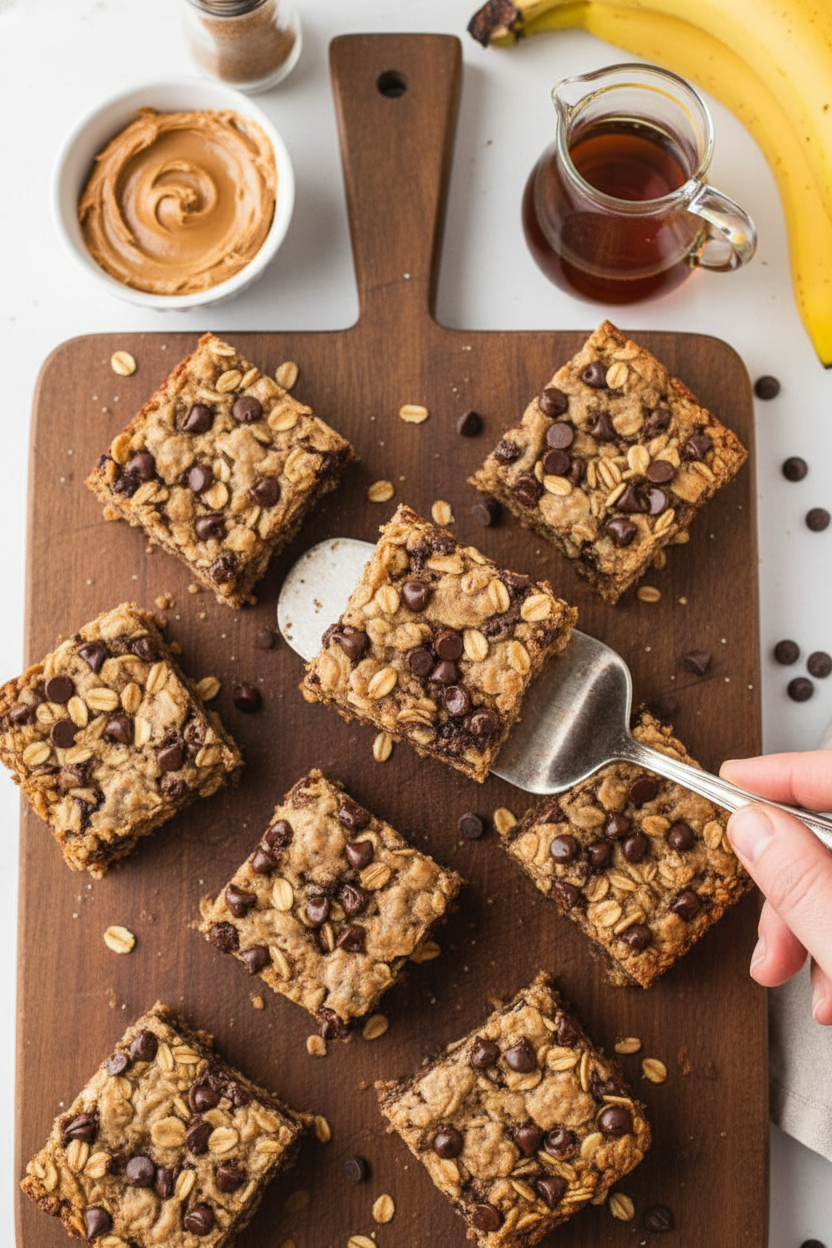
First, line your pan with paper. This is my favorite trick. It makes lifting the bars out so easy. No stuck-on mess!
Mash your bananas in a bowl. Add the syrup, egg, oil, and vanilla. Doesn’t that smell amazing? Now stir in everything else. Finally, fold in those chocolate chips. Save a few for the top.
A Little Baking Magic
Pop the dish in a hot oven. In 25 minutes, your kitchen will smell wonderful. The edges will be golden. The top will look set.
Here’s the fun part. As soon as it comes out, sprinkle more chips on top. The heat makes them melt into little puddles. *Fun fact: This is called “blooming” the chocolate. It makes the flavor even richer.*
The Hardest Part
Let them cool if you can. This matters because it helps them hold their shape. But I understand if you can’t wait. I’ve eaten many a warm, crumbly square.
Use the paper to lift the whole block onto a rack. Then, cut into squares. Do you like your bars chewy or more cake-like? I’d love to know your perfect bake time.
Ingredients:
| Ingredient | Amount | Notes |
|---|---|---|
| large ripe bananas | 2 | about 1 cup |
| maple syrup | ¼ cup | |
| egg | 1 | beaten |
| coconut oil | 2 tablespoons | |
| vanilla | 1 teaspoon | |
| rolled oats | 2 cups | |
| natural peanut butter | ¾ cup | |
| cinnamon | 1 teaspoon | |
| baking powder | 1 teaspoon | |
| salt | ½ teaspoon | |
| mini chocolate chips | ⅔ cup | plus more for sprinkling on top |
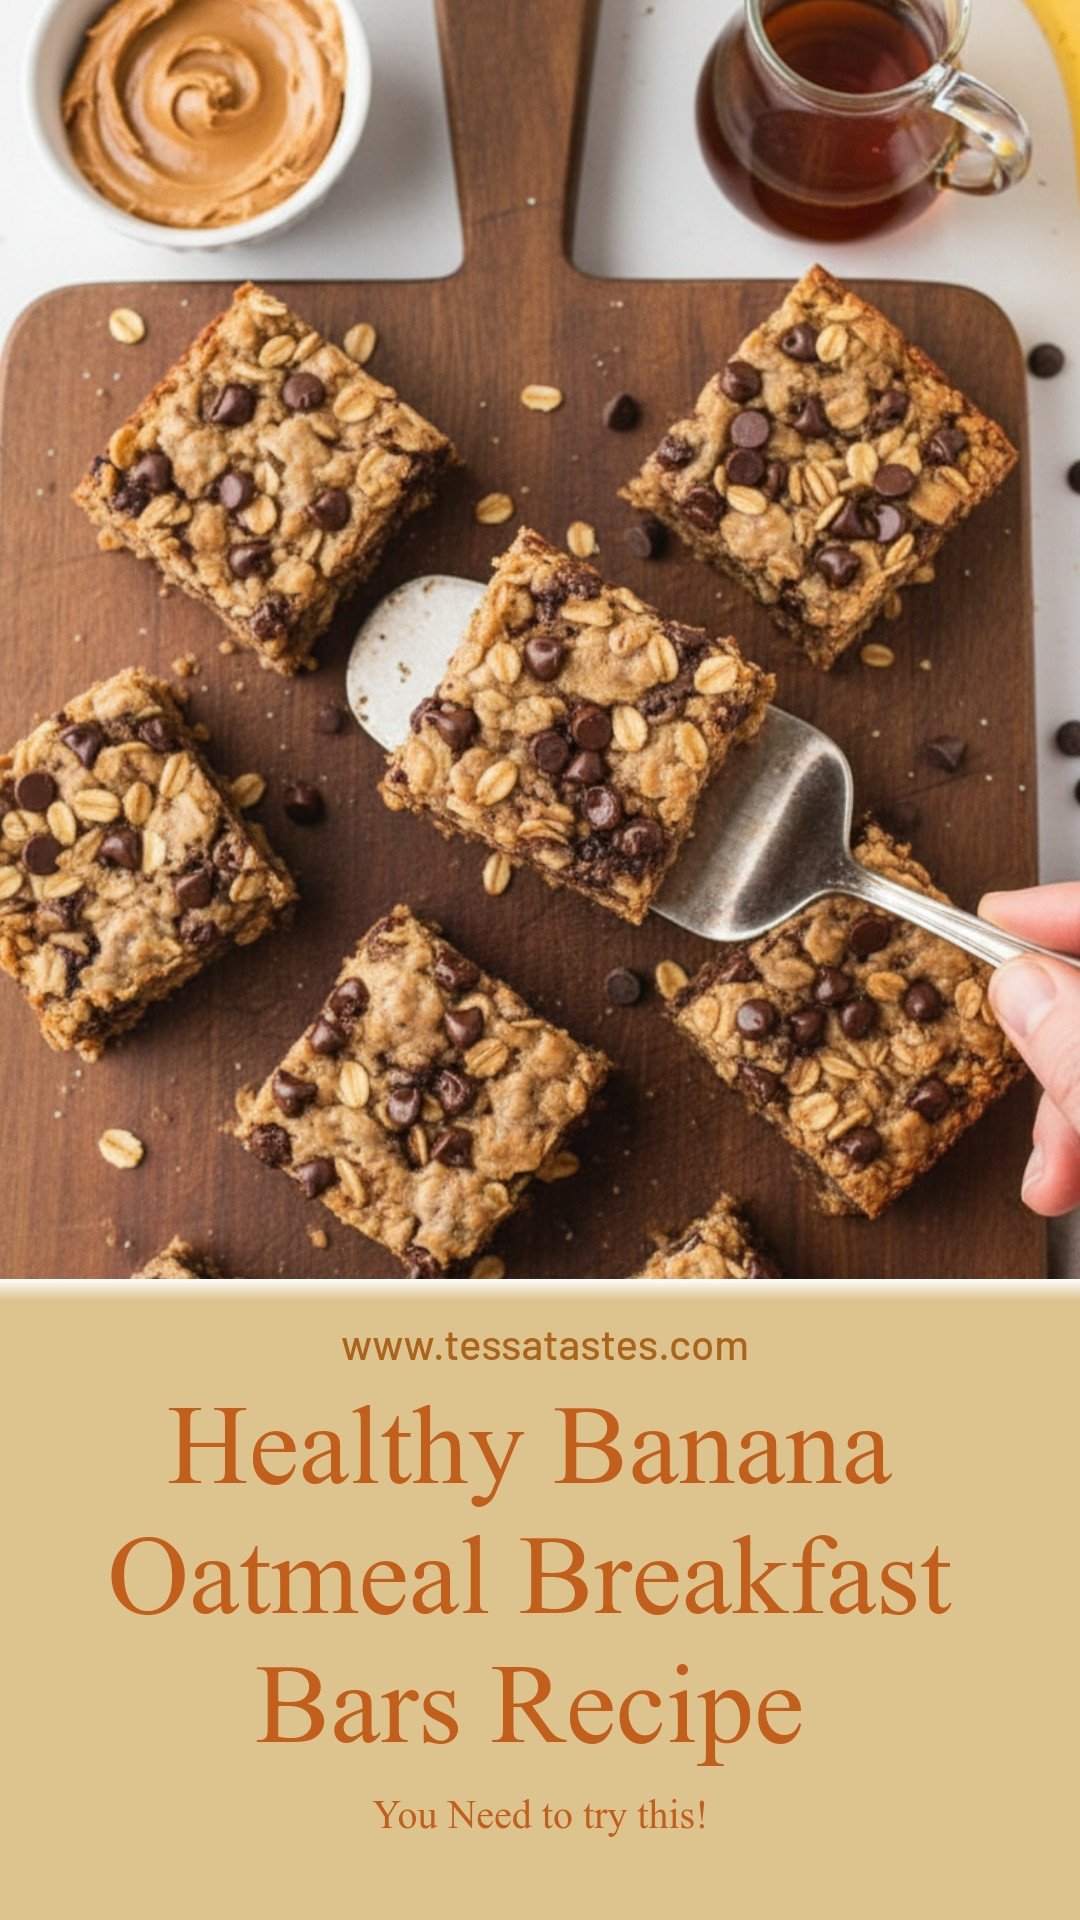
My Favorite Banana Oatmeal Bars
Hello, my dear! Come sit at the counter. I want to share my favorite bar recipe. It’s perfect for busy mornings. You can even eat it warm from the pan. Doesn’t that smell amazing? I make these for my grandkids all the time. They call them “Grandma’s Grab-and-Go Bars.” I still laugh at that. The recipe is wonderfully simple. It uses those sad, spotty bananas on your counter. Let’s turn them into something special together.
Here is how we make them. Just follow these easy steps. I promise it’s not tricky at all.
Step 1: First, line your baking dish with parchment paper. Let the paper hang over the sides. This is our magic trick for later. Now, preheat your oven to 350°F. Grab those ripe bananas. Mash them in a bowl with a fork. A few little lumps are just fine. It reminds me of mashing bananas for my own children.
Step 2: To the bananas, add the maple syrup and beaten egg. Stir in the coconut oil and vanilla too. Mix it all until it looks like a happy, gloppy mess. (A hard-learned tip: If your coconut oil is solid, just warm the jar in a bowl of hot water for a minute.)
Step 3: Now, pour in the rolled oats and peanut butter. Sprinkle in the cinnamon, baking powder, and salt. Stir everything with a big spoon. You will feel your arm get a little workout! This is the heart of the bar. It will be a thick, sticky dough. That’s exactly what we want.
Step 4: Time for the best part! Fold in most of the mini chocolate chips. Save a handful for the top. Spread the dough into your prepared pan. Press it down gently with your fingers. I always sneak a taste of the dough now. Do you prefer dough or baked treats? Share below!
Step 5: Bake for about 25 minutes. Your kitchen will smell like a cozy dream. The edges will be just golden. Pull the pan from the oven. Quickly sprinkle those saved chocolate chips on top. They will melt a little from the heat. It makes them pretty and delicious.
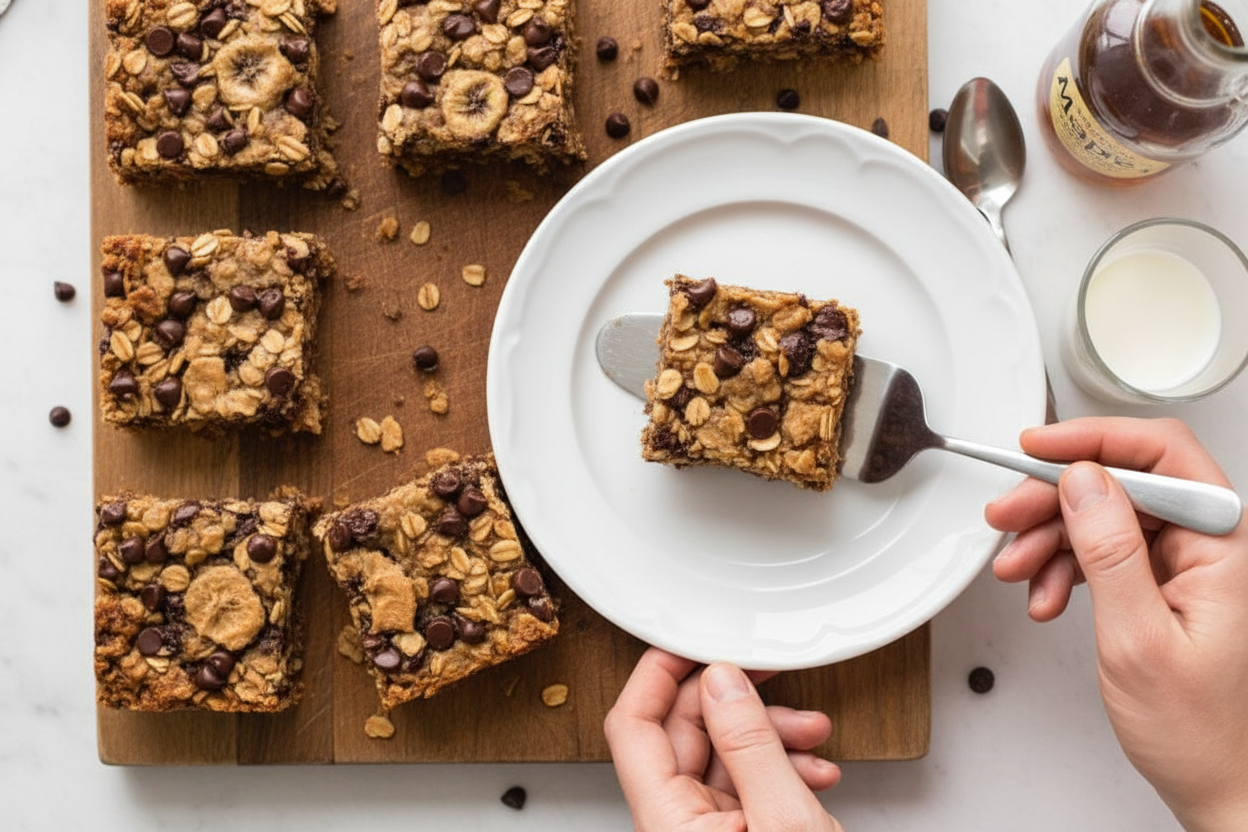
Step 6: This takes patience. Use the parchment paper “handles” to lift the whole slab out. Place it on a rack to cool. If you can wait, they slice neatly when cool. But I understand if you eat a warm, gooey piece right away. I often do!
Cook Time: 25 minutes
Total Time: 40 minutes
Yield: 9 bars
Category: Breakfast, Snack
Three Fun Twists to Try
Once you master the basic bar, you can play! Here are three of my favorite twists. They make the recipe feel new again.
Berry Blast: Swap the chocolate chips for dried cranberries or chopped freeze-dried strawberries. It’s like a fruit and oat cookie.
Trail Mix Crunch: Use almond butter instead of peanut butter. Mix in a handful of sunflower seeds and chopped dried apricots.
Double Chocolate: Add two tablespoons of cocoa powder with the dry ingredients. Use white chocolate chips for a pretty look. Which one would you try first? Comment below!
Serving Them Up Right
These bars are wonderful all on their own. But sometimes, I like to dress them up a bit. For a real treat, I’ll warm a bar and add a dollop of Greek yogurt. A drizzle of honey on top is lovely too. You could also crumble one over a bowl of apple sauce. It’s like a deconstructed dessert for breakfast!
What to drink with them? On a chilly morning, a big glass of cold milk is perfect. For a cozy evening snack, I love it with a cup of chamomile tea. My husband prefers his with a dark coffee stout. Which would you choose tonight?
Keeping Your Banana Oatmeal Bars Fresh
These bars are perfect for making ahead. Let them cool completely first. Then store them in a sealed container. They will stay fresh on the counter for three days.
For longer storage, wrap them tightly. You can freeze them for up to three months. I once froze a whole batch for my grandkids. They loved finding a ready-made treat after school.
To reheat, just pop one in the toaster oven. It makes the chocolate melty again. Batch cooking like this saves your morning. It means you always have a healthy bite ready.
Have you ever tried storing it this way? Share below!
Simple Fixes for Common Baking Hiccups
First, if your bars are too crumbly, your bananas might not be ripe enough. Use bananas covered in brown spots. They add moisture and sweetness. This matters because ripe fruit makes a softer, tastier bar.
Second, if the bars seem too wet, you may have measured the oats loosely. Always spoon oats into your measuring cup. I remember when my first batch was mushy. I had pressed the oats down too hard.
Third, if they stick to the pan, your parchment paper is a lifesaver. Let the paper hang over the sides. This simple step builds confidence. It means your bars come out perfectly every time.
Which of these problems have you run into before?
Your Quick Questions, Answered
Q: Can I make these gluten-free?
A: Yes! Just use certified gluten-free rolled oats. They work exactly the same.
Q: Can I make them ahead?
A: Absolutely. They are a perfect make-ahead breakfast or snack.
Q: What can I swap for peanut butter?
A: Any nut or seed butter works. Try almond or sunflower butter.
Q: Can I double the recipe?
A: You can! Use a 9×13 pan. Just bake it a few minutes longer.
Q: Any optional tips?
A: Add a handful of chopped walnuts for a nice crunch. *Fun fact: Adding a pinch of salt to sweet things makes the flavor pop!*
Which tip will you try first?
From My Kitchen to Yours
I hope you love making these bars as much as I do. They fill the kitchen with a wonderful smell. It reminds me of happy, busy mornings with my family.
I would be so delighted to see your creation. Share a photo of your finished bars with me.
Have you tried this recipe? Tag us on Pinterest! Let’s share the joy of simple, good food.
Happy cooking!
—Tessa Hammond.
Healthy Banana Oatmeal Breakfast Bars Recipe
Description
These easy, wholesome breakfast bars are packed with banana, peanut butter, and oats, with melty chocolate chips for a delicious treat.
Ingredients
Instructions
- Line a 9×9 baking dish with parchment paper that extends over the sides to make it easy to remove the bars later, and preheat your oven to 350°F.
- In a medium bowl, mash 2 bananas with a fork until mostly smooth, then stir in maple syrup, egg, coconut oil, and vanilla.
- To that, add peanut butter, oats, cinnamon, baking powder, and salt and mix until combined.
- Mix in your chocolate chips, then transfer the mixture to the prepared 9×9 dish.
- Bake at 350°F for 25 minutes until just beginning to brown around the edges.
- Remove from the oven and immediately top with additional chocolate chips.
- Transfer the bars from the baking dish to a cooling rack using the excess parchment paper on the sides to easily remove the bars. Cut and serve cool for those patient enough to wait, or eat hot straight from the oven while the chocolate is still melty.
Notes
- For a nut-free version, substitute the peanut butter with sunflower seed butter. Bars can be stored in an airtight container for up to 5 days.


Leave a Reply