A Spooky Idea from My Garden
Hello, my dear! It’s Tessa. I was in my garden last fall. The pumpkins were so big and round. They looked like happy faces waiting to be carved.
I thought, why not eat the face instead of carving it? So I tried. My first one looked a bit lopsided. I still laugh at that. But it tasted wonderful. This matters because food should be fun, not fussy.
Let’s Make a Smiling Supper
First, get your pumpkin slices. Lay them in a big circle on your pan. This is your pumpkin’s head. Now for the fun part! Use pepper strips to make eyes and a mouth.
Fill the spaces with zucchini and onion. It’s like painting with vegetables! Doesn’t that smell amazing already? What silly face will you make? A wink or a big grin? Tell me about it.
A Little Magic in the Seasoning
Drizzle everything with olive oil. Then add the smoked paprika and cumin. This is the magic step. The spices make the vegetables taste warm and cozy.
*Fun fact*: Smoked paprika gets its flavor from peppers dried over oak fires. It gives our dish a campfire whisper. This matters because simple seasonings can tell a whole story.
Watching the Oven Work
Pop your pan in the hot oven. Now wait. The heat works its magic. It makes the veggies sweet and tender. The edges get a little dark and crispy.
That’s the best part. It takes about half an hour. Do you like your veggies soft or with a little crunch? I’m always team crispy edge!
The Grand Finale
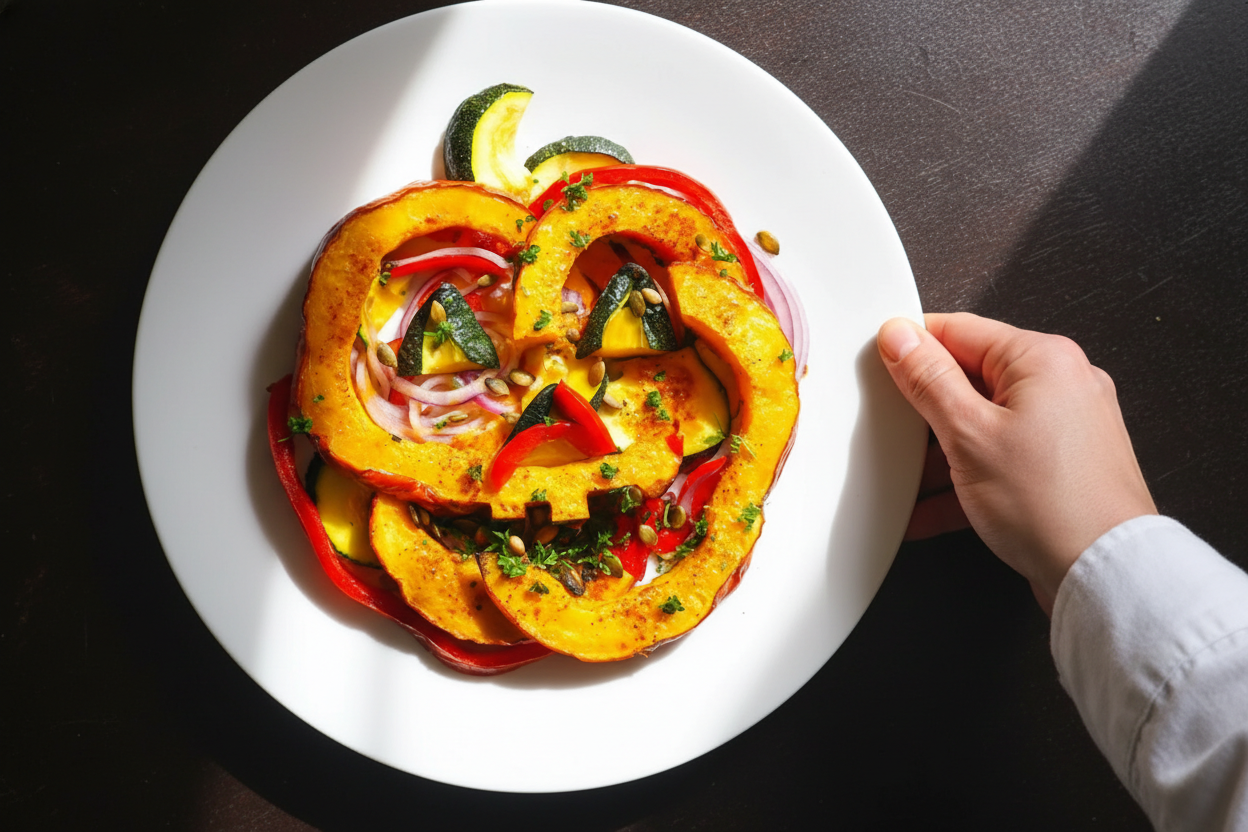
Carefully slide your creation onto a plate. Try to keep the face together. Now, sprinkle on the green parsley and crunchy pumpkin seeds.
The seeds are like little freckles. It’s ready! Would you serve this for a party or a family dinner? I’d love to see a photo of your pumpkin plate. Share it if you can.
Ingredients:
| Ingredient | Amount | Notes |
|---|---|---|
| Small round pumpkin | 1 (about 2 lbs) | peeled, seeded, and cut into 1/2-inch slices |
| Red bell pepper | 1 | seeded and sliced into thin strips |
| Yellow bell pepper | 1 | seeded and sliced into thin strips |
| Zucchini | 1 small | sliced into rounds |
| Red onion | 1 small | sliced into thin wedges |
| Olive oil | 2 tablespoons | |
| Smoked paprika | 1 teaspoon | |
| Ground cumin | 1/2 teaspoon | |
| Salt and black pepper | to taste | |
| Fresh parsley, chopped | 2 tablespoons | |
| Toasted pumpkin seeds (pepitas) | 1 tablespoon |
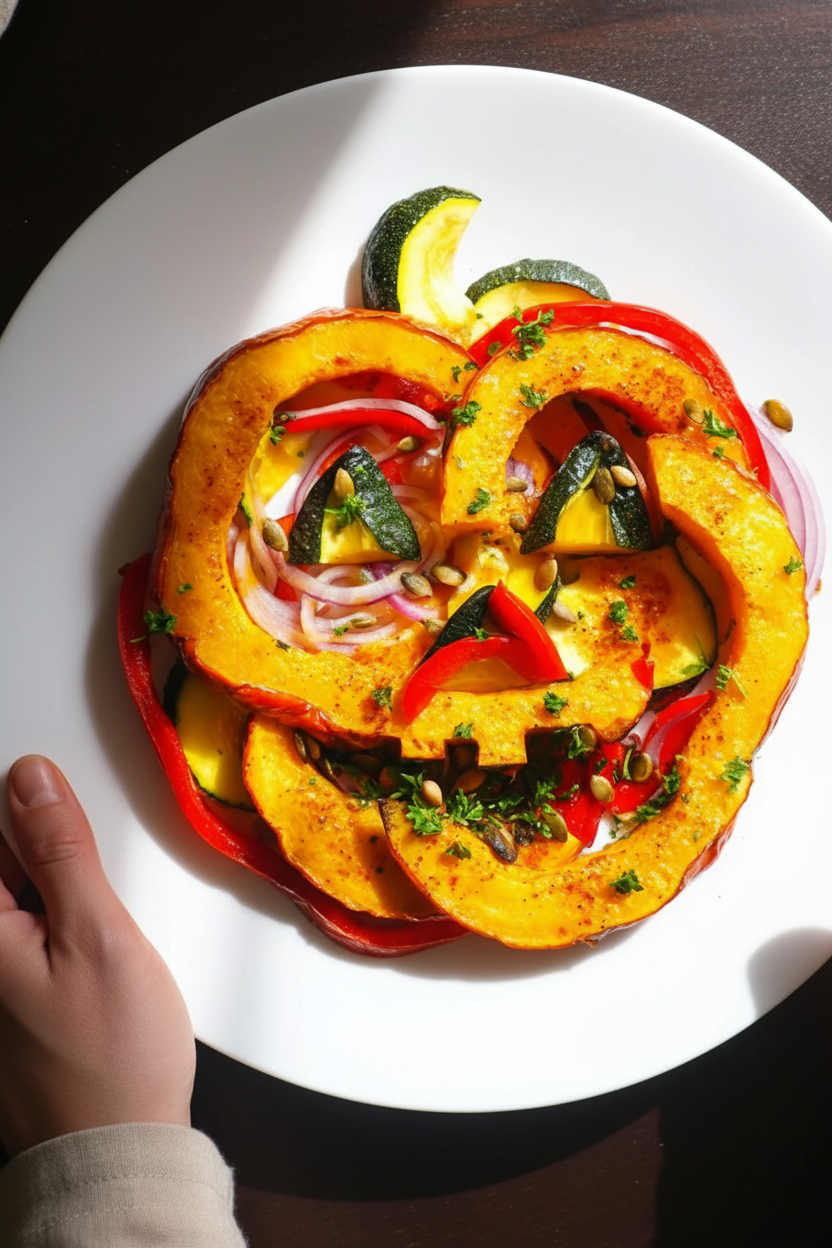
My Pumpkin Lantern Halloween Plate
Hello, my dear! It’s Tessa. Come sit at my kitchen table. I want to share a fun Halloween dinner idea. We are making a jack-o’-lantern you can eat! It uses colorful roasted vegetables. This dish always makes me smile. It reminds me of carving pumpkins with my grandkids. The best part is, it’s delicious and good for you. Let’s make a spooky, tasty plate together.
Step 1: First, get your oven nice and hot. Set it to 400°F. Line your baking sheet with parchment paper. This little sheet is a lifesaver. It stops our veggie lantern from sticking. I learned that the messy way once! (My hard-learned tip: always use parchment. Clean-up is a breeze.)
Step 2: Now, let’s make the pumpkin’s face. Lay your pumpkin slices in a big circle. This is the lantern’s head. Use the pepper strips to make eyes and a mouth. Fill spaces with zucchini and onion. It’s like an art project you can eat! I still laugh at the silly faces we make.
Step 3: Time for flavor! Drizzle everything with olive oil. Then sprinkle on the smoked paprika and cumin. Doesn’t that smell amazing already? Add a little salt and pepper. This makes the vegetables sweet and smoky when they roast. What’s your favorite spice? Share below!
Step 4: Slide your creation into the oven. Bake for 25 to 30 minutes. You’ll know it’s ready when the edges look golden. The kitchen will smell wonderful. Be careful when you take it out. It’s very hot! Let it cool just a minute.
Step 5: The final touch! Move your lantern to a big plate. Try to keep the face shape. Now sprinkle on fresh parsley and toasted pumpkin seeds. These add a nice little crunch. And there you have it! A Halloween masterpiece.
Cook Time: 30 minutes
Total Time: 45 minutes
Yield: 4 servings
Category: Dinner, Side Dish
Three Fun Twists to Try
This recipe is like a friendly base. You can change it up! Here are three ideas. Cheesy Ghost: Add little mozzarella “ghosts” on top after baking. Spicy Bat: Use a pinch of chili powder for a warm kick. Autumn Harvest: Swap pumpkin for sweet potato slices. Which one would you try first? Comment below!
Serving It Up Just Right
This plate is a full meal with a side. Try it with garlic bread “fingers.” Or a simple bowl of black bean soup. For drinks, grown-ups might like a crisp apple cider beer. Kids will love sparkling apple juice with a cinnamon stick. Which would you choose tonight?
Keeping Your Pumpkin Lantern Bright
Let’s talk about storing your pretty plate. First, let it cool completely. Then, carefully slide it onto a big plate. Cover it tightly with plastic wrap. It will keep in the fridge for about three days.
You can freeze it too. Use a freezer-safe container. It keeps for one month. Thaw it in the fridge overnight before reheating.
To reheat, use your oven. Warm it at 350°F for 15 minutes. This keeps the veggies from getting soggy. I once used the microwave and it got mushy!
Batch cooking saves so much time. Make two lanterns at once. Roast one for dinner tonight. Store the other for a busy night later. This matters because good food should help you, not stress you. Have you ever tried storing it this way? Share below!
Fixes for Common Kitchen Spooks
Is your pumpkin not tender? The slices might be too thick. Cut them evenly, about half an inch. This helps everything cook at the same speed.
Are the bell peppers burning? They are thinner than pumpkin. Place them on top of the pumpkin base. I remember when I put them flat and they charred!
Is the design falling apart? Let it cool for five minutes first. Then use a big spatula to move it. This keeps your jack-o’-lantern face looking happy.
Fixing these small things builds your cooking confidence. You learn how ingredients work together. It also makes the final flavors so much better. Every vegetable gets perfectly roasted. Which of these problems have you run into before?
Your Questions, My Answers
Q: Is this recipe gluten-free? A: Yes, it is naturally gluten-free. All the ingredients are safe.
Q: Can I make it ahead? A: Absolutely. Prep the veggies and arrange them. Cover and refrigerate for a few hours before baking.
Q: What if I don’t have zucchini? A: Try yellow squash or more bell peppers. Use what you have in your fridge.
Q: Can I double the recipe? A: Yes, just use two baking sheets. Switch their positions in the oven halfway through.
Q: Any fun extra tip? A: *A fun fact: pumpkin seeds (pepitas) are full of good protein!* Try adding a sprinkle of chili powder for a kick. Which tip will you try first?
From My Kitchen to Yours
I hope you have fun making this edible lantern. Cooking is about sharing joy and good food. I would love to see your creations.
Take a picture of your plate. Show me your smiling vegetable faces. It makes my day to see you in the kitchen.
Have you tried this recipe? Tag us on Pinterest! You can find me at @TessasKitchen. I can’t wait to see what you make. Happy cooking!
—Tessa Hammond.

Pumpkin Lantern Halloween Dinner Plate
Description
A festive and healthy roasted vegetable platter arranged and seasoned to look like a glowing jack-o’-lantern, perfect for a Halloween dinner centerpiece.
Ingredients
Vegetables
Seasonings
Garnishes
Instructions
- Preheat Oven: Set the oven to 400°F and line a baking sheet with parchment paper.
- Arrange Pumpkin Base: Place pumpkin slices in a large circle on the prepared baking sheet forming a pumpkin face shape.
- Form Jack-o-Lantern Features: Outline eyes, nose, and mouth using red and yellow bell pepper strips; fill spaces with zucchini rounds and red onion wedges for color contrast.
- Season Vegetables: Drizzle olive oil over the arranged vegetables and sprinkle smoked paprika, ground cumin, salt, and black pepper evenly.
- Roast Vegetables: Bake in the oven for 25 to 30 minutes until the vegetables are tender and caramelized around the edges.
- Transfer and Garnish: Carefully transfer the roasted arrangement to a serving platter, preserving the jack-o-lantern design; top with chopped parsley and toasted pumpkin seeds.
Notes
- For a crispier finish, broil for the last 2-3 minutes of cooking. You can substitute butternut squash for the pumpkin if desired.


Leave a Reply