My First Oreo Ball Fiasco
Let me tell you about my first try. I was so excited. I skipped the freezing step.
The balls turned into a gooey puddle. It was a chocolate swamp! I still laugh at that. Freezing matters. It gives the balls a brave heart for their chocolate bath.
Why Two Cheeses?
You might wonder about the cottage cheese. I did too! My friend Marie told me to try it. The cream cheese gives rich flavor.
The cottage cheese makes them lighter. It’s a magic little trick. The mix becomes perfectly smooth. Have you ever used cottage cheese in a sweet treat?
The Simple Magic of Making Them
Crush those cookies fine. Then blend everything well. Rolling the balls is fun. Get your hands in there!
Freeze them solid. This is the most important step. Trust your grandma on this. Then melt your chocolate with the coconut oil.
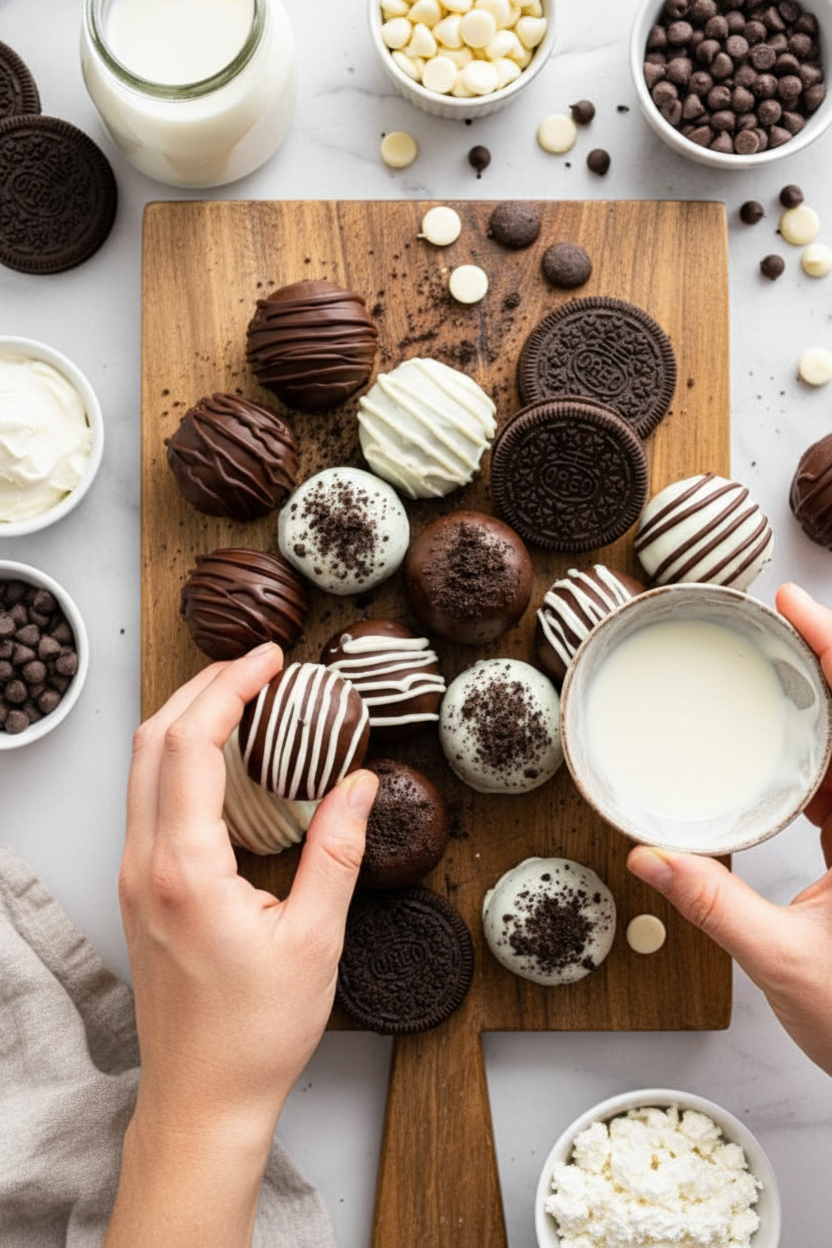
*Fun fact*: The coconut oil makes the chocolate shiny and helps it melt smoothly. Dip each frozen ball fast. Let the extra chocolate drip off. Doesn’t that smell amazing?
Make Them Your Own
This is where you play. While the chocolate is wet, add your touch. Sprinkles are classic. Crushed Oreo crumbs are too.
A tiny pinch of sea salt is my favorite. It makes the chocolate taste deeper. What topping would you choose? Tell me your idea!
Why This Little Recipe Matters
These are more than candy. They are a confidence builder. You made something wonderful from simple things.
Sharing them is the best part. Seeing someone’s smile is the real reward. Food made with happy hands tastes better. Do you have a favorite treat to share with friends?
Ingredients:
| Ingredient | Amount | Notes |
|---|---|---|
| Oreo cookies | 36 cookies | or similar substitute* |
| Cream cheese | 4 oz | softened |
| Full fat cottage cheese | ¼ cup | |
| Semi-sweet or dark chocolate | 12 oz | chopped; white chocolate or chocolate chips can be used |
| Coconut oil | 2-3 teaspoons |
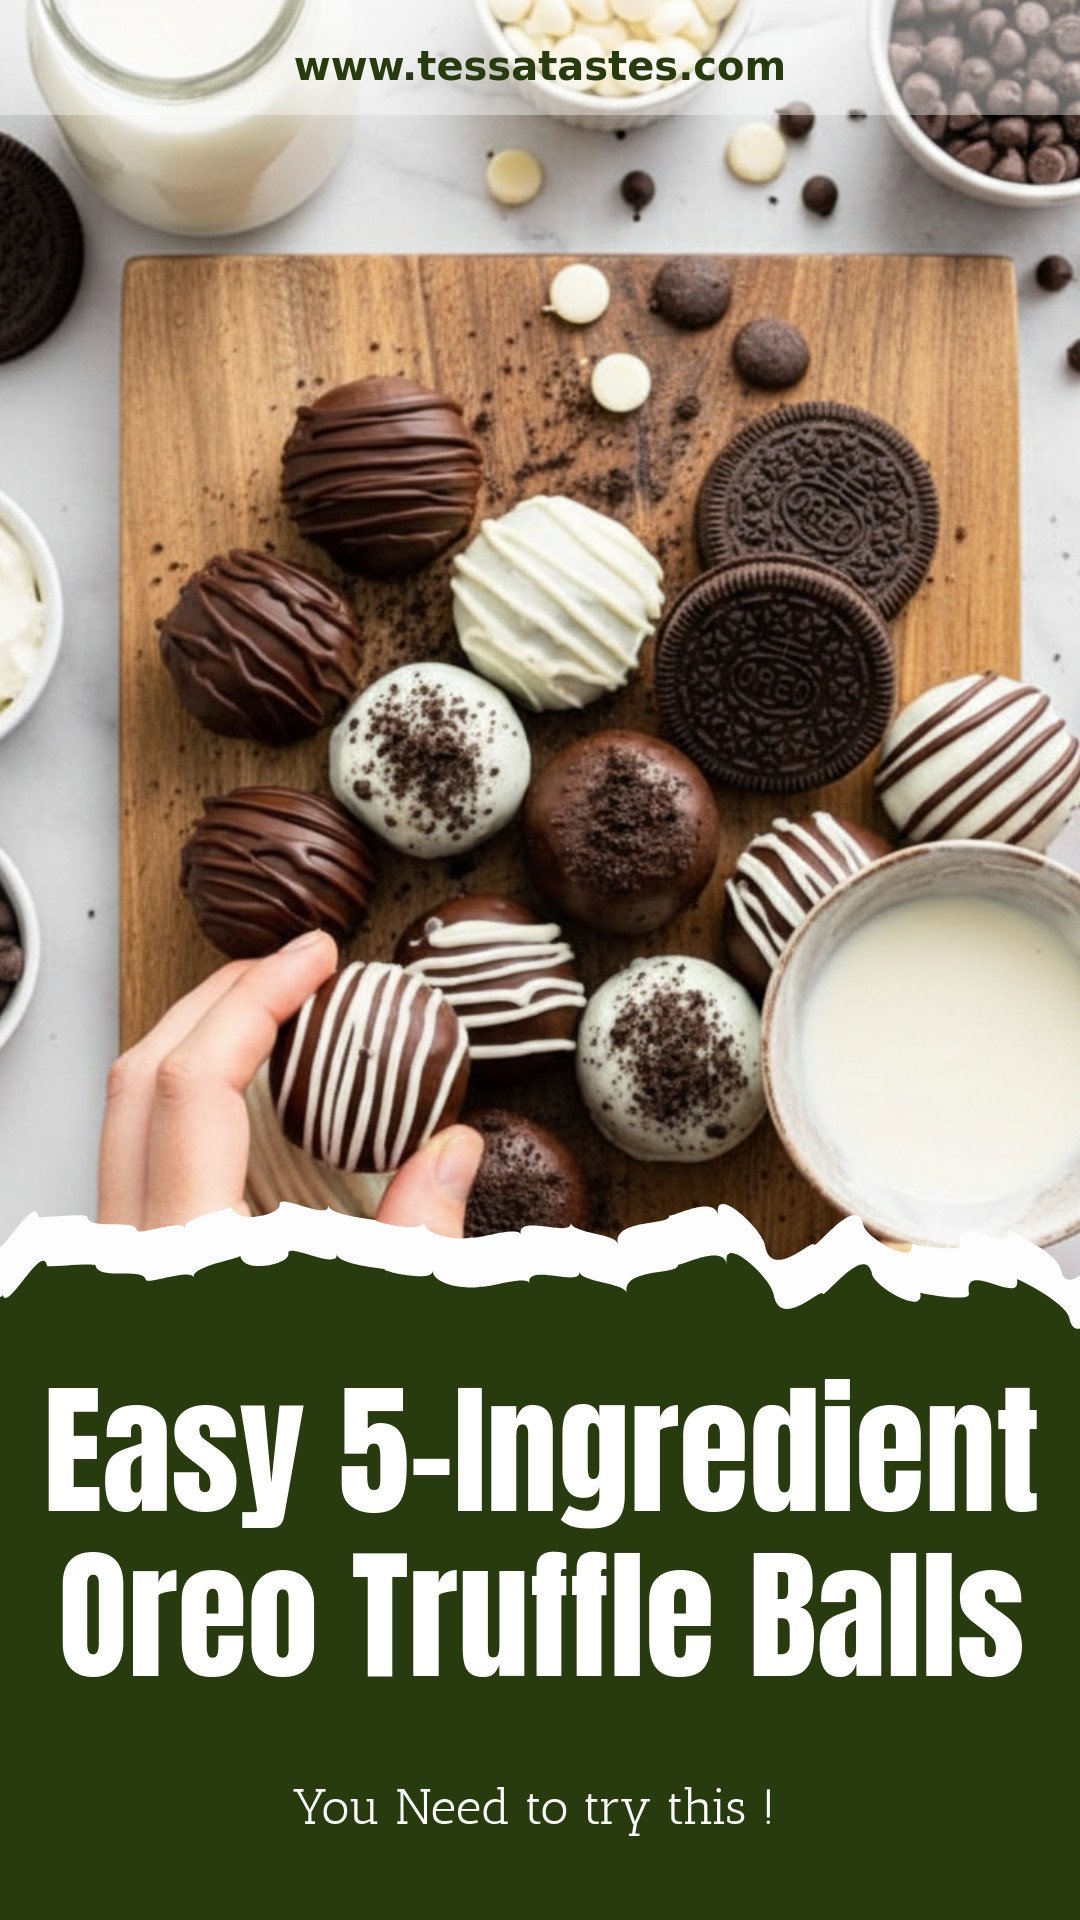
My Magical 5-Ingredient Oreo Balls
Hello, my dear. Come sit at the counter. Let’s make some magic. These Oreo balls are pure joy. They look so fancy. But they are secretly simple. I first made these with my grandson, Leo. His hands were covered in chocolate. We laughed so much. I still smile thinking of it. You will love these. They are creamy, crunchy, and sweet. Perfect for sharing. Or for keeping all to yourself. I won’t tell.
Now, let’s gather our five friends. You need Oreos, cream cheese, and a little cottage cheese. The cottage cheese is my secret. It makes them extra smooth. Then, chocolate and coconut oil for dipping. That’s it. Are you ready? Let’s begin our little project.
Step 1: First, let’s turn those cookies into dust. Put all the Oreos in the food processor. Pulse it until they look like dark sand. Doesn’t that smell amazing? My kitchen always smells like happiness now. Scrape down the sides once. We want every crumb.
Step 2: Now, add the soft cream cheese and cottage cheese. Blend it all together. Watch it become a dark, sticky dough. It will pull away from the sides. (My hard-learned tip: make sure your cream cheese is soft. Otherwise, you’ll have lumpy bits. No one wants that!).
Step 3: Time to get our hands dirty. Scoop a tablespoon of dough. Roll it into a ball. Place it on a parchment-lined tray. Repeat. Your hands will get quite chocolaty. Leo used to lick his fingers. I don’t blame him. Freeze these balls for 30 minutes. This keeps them from falling apart later.
Step 4: Let’s melt our chocolate. Put chocolate and coconut oil in a bowl. Microwave in 30-second bursts. Stir well each time. Be patient. Burnt chocolate is sad chocolate. You’ll get a lovely, shiny pool. What’s the secret to smooth melted chocolate? Share below!
Step 5: The fun part! Dip each frozen ball. Use a fork to let extra chocolate drip off. Place it back on the parchment. If you want sprinkles, add them now. The chocolate sets fast. I like to crush a spare cookie for topping. It looks so pretty.
Step 6: Almost done. Just pop the tray in the fridge. Wait 15-20 minutes. The chocolate will become firm and snap. Then, you can taste your creation. Try not to eat them all at once. I know it’s hard.
Cook Time: 1 hour
Total Time: 1 hour 30 minutes
Yield: About 30 truffles
Category: Dessert, No-Bake
Three Fun Twists to Try
These treats are like a blank canvas. You can dress them up so many ways. Here are my favorite ideas. They make a simple treat feel special.
Peppermint Party: Add a drop of peppermint extract to the dough. Dip in white chocolate. Crush candy canes on top. Perfect for December.
Peanut Butter Dream: Use peanut butter Oreos if you can find them. Roll the finished ball in crushed peanuts. Oh my, it’s good.
Orange Zest Delight: Stir a teaspoon of orange zest into the dough. Dip in dark chocolate. It tastes like a chocolate orange. So bright and happy.
Which one would you try first? Comment below!
Serving Them Up With Style
Presentation is part of the fun. I like to put these in little paper cups. It makes them feel like gifts. Arrange them on a pretty plate. Maybe with some fresh berries on the side. The red and black looks so lovely. For a party, stack them in a tower. People will be so impressed.
What to drink? For the grown-ups, a small glass of coffee liqueur is nice. The bitterness balances the sweet. For everyone, a tall, cold glass of milk is the classic choice. Or a fizzy cream soda. It’s a perfect match.
Which would you choose tonight?
Keeping Your Oreo Balls Perfect
These treats are best kept cold. Store them in the fridge for up to a week. Use a container with a tight lid. This keeps them fresh and tasty.
You can also freeze them for a month. I freeze them on a tray first. Then I pop them into a freezer bag. This stops them from sticking together.
I once left a plate out overnight. They got too soft and messy. Now I always put them away right after serving. This little habit saves the dessert.
You can make a whole batch ahead of time. It is perfect for surprise guests. Having treats ready makes hosting easy and fun. Have you ever tried storing it this way? Share below!
Easy Fixes for Common Hiccups
Is your mixture too sticky to roll? Your hands might be too warm. I run mine under cold water first. Chilling the mix a little also helps.
Does the chocolate crack when dipping? The filling balls are likely too cold. Let them sit out for five minutes. This small step makes a big difference.
I remember when my chocolate seized up. I learned to melt it slowly. Use short bursts in the microwave and stir well. Adding the coconut oil keeps it smooth.
Fixing small problems builds your kitchen confidence. You learn what works and what does not. It also makes your food look and taste better. Which of these problems have you run into before?
Your Oreo Ball Questions, Answered
Q: Can I make these gluten-free?
A: Yes! Just use your favorite gluten-free sandwich cookies.
Q: How far ahead can I make them?
A: You can make them up to three days before serving. Keep them chilled.
Q: What can I use instead of cottage cheese?
A: Use all cream cheese. Just use eight ounces total.
Q: Can I double the recipe?
A: Absolutely. It is great for a party or a bake sale.
Q: Any fun topping ideas?
A: Try crushed candy canes or a tiny bit of flaky salt. *Fun fact: The first Oreo cookie was sold in 1912!* Which tip will you try first?
From My Kitchen to Yours
I hope you love making these little bites of joy. They always bring smiles to my table. Cooking is about sharing simple, happy moments.
I would love to see your creations. Did you use different sprinkles or chocolate? Your version might give me a wonderful new idea. Have you tried this recipe? Tag us on Pinterest!
Thank you for spending time with me in my kitchen today. I will be back soon with another simple recipe. Until then, keep creating and sharing.
Happy cooking!
—Tessa Hammond.

Easy 5-Ingredient Oreo Truffle Balls
Description
These decadent Oreo Truffle Balls are incredibly easy to make with just 5 simple ingredients, featuring a creamy Oreo and cheese center coated in rich chocolate.
Ingredients
Instructions
- Add Oreos to a food processor and pulse until finely ground.
- Add softened cream cheese and cottage cheese. Blend until the mixture is smooth and fully combined.
- Scoop out about 1 tablespoon of the mixture and roll into balls. Place the balls on a baking sheet or plate lined with parchment paper. Freeze for about 30 minutes, or until firm.
- Melt the chocolate with coconut oil in a microwave-safe bowl in 30-second increments, stirring between each until smooth. You can use a double broiler if you prefer.
- Using a fork, dip each truffle into the melted chocolate, letting excess drip off before returning to the parchment.
- While the chocolate is still wet, top with sprinkles, crushed Oreos, or sea salt if desired.
- Refrigerate until the chocolate is set, about 15–20 minutes.
Notes
- *Ensure cookies include the cream filling for proper texture. Store truffles in an airtight container in the refrigerator for up to 1 week.


Leave a Reply