My First Custard Pie
I made my first custard pie when I was about your age. I was so nervous. I thought I would break the eggs wrong. But you know what? It turned out just fine. A little wobbly, but delicious. I still laugh at that.
That pie taught me a good lesson. Cooking is about trying, not being perfect. This recipe is a great first pie. It is simple and forgiving. What was the first dessert you ever tried to make? I would love to hear about it.
Why Room Temperature Matters
Let’s talk about that “room temperature” note. I know it seems fussy. But it matters a lot here. Cold milk and eggs don’t mix well with sugar. They can make your custard lumpy.
Taking them out an hour before helps everything become friends. They blend into a smooth, happy mixture. This is the secret to a creamy filling, not a curdled one. Trust your grandma on this one!
The Magic of Whisking
Now, grab your bowl. Whisk the eggs, sugar, and spices for two whole minutes. Set a timer! This is not a quick stir. You want it to get light and frothy.
This puts tiny bubbles of air into the mix. Those bubbles make the custard light. Then you add the milk and whisk three more minutes. Your arm might get tired. But doesn’t that smell amazing already? The vanilla and nutmeg are like a cozy hug.
Watching it Bake
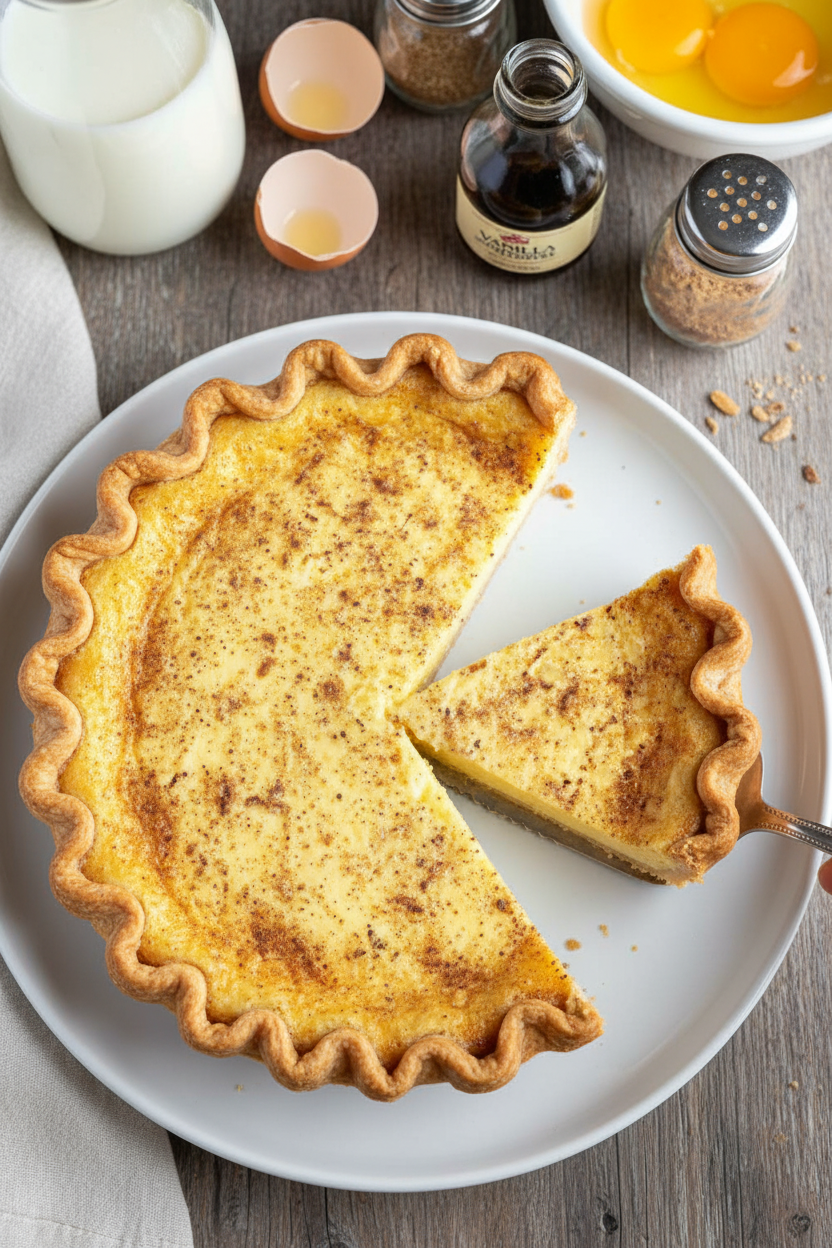
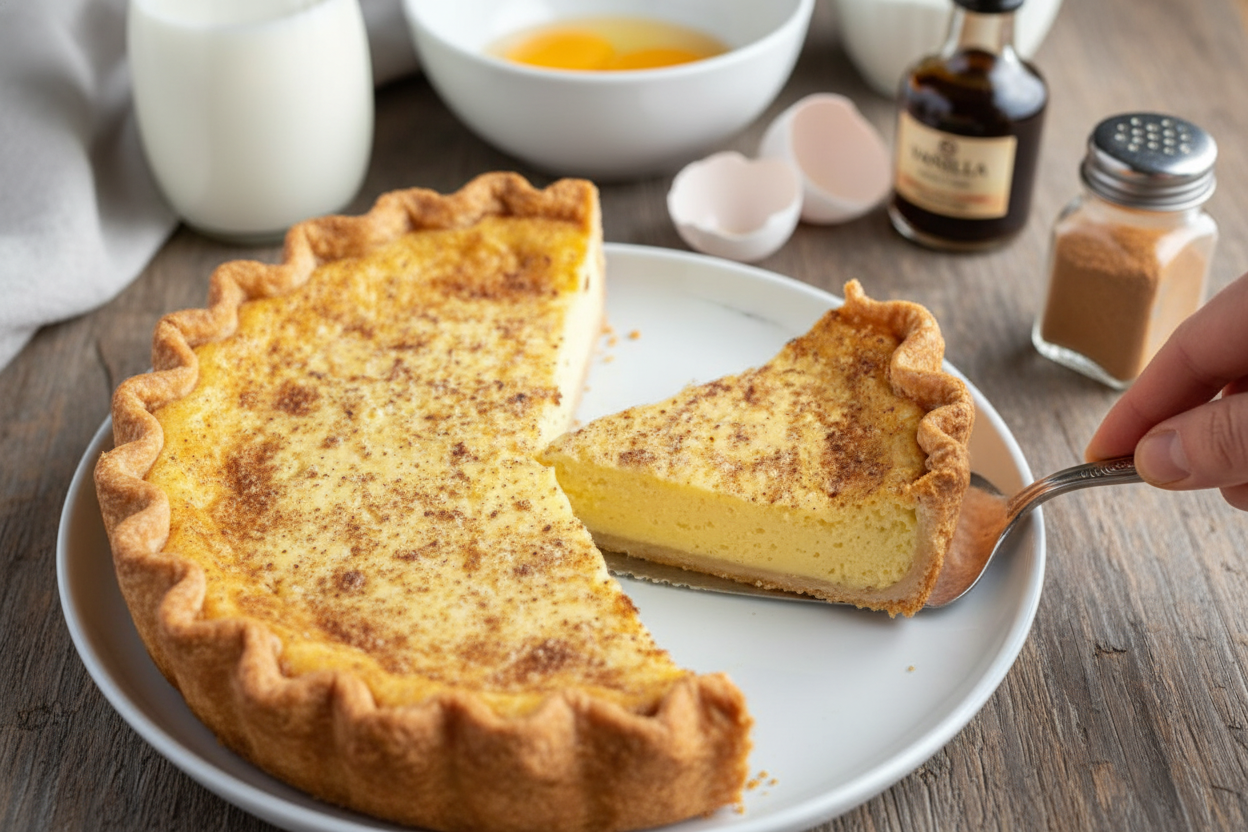
Pour your mixture into the chilled crust. Give it a little sprinkle of nutmeg on top. Now, the hard part: waiting. It bakes for a long time, covered in foil.
All ovens are different, like people. Start checking at one hour fifteen minutes. The edges should be set. The very center should have a gentle jiggle, like jelly. That jiggle is important. It means your pie will be creamy, not rubbery. Do you prefer your desserts creamy or firm?
A Slice of Comfort
This pie is pure comfort food. It is not too sweet. It feels old-fashioned and special. Serving it says, “I made this for you with care.” That feeling matters more than a fancy look.
*Fun fact: Nutmeg comes from the seed of a tropical fruit. It has a warm, sweet smell. People have used it in cooking for hundreds of years!* Let the pie cool completely before you slice it. This gives the custard time to set up properly. What is your favorite old-fashioned dessert? Is it one a family member makes?
Ingredients:
| Ingredient | Amount | Notes |
|---|---|---|
| unbaked refrigerated pie crust | 1 | room temperature |
| sugar | 1 cup | |
| large eggs | 6 | room temperature |
| pure vanilla extract | 2 tsp | |
| ground cinnamon | ½ tsp | |
| ground nutmeg | ¼ tsp | |
| whole milk | 3 cups | room temperature |
My Creamiest Custard Pie, Just Like My Grandma Made
Hello, my dear! Come sit a spell. Let’s talk about custard pie. It’s a hug in a dish. My own grandma taught me this recipe. I still remember her kitchen on a Sunday. The smell of vanilla and nutmeg was pure comfort. We’ll make that same magic today. It’s simpler than you think. Just a few good ingredients and a little patience. Doesn’tt that sound nice?
The secret is in the whisking. And using room-temperature everything! Cold ingredients just don’t play nice together. (That’s my hard-learned tip for you). Trust me, I’ve learned that the messy way. Ready to begin? Let’s get our hands busy. I’ll tell you a story as we go.
Step 1: First, get your crust ready. Let it sit out until it’s soft. Gently press it into your pie dish. Crimp the edges with your fingers. I make little waves with my thumb. It looks so pretty. Then pop it in the fridge. This keeps it from shrinking. My grandkids love helping with this part. Step 2: Now, let’s make the custard. Crack your eggs into a big bowl. Add the sugar, vanilla, cinnamon, and nutmeg. Start whisking! You want it light and frothy. Whisk for a full two minutes. Your arm might get a little tired. I still laugh at my first try. I didn’t whisk enough. The pie was a bit flat. But yours will be perfect. Step 3: Time for the milk. Pour in all three cups slowly. Keep whisking for another three minutes. This mixes everything smoothly. See how it turns a sunny yellow? That’s how you know it’s right. The sound of the whisk is so cheerful. It reminds me of my grandma humming. Step 4: Carefully take your crust from the fridge. Pour the custard right into the middle. Give it a little sprinkle of nutmeg on top. It makes the top look speckled and sweet. Now, cover it loosely with foil. This is important. It keeps the top from browning too fast. We want it creamy, not brown. Step 5: Into the oven it goes! Bake it for about an hour and fifteen minutes. All ovens are a bit different, though. So start checking then. The edges should be set. The very center should have a tiny jiggle. Like a wobbly pudding. What does a “set” edge look like? Share below! Let it cool completely before you slice. The waiting is the hardest part. Cook Time: 1 hour 15 minutes Total Time: 1 hour 30 minutes (plus cooling) Yield: 8 servings Category: Dessert, PieThree Fun Twists for Your Next Pie
Once you master the classic, try a little twist! It’s fun to play with flavors. Here are three of my favorites. They make the pie feel new again. I tried the citrus one just last spring. It was so bright and happy. Which one would you try first? Comment below!
Sunshine Citrus: Add the zest of one lemon or orange to the sugar. It smells like a sunny morning. Berry Swirl: Drop spoonfuls of raspberry jam into the custard before baking. Use a knife to swirl it gently. Maple Dream: Swap half the sugar for real maple syrup. Use just a pinch of cinnamon. It tastes like fall.Serving Your Slice of Sunshine
A slice of this pie is wonderful all on its own. But sometimes, I like to dress it up a bit. A dollop of softly whipped cream is heavenly. A few fresh berries on the side add a nice pop. For a special breakfast, I serve a small slice with bacon. The sweet and salty mix is just right.
What to drink with it? A cup of strong coffee is my go-to. The bitterness balances the sweet creaminess. For a treat, a small glass of sweet sherry is nice for the grown-ups. Or a cold glass of milk, always a classic. Which would you choose tonight?
Keeping Your Custard Pie Perfect
Let’s talk about keeping your pie lovely. Cool it completely on the counter first. Then, cover it tightly and pop it in the fridge. It will stay good for about three days.
You can freeze slices, too. Wrap each piece well in plastic wrap. I once froze a whole pie for my grandson’s surprise visit. It thawed perfectly in the fridge overnight.
To reheat, a warm oven for 10 minutes works best. This keeps the texture creamy. Storing food well means less waste and more sweet treats. Have you ever tried storing it this way? Share below!
Simple Fixes for Common Pie Problems
Sometimes, little things go wrong. That’s okay. First, if your crust gets too brown, use foil. Just cover the edges halfway through baking.
Second, a watery filling means it needed more time. The center should be just slightly jiggly. I remember when I pulled my first pie out too early. We ate it with spoons like soup!
Third, bubbles on top mean you whisked too fast. A gentle stir by hand is best. Fixing these issues builds your confidence. It also makes your pie taste and look just right. Which of these problems have you run into before?
Your Custard Pie Questions, Answered
Q: Can I make this gluten-free? A: Yes! Use your favorite gluten-free pie crust from the store.
Q: Can I make it ahead? A: Absolutely. Bake it the day before you need it. The flavor gets even better.
Q: What if I don’t have nutmeg? A: Just use a bit more cinnamon. It will still be delicious.
Q: Can I double the recipe? A: For two pies, yes. But mix the filling in two separate batches for best results.
Q: Any extra tips? A: Room temperature ingredients are the secret! *Fun fact: This helps everything mix smoothly without lumps.* Which tip will you try first?
From My Kitchen to Yours
I hope you love making this creamy pie. It is a recipe full of comfort. Sharing food is one of life’s great joys.
I would love to see your creation. Your kitchen stories make me so happy. Have you tried this recipe? Tag us on Pinterest! You can find me at @TessasKitchen.
Thank you for baking with me today. Happy cooking!
—Tessa Hammond.

Creamy Custard Pie Recipe for Homemade Dessert
Description
A classic, smooth, and creamy custard pie with a hint of cinnamon and nutmeg, baked in a flaky crust for the perfect homemade dessert.
Ingredients
Instructions
- Make sure all your ingredients are room temperature before you start. Preheat the oven to 350°F (175°C).
- Line a 9-inch pie dish with the pie crust and crimp the edges. Refrigerate.
- Whisk together the eggs, sugar, vanilla, cinnamon, and nutmeg for 2 minutes until frothy. You can do this by hand or using a mixer with the whisk attachment.
- Add the milk and continue whisking for an additional 3 minutes. Do this by hand or using a mixer with the whisk attachment.
- Pour the egg mixture into the pie crust, sprinkle with a little nutmeg on top, cover with foil, and bake for 1 hour 15 mins or until the edges of the pie are set and the center is slightly jiggly. All ovens are not created equally, so your pie may take less or more time to cook. Start checking for set edges and slightly jiggly center at 1 hour 15 mins.
Notes
- Ensure ingredients are at room temperature for a smooth custard. The pie is done when the edges are set but the center still has a slight jiggle.


Leave a Reply