My Kitchen Smells Like a Cinnamon Hug
Hello, dear. Come sit a spell. I just pulled a tray of cinnamon biscuit balls from the oven. Doesn’t that smell amazing? It reminds me of my grandson’s first baking attempt. He got flour everywhere. I still laugh at that.
These little balls are pure joy. They are soft and sweet. Making them gluten-free means everyone can join the fun. That matters to me. No one should miss out on a warm treat.
A Little Story and a Handy Trick
I used to make these with regular flour. Then my friend Clara visited. She can’t have gluten. I wanted her to feel welcome. So I tried a gluten-free mix. It worked perfectly!
Here’s my favorite trick. No buttermilk? No problem! Add a spoon of vinegar to your milk. Let it sit for five minutes. It makes the dough tender. *Fun fact: This is called “clabbering” the milk. Fancy word for a simple trick!
Let’s Get Our Hands Doughy
The dough will be sticky. That’s okay! Good things are often a little messy. Use a spoon or a cookie scoop. Roll them into little balls. They don’t need to be perfect.
Pop them in a hot oven. In fifteen minutes, magic happens. Your kitchen will fill with that wonderful cinnamon smell. What’s your favorite smell from the oven? Tell me, I’d love to know.
The Sweet Finish
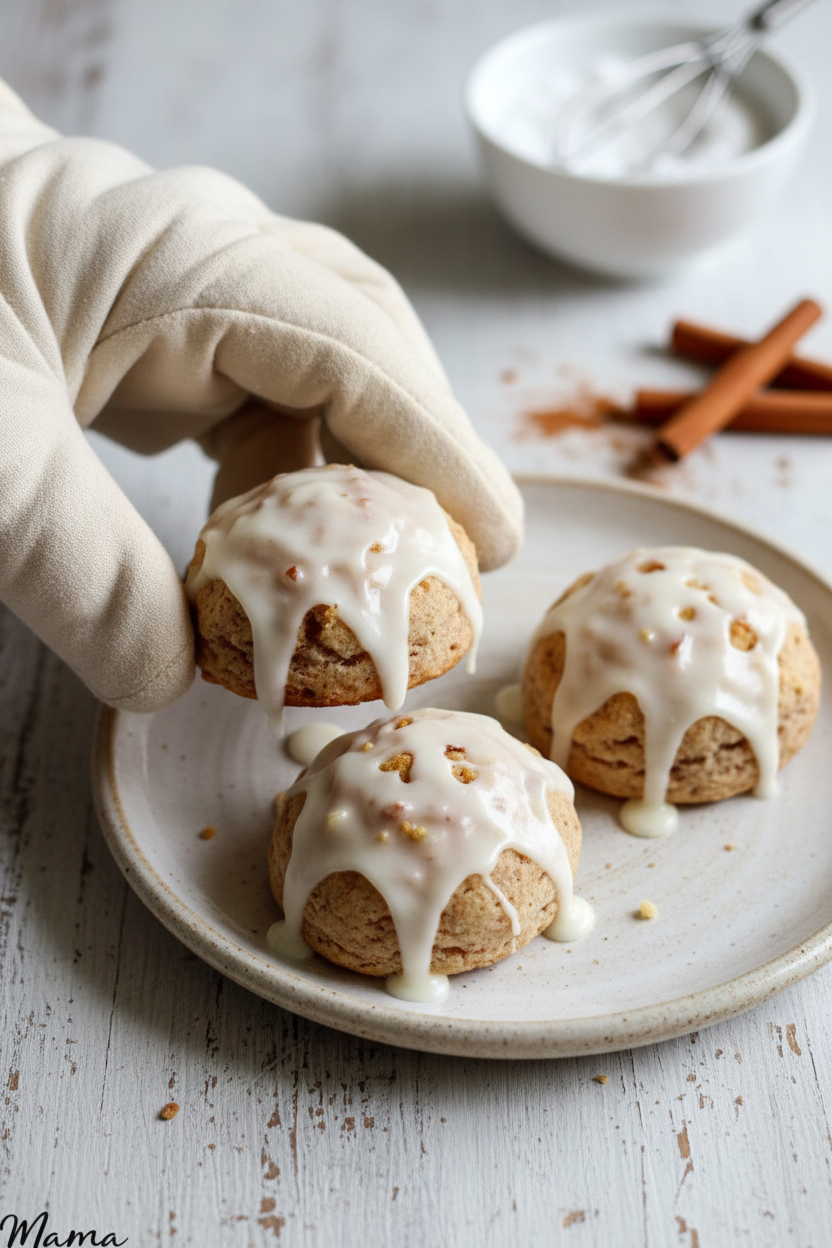
While they bake, make the icing. Just powdered sugar, vanilla, and a splash of milk. Stir until it’s smooth. Drizzle it over the warm biscuit balls.
The icing will melt a little. It soaks into the top. This makes every bite moist and sweet. Do you like a lot of icing or just a little? I’m a “more is better” person myself!
Why This All Matters
Food is more than eating. It’s about sharing. Making a recipe everyone can eat shows you care. That is the most important ingredient of all.
These little balls are a simple pleasure. They prove that a small, sweet thing can make a big, happy moment. What’s a simple treat that makes you smile? Share your story with me.
Ingredients:
| Ingredient | Amount | Notes |
|---|---|---|
| gluten-free all-purpose flour | 2 1/2 cups | I like Pillsbury gluten-free |
| xanthan gum | 1/2 teaspoon | leave out if your flour already has it |
| gluten-free baking powder | 1 tablespoon | |
| salt | 1 teaspoon | |
| granulated sugar | 1 cup | |
| cinnamon | 1 tablespoon | |
| buttermilk | 1 cup | dairy-free use cashew, almond or coconut milk. Make your own buttermilk by adding 1 tablespoon of white vinegar or lemon juice to the cup of milk and let stand 5-10 minutes. |
| butter | 6 tablespoons | dairy-free use shortening or Smart Balance or Earth Balance butter |
| egg | 1 | room temperature |
| powdered sugar | 1 cup | for icing |
| pure vanilla extract | 2 teaspoons | for icing |
| milk | 4 teaspoons | for icing; dairy-free use cashew, almond or coconut milk |
My Cozy Cinnamon Biscuit Balls
Hello, my dear! Come sit a spell. Let’s make something sweet. These little biscuit balls are pure comfort. I think of my grandkids when I make them. They always disappear so fast! The kitchen smells like a hug. Doesn’t that smell amazing? This recipe is gentle for many tummies, too. We’ll use gluten-free flour and have a dairy-free option. It’s easier than you think. I promise. Ready? Let’s begin our baking story together.
Step 1: First, get your oven nice and hot. Set it to 450° F. Now, grab a big bowl. Put in your flour, baking powder, salt, sugar, and cinnamon. Give it a good stir with a whisk. This mixes all the friends together. I still laugh at the time I forgot the sugar. The dough looked so sad! (A hard-learned tip: Check your flour bag. If it already has xanthan gum, you can skip adding more.)
Step 2: Time to cut in the butter. Use a pastry cutter or a fork. You want the butter to look like tiny peas in the flour. This makes the biscuits fluffy. For dairy-free, shortening works just fine. My hands used to ache doing this. Now I let the tools help. It’s a good little arm workout, though!
Step 3: Now, stir in your buttermilk. No buttermilk? No worry! Put a tablespoon of vinegar in your milk. Let it sit for five minutes. It makes its own buttermilk magic. Then add your whisked egg. Stir until a soft, sticky dough forms. Sticky dough is just fine. It means they’ll be tender. What’s your favorite smell in a kitchen? Share below!
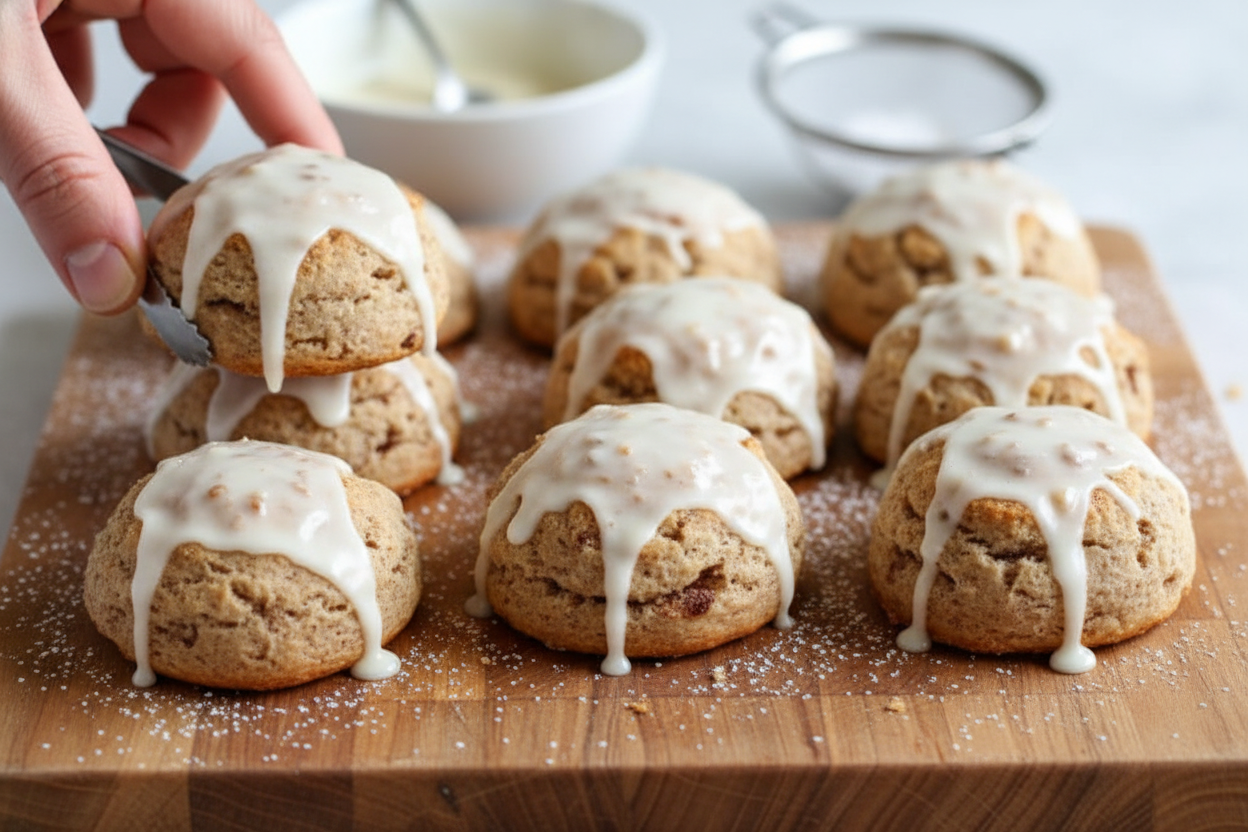
Step 4: Line your cookie sheet with parchment paper. This is my secret for no sticking. Use a spoon or a cookie scoop. Scoop some dough and roll it into a one-inch ball. Just like playing with clay! Place them on the sheet. They don’t need much space. They are friendly little things. They like to be cozy but not touching.
Step 5: Bake them for 15 minutes. They will get golden and puffy. Your whole house will smell wonderful. While they bake, make the icing. Mix powdered sugar, vanilla, and milk. That’s it! When the biscuits come out, let them cool just a bit. Then drizzle that sweet icing all over. Now, the best part. Enjoy them warm. Pure happiness in a bite.
Cook Time: 15 minutes
Total Time: 30 minutes
Yield: About 2 dozen balls
Category: Dessert, Snack
Three Fun Twists to Try
Oh, I do love a good recipe twist. It makes cooking an adventure. Here are three ideas for our biscuit balls. They are all so simple and fun. You can make them your very own.
Apple Pie Balls: Add a half cup of finely chopped apple to the dough. A pinch of nutmeg is nice, too.
Chocolate Chip Joy: Stir in a handful of dairy-free chocolate chips. Everything is better with chocolate, I say.
Orange Sunshine: Use orange juice in the icing instead of milk. Add a little zest to the dough for a bright zing.
Which one would you try first? Comment below!
Serving Them Up Right
These little balls are stars all on their own. But sometimes, I like to dress them up. For a special breakfast, pile them in a bowl. Drizzle with extra icing. A few fresh berries on the side look so pretty. For dessert, serve them warm with a scoop of dairy-free vanilla ice cream. The mix of warm and cold is divine.
What to drink? A cold glass of almond milk is perfect for the kids. For the grown-ups, a hot cup of coffee with cinnamon is just right. The flavors dance together so nicely. Which would you choose tonight?
Keeping Your Cinnamon Biscuit Balls Fresh
These little balls are best fresh from the oven. But we all have leftovers. Let them cool completely first. Then store them in a sealed container. They will stay good on the counter for two days.
You can freeze them for later, too. I freeze them before adding the icing. Place the baked balls on a tray until frozen solid. Then pop them into a freezer bag. This stops them from sticking together. I once forgot to do this. I had one giant biscuit lump!
To reheat, warm them in a 350°F oven for 5-10 minutes. This brings back their soft warmth. Batch cooking matters for busy weeks. A ready treat makes any day sweeter. Have you ever tried storing it this way? Share below!
Simple Fixes for Common Baking Hiccups
Is your dough too sticky? This is very common with gluten-free flour. Just add a little more flour to your hands. Roll the balls gently. They do not need to be perfect. I remember when my first batch looked like little mountains. They tasted wonderful anyway.
Are your biscuit balls dry? You may have over-measured the flour. Spoon the flour into your cup. Then level it off with a knife. This matters for a soft texture. Do not pack the flour down.
Is the icing too runny or too thick? Fix it easily. Add more sugar for a thick icing. Add more milk, one drop at a time, for a thin icing. Getting this right builds your kitchen confidence. Which of these problems have you run into before?
Your Quick Questions, Answered
Q: Can I make the dough ahead? A: Yes. Mix the dough and keep it covered in the fridge. Bake it within 24 hours for best results.
Q: What other milk can I use? A: Any milk works. I like canned coconut milk for richness. *Fun fact: The acid in lemon juice makes milk thicken like buttermilk.*
Q: Can I make these less sweet? A: Of course. Reduce the sugar in the dough by a quarter cup.
Q: Can I double the recipe? A: You can. Just use two baking sheets. Switch their oven positions halfway through baking.
Q: Is the icing optional? A: Yes. They are lovely with just a sprinkle of cinnamon sugar. Which tip will you try first?
From My Kitchen to Yours
I hope you love making these cozy treats. The smell of cinnamon baking is pure happiness. It reminds me of my own grandma’s kitchen. I would love to see your creations.
Share a picture of your biscuit balls with me. Let’s build a little community of bakers. Have you tried this recipe? Tag us on Pinterest! Your photos make my day.
Happy cooking!
—Tessa Hammond.
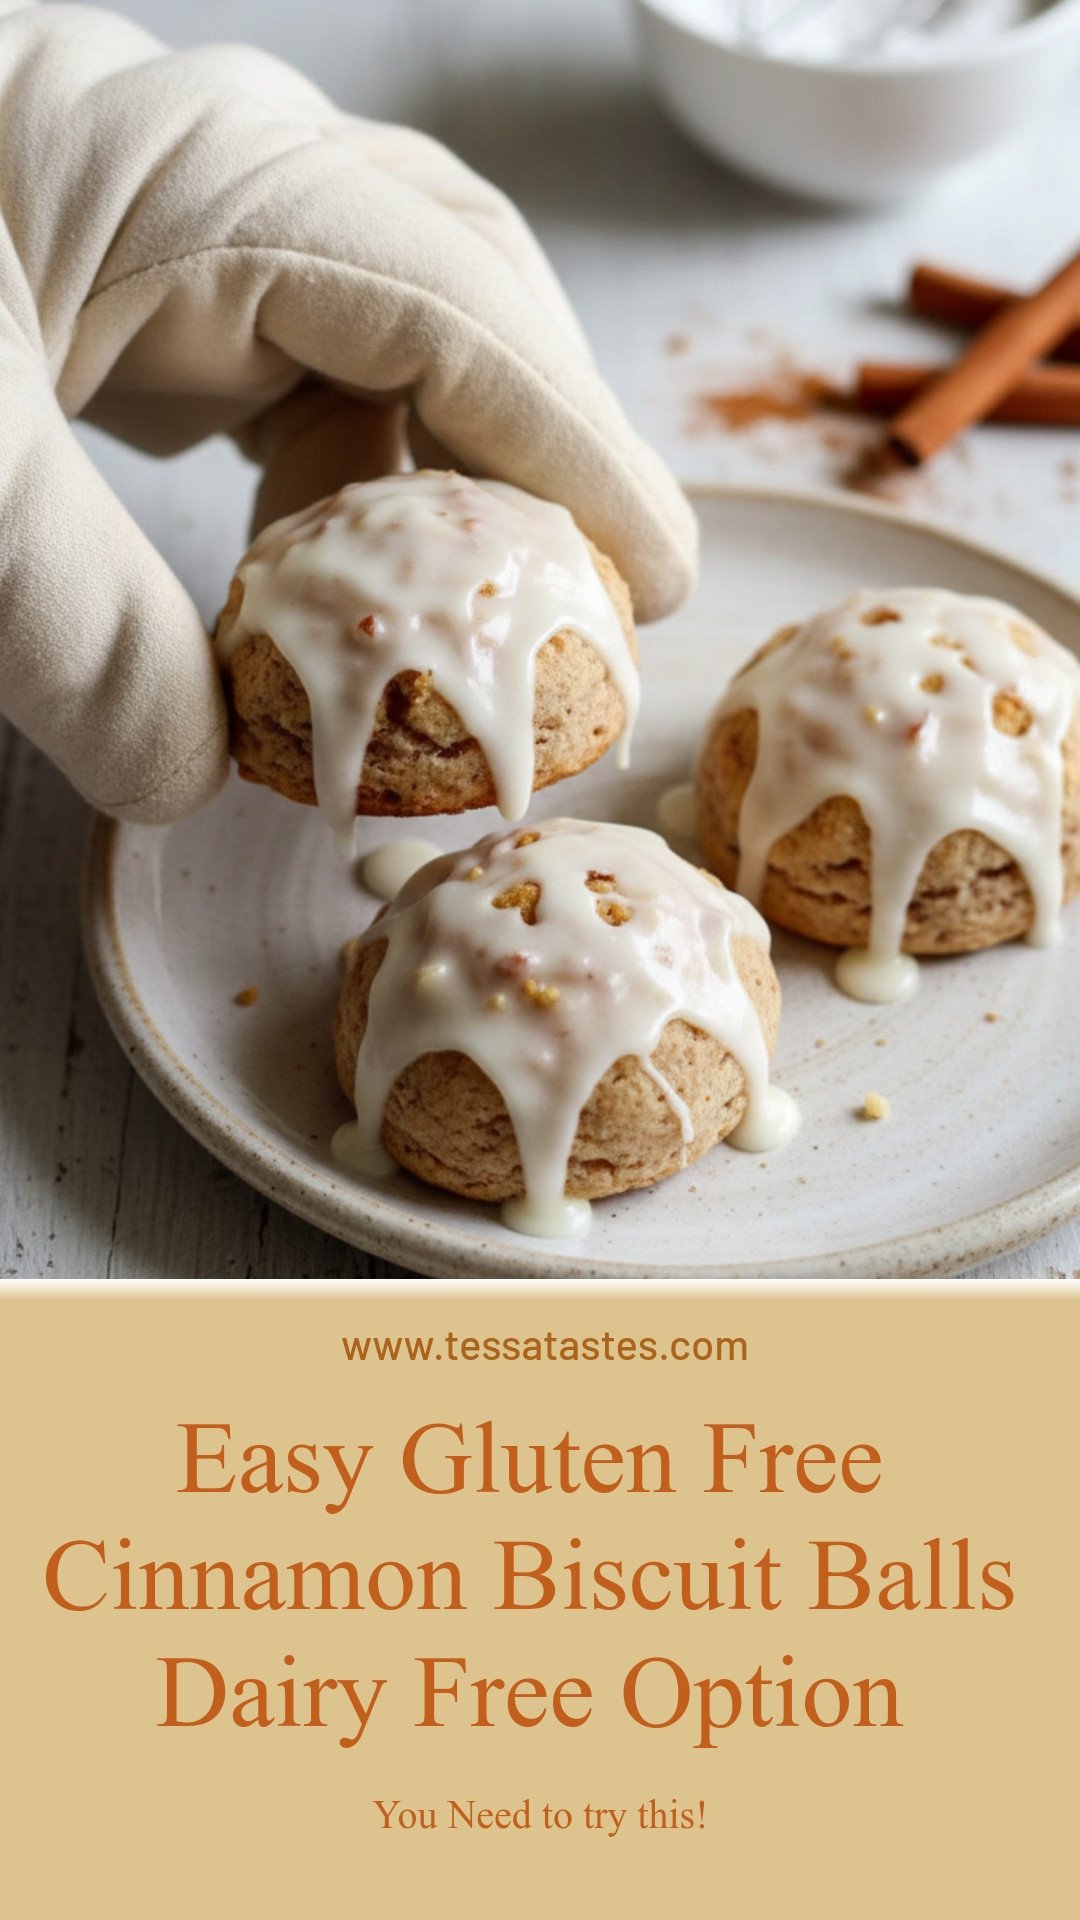
Easy Gluten-Free Cinnamon Biscuit Balls {Dairy-Free Option}
Description
These easy, bite-sized cinnamon biscuit balls are a delightful gluten-free treat with a simple dairy-free option. Perfect for a quick snack or dessert.
Ingredients
Biscuits:
Icing:
Instructions
- Preheat oven to 450° F.
- In a large bowl add the gluten-free flour, baking powder, salt, sugar, and cinnamon and give it a quick whisk or stir to combine the ingredients.
- Cut in butter (or shortening for dairy-free) into the flour with a pastry cutter or fork until it looks like the size of small peas.
- Stir in the buttermilk. To make your own buttermilk by adding 1 tablespoon of white vinegar or lemon juice to the cup of milk and let stand 5-10 minutes in the refrigerator to stay cold.
- Add the whisked egg and stir until a soft dough forms. The dough will be sticky.
- Use parchment paper or gluten-free cooking spray on cookie sheet.
- Use either a cookie scoop or tablespoon to scoop out a ball of dough. Roll the dough into 1 inch balls.
- Bake for 15 minutes.
- Combine icing ingredients.
- Drizzle icing over cinnamon biscuit balls.
- Enjoy!
Notes
- For dairy-free version, ensure all milk and butter substitutes are used. The dough is sticky, so lightly wetting your hands can help when rolling the balls.


Leave a Reply