
A Pie for Special Days
I first made this pie for my grandson’s birthday. He loves anything with strawberries. His smile was worth every minute. This Berry Cream Cheese Delight is pure joy in a pie pan.
It looks fancy, but it’s really quite simple. You just need a little patience. The secret is letting it chill. Good things come to those who wait, you know.
The Magic of a Good Crust
Let’s start with the crust. You can make your own or buy one. I won’t tell anyone. Pricking the bottom with a fork is important. It stops the crust from puffing up too much.
I still laugh at that. The first time I forgot, my crust looked like a little balloon. We had to poke it with a knife to let the air out. Now I never forget.
The Dreamy Cream Cheese Filling
Next is the creamy filling. Make sure your cream cheese is soft. This matters because hard cream cheese makes lumpy filling. And nobody wants lumps.
When you whip the heavy cream, watch for stiff peaks. It’s like making fluffy clouds for your pie. Doesn’t that smell amazing? Folding it gently into the cream cheese keeps it light and airy.
The Shiny Strawberry Topping
The gelatin is what makes the topping so shiny and set. It’s like a magic trick. You mix it with water and it gets thick. Then you add it to the warm jam.
Fun fact: Gelatin comes from animal collagen. It’s what gives Jell-O its wiggly jiggle! Tossing the berries in this glossy jam makes them look like jewels.
The Hardest Part: Waiting
Now, you must put the whole pie in the fridge. It needs at least five hours to set. This is the hardest part. Waiting for a pie to chill teaches you patience.
I like to make it the night before a big day. That way, it’s ready and waiting. It also gives the flavors time to get to know each other. They become better friends.
Your Turn in the Kitchen
What’s your favorite berry to bake with? I’m a strawberry girl, but I’d love to hear. Do you think you’ll try a homemade crust or a store-bought one?
This recipe matters because sharing food is sharing love. Making something beautiful with your own hands is a wonderful feeling. Tell me, what’s the first dessert you ever learned to make?
Ingredients:
| Ingredient | Amount | Notes |
|---|---|---|
| Store-bought pie crust | 1 | or the flaky and homemade pie crust recipe from our site |
| Cold water | ½ cup | |
| Unflavored gelatin | 2¼ teaspoons | like Knox brand (0.25-ounce packet) |
| Heavy whipping cream | 1 cup | |
| Cream cheese | 12 ounces | softened to room temperature |
| Powdered sugar | 2 cups | |
| Vanilla extract | 2 teaspoons | |
| Fresh strawberries | 1 pound | sliced |
| Seedless strawberry jam | ½ cup | |
| Cold water | 2 tablespoons | |
| Unflavored gelatin | 2¼ teaspoons | like Knox brand (0.25-ounce packet) |
| Heavy whipping cream | 1 cup | |
| Powdered sugar | ½ cup |
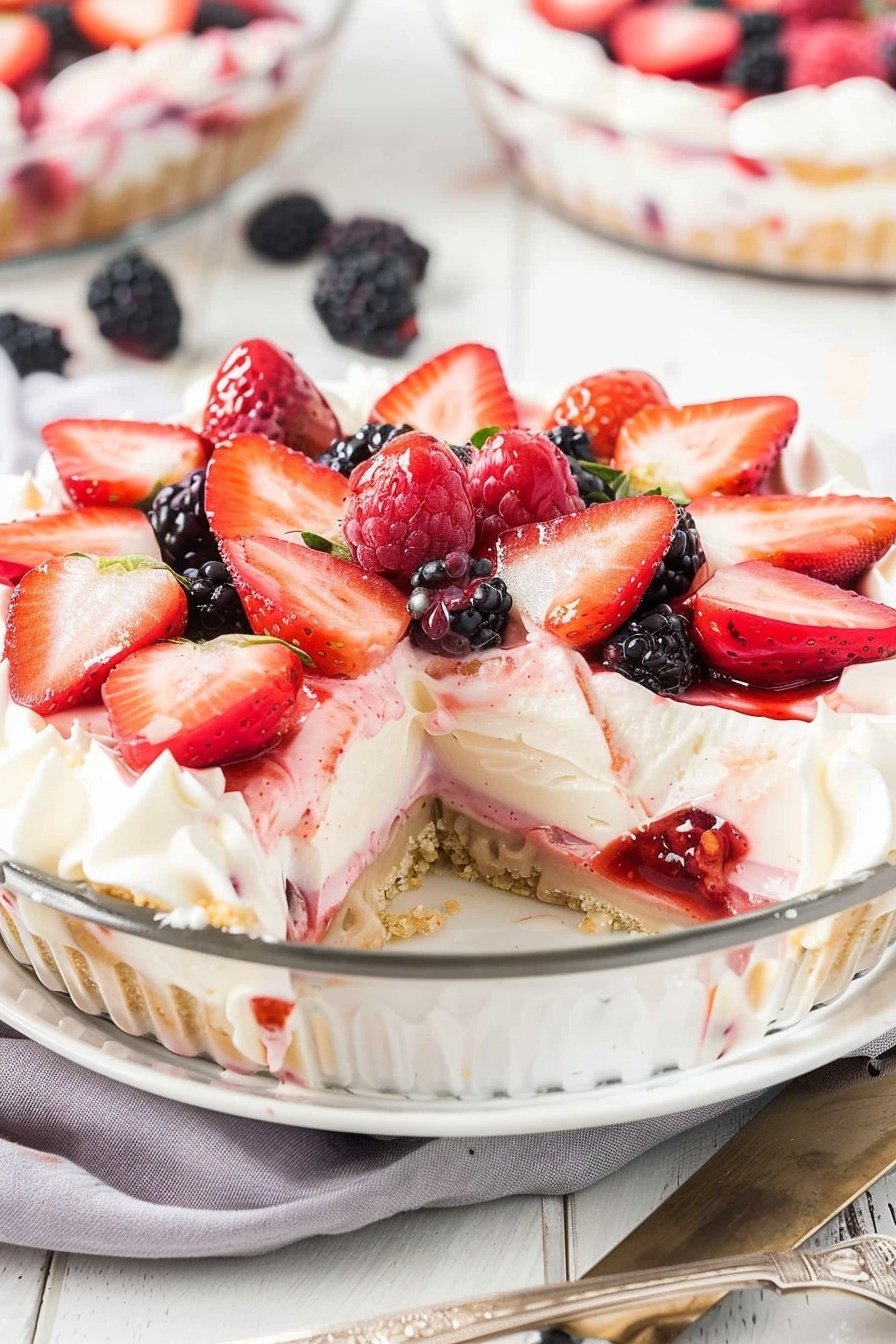
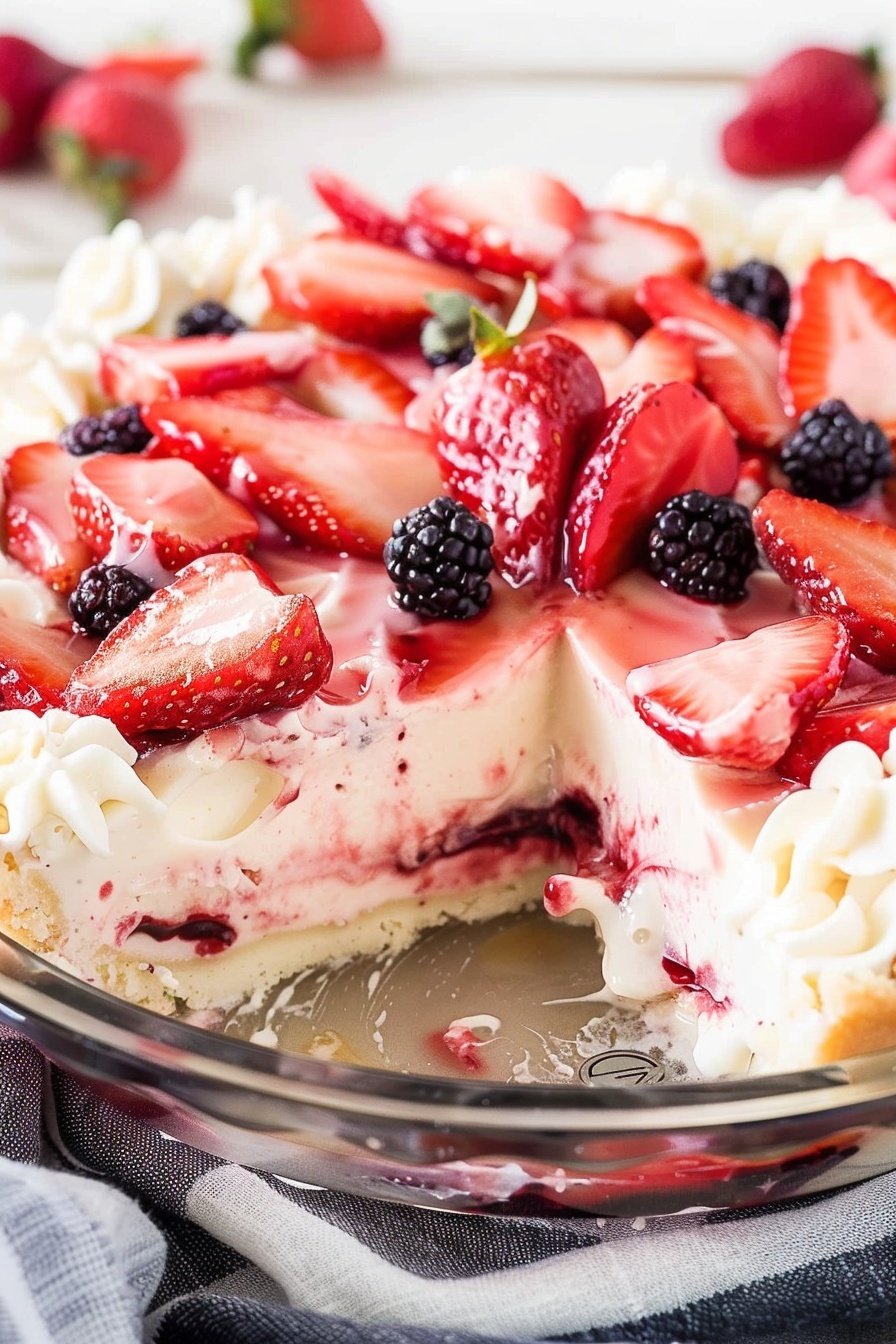
Berry Cream Cheese Delight: A Slice of Sunshine
Oh, this pie brings back such happy memories. My granddaughter Lily calls it my “pink cloud pie.” It’s tart, creamy, and just sweet enough. The flaky crust holds a pillow of cream cheese filling. Then we pile on the shiny, fresh strawberries. Doesn’t that sound wonderful? I love making it for summer birthdays.
Making the Crust
Let’s get that crust ready first. Step 1: Heat your oven to 450°F. Gently press your pie crust into a sprayed pie pan. Prick the bottom with a fork so it doesn’t puff up. I use dried beans as pie weights. It works just as well as fancy store-bought ones.
Creating the Filling
Now for the fluffy filling. Step 2: Whip the heavy cream until it forms soft peaks. Set it aside for a moment. Step 3: In a tiny bowl, mix gelatin with cold water. It will look a bit strange and lumpy. That’s perfectly normal, dear.
Step 4: Beat the softened cream cheese until it’s super smooth. Step 5: Add the powdered sugar and vanilla. Keep mixing until it’s all one happy, creamy family. Step 6: Now, melt that gelatin in the microwave for a few seconds. Stir it until it’s clear. Then slowly mix it into the cream cheese. (A hard-learned tip: If your cream cheese is too cold, you’ll get little lumps. Let it sit on the counter first!)
Step 7: Gently fold in your whipped cream. Be patient and gentle here. You want to keep all that lovely air in. Step 8: Spread this dreamy filling into your cooled crust. Pop it in the fridge to firm up. What’s the secret to a light filling? Share below!
Adding the Berry Topping
Time for the beautiful berry top. Step 9: Wash and slice your strawberries. I like to make them all about the same thickness. Step 10: Make another small bowl of gelatin and water. Step 11: Warm the strawberry jam in the microwave. This makes it so glossy. It reminds me of red lipstick.
Step 12: Whisk the gelatin into the warm jam. Step 13: Pour this over your sliced berries and stir gently. Step 14: Carefully spoon the berries over the chilled filling. Try to leave most of the extra liquid behind. Step 15: Let the whole pie chill for at least five hours. I know, the waiting is the hardest part!
The Final Touches
Just before serving, make it extra special. Step 16: Whip the last bit of cream with powdered sugar. Step 17: Pipe little dollops around the edge. I still laugh at my first attempts. They looked more like clouds than swirls. It always tastes delicious no matter what.
| Cook Time | 15 minutes |
| Total Time | 5 hours 35 minutes |
| Yield | 8 servings |
| Category | Dessert, Pie |
Make It Your Own Delight
This recipe is like a favorite story. You can tell it a little differently each time. Here are some fun twists we’ve tried over the years. They are all so simple and tasty.
- Mixed Berry Bonanza: Use raspberries, blueberries, and blackberries with the strawberries. The color is just gorgeous.
- Lemon Zest Zing: Add the zest of one lemon to the cream cheese filling. It gives it a lovely, sunny little kick.
- Chocolate Crust Surprise: Add two tablespoons of cocoa powder to your pie crust dough. It’s a chocolatey secret underneath.
Which one would you try first? Comment below!
The Perfect Slice
This pie is a star all on its own. But I love making a whole event out of it. For a real treat, serve a thin slice with a small scoop of vanilla bean ice cream. The cold creaminess is just perfect. You could also crumble a little extra pie crust on top for a nice crunch.
What to drink with it? A glass of cold milk is always my go-to. It’s a classic for a reason. For the grown-ups, a little glass of sweet Moscato wine pairs beautifully. It’s like a party in your mouth. Which would you choose tonight?
Storing Your Berry Cream Cheese Delight
This pie is best kept in the fridge. Cover it loosely with plastic wrap. It will stay fresh for about three days.
You can freeze the pie without the whipped cream topping. Wrap the whole pie tightly. It will keep for one month in the freezer.
I once put the topping on before freezing. It became a weepy mess when it thawed. Now I always add it fresh at serving time.
Thaw your frozen pie overnight in the refrigerator. Do not try to reheat this dessert. It is meant to be served cold and creamy.
Batch cooking helps on busy days. Making two pies takes little extra time. You can have a sweet treat ready for surprise guests.
This matters because a planned treat brings joy. It saves you from last-minute stress. Have you ever tried storing it this way? Share below!
Fixing Common Berry Cream Cheese Delight Problems
Is your filling too runny? Your cream cheese might have been too cold. Always let it soften on the counter first.
I remember when my gelatin would not dissolve. I learned to swirl it gently in the water. This prevents lumpy pockets in your filling.
Is your pie crust soggy? Make sure it cools completely before adding the filling. A warm crust will melt your creamy layer.
Fixing these small issues builds your cooking confidence. A smooth filling also feels much nicer in your mouth. It makes the dessert truly special.
Fun fact: The gelatin helps the filling hold its shape. It is like a tiny helper holding everything together for you. Which of these problems have you run into before?
Your Berry Cream Cheese Delight Questions
Q: Can I make this gluten-free? A: Yes! Just use your favorite gluten-free pie crust from the store.
Q: How far ahead can I make it? A: You can make the whole pie the day before. It needs that long to chill properly.
Q: Can I use different berries? A: Of course. Raspberries or blueberries work wonderfully. Just use seedless jam that matches your fruit.
Q: Can I make a smaller pie? A: You can halve the recipe. Use a smaller pie pan. The baking time will be less.
Q: Is the whipped cream necessary? A: No, it is just a pretty finish. The pie is delicious all on its own. Which tip will you try first?
Sharing Your Kitchen Creations
I hope you love making this Berry Cream Cheese Delight. It always reminds me of summer days with my grandchildren. Seeing their happy faces is the best part.
I would be so thrilled to see your beautiful pie. Sharing our creations makes the kitchen feel like a friendly place. It connects us all.
Have you tried this recipe? Tag us on Pinterest! I look at every single photo. It makes my day to see your work.
Happy cooking!
—Tessa Hammond.
Berry Cream Cheese Delight: Tart and creamy perfection: Tart and creamy perfection
Description
Tart berry swirls meet creamy cheesecake in this easy no-bake dessert. Perfect for summer parties & sweet cravings!
Ingredients
=== Filling ===
=== Topping ===
Instructions
- Preheat the oven to 450°F. Lightly spray a 9-inch pie pan with nonstick spray. Place the crust in the pie pan and gently prick the crust on the bottom with a fork. Lay a piece of parchment paper on top of the pie crust and gently fill with pie weights. Bake for 15 minutes, or until the crust is golden. Once baked, remove the parchment and pie weights and set the pre-baked crust on the counter to cool while preparing the cream cheese filling mixture.
- In a medium-sized bowl, using a hand mixer on medium-high speed, whip the heavy cream until stiff peaks form. Set aside.
- In a small bowl, combine the water and gelatin. Gently swirl the gelatin around, making sure that it is completely absorbed by the water. Set aside.
- In the bowl of a stand mixer, or using another medium-sized mixing bowl and a handheld mixer on medium-high speed, blend the cream cheese for 30 seconds to 1 minute, or until smooth.
- Add the powdered sugar and vanilla extract and continue mixing for 1½ to 2 minutes or until no lumps remain. Start your mixer on low, then work up to medium-high speed.
- Heat the bowl with the gelatin and water mixture in the microwave for 20 to 30 seconds. Give it a good stir making sure that there are no lumps remaining. While your mixer is on low speed, pour the warm gelatin into the bowl of the cream cheese mixture. Mix on low for 1 to 2 minutes or until completely combined.
- Gently fold the whipped heavy cream into the cream cheese mixture just until everything is evenly incorporated.
- Spread the cream cheese mixture evenly on top of the crust. Refrigerate the cream cheese pie base while you prepare the strawberry topping.
- Prepare your fresh strawberries by rinsing them in cool water and then patting them completely dry. Remove the green tops, cut the berries into ¼-inch slices, and place them into a large bowl. Set aside.
- In a small bowl, add the water and unflavored gelatin. Gently swirl to make sure that all the gelatin is mixed with the water. Let it sit for about 2 to 3 minutes to thicken.
- In a microwave-safe bowl (a glass 2 cup measure works great for this), place the seedless strawberry jam and microwave on high for 30 to 45 seconds. Once warm, give it a whisk to loosen it up and make it smooth and pourable.
- Once the jam is hot and smooth, add the gelatin mixture to the jam and whisk again until it is completely incorporated and no lumps remain.
- Pour the jam mixture over the sliced berries and gently combine, making sure that all the berries are coated.
- Remove the pie from the refrigerator; using a slotted spoon, spoon the berry mixture gently over the cheesecake filling, being careful not to get too much extra liquid on the pie.
- Place the pie back in the refrigerator to chill and set for at least 5 hours (or up to overnight). While the pie is chilling, you can make the whipped topping for the garnish.
- Using a medium-sized mixing bowl and a handheld mixer on medium-high speed, beat the heavy cream and powdered sugar until stiff peaks form.
- Fill a decorator’s piping bag, or a gallon-sized Ziploc bag with a small corner of the bag snipped off, with the whipped cream. Pipe small swirls at the edge of your pie just before serving. Note: Do not add the whipped topping until just before you are ready to serve.
=== Filling ===
=== Topping ===
Notes
- For best results, ensure the pie has chilled for the full 5 hours to allow the filling to set properly. The whipped cream topping should be added just before serving to maintain its texture.


Leave a Reply