My First Meringue Mistake
Let me tell you about my first meringue. I was so nervous. I beat those egg whites forever. My arm got tired. They never got fluffy. I used cold eggs right from the fridge. That was my mistake. Cold eggs just won’t whip up right. I still laugh at that.
So, use room temperature eggs. It makes all the difference. Your mixer will do the hard work. In about seven minutes, you’ll have fluffy, white clouds. Doesn’t that sound easier? This matters because good meringue is the heart of this cake. It’s the crispy, sweet base for all the goodness.
The Long, Slow Bake
This cake needs patience. You bake it low and slow. Six hours at a very low heat. It dries out slowly. This makes it crispy, not chewy. It’s like making edible clouds. You must rotate the pans, too. This keeps the cooking even.
I set a timer for every two hours. I do chores while I wait. The house smells lightly sweet. *Fun fact*: This slow bake is why it’s called “Boccone Dolce.” It means “sweet mouthful” in Italian. And one crispy bite tells you why. Have you ever baked something for this long before?
The Magic of Cold Cream
Now for the frosting. It is just whipped cream. But here is my secret. Make everything very cold. I put my mixing bowl in the freezer. I chill the whisk, too. I keep the cream in the fridge until the last second.
Cold tools make the cream whip up fast. It gets thick and dreamy. It won’t turn to butter. This matters for a light cake. You don’t want a heavy frosting. It should feel like a fluffy blanket on the crispy layers. Do you prefer whipped cream or buttercream frosting?
Building Your Sweet Masterpiece
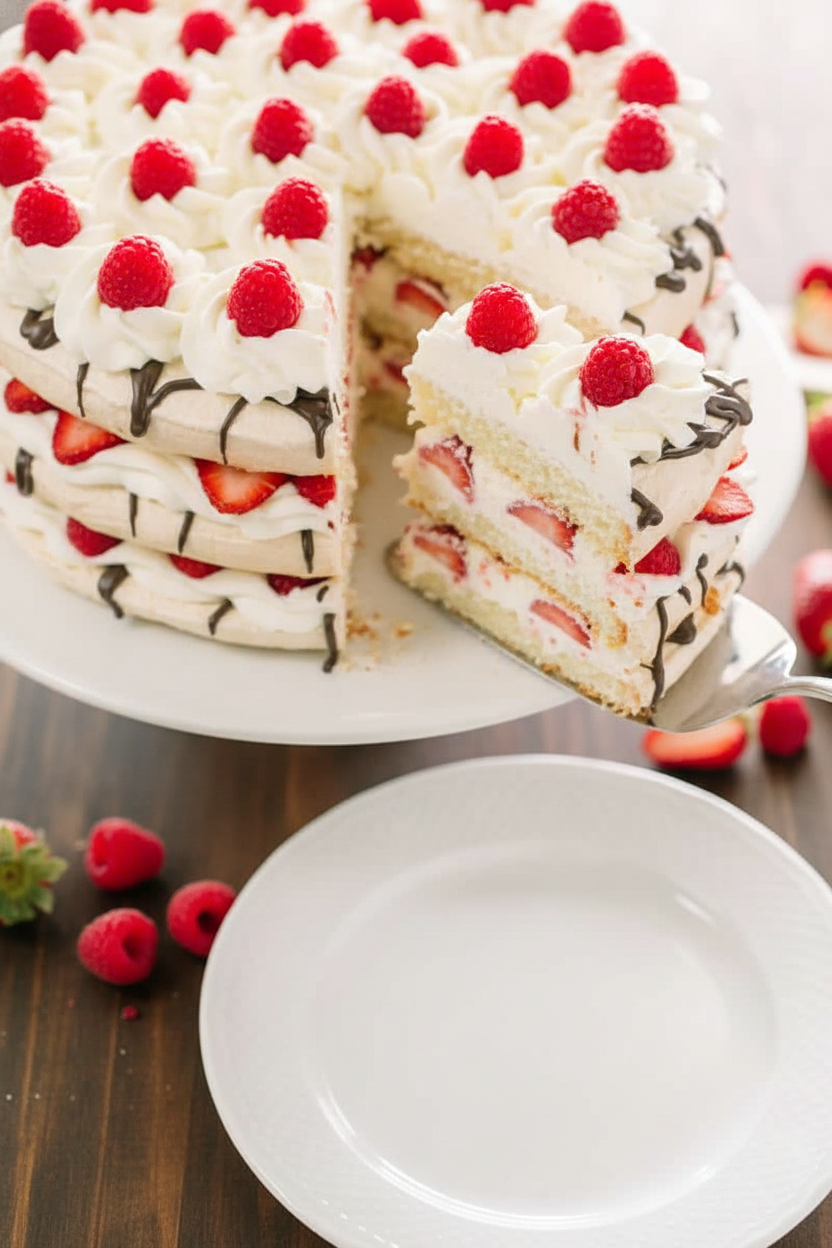
This is the fun part. You get to build it. First, paint melted chocolate on each meringue layer. Let it set. It keeps the layers from getting soggy. Then, stack them with cream and berries. I love slicing the strawberries the long way. They look so pretty.
Layer by layer, it grows tall. The red berries peek out. The white cream holds it together. Finally, you drizzle berry syrup on each slice. The syrup soaks in just a little. It makes every bite juicy and sweet. What’s your favorite berry to use in desserts?
Why This Cake is Special
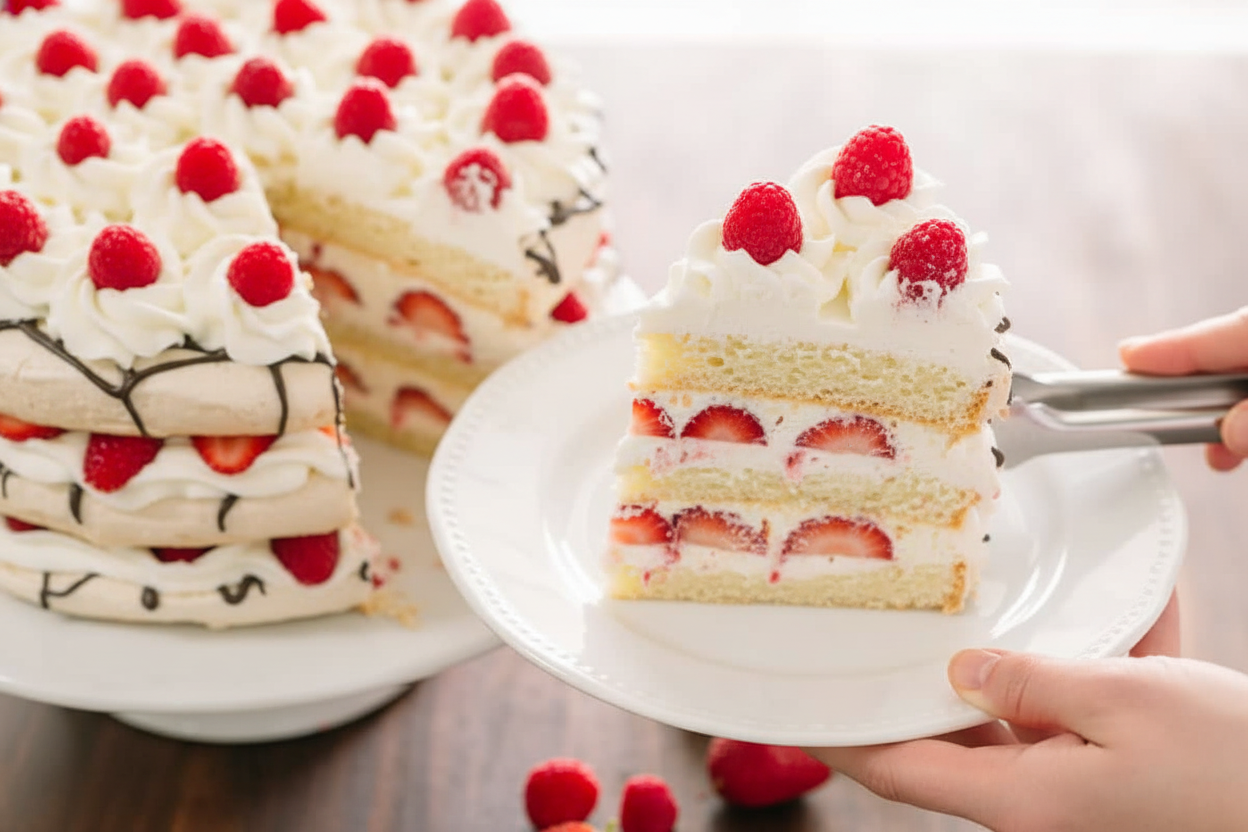
This isn’t a normal cake. There is no flour. It’s light as air. The textures are wonderful. You get crispy, creamy, juicy, and chocolatey all at once. It looks fancy but it’s simple inside. It’s about good ingredients treated right.
Making it teaches you kitchen magic. You see eggs turn into clouds. You see cream turn into peaks. This matters. Cooking is about watching and learning. It’s about sharing something beautiful. I always feel proud when I serve this. It’s a sweet mouthful of joy, just like its name says.
Ingredients:
| Ingredient | Amount | Notes |
|---|---|---|
| Egg whites | 10 (about 1 1/3 cups + 1 Tbsp) | room temperature |
| Sugar | 1 3/4 cups | for the meringue |
| Cream of tartar | 1/4 tsp | |
| Salt | 1/4 tsp | |
| Chocolate chips | 1 cup | milk chocolate or semi-sweet, or a mix |
| Strawberries | 1/2 lb | for the cake layers |
| Raspberries (or other berries) | 1 pint | for decoration |
| Strawberries (for syrup) | 2-4 cups | fresh or thawed frozen |
| Granulated sugar (for syrup) | 1-2 Tbsp | or to taste |
| Heavy whipping cream | 3 cups | for the frosting |
| Powdered sugar | 1/2 cup | for the frosting |
My Heavenly Boccone Dolce Story
Let me tell you about my first Boccone Dolce. My Nonna made it for Easter. It looked like a cloud from a dream. Light meringue, sweet berries, and fluffy cream. I thought it was magic. Now I make it for my own grandkids. Their eyes get so wide! It’s a special-occasion treat. We make a whole afternoon of it. Doesn’t that sound lovely?
The secret is patience. This isn’t a rush-into-the-oven cake. It’s a slow, gentle bake. You’ll have time to tell stories while it cooks. I still laugh at that. My first time, I peeked in the oven every five minutes! The meringue needs to dry out slowly, like laundry on a sunny line. Trust the process. The result is so worth it.
Step 1: First, draw three circles on parchment paper. Use a pen, then flip the paper over. You don’t want ink on your meringue! This is your guide. It helps make nice, even layers. My circles are never perfect. That’s part of the charm. Preheat your oven to 200°F. It’s a very low heat.
Step 2: Now, beat the egg whites. They must be at room temperature. If they’re cold, they’ll take forever to whip. Add the sugar, salt, and cream of tartar. Beat for about 7 minutes. You want stiff, glossy peaks. It should look like fluffy snow. (Hard-learned tip: A pinch of salt makes the sweetness taste even better.)
Step 3: Spread the meringue inside your circles. Make them about an inch tall. Try to flatten the tops. This helps them stack later. Bake them for 6 whole hours. Rotate the pans every 2 hours. If the center feels soft, turn the oven off. Let them sit inside for another hour. What’s your favorite thing to do while something bakes for a long time? Share below!
Step 4: Time for the cream! Freeze your mixing bowl and whisk for 15 minutes first. This is the best trick. Cold tools make the cream whip up beautifully. Beat the heavy cream and powdered sugar until it’s thick. Then put it in the fridge. Slice your strawberries the long way. They look so pretty like that.
Step 5: Melt the chocolate chips. Spread it thinly over the cooled meringue layers. This adds a lovely crunch. Now, assemble your cake! Place the first layer on a plate. Spread on some cream. Add a layer of sliced strawberries. Repeat with the next two layers. Decorate the top with the last of the cream and all your berries. Drizzle with berry syrup right before serving. Doesn’t that smell amazing?
Three Sweet Twists to Try
This cake is a wonderful canvas. You can play with it! Here are three fun ideas I’ve tried over the years. Each one makes it feel new again. My grandson loves the minty one.
Summer Citrus: Use lemon curd between the layers instead of some cream. Top with blueberries and blackberries. It’s so bright and tangy.
Chocolate Mint: Add a drop of peppermint extract to the whipped cream. Use dark chocolate chips. It tastes like a cool, fancy candy.
Tropical Dream: Skip the berries. Use sliced mango and toasted coconut flakes. Drizzle with a passionfruit syrup. It’s a vacation on a plate!
Which one would you try first? Comment below!
Serving It Up With Style
This cake is the star. But a few little touches make it a real celebration. Serve each slice with an extra spoonful of that berry syrup. I like to add a few whole, fresh berries on the side of the plate. It looks so cheerful. For a special touch, grate a little dark chocolate over the top right at the table. The little curls are so elegant.
What to drink? For the grown-ups, a small glass of chilled Prosecco is lovely. The bubbles cut through the sweetness. For everyone, I make a sparkling raspberry lemonade. Just mix raspberry syrup with lemonade and top with soda water. It’s fizzy and pink and perfect. Which would you choose tonight?
Keeping Your Boccone Dolce Happy
This cake is best eaten the day you make it. The meringue stays crisp. Store any leftovers in the fridge, covered lightly. It will get softer but still taste wonderful. I do not recommend freezing the assembled cake. The meringue weeps.
You can bake the meringue layers ahead of time. Just store them in a dry, airtight container. They keep for weeks. My first time, I left a layer out overnight. The humid air made it chewy. I learned my lesson. Storing food right keeps it safe and tasty.
Have you ever tried storing it this way? Share below!
Fixing Common Meringue Mishaps
First, if your egg whites won’t get fluffy, check your bowl. Any speck of grease will stop them. I once had a slick bowl and whisked for ages.
Second, if your baked meringue is sticky, it needed more time. Just turn the oven off. Let it sit inside for another hour to dry.
Third, if your whipped cream looks grainy, you beat it too long. Stop when it forms stiff peaks. This matters for a smooth, cloud-like frosting.
Getting these steps right builds your kitchen confidence. It also makes the flavors and textures perfect. Which of these problems have you run into before?
Your Boccone Dolce Questions, Answered
Q: Is this cake gluten-free? A: Yes, the meringue layers are naturally gluten-free. Just check your chocolate chips.
Q: Can I make parts ahead? A: Absolutely. Bake the meringue disks days ahead. Whip the cream the day of.
Q: What berry swaps work? A: Use any berries you love. Blueberries and blackberries are lovely. *Fun fact: The name “Boccone Dolce” means “sweet mouthful” in Italian.*
Q: Can I make a smaller cake? A: Yes. Halve the recipe. Draw two smaller circles on your parchment.
Q: Is the berry syrup needed? A: It adds a juicy punch, but it’s optional. The cake is sweet without it. Which tip will you try first?
Share Your Sweet Creation
I hope you have fun making this special dessert. It is a showstopper. Your family will be so impressed. I would love to see your beautiful cakes. Please share a picture if you make it. It makes my day to see your kitchen wins.
Have you tried this recipe? Tag us on Pinterest! You can find me at Tessa’s Kitchen Table. I will be looking for your photos.
Happy cooking!
—Tessa Hammond.
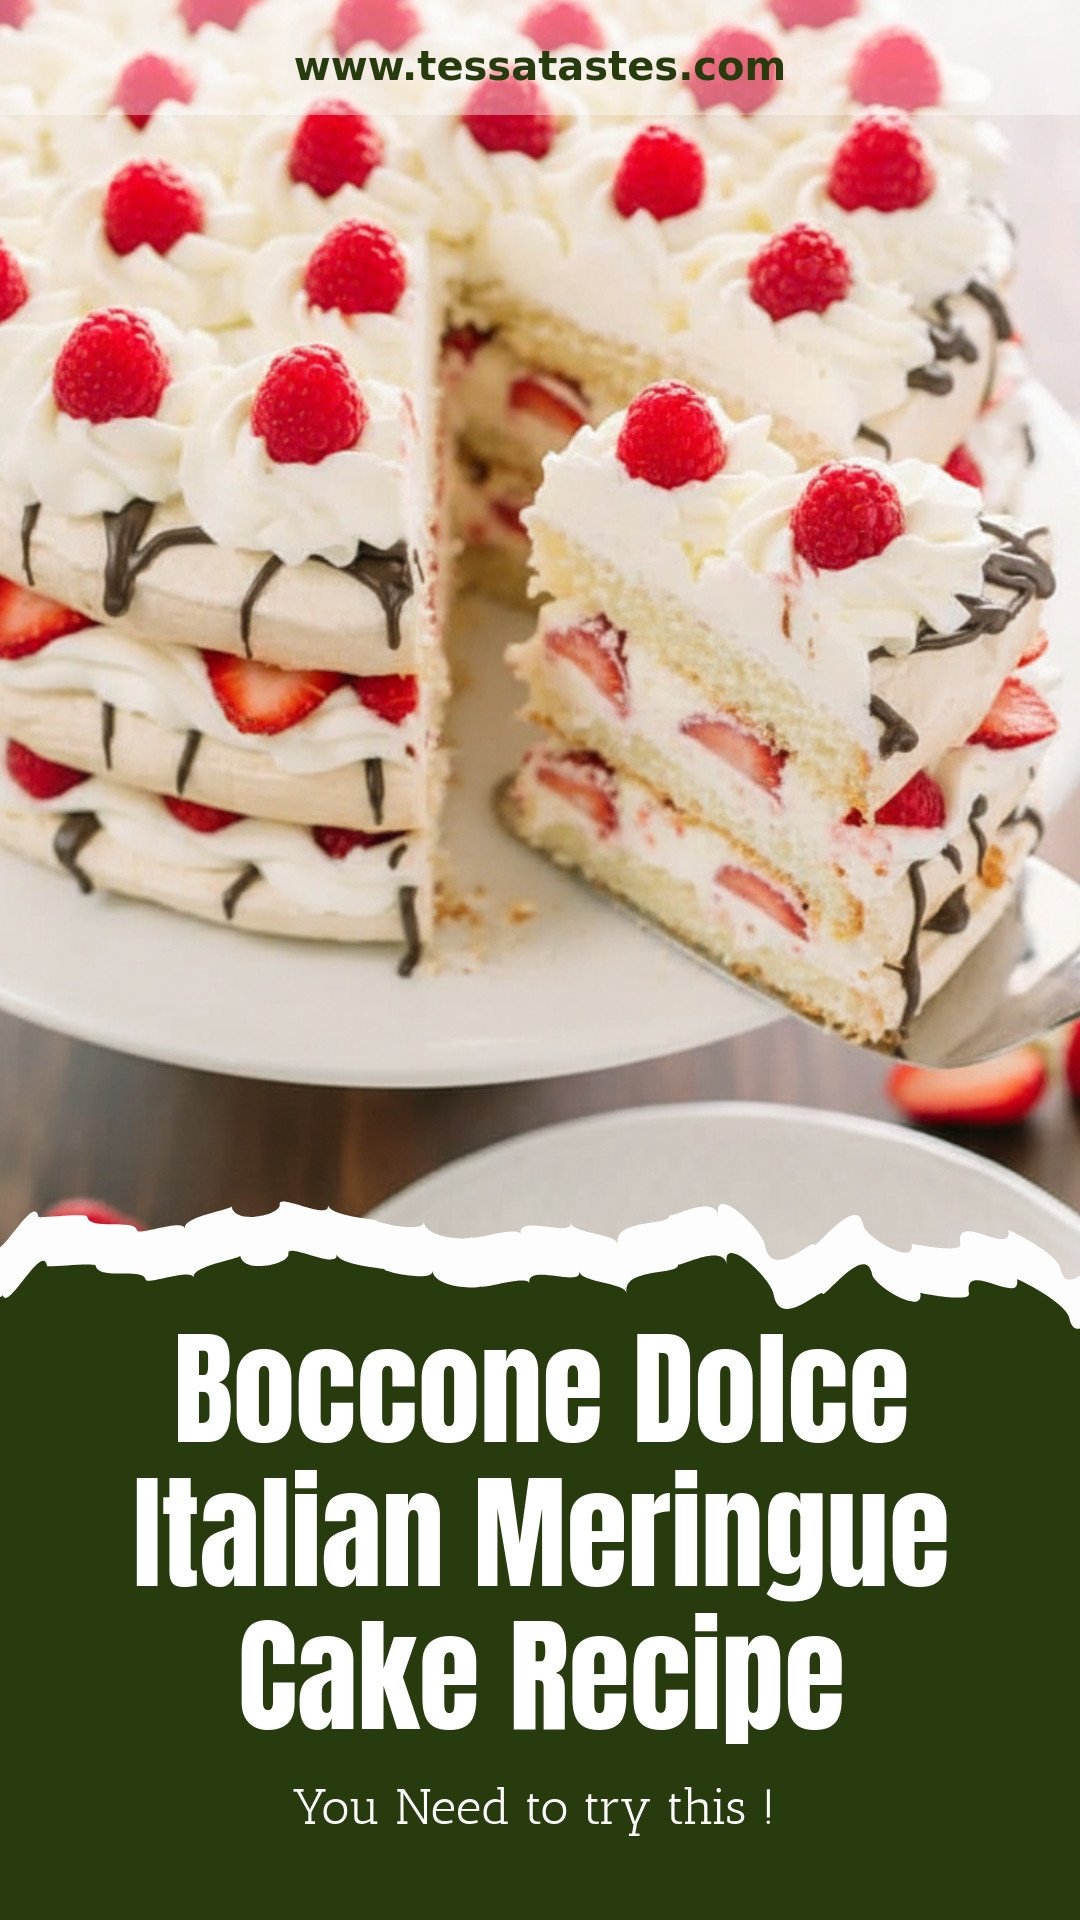
Boccone Dolce Italian Meringue Cake Recipe
Description
A stunning Italian dessert featuring crisp, chewy meringue layers, fresh berries, chocolate, and whipped cream.
Ingredients
For the Berry Syrup:
Frosting Ingredients:
Instructions
- Preheat oven to 200°F. Draw three 9 1/2″ circles on parchment paper with a pen, then flip paper over.
- Beat room temp egg whites with sugar, salt, and cream of tartar for about 7 minutes on high speed until stiff peaks form.
- Divide meringue between the three circles, forming 1″ tall layers. Flatten the tops.
- Bake for 6 hours at 200°F, rotating pans every 2 hours. If centers are springy, turn off oven and leave in for another hour. Cool completely.
- Freeze mixing bowl and whisk for 15 minutes. Beat heavy cream with powdered sugar for 2 minutes until stiff peaks form. Refrigerate.
- Rinse and dry berries; slice strawberries lengthwise. Melt chocolate and spread over the tops of each cooled meringue layer.
- Place first meringue layer on serving platter. Spread with about 1/3 of the frosting, then top with a layer of sliced strawberries.
- Repeat with next two layers. Decorate top with piped whipped cream, berries, and extra chocolate if desired.
- For the syrup: Pulse thawed strawberries with sugar in a food processor. Drizzle over each slice when serving.
Notes
- Ensure egg whites are at room temperature for best volume. The meringue layers must be completely cool and dry before assembling.


Leave a Reply