The Best Dough is a Cold Dough
Let’s start with the pastry. You want everything very cold. I keep my butter in the freezer for a bit first. My grandson once used soft butter. His dough turned into a puddle! I still laugh at that.
Why does cold matter? It makes the pastry flaky and light. When the cold bits of fat hit the hot oven, they steam up. That steam creates little pockets of air. That is the secret to a perfect crust.
A Sweet Memory in a Bowl
Now for the filling. Mix the brown sugar and cinnamon. Doesn’t that smell amazing? It reminds me of my grandma’s kitchen. She always had a jar of this mix ready for toast.
This simple filling matters. It’s not just sugar. It’s a warm, cozy feeling. It makes the whole house smell like love. What smell always makes you think of home?
Putting Our Pop-Tarts Together
This part is like making little sandwiches. Brush the edges with egg wash. This is the glue. It holds our pop-tart together. Be sure to leave a good border so the filling stays inside.
Then you must chill them again. I know, more waiting! But this step is important. It keeps our pastries from getting skinny in the oven. They will keep their beautiful shape.
The Magic of Baking
Into the oven they go. Watch them through the window. They will puff up and turn a lovely golden brown. That is the sign they are ready.
Fun fact: The little holes you poked are not just for looks. They let the hot steam escape from inside. This stops our pop-tarts from bursting open like a balloon!
Do you like to watch things bake? I can do it for hours. It’s so peaceful.
The Icing on the Cake… Or Tart!
Wait for them to cool completely. This is the hardest part! If you ice them warm, the glaze will just melt right off. Patience is a baker’s best tool.
The glaze is thick and sweet. Spreading it on is my favorite step. It makes everything look finished and special. It shows you took the time to make something wonderful.
What’s your favorite part of baking? Is it mixing, shaping, or maybe just eating? Tell me all about it.
Ingredients:
| Ingredient | Amount | Notes |
|---|---|---|
| all purpose flour | 2 1/2 cups | For the dough |
| powdered sugar | 1 Tbsp. | For the dough; optional |
| kosher salt | 2 tsp. | For the dough (or 1 tsp. fine salt) |
| unsalted butter | 1/2 cup | For the dough; cut into cubes, cold |
| vegetable shortening | 1/2 cup | For the dough; cut into cubes, cold (or you can use 1/2 cup more butter in place of the shortening) |
| ice cold water | 6-8 Tbsp. | For the dough |
| dark brown sugar | 3/4 cup | For the filling |
| ground cinnamon | 1 1/2 tsp. | For the filling |
| all purpose flour | 1 1/2 Tbsp. | For the filling |
| kosher salt | 1 tsp. | For the filling (or 1/4 – 1/2 tsp. fine salt) |
| melted butter, unsalted | 3-4 Tbsp. | For the filling |
| vanilla extract | splash | For the filling |
| egg | 1 | For the egg wash; whisked with a splash of milk or water |
| powdered sugar | 1 cup | For the glaze |
| brown sugar | 1/4 cup | For the glaze |
| light corn syrup | 2 Tbsp. | For the glaze |
| whole milk | 1-2 Tbsp. | For the glaze |
| ground cinnamon | 1/2 tsp. | For the glaze |
| vanilla extract | 1/2 tsp. | For the glaze |
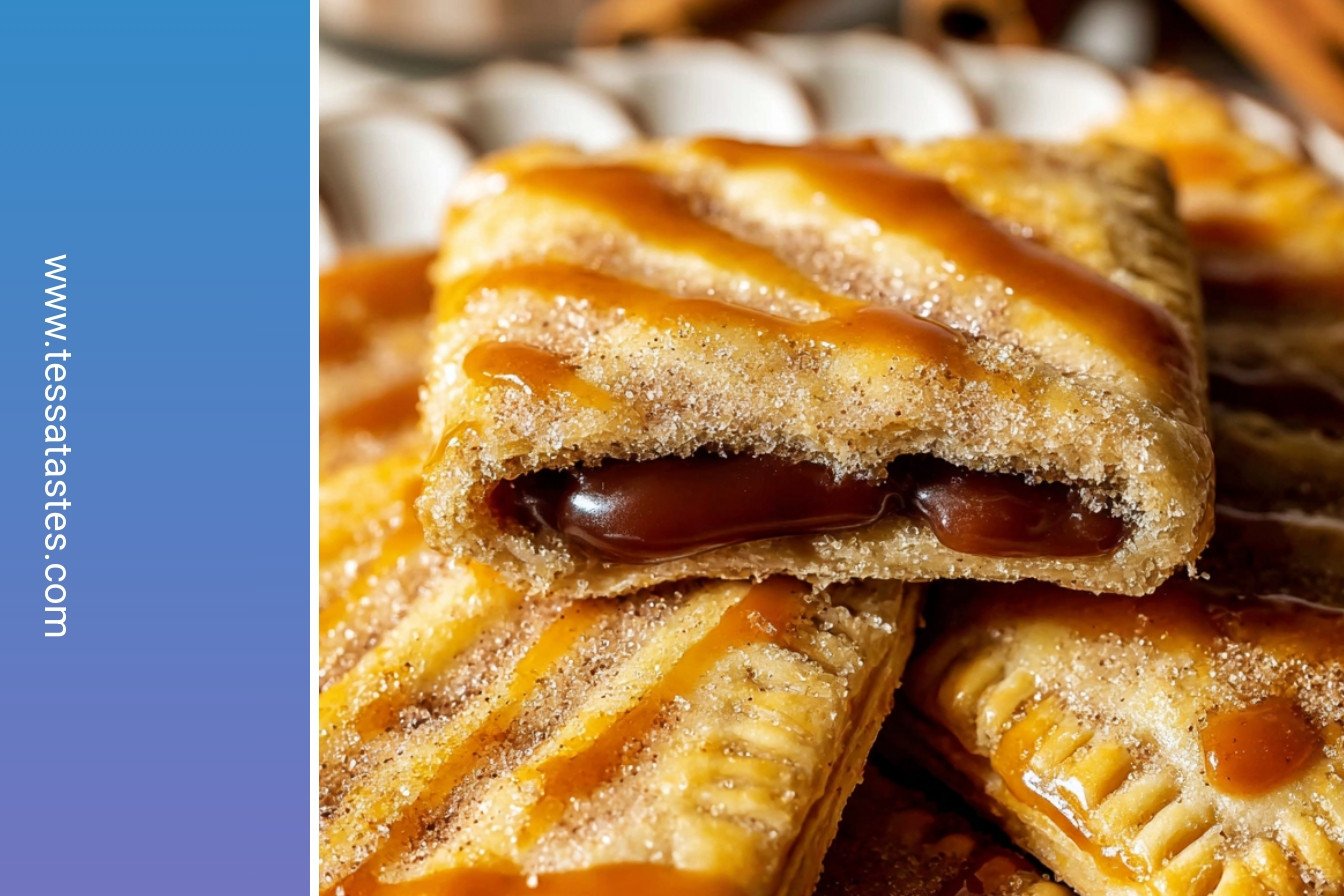
My Homemade Brown Sugar Pop Tarts
Oh, these take me back. My grandson Leo calls them “the fancy ones.” He loves them so much. I think it’s the brown sugar and cinnamon. Doesn’t that smell amazing? It fills the whole kitchen with warmth. Making the dough from scratch is the real secret. It feels like a little kitchen magic. Let’s make some memories together.
- Prep Time: 1 hour
- Cook Time: 20 minutes
- Total Time: 1 hour 20 minutes
- Yield: 8 pop tarts
- Category: Breakfast, Treat
Instructions
Step 1: First, we make our dough. Pulse the flour, powdered sugar, and salt together. Then add the cold butter and shortening. It should look like little pebbles. Drizzle in the ice water, one spoonful at a time. The dough will come together. (My hard-learned tip: Your butter must be cold! This makes the pastry flaky.)
Step 2: Press the dough into a disk on your counter. I love this part. It feels so promising. Divide it in half and wrap each piece. They need a good rest in the fridge. This helps the dough relax. I sometimes make it the night before. It makes the morning so special.
Step 3: Time to roll it out! Let the dough sit for a few minutes first. This makes it easier to handle. Roll it into a big rectangle. Don’t worry if it’s not perfect. Mine never are! Then, cut it into smaller rectangles. I use a little index card as a guide. I still laugh at that.
Step 4: Now for the fun filling. Mix the brown sugar, cinnamon, flour, and salt. Add the melted butter and vanilla. It becomes a sweet, fragrant paste. In another bowl, whisk your egg with a splash of milk. This is our “glue.” It helps seal our pop tarts shut. What’s your favorite sweet spice? Share below!
Step 5: Let’s assemble them. Brush egg wash on all the rectangles. Add a spoonful of filling to half of them. Leave a little border around the edge. Then, place another rectangle on top. Press the edges together gently. Chill them again before baking. This keeps their shape pretty.
Step 6: Preheat your oven. Brush the tops with more egg wash. Poke a few holes in each one with a toothpick. This lets the steam out. Bake them until they’re golden brown. The smell is just wonderful. Let them cool completely before you add the glaze.
Step 7: Finally, the glaze! Whisk the powdered sugar, brown sugar, and cinnamon. Add corn syrup, milk, and vanilla. Spread it thick on the cooled pop tarts. Let it set for an hour. It gets that perfect, crackly top. Then, you can finally enjoy your creation.
Three Tasty Twists to Try
Once you master the classic, you can get creative. I love playing with new fillings. It makes each batch a new adventure. Here are a few ideas my family adores. They are all so simple and delicious.
- Apple Pie Twist: Use a spoonful of thick apple butter inside. It tastes like a cozy fall day.
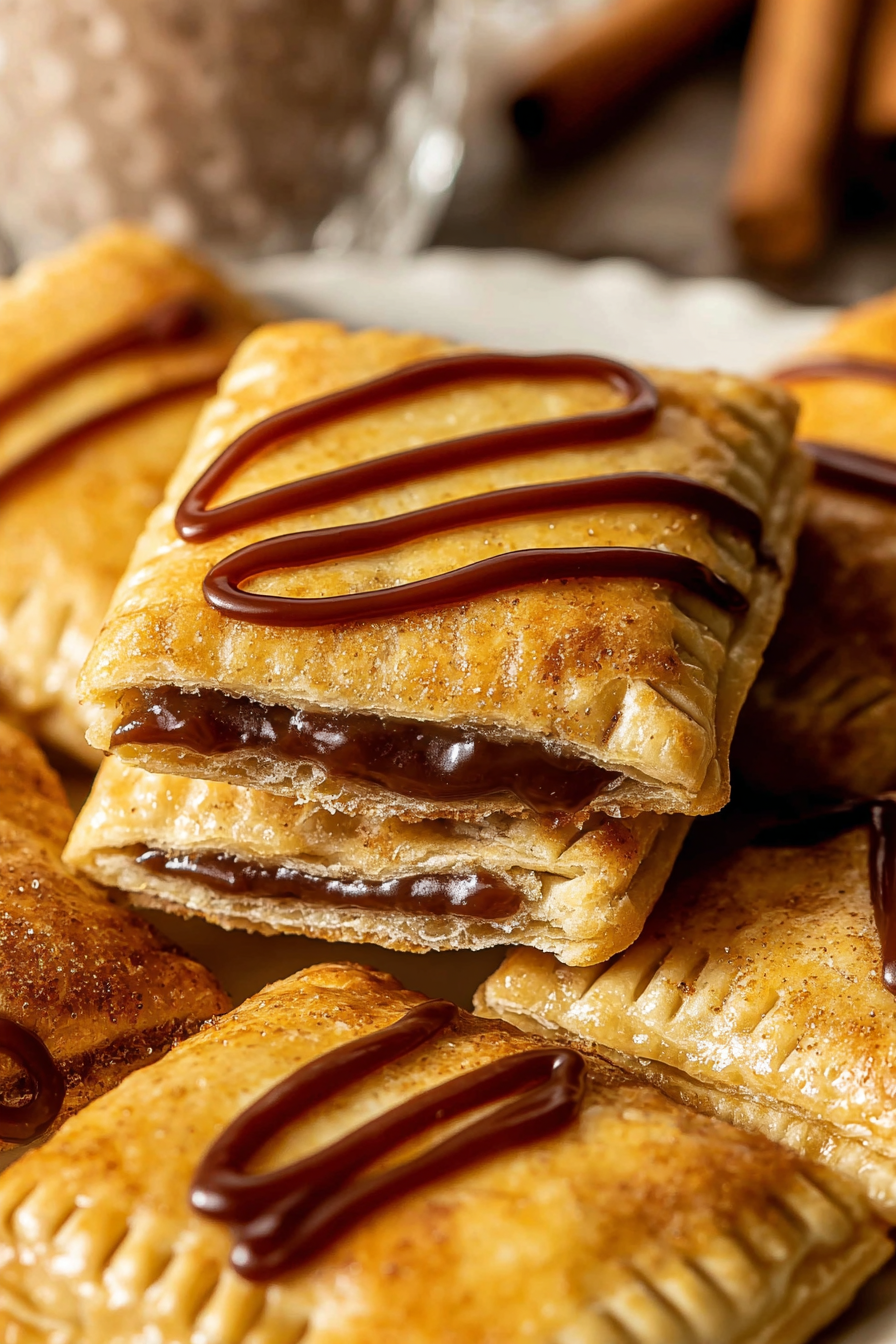
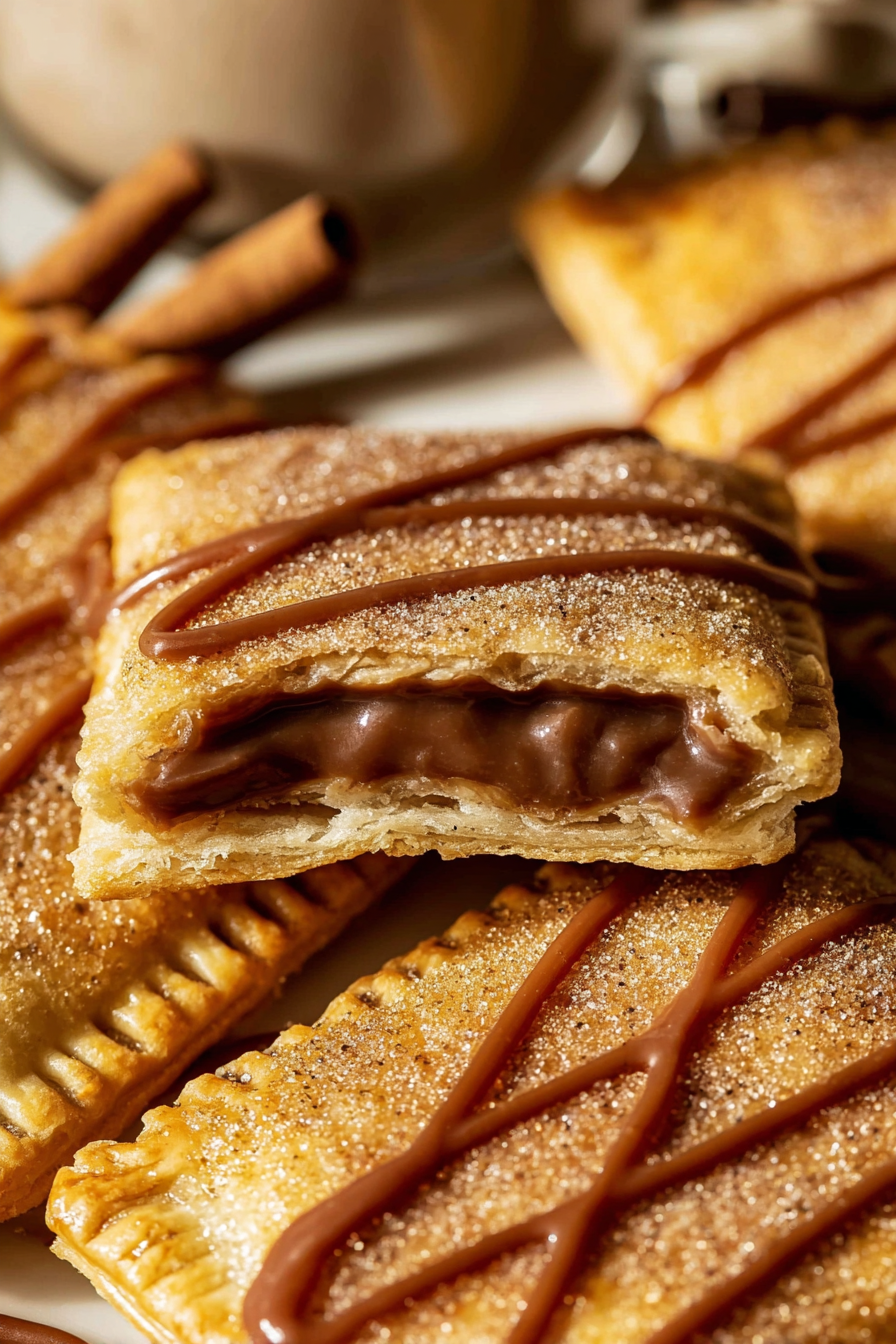
- Chocolate Dream: Swap the filling for Nutella. Add a few mini chocolate chips too. It’s a real treat.
- Jam Surprise: Use your favorite berry jam instead. Raspberry is my personal favorite. It’s so fruity and bright.
Which one would you try first? Comment below!
Serving Your Pop Tarts with Style
A warm pop tart is a joy all by itself. But you can make it a real event. I love serving these when friends visit. It feels so homey and welcoming. Here’s how I like to round out the experience.
For a full breakfast, add some fresh fruit on the side. A big bowl of berries is perfect. You could also add a dollop of whipped cream. For a drink, a tall glass of cold milk is the classic choice. For the grown-ups, a hot cup of coffee with cream pairs beautifully.
Which would you choose tonight?
Keeping Your Pop Tarts Perfect
These pop tarts are best fresh from the oven. But you can make them ahead. Let them cool completely after baking. Then store them in an airtight container. They will stay good for two days on the counter.
You can also freeze them for later. I wrap each one in plastic wrap. Then I put them all in a freezer bag. This stops them from getting freezer burn. I remember making a double batch for my grandson’s visit. He was so happy to find a warm pop tart for breakfast.
To reheat, just warm them in a toaster oven. This keeps the crust flaky. A microwave can make the pastry soft. Batch cooking like this saves you time on busy mornings. It means a special treat is always close by. Have you ever tried storing it this way? Share below!
Easy Fixes for Common Troubles
Is your filling bubbling out? You might have spread it too close to the edge. Always leave a good border. Press the edges together firmly. This seals the sugary goodness inside. I once got too eager and lost half the filling. It made a sticky mess in my oven.
Is your dough too soft and hard to roll? Your kitchen might be too warm. Just pop the dough back in the fridge. Let it chill for another fifteen minutes. This matters because cold dough is much easier to handle. It makes you feel like a confident baker.
Is your pastry not flaky? Your butter might have been too warm. Always use cold butter and water. A flaky crust makes the treat feel extra special. It is the sign of a well-made pastry. Which of these problems have you run into before?
Your Pop Tart Questions Answered
Q: Can I make these gluten-free? A: Yes. Just use your favorite gluten-free flour blend. The results are still very tasty.
Q: Can I make them ahead? A: Absolutely. You can freeze the unbaked pop tarts. Bake them straight from the freezer.
Q: What can I use instead of shortening? A: You can use all butter. The crust will be a bit richer. Fun fact: Using all butter gives you a wonderfully rich, buttery flavor.
Q: Can I double the recipe? A: Of course. It is a great idea for a big family or for freezing.
Q: Is the egg wash necessary? A: It helps the tops turn a beautiful golden brown. But you can skip it if you need to. Which tip will you try first?
From My Kitchen to Yours
I hope you love making these brown sugar pop tarts. Baking should be fun and full of joy. There is nothing better than sharing a homemade treat.
I would love to see what you create in your kitchen. Your photos always make my day. Have you tried this recipe? Tag us on Pinterest! I cannot wait to see your beautiful pastries.
Happy cooking! —Tessa Hammond.
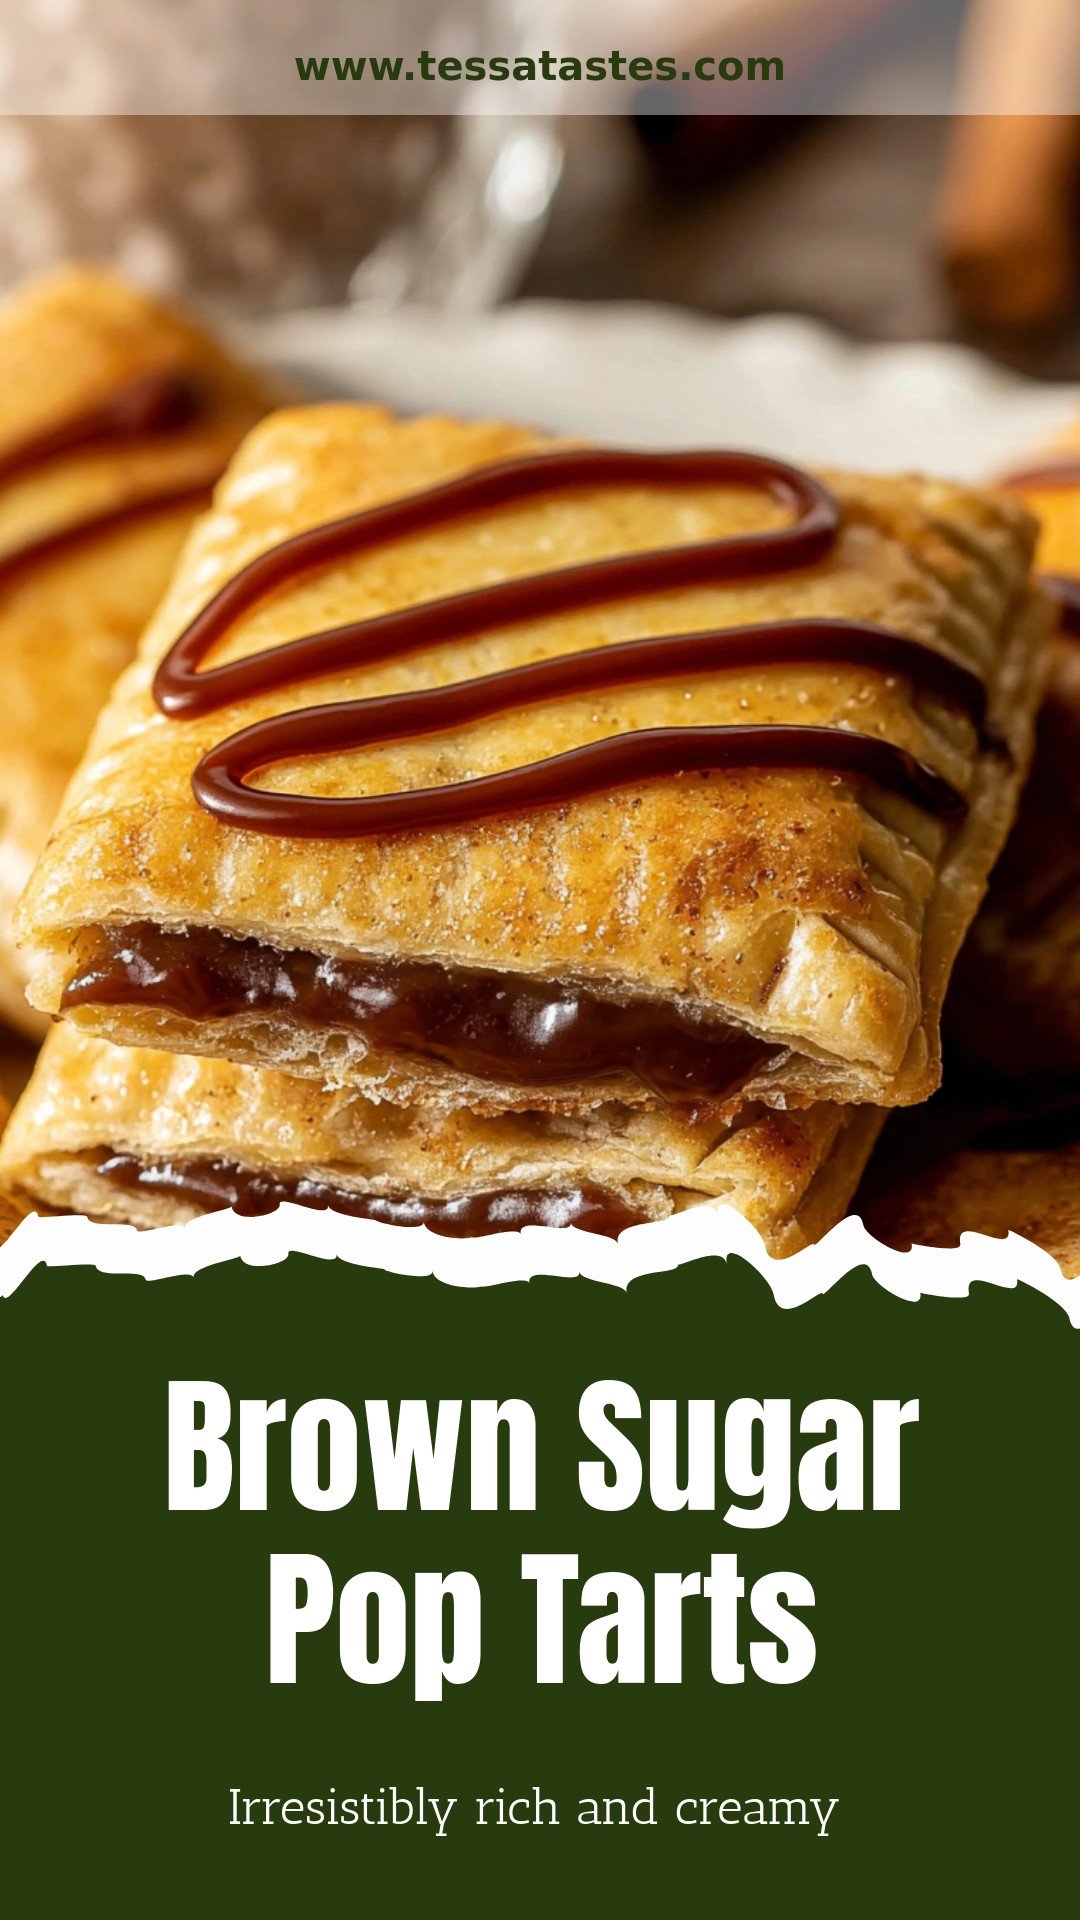
Brown Sugar Pop Tarts: Irresistibly rich and creamy
Description
Homemade Brown Sugar Pop Tarts with a sweet, cinnamon filling and creamy glaze. This easy, flaky pastry recipe is the ultimate breakfast treat or fun baking project.
Ingredients
=== For the dough ===
=== For the filling ===
=== For the glaze ===
Instructions
- Pulse the dry ingredients in a food processor. Pulse in the cold butter cubes and cold shortening. Slowly drizzle in the ice cold water, 1 Tbsp. at a time. It should be able to form into what feels like dough when pressed between your fingers.
- Turn out the dough on a clean cutting board or work surface and bring the dough together into a disk. Divide in half, and form into disks. Wrap each portion in plastic wrap and refrigerate for at least 1 hour, overnight, or up to 2 days.
- When ready, remove one disk from the fridge and allow to sit 5-10 minutes on the counter so it’s easier to roll out.
- Roll the dough into a rectangle on a lightly floured surface, about 1/4 inch thick.
- Cut the dough into ~3.5 inch x 4.75 inch rectangles. You can use a 3×5 index card for a guide or I like to usethis cookie cutter.Place on a parchment lined baking sheet and put in the fridge. Rework the dough and continue to cut out more rectangles. Repeat steps with other half of dough and place them in the fridge too on a separate baking sheet.
- Mix together the brown sugar, cinnamon, flour, salt, butter, and vanilla in a bowl. It should be like a paste like consistency.
- In another bowl, whisk together the egg and milk for the egg wash and set aside.
- Remove one baking sheet of the rectangles from the fridge.
- Lightly brush egg wash over each rectangle.
- Spread ~1 Tbsp. of the filling on half of the rectangles, spreading and gently pressing down but leaving at least a 1/4 – 1/2 inch border. The border is key so none of the filling oozes out.
- Place the other rectangle on top, egg wash side down, and gently press the edges together. Place these in the fridge and repeat the process with the others.
- Chill the assembled pop tarts for 30-60 minutes to ensure they keep their shape when baking.
- Preheat the oven to 350°F. Remove pop tarts from the fridge. Brush the tops with the remaining egg wash and poke ~6-8 holes in the tops using a toothpick or something similar.
- Bake for ~20 minutes or until the tops are a light golden brown. Cool for 5-10 min, and then transfer to cooling rack.
- Once cooled, whisk together all the icing ingredients. It should be thick. Spread on top. Let it set 1 hour so it can harden.
- Enjoy. Finally!
=== Dough: ===
=== Filling: ===
=== Assembly: ===
=== Glaze ===
Notes
- For best results, ensure all ingredients for the dough are very cold. The chilling steps are crucial for a flaky pastry.


Leave a Reply