The Heart of the Home
For me, an apple pie is pure happiness. It fills your kitchen with a cozy, sweet smell. That smell means everyone is home and all is right with the world. I hope you feel that, too.
This recipe is my go-to for a simple, delicious treat. It uses a few good apples and some warm spices. It’s not fussy at all. What’s your favorite smell that makes a house feel like a home? I’d love to know.
A Little Story About Apples
My grandson once tried to make a pie with sweet red apples. The filling was so runny! We had to eat it with spoons. I still laugh at that.
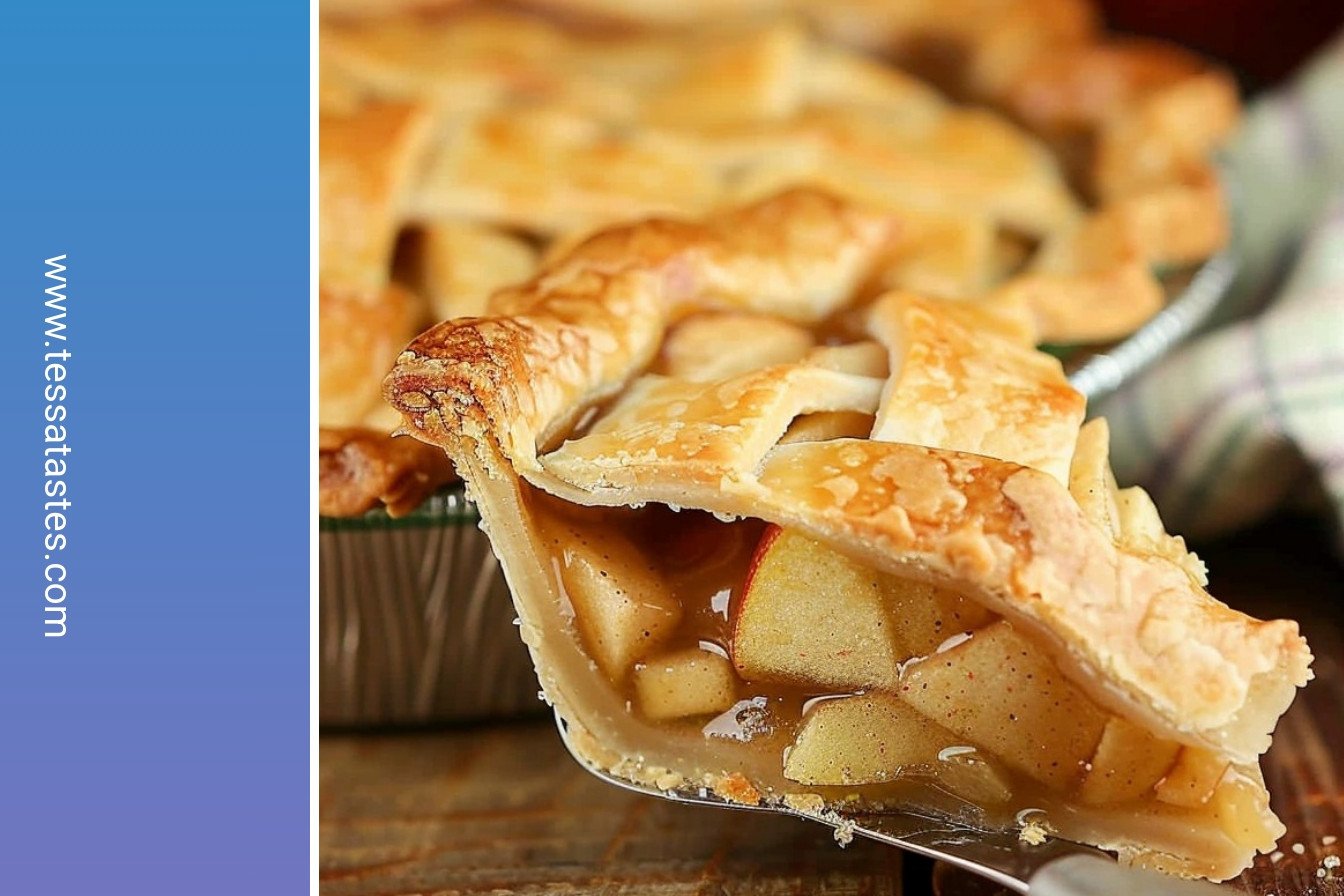
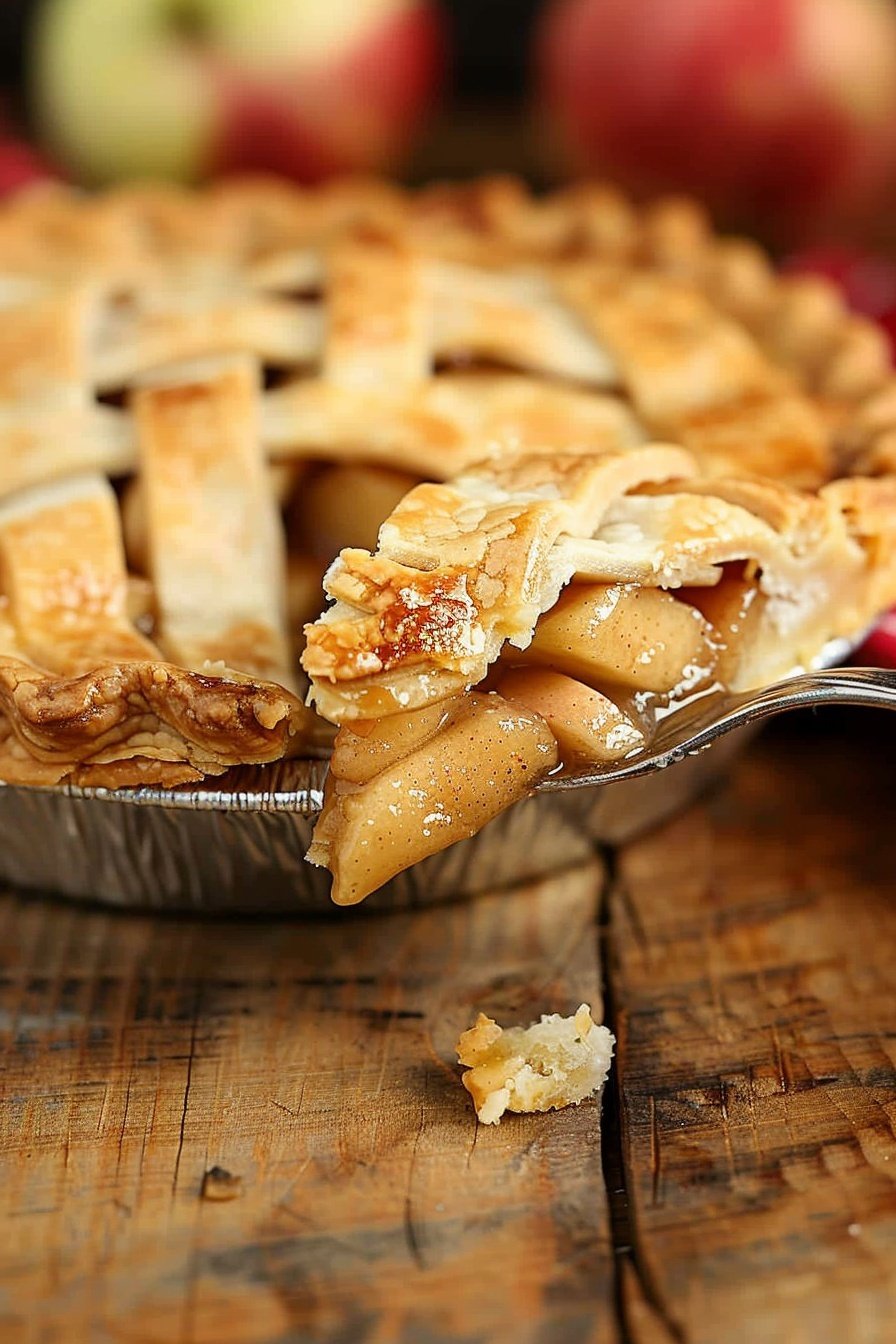
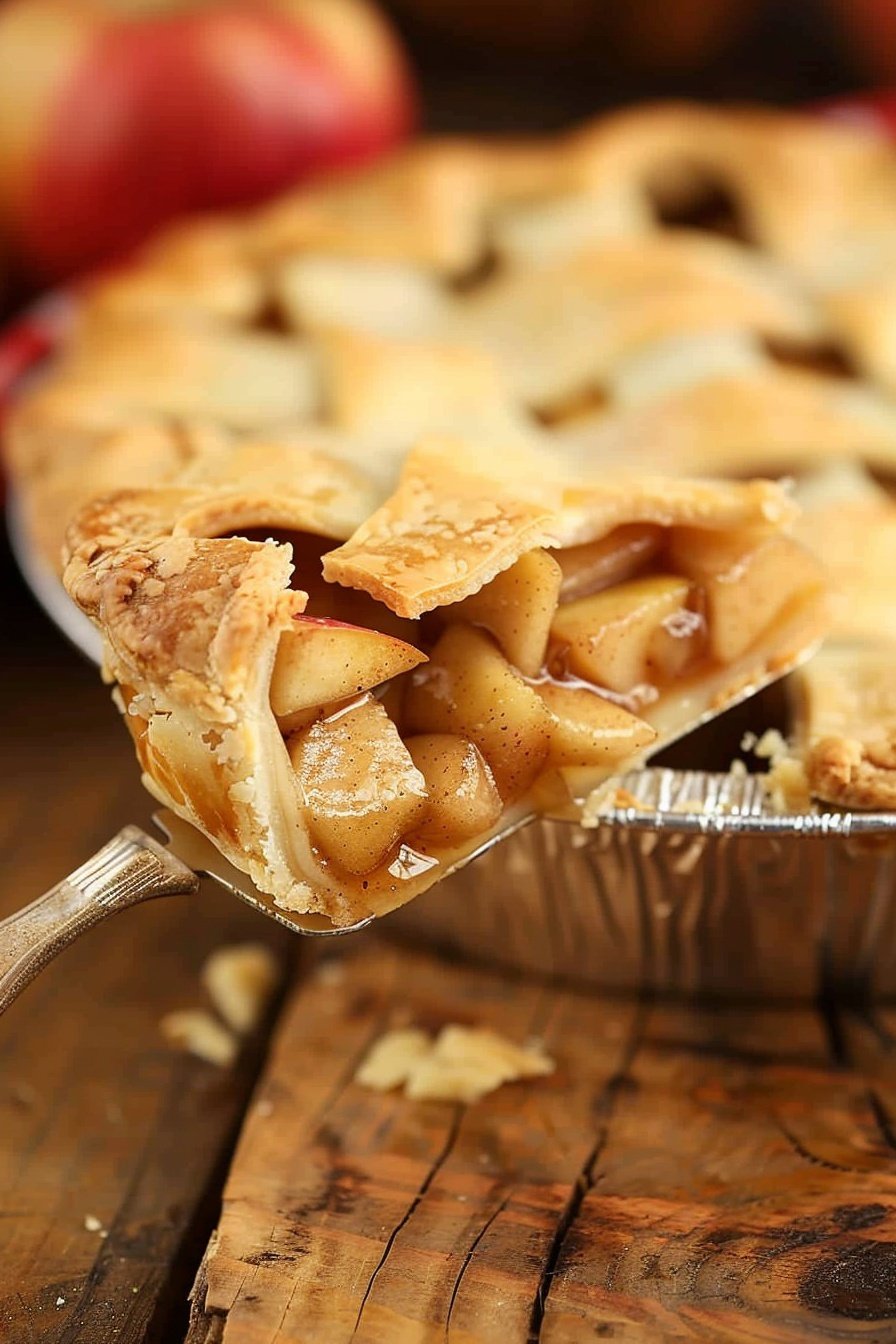
That’s why we use firm, tart apples here. They hold their shape and don’t get too mushy. This matters because you want perfect slices, not apple sauce. It makes your pie look and taste wonderful.
The Magic of the Spices
Cinnamon and nutmeg are the stars. When you mix them with the sugar, doesn’t that smell amazing? It’s like a warm hug for your nose.
Fun fact: nutmeg comes from the seed of a tropical fruit! Mixing your spices right into the sugar is a little trick. It makes sure every single apple slice gets a perfect coat of flavor. This matters for a pie where every bite is just right.
Putting It All Together
Don’t worry if your crust isn’t perfect. My first pie crust looked a bit lopsided. It still tasted delicious. The little slits on top are important. They let the steam out so your pie doesn’t get soggy.
Placing the pie on a baking sheet is a smart step. It catches any bubbly juices that escape. Do you like a lattice top or a solid crust with pretty slits? Tell me which one you try.
The Hardest Part
You must let the pie cool. I know, it’s so hard to wait! The smell is driving you crazy. But if you cut it warm, the filling will run everywhere.
Letting it cool for a few hours lets the juices thicken up. Then you get those perfect, beautiful slices. It’s worth the wait, I promise. What’s your favorite thing to eat with warm apple pie? Ice cream or whipped cream?
Ingredients:
| Ingredient | Amount | Notes |
|---|---|---|
| firm, tart apples (like Granny Smith) | 4 large | |
| sugar | 1/3 cup | |
| light brown sugar | 1/3 cup | firmly packed |
| cornstarch | 3 tablespoons | |
| salt | 1/4 teaspoon | |
| cinnamon | 1 teaspoon | |
| nutmeg | 1/8 teaspoon | |
| premade refrigerated pie crusts | 1 (14.1-ounce) box | 2 count |
| unsalted butter | 2 tablespoons | cut into small cubes |
My Cozy Apple Pie Adventure
Hello, my dear! Come sit with me. I want to share my favorite apple pie recipe. It always fills the house with the most wonderful smell. It reminds me of autumn afternoons with my own grandma.
We will use firm, tart apples. Granny Smith apples are my go-to. They hold their shape so nicely. The mix of cinnamon and nutmeg is just pure comfort. Are you ready? Let’s begin our baking adventure together.
Step 1: First, turn your oven on to 450°F. It needs to get nice and hot. Then, peel and slice your apples. Make the slices thin, about the width of a pencil. I still laugh at that one time I sliced them too thick. The pie took forever to bake!
Step 2: Put all those apple slices in a big bowl. Now, grab your sugars and spices. Whisk them all together in a smaller bowl. Doesn’t that brown sugar smell amazing? Sprinkle this sweet mixture over the apples and toss them gently. You want every slice to get a little hug of flavor.
Step 3: Let your store-bought pie crusts sit out for a bit. They are much easier to work with when they’re not cold. Gently unroll one crust into your pie dish. Press it in gently. (A hard-learned tip: if it tears, just patch it with a little piece from the edge. No one will ever know!)
Step 4: Now, pour your apple filling into the crust. Spread them out evenly. Don’t forget any of that juicy syrup in the bowl! Take your little cubes of butter and scatter them over the top. This makes the filling so rich and delicious.
Step 5: Time for the top crust! Unroll the second one and lay it over the apples. Tuck the edges under and pinch them together. You can make a simple crimped edge with your fingers. Then, cut a few slits in the top. This lets the steam out while it bakes. What shape would you make your steam vents? Share below!
Step 6: Place your pie on a baking sheet. This catches any bubbly spills. Bake it for 10 minutes at 450°F. Then, turn the oven down to 350°F. Bake for another 50 minutes. If the crust edges get too dark, just cover them with foil. The waiting is the hardest part, I think.
Step 7: This is very important. Let the pie cool completely. I know it’s tempting to cut it right away. But if you wait, the filling will thicken up perfectly. It takes about 2 to 3 hours. Then you can slice it and serve it slightly warm.
Cook Time: 1 hour
Total Time: 1 hour 30 minutes
Yield: 8 servings
Category: Dessert, Pie
Three Fun Twists to Try
Once you master the classic, you can have some fun. I love playing with new ideas. It keeps things exciting in the kitchen. Here are a few of my favorite twists on this old-fashioned pie.
Apple-Cranberry Sparkle: Add a handful of fresh cranberries to the apples. They add a lovely, tart little pop. The red color is so pretty, too.
Caramel Drizzle Dream: After the pie has cooled, drizzle it with warm caramel sauce. It’s like having a caramel apple, but in a pie. So decadent!
Oatmeal Cookie Crumble: Skip the top crust. Instead, mix oats, flour, brown sugar, and butter for a crumbly topping. It’s a different kind of delicious.
Which one would you try first? Comment below!
The Perfect Slice of Pie
Now, how should we serve our beautiful pie? A warm slice is wonderful all on its own. But a little extra treat makes it feel special. A scoop of vanilla ice cream is my classic choice. It melts into the pie in the most wonderful way. A dollop of freshly whipped cream is also divine.
What about a drink to go with it? For a cozy evening, a hot cup of tea or apple cider is perfect. If you’re feeling a bit fancy, a small glass of sweet dessert wine pairs beautifully. The flavors just sing together. Which would you choose tonight?
Keeping Your Apple Pie Cozy
Fresh apple pie is a wonderful treat. You can keep it on the counter for two days. Just cover it with a cloth.
For longer storage, the fridge is your friend. Wrap the cooled pie tightly in plastic. It will stay good for up to four days.
You can also freeze a baked pie. Let it cool completely first. Wrap it well in foil and freeze for up to three months.
I once reheated a frozen pie straight from the freezer. The center was still cold! Now I always thaw it in the fridge overnight.
Warm a slice in the oven for that just-baked feel. This matters because a warm pie makes any day feel special. Have you ever tried storing it this way? Share below!
Fixing Common Apple Pie Troubles
Is your bottom crust soggy? Try baking your pie on a preheated baking sheet. The extra heat helps crisp the bottom crust.
Are your apple slices overflowing? Pack them tightly into the pie dish. They will shrink down a lot as they cook.
I remember when my pie filling was too runny. I did not let it cool enough. Now I am always patient.
Letting the pie cool completely is crucial. This allows the filling to thicken up nicely. A perfect slice builds your cooking confidence.
Using the right apples makes the flavor brighter. Tart apples balance the sweet sugar. Which of these problems have you run into before?
Your Apple Pie Questions Answered
Q: Can I make this gluten-free? A: Yes! Just use your favorite gluten-free pie crust from the store.
Q: Can I make the filling ahead? A: You can mix the apples and sugar a day early. Keep it covered in the fridge.
Q: What if I don’t have nutmeg? A: A little extra cinnamon works just fine. Fun fact: My grandma always used a pinch of cardamom instead!
Q: Can I make a smaller pie? A: Sure. Just use a smaller dish and less filling. Your baking time will be shorter.
Q: Is the ice cream necessary? A: No, but it is a delicious treat. A cold scoop on warm pie is heaven. Which tip will you try first?
Bake Some Happy Memories
I hope you love baking this pie. The smell of warm apples and cinnamon is pure joy. It always fills my kitchen with happiness.
I would love to see your beautiful creation. Share a picture with all of us. Have you tried this recipe? Tag us on Pinterest!
Your stories and photos make my day. Thank you for baking along with me. Happy cooking!
—Tessa Hammond.

Classic Homemade Apple Pie: Warm Spiced Apple Bliss: Warm Spiced Apple Bliss
Description
Bake the perfect Classic Homemade Apple Pie. This easy recipe is filled with warm, spiced apples and a flaky, golden crust. The ultimate comforting dessert!
Ingredients
Instructions
- Preheat the oven to 450°F. Peel, core, and slice the apples into 1/8-inch slices.
- Add the apples to a large bowl. In a small bowl, whisk the sugar, brown sugar, cornstarch, salt, cinnamon, and nutmeg together. Sprinkle over the apples and toss to coat the apples in the sugar mixture.
- Allow the pie crusts to come to room temperature then gently unroll one crust to cover the bottom and sides of a 9-inch pie dish. Trim off the excess crust around the edges.
- Add the apples and any juice from the bowl into the crust. Spread the apples out evenly in the crust. Sprinkle the butter over the apples.
- Gently unroll the other crust and place it centered over the pie dish. Fold any overhang under the edge of the bottom crust and pinch together to seal. Crimp to form a decorative edge. Cut 3 to 4 3-inch slits in the top of the pie to allow it to vent.
- Place the pie on a rimmed baking sheet and place in the oven. Bake for 10 minutes at 450°F then reduce the heat to 350°F and bake for an additional 50 minutes. If the edges brown too quickly, cover them with strips of aluminum foil.
- Allow the pie to cool completely, 2 to 3 hours, before slicing. The filling will thicken as it cools. Serve slightly warmed with whipped cream or vanilla ice cream, if desired.
Notes
- Allow the pie to cool completely for the filling to set properly.


Leave a Reply