A Sweet Memory
My grandson once tried to make a milkshake with just a bowl and spoon. He ended up with a sticky mess. I still laugh at that.
It taught me that the best treats are often the simplest. You just need a few good ingredients and a blender. This recipe is one of those simple joys.
Why We Chill the Glasses
Putting the glasses in the freezer first seems like a small step. But it makes a big difference. A cold glass keeps your milkshake frosty for longer.
Nobody likes a watery, melted milkshake. That first cold sip is the best part. This little trick makes the whole experience better.
The Magic of Blending
Now for the fun part. Toss the ice cream, milk, and cookies into the blender. Listen to that crunch turn into creamy smoothness.
Doesn’t that smell amazing? The vanilla and chocolate mix together so nicely. *Fun fact: The first blender was invented to make milkshakes!*
Making It Pretty
Drizzling chocolate inside the glass is my favorite step. It feels like you are an artist. It makes the drink look special from the very first sip.
This matters because we eat with our eyes first. A pretty treat just tastes happier. What is your favorite way to decorate a milkshake?
Your Turn to Share
This recipe is a wonderful starting point. You can add a spoonful of peanut butter. Or maybe a handful of strawberries. Make it your own!
I love hearing your ideas. What cookie would you try in this milkshake? Tell me about your favorite kitchen creation. Did you have a funny kitchen mistake like my grandson?
Ingredients:
| Ingredient | Amount | Notes |
|---|---|---|
| Vanilla ice cream | 2 cups | |
| Whole milk | 1 cup | |
| Oreo cookies | 10 | Plus several more for garnish |
| Chocolate syrup | For garnish | |
| Whipped cream | For garnish |
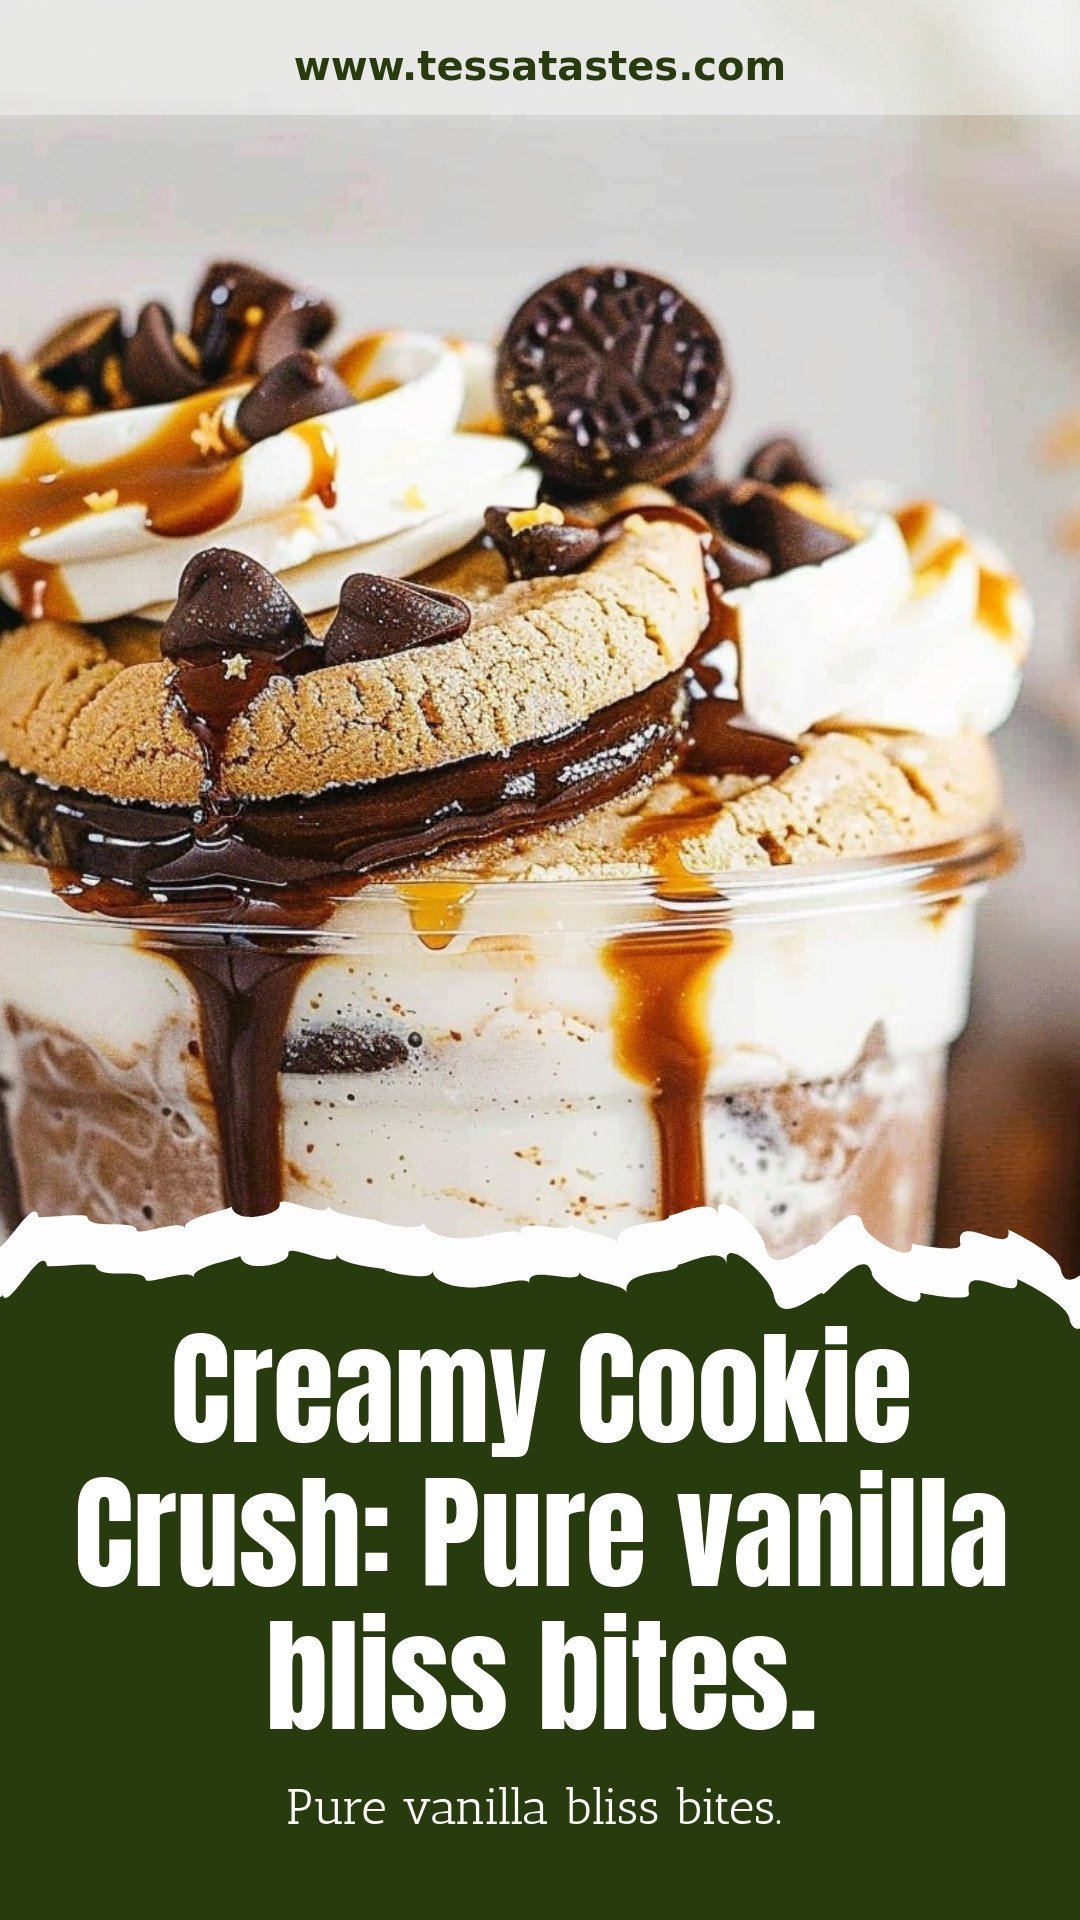
Creamy Cookie Crush: Pure Vanilla Bliss Bites
Oh, this recipe takes me back. My grandson Leo invented it one hot summer afternoon. He wanted the creamiest, cookie-filled milkshake possible. We had such a fun time testing it in my kitchen. I still laugh at that. His face was covered in whipped cream by the end.
It is the easiest treat to make together. You just need a blender and a happy heart. Let me walk you through our favorite method. I will share all our little secrets for the best result.
- Step 1: First, grab two tall glasses. Pop them right into the freezer. This chills them perfectly. A cold glass keeps your shake frosty for longer. It is a small step that makes a big difference.
- Step 2: Now for the fun part! Add the ice cream, milk, and ten cookies to your blender. Let it whir until it is super smooth. I love the sound of those cookies crunching up. Doesn’t that smell amazing? (A hard-learned tip: Let the ice cream soften for five minutes first. It saves your blender’s motor!).
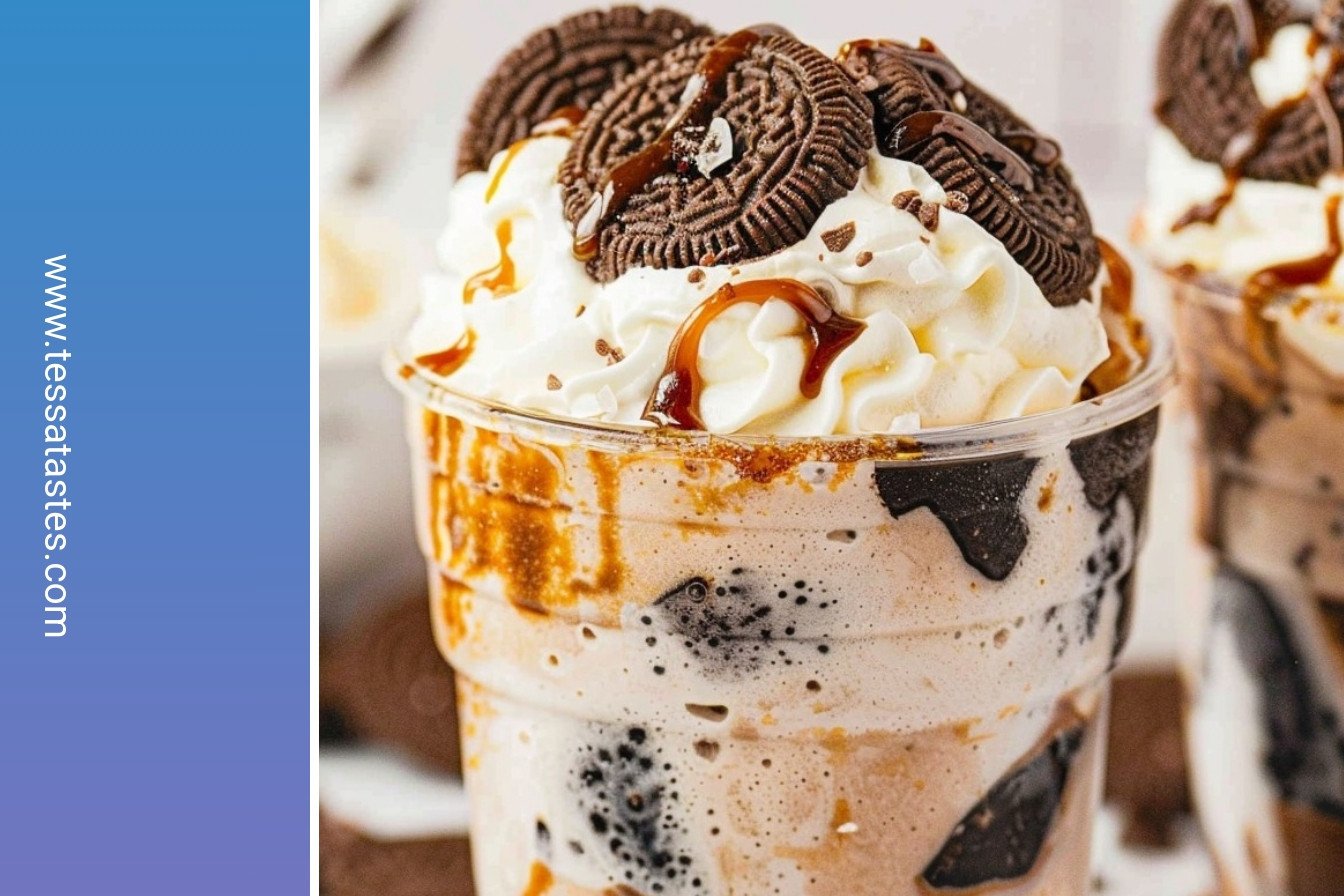
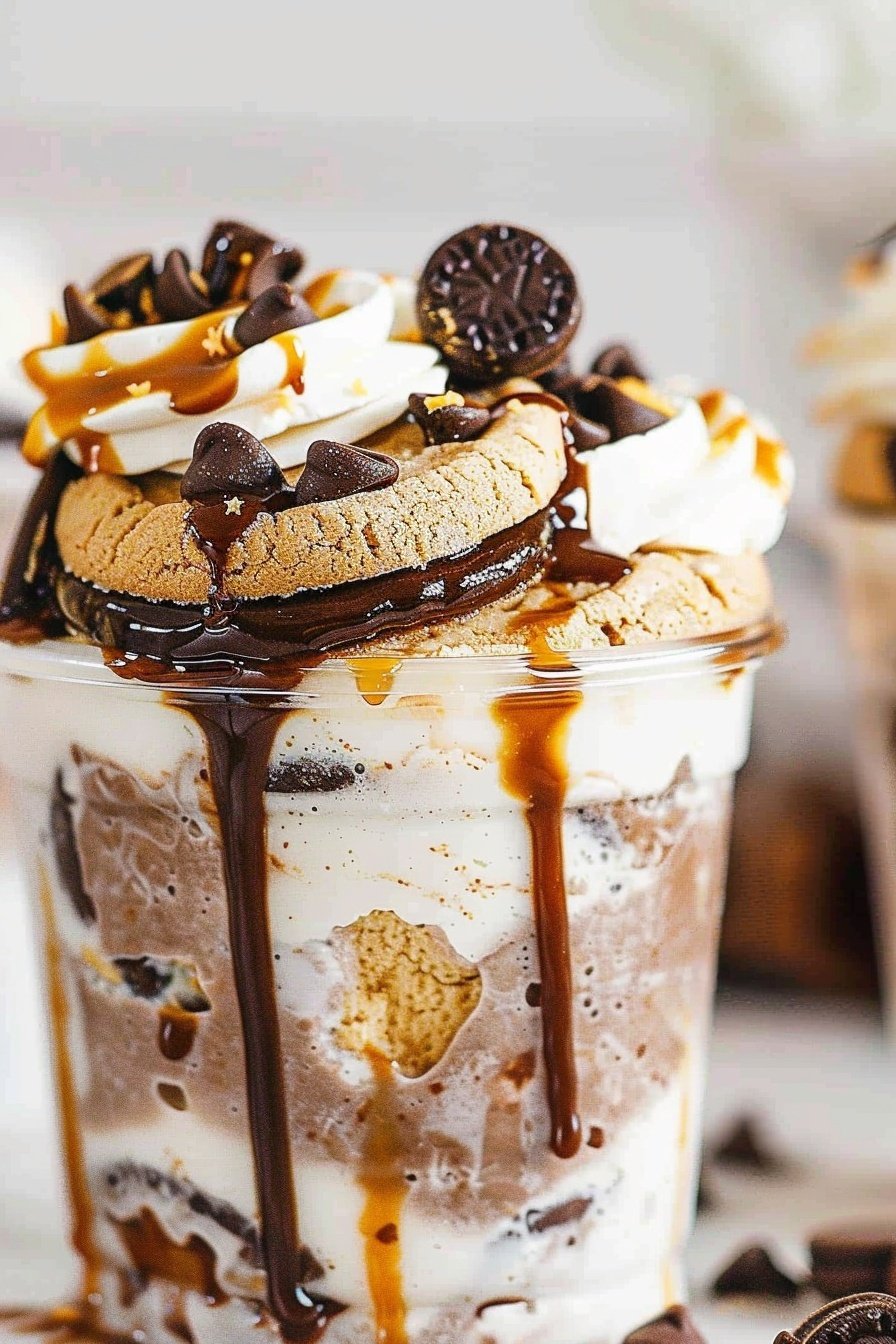
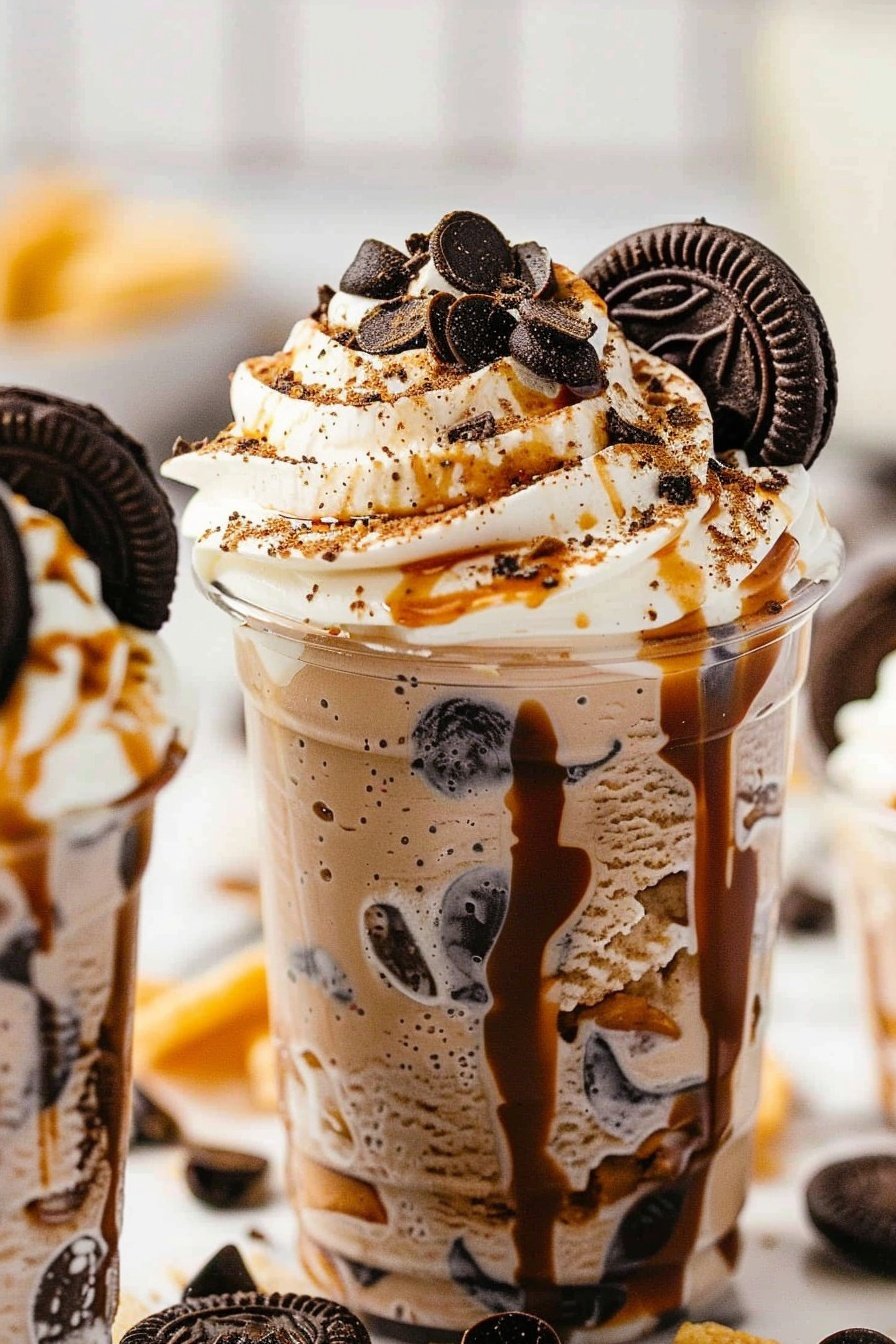
- Step 3: Take your chilled glasses from the freezer. Drizzle chocolate syrup inside. You can make pretty lines down the sides. This is my favorite step. It makes the drink look so fancy. It is like creating edible art.
- Step 4: Carefully pour your milkshake into the glasses. Try to divide it evenly between the two. No one wants a smaller share! I always give the glass with a little extra to Leo. He has a growing boy’s appetite.
- Step 5: Time for the toppings! Pile on the whipped cream. Add more chocolate syrup and some crushed cookies. Why not pop a whole Oreo on top? This is where you can be really creative. What is your favorite milkshake topping? Share below!
- Step 6: Serve your milkshakes right away. They are best enjoyed fresh and cold. Find a sunny spot to sit and sip. I promise you will feel pure joy with every single sip.
Prep Time: 10 minutes
Total Time: 10 minutes
Yield: 2 servings
Category: Dessert, Drink
Shake Up Your Shake!
This recipe is wonderful as it is. But you can also change it up. Here are a few fun twists we love to try. They are all so delicious in their own way.
- Peanut Butter Cup: Add two tablespoons of peanut butter to the blender. It tastes just like your favorite candy.
- Minty Fresh: Use mint chocolate chip ice cream instead of vanilla. It is so cool and refreshing on a warm day.
- Birthday Cake: Swap the Oreos for a handful of rainbow sprinkles. It turns into a party in a glass!
Which one would you try first? Comment below!
The Perfect Pairing
This milkshake is a treat all by itself. But sometimes, you want to make a whole event out of it. I love serving it with a small, salty snack. It balances the sweetness so nicely. A few pretzel rods on the side are just perfect.
For a real dessert party, try a pairing. A cold glass of milk is a classic choice. It might seem funny to have milk with a milkshake. But it works! For the grown-ups, a little shot of coffee liqueur is lovely. It adds a nice, deep flavor. Which would you choose tonight?
Keeping Your Milkshake Bliss
Milkshakes are best enjoyed right away. But sometimes you might want to save some. Pour any extra into an airtight container.
Press plastic wrap right on the surface. This stops ice crystals from forming. Then pop the lid on and freeze it.
I once made a big batch for my grandkids. We stored the leftovers just like this. It was still creamy the next day. This matters because a little planning means less waste and more sweet treats.
Let it sit on the counter for five minutes before re-blending. Have you ever tried storing it this way? Share below!
Simple Fixes for Shake Troubles
Is your shake too thick? Just add a splash more milk. Blend it again for a few seconds. This makes it easier to drink with a straw.
Is it not sweet enough for you? Add a tablespoon of chocolate syrup. Blend it right into the mixture. I remember when my grandson taught me that trick.
Are the cookies not crushed enough? Pulse your blender a few times first. This breaks them up before you fully blend. Getting the texture right builds your confidence in the kitchen. It also makes every sip perfectly delicious.
Which of these problems have you run into before?
Your Milkshake Questions Answered
Q: Can I make this gluten-free? A: Yes! Just use your favorite gluten-free chocolate sandwich cookies.
Q: Can I make it ahead? A: You can mix it and freeze it. But it is best fresh.
Q: What if I don’t have Oreos? A: Any chocolate cookie will work. You could even use brownies.
Q: Can I make more for a crowd? A: Absolutely. Just double or triple all the ingredients.
Q: Are the garnishes needed? A: No, they are just for fun. The shake is yummy without them. Which tip will you try first?
A Sweet Note From My Kitchen
I hope you love making this creamy treat. It always brings a smile to my face. Sharing food is one of life’s great joys.
I would love to see your creation. Have you tried this recipe? Tag us on Pinterest! Let’s build a community of happy, hungry friends.
*Fun fact: The first blender was invented to make milkshakes!*
Happy cooking!
—Tessa Hammond.
Creamy Cookie Crush: Pure vanilla bliss bites.: Pure vanilla bliss bites.
Description
Indulge in pure vanilla bliss with these creamy, soft-baked cookie bites. The ultimate easy dessert recipe for any sweet craving.
Ingredients
Instructions
- Place two tall milkshake glasses in the freezer to chill while making the milkshakes.
- Blend together ice cream, milk, and 10 Oreo cookies.
- Drizzle chocolate syrup on the inside of each chilled glass and/or along the rim.
- Divide the milkshake mixture between the two glasses.
- Top with whipped cream, more chocolate syrup, crushed Oreos, and/or a whole Oreo.
- Serve immediately.


Leave a Reply