The Best Kind of Messy
I first made this pie for my grandson’s birthday. He wanted something pink. The kitchen was a wonderful mess by the end. I still laugh at that.
This pie is not baked. It is chilled. So it is perfect for a hot summer day. Your oven gets to take a nap. What is your favorite no-bake dessert to make when it’s hot outside?
A Cloud in a Pie Crust
Let’s make the creamy filling. You whip the heavy cream first. Watch it turn into fluffy white clouds. Doesn’t that smell amazing?
Then you mix the soft cream cheese with powdered sugar. It gets so smooth. The vanilla makes it smell like a happy memory. This matters because taking your time here makes the pie extra smooth.
The Magic of Gelatin
Now for the secret helper. It is gelatin. You mix it with water and it looks like wet sand. Then you heat it for a few seconds.
Fun fact: Gelatin comes from animal collagen. It is what makes Jell-O jiggle! You mix this into the cream cheese. It helps the whole pie hold its shape later. This step matters because it turns our creamy fluff into a sliceable dream.
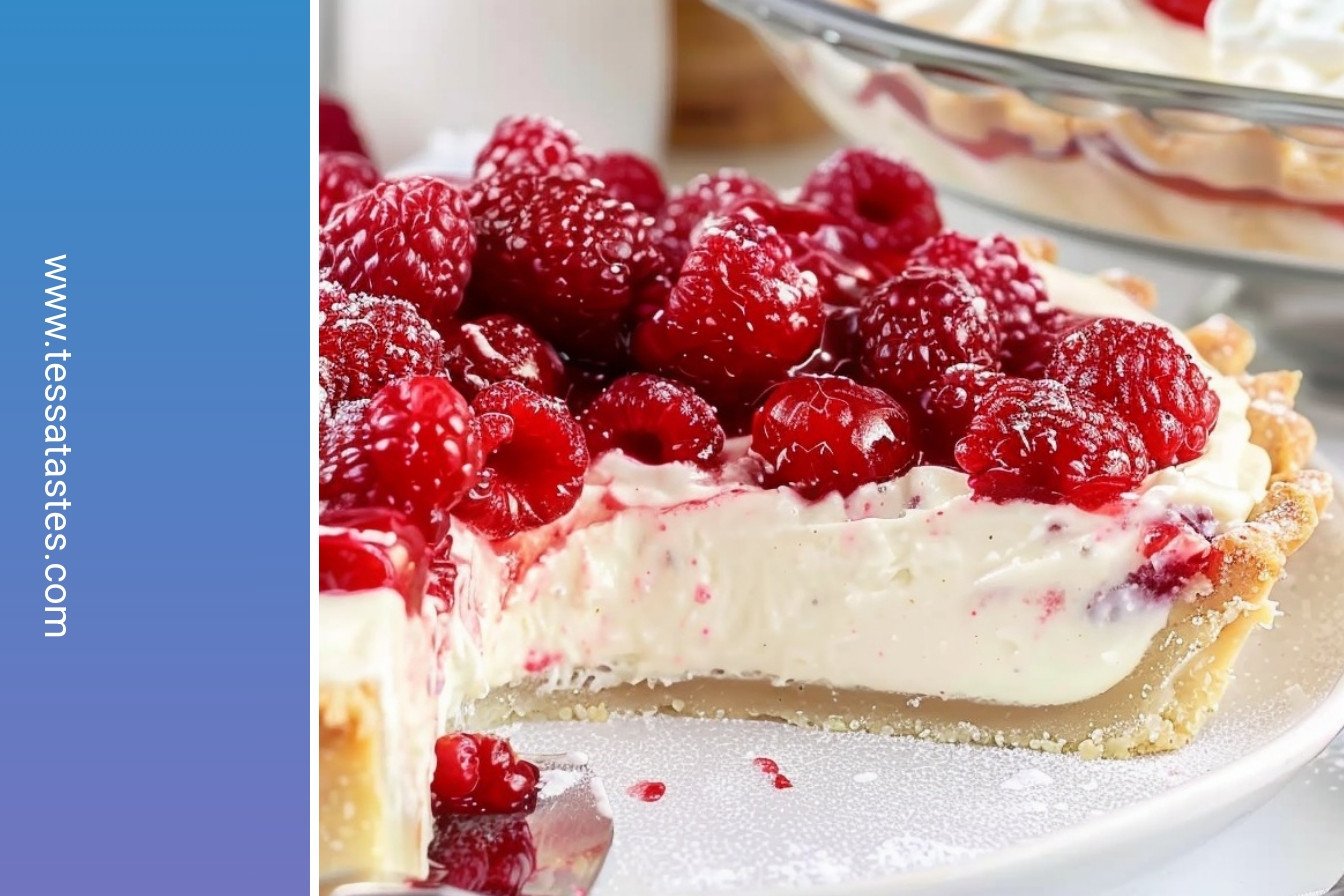
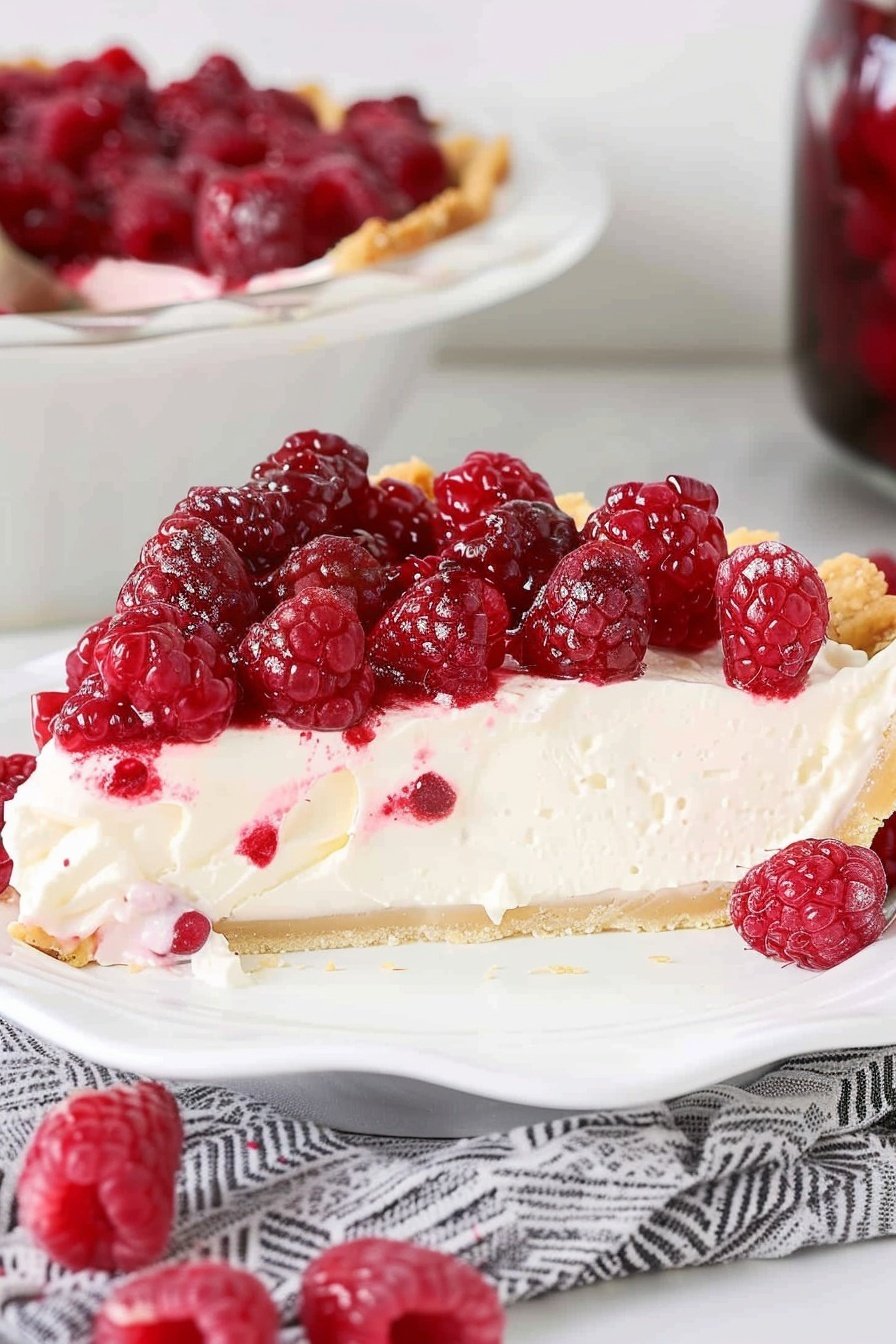
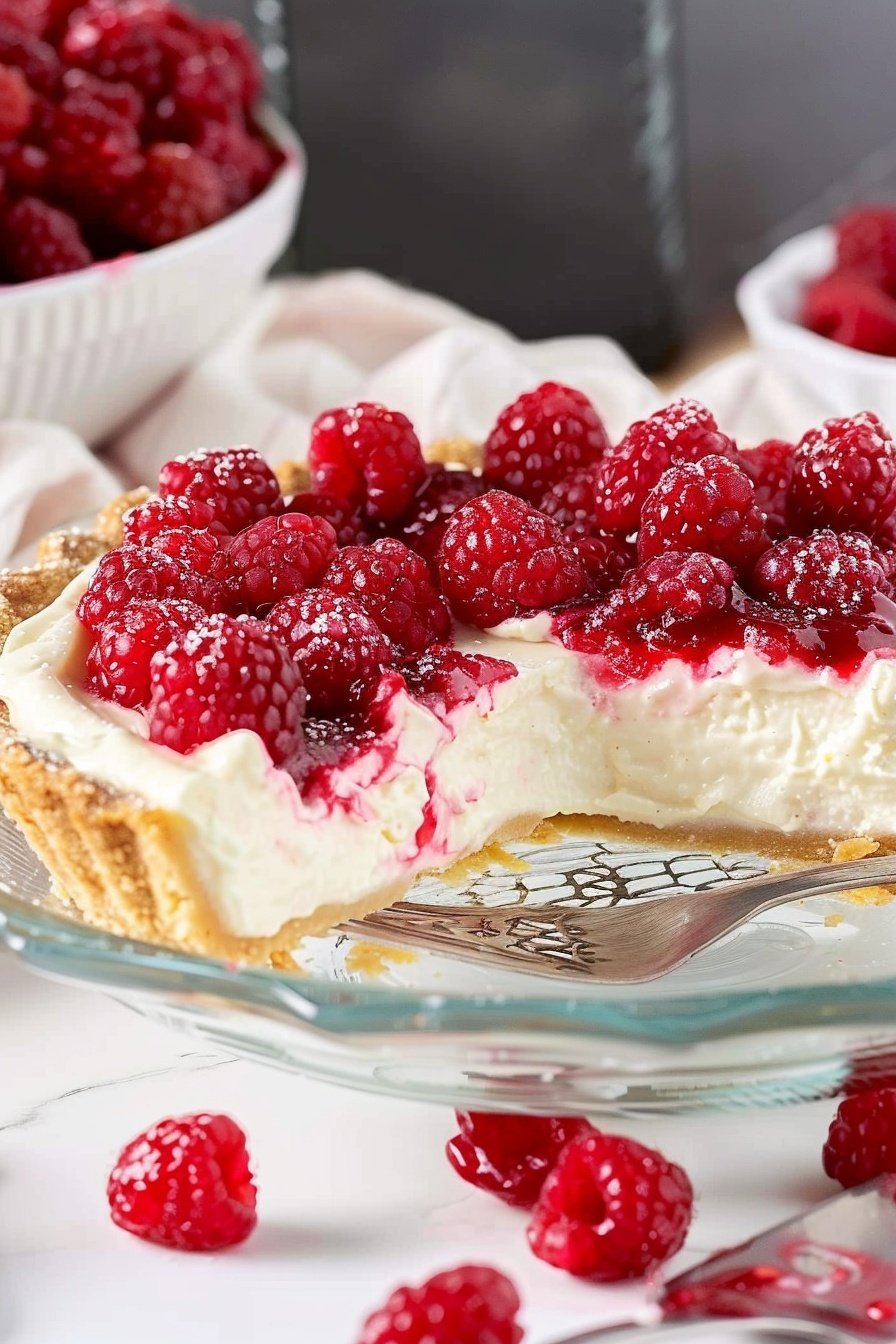
A Shiny Berry Blanket
The topping is my favorite part. You take beautiful red raspberries. You coat them in warm, shiny jam. It is like putting a glossy blanket on them.
Be gentle when you spoon them onto the cream. You want to keep some of that lovely juice off the pie. Do you prefer your berries sweet or a little tart?
The Hardest Part
Now comes the test. You must put the pie in the fridge. It needs to chill for at least five hours. I know, it is so hard to wait!
But trust me, it is worth it. The wait lets all the flavors become friends. The texture becomes just perfect. What is the hardest part about waiting for a treat to be ready for you?
Ingredients:
| Ingredient | Amount | Notes |
|---|---|---|
| Cold water | ½ cup | For filling |
| Unflavored gelatin | 2¼ teaspoons | For filling (like Knox brand – 1 (0.25-ounce packet)) |
| Heavy whipping cream | 1 cup | For filling |
| Pre-baked pie crust | 1 | For filling |
| Cream cheese | 12 ounces | For filling (softened and room temperature) |
| Powdered sugar | 2 cups | For filling |
| Vanilla extract | 2 teaspoons | For filling |
| Fresh raspberries | 1 pound | For topping (washed and dried) |
| Cold water | 2 tablespoons | For topping |
| Unflavored gelatin | 2¼ teaspoons | For topping (like Knox brand – 1 (0.25-ounce packet)) |
| Seedless raspberry jam/jelly | ½ cup | For topping |
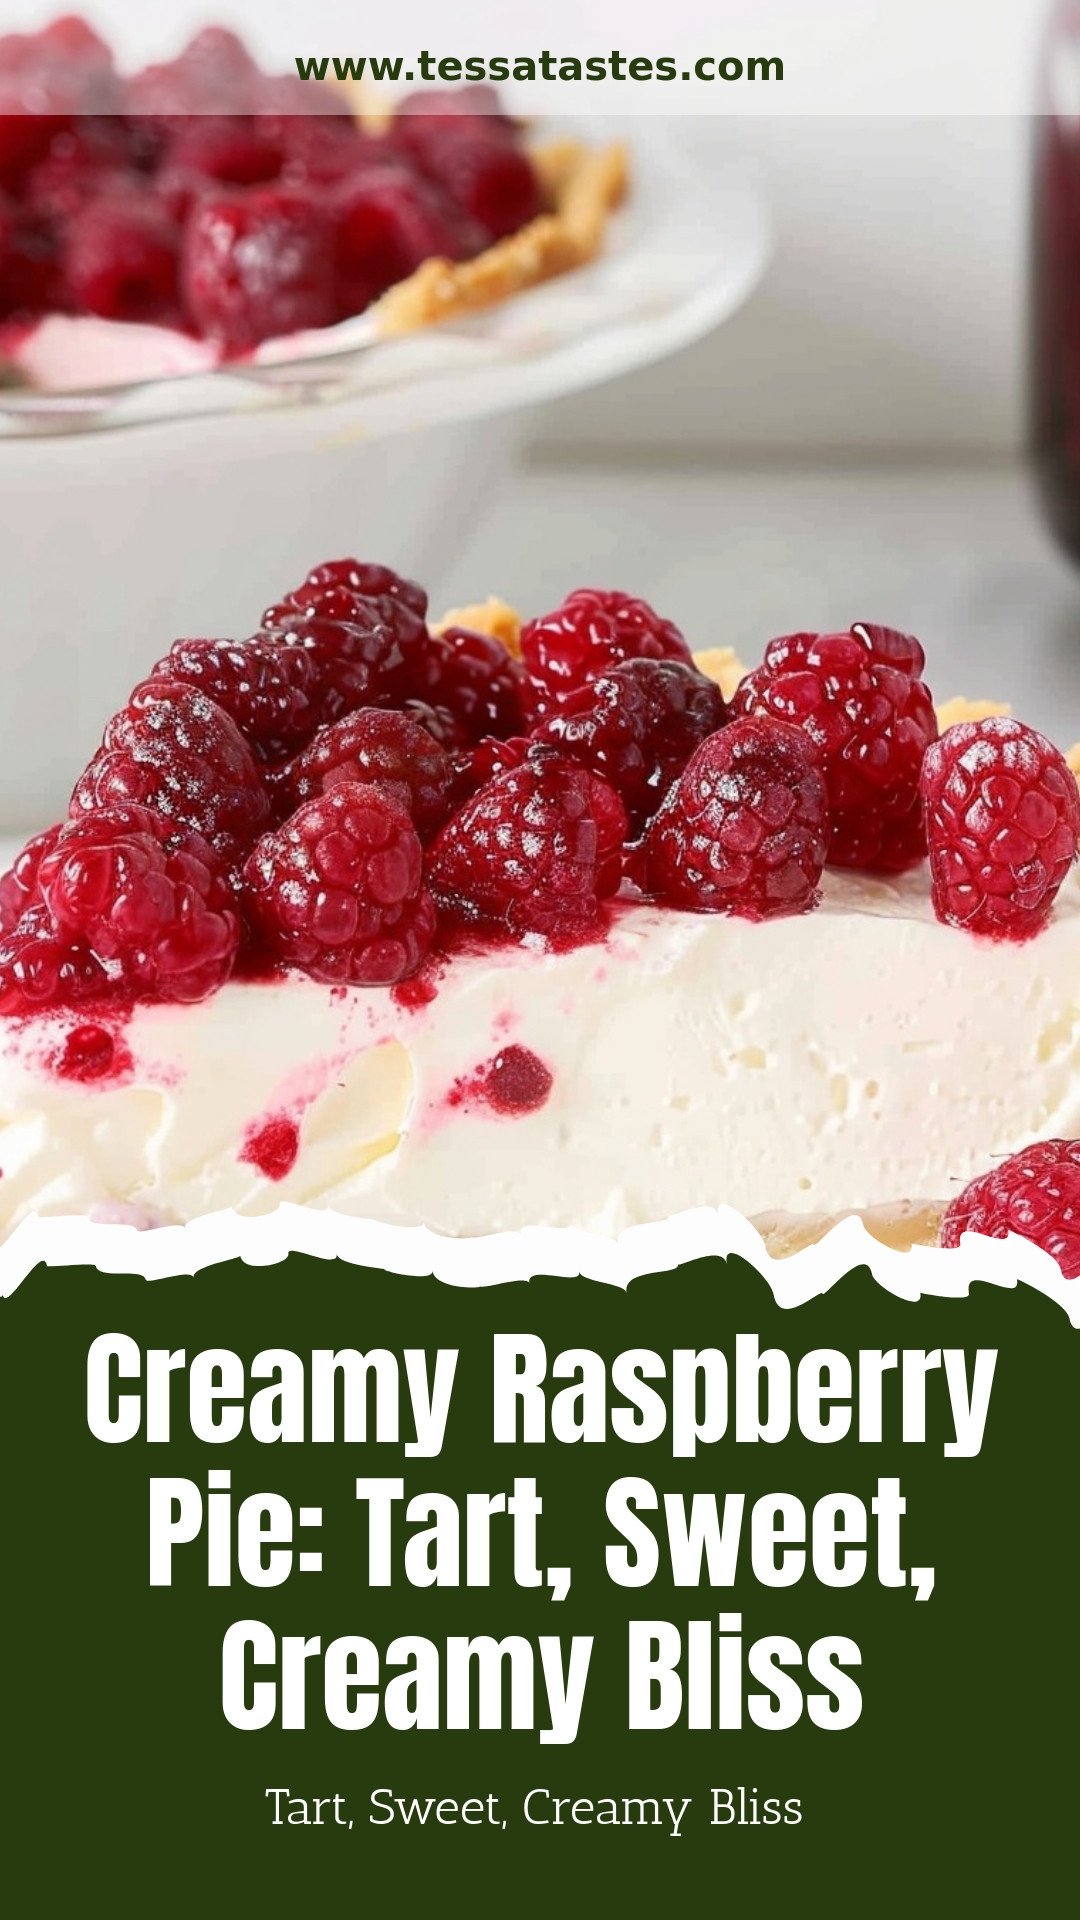
Creamy Raspberry Pie: Tart, Sweet, Creamy Bliss
Oh, this pie brings back such happy memories. My granddaughter Lily helped me make it last summer. Her face was covered in pink jam by the end. I still laugh at that.
It looks fancy, but it’s really quite simple. We just take it one step at a time. The secret is letting the fridge do most of the work. You’ll feel so proud when you pull it out.
- Step 1: Let’s start with the gelatin. Sprinkle it over cold water in a small bowl. Gently swirl it until the water soaks it all up. It will look a bit cloudy. Just set it aside for now.
- Step 2: Now for the fun part. Pour the heavy cream into a medium bowl. Use your mixer on medium-high speed. Watch for soft peaks to form. (A hard-learned tip: Make sure your bowl and beaters are cold. It whips up much faster that way!)
- Step 3: In another bowl, blend the softened cream cheese. Mix it until it’s smooth and fluffy. This is the base of our creamy filling. Doesn’t that smell amazing already?
- Step 4: Add the powdered sugar and vanilla. Start your mixer on low speed. This keeps the sugar from flying everywhere! Then mix on medium-high until it’s all smooth.
- Step 5: Warm the gelatin in the microwave for about 20 seconds. Stir it well. With the mixer on low, slowly pour it into the cream cheese. This helps everything set later.
- Step 6: Time to be gentle. Add the whipped cream to the cream cheese bowl. Use a spatula to fold it in. Go slowly so you don’t flatten all the air out.
- Step 7: Spread this creamy dream into your pie crust. Smooth the top with your spatula. Pop it into the fridge. It needs to chill while we make the topping. Do you like your desserts more tart or more sweet? Share below!
- Step 8: Wash your beautiful raspberries. Pat them dry with a towel. This is very important. Wet berries will make the topping runny.
- Step 9: Just like before, mix gelatin with cold water. Let it sit for a few minutes. It will become a little bit thick. This is perfectly normal.
- Step 10: Warm the raspberry jam in the microwave. Whisk it until it’s nice and smooth. This will be our shiny glaze.
- Step 11: Whisk the gelatin into the warm jam. Make sure it all dissolves. You don’t want any little lumps in your glossy topping.
- Step 12: Gently toss the dry raspberries in the jam mixture. Coat every single berry. They will look so pretty and glistening.
- Step 13: Take your pie out of the fridge. Use a slotted spoon to scoop the berries on top. This leaves extra liquid behind. We want a pretty pie, not a soggy one!
- Step 14: Back into the fridge it goes. You must be patient now. Let it chill for at least five hours. Overnight is even better.
- Step 15: Finally, slice and serve! A little extra whipped cream on the side is lovely. Enjoy every creamy, fruity bite.
Cook Time: 0 minutes
Total Time: 5 hours 20 minutes
Yield: 8 servings
Category: Dessert, Pie
Three Tasty Twists on Our Raspberry Pie
This recipe is like a good friend. It’s happy to go on new adventures with you. Feel free to play around with it. Here are a few ideas to get you started.
- Lemon Zest Dream: Add the zest of one lemon to the cream cheese filling. It gives a lovely, sunny zing that pairs so well with the raspberries.
- Chocolate Crust Surprise: Use a chocolate cookie crust instead of a plain one. It adds a rich, deep flavor that makes the pie feel extra special.
- Mixed Berry Bonanza: Use a mix of raspberries, blueberries, and blackberries for the topping. It’s a beautiful and delicious celebration of summer.
Which one would you try first? Comment below!
Serving Your Beautiful Pie
This pie is a star all on its own. But a few little touches can make it even better. I love to add a dollop of freshly whipped cream on the side. A sprig of mint looks so pretty on the plate, too.
For a drink, a cup of hot tea is just perfect. It cuts through the sweetness nicely. If you’re feeling fancy, a glass of champagne or prosecco is a wonderful match. The bubbles are so fun with the creamy pie.
Which would you choose tonight?
Keeping Your Raspberry Pie Perfect
This pie is best kept in the fridge. Just cover it loosely with plastic wrap. It will stay fresh for about three days.
You can also freeze slices for later. Wrap each piece tightly in plastic. Then place them in a freezer bag. I once forgot a slice in the freezer for a month. It was still a lovely treat!
This matters because a good dessert should bring joy for days. Batch cooking lets you share with friends or save for a busy day. Have you ever tried storing it this way? Share below!
Easy Fixes for Common Pie Problems
Is your filling too soft? The gelatin might not have dissolved. Make sure you whisk it into warm jam very well. I remember when my first pie was runny. Now I am very careful with the gelatin.
Are your berries making the crust soggy? Pat them completely dry first. A soggy crust can ruin a perfect pie. Is the cream cheese lumpy? Let it get soft at room temperature first.
Getting these steps right builds your cooking confidence. A perfect slice also tastes so much better. Which of these problems have you run into before?
Your Pie Questions Answered
Q: Can I make this gluten-free? A: Yes! Just use your favorite gluten-free pie crust.
Q: Can I make it ahead? A: Absolutely. Make it the day before you need it.
Q: What if I don’t have fresh berries? A: Frozen berries work, but thaw and dry them well.
Q: Can I make a smaller pie? A: You can halve the recipe for a smaller dish.
Q: Is the whipped cream necessary? A: No, but it adds a lovely extra creamy touch. Which tip will you try first?
From My Kitchen to Yours
I hope you love making this creamy raspberry pie. It always reminds me of summer afternoons. My grandkids’ faces light up when they see it on the table.
*Fun fact: Raspberries are not true berries! They are made of many tiny fruits.* I would love to see your beautiful creations. Have you tried this recipe? Tag us on Pinterest!
Happy cooking! —Tessa Hammond.
Creamy Raspberry Pie: Tart, Sweet, Creamy Bliss
Description
Indulge in this creamy raspberry pie! A perfect balance of tart and sweet in a no-bake, easy dessert that’s pure bliss.
Ingredients
Filling
Topping
Instructions
- In a small bowl, combine the water and gelatin. Gently swirl the gelatin around, making sure that it is completely absorbed by the water. Set aside.
- In a medium-sized bowl, use a hand mixer on medium-high speed to whip the heavy cream until stiff peaks form. Set aside.
- In another medium-sized mixing bowl, use a handheld mixer on medium-high speed to blend the cream cheese until smooth and fluffy.
- Add the powdered sugar and vanilla extract and continue mixing for 1½ to 2 minutes or until no lumps remain. Start your mixer on low, then work up to medium-high speed.
- Heat the bowl with the gelatin and water mixture in the microwave for 20 to 30 seconds. Give it a good stir making sure that there are no lumps remaining. While your mixer is on low speed, pour the warm gelatin into the bowl of the cream cheese mixture. Mix on low for 1 to 2 minutes or until completely combined.
- Gently fold the whipped heavy cream into the cream cheese mixture just until everything is evenly incorporated.
- Spread the cream cheese mixture evenly into the pre-baked pie crust. Refrigerate the cream cheese pie base while you prepare the raspberry topping.
- Prepare your fresh raspberries by rinsing them in cool water and then patting them completely dry. Set them out on a dish towel or paper towels to dry.
- In a small bowl, add the water and unflavored gelatin. Gently swirl to make sure that all the gelatin is mixed with the water. Let it sit for about 2 to 3 minutes to thicken.
- In a microwave-safe bowl, heat the seedless raspberry jam in the microwave on high for 30 to 45 seconds. Whisk until the jam is smooth and pourable.
- Add the gelatin mixture to the warm jam and whisk again until it is completely incorporated and no lumps remain.
- Pour the jam mixture over the berries and gently combine, making sure that all the berries are coated.
- Remove the pie from the refrigerator. Use a slotted spoon to spoon the berry mixture gently over the cheesecake filling, being careful not to get too much extra liquid on the pie.
- Place the pie back in the refrigerator to chill and set for at least 5 hours (or up to overnight).
- Slice the pie and serve. Top with whipped cream for serving, if desired.


Leave a Reply