A Sweet and Salty Memory
I first made these treats for my grandson Leo. He was having a tough week at school. His face lit up after one bite. I still laugh at that happy chocolate smile.
That is why this recipe matters. A small, sweet treat can turn a whole day around. It is a little hug for your heart. What is your favorite treat to eat when you need a smile?
Let’s Get Our Hands Dirty
First, line your muffin cups. Now, we melt the chocolate. Go slow with 30-second bursts in the microwave. Stir well in between. Doesn’t that smell amazing?
We put a little chocolate in each liner. Then we shake the pan to spread it. This makes a perfect bottom crust. Pop it in the freezer. The hard part is waiting!
The Magic in the Middle
While the chocolate chills, make the filling. Peanut butter, powdered sugar, and soft butter go in a bowl. Mix it until it is super creamy. I like to taste a tiny bit.
*Fun fact*: Peanut butter was first made by the Aztecs and Incas! Now, plop the filling on the cold chocolate. Try to keep it from touching the sides. This keeps the layers neat.
The Final Chocolate Coat
Melt the rest of your chocolate. It is the same easy method. Then, cover that peanut butter layer completely. Be generous with the chocolate!
Back into the cold it goes. The freezer works fastest. The fridge is fine too. This last chill makes them firm and perfect for eating. Do you prefer your treats crunchy or chewy?
Why We Make Food With Love
Sharing food you made is a special kind of love. It says, “I was thinking of you.” That is why this matters. It is not just about the ingredients.
It is about the time and care you put in. Anyone can buy a candy bar. But you made this. Tell me, who would you love to make these for?
Ingredients:
| Ingredient | Amount | Notes |
|---|---|---|
| Semi-sweet chocolate chips | 14 ounces | Divided in half |
| Creamy peanut butter | 1 cup | |
| Powdered sugar | 6 tablespoons | |
| Butter | 4 tablespoons | Softened |
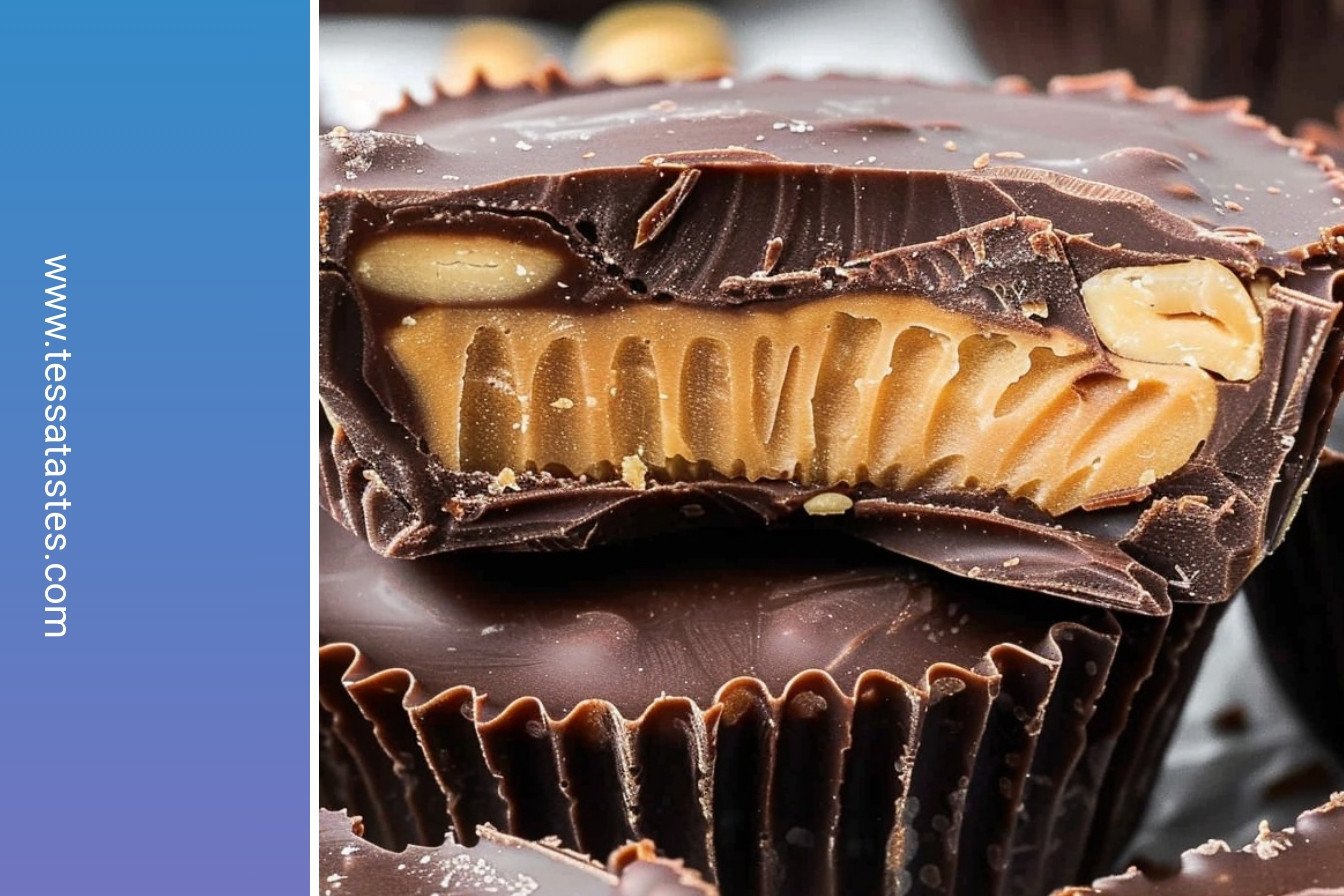
My Sweet-and-Salty Chocolate Treats
Oh, these little cups bring back such memories. My grandson Leo helped me make them last summer. He loved the part where you get to lick the peanut butter bowl. I still laugh at that. They are the perfect mix of sweet chocolate and salty peanut butter. And you don’t even need an oven. Doesn’t that sound wonderful?
Let’s get our hands busy. It’s like building a tiny, tasty tower. Here is how we make them.
- Step 1: First, line up your muffin pan with paper liners. I like the colorful ones. They make everything happier. Now, we melt half of our chocolate chips. Do this in a small bowl in the microwave. Heat it for 30 seconds, then stir. Heat it again if you need to. Be careful, the bowl might be warm.
- Step 2: Spoon a little melted chocolate into each liner. Just enough to cover the bottom. Then, give the pan a little shake. This spreads the chocolate out nicely. Pop the whole pan into the freezer for 15 minutes. This is our foundation. (A hard-learned tip: Don’t skip the freezing! It keeps the layers separate.)
- Step 3: While that chills, let’s make the filling. Put the peanut butter, soft butter, and powdered sugar in a bowl. Mix it with a hand mixer until it’s smooth and creamy. This part smells so good. My dog always comes into the kitchen when I do this.
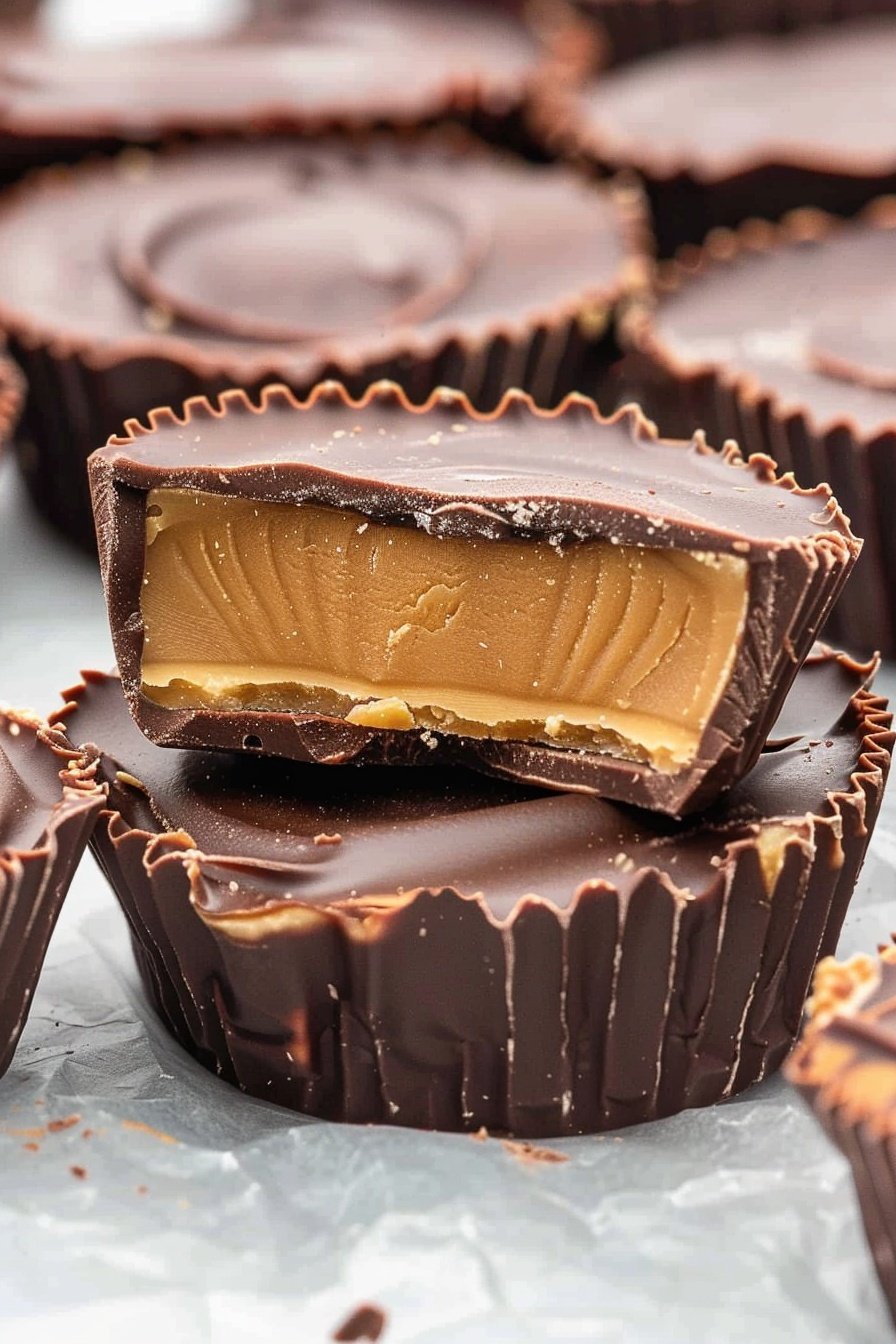
- Step 4: Take the pan out of the freezer. The chocolate should be firm. Now, add a big spoonful of peanut butter filling to each cup. Try to keep it from touching the sides. We want a perfect middle layer. Then, back into the freezer it goes for 5 more minutes.
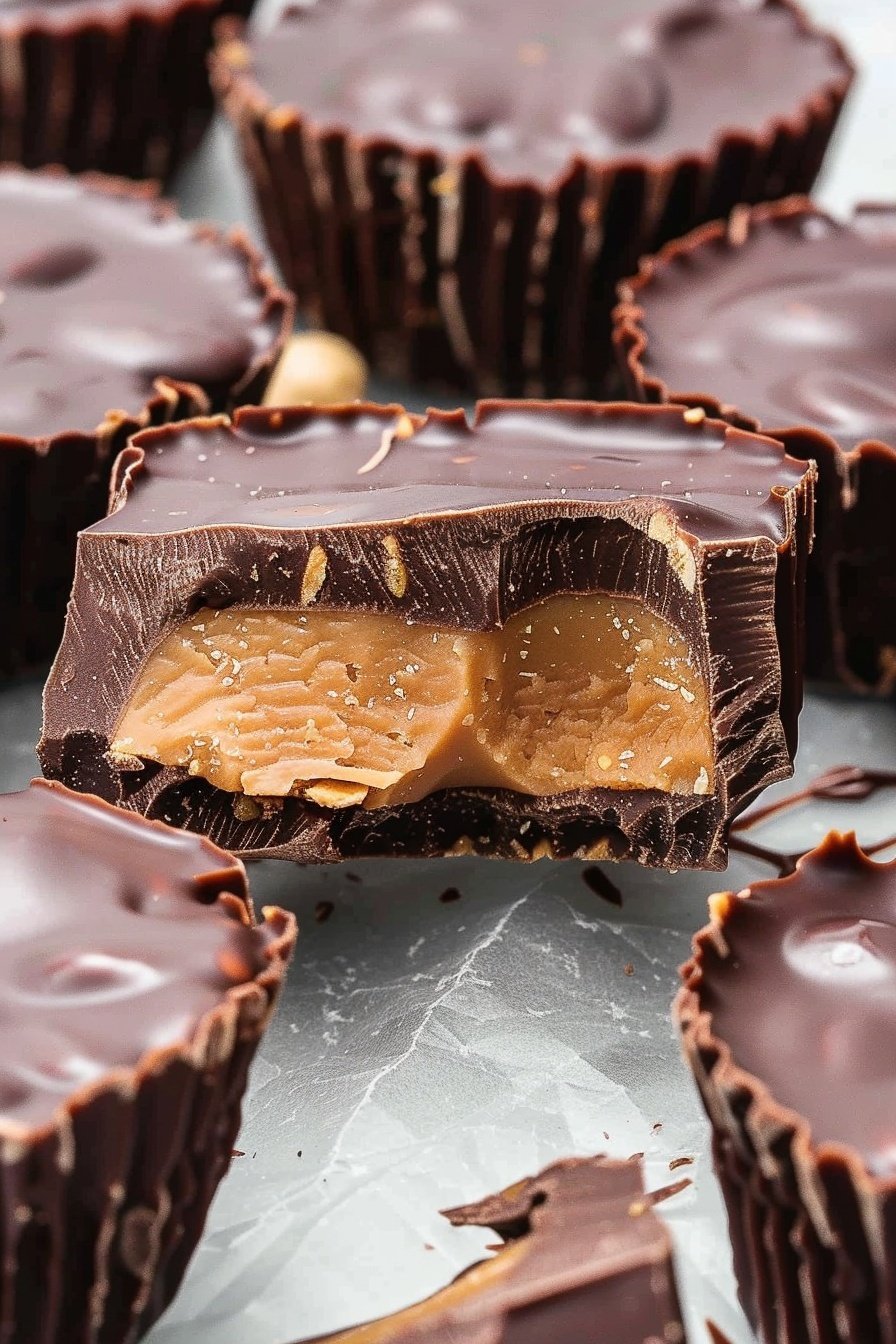
- Step 5: Time for the final touch. Melt the rest of the chocolate, just like before. Carefully pour it over the peanut butter to cover it. This is the roof of our treat. Freeze them one last time until they’re solid. What’s your favorite sweet and salty combo? Share below!
Prep Time: 15min
Total Time: 50mins
Yield: 12 servings
Category: Dessert, Snack
Three Fun Ways to Mix It Up
The best part about cooking is making a recipe your own. You can add so many fun things to these little cups. Here are a few ideas I love to play with. They are all so simple.
- Crunchy Pretzel Twist: Crush up some tiny pretzels. Sprinkle them on top of the last chocolate layer before it sets. It adds a wonderful salty crunch.
- Jelly Surprise Center: Instead of all peanut butter, make a small well in the filling. Drop a tiny bit of strawberry jelly inside. It’s like a secret pocket of fruit.
- Coconut Dream: Mix a handful of shredded coconut into the peanut butter filling. It tastes like a candy bar from my childhood. So sweet and chewy.
Which one would you try first? Comment below!
Serving Your Little Masterpieces
These treats are perfect just as they are. But you can make them extra special. I like to put two on a small plate with a few raspberries. The red looks so pretty next to the chocolate. You could also sprinkle a little sea salt on top right after you add the final chocolate.
What to drink with them? A tall, cold glass of milk is always the best choice. For the grown-ups, a little glass of creamy bourbon is a nice match. It makes for a cozy evening. Which would you choose tonight?
Keeping Your Chocolate Peanut Treats Perfect
These treats love the cold. Keep them in the fridge for up to a week. Use a container with a tight lid.
You can also freeze them for a whole month. I once forgot a batch in my freezer. Finding them a few weeks later was a happy surprise. They tasted just as good.
Batch cooking is a wonderful time-saver. Making a double batch means you always have a sweet treat ready. This is so helpful for busy days or surprise guests.
Have you ever tried storing it this way? Share below!
Fixing Common Chocolate Treat Troubles
Is your melted chocolate too thick? Make sure no water gets in the bowl. Even one drop can make chocolate seize up. This matters because smooth chocolate gives a perfect, shiny finish.
Is the peanut butter filling too runny? Your butter might be too soft. I remember when my filling was like soup. Chilling the bowl for ten minutes fixed it right up.
Are the layers mixing together? Your bottom chocolate layer needs to be fully frozen. A solid base keeps the pretty layers separate. This builds your confidence when you see a perfect treat.
Which of these problems have you run into before?
Your Quick Questions, Answered
Q: Can I make this gluten-free? A: Yes! Just check your powdered sugar label to be sure.
Q: Can I make them ahead? A: Absolutely. They are perfect for making a day or two early.
Q: What can I use instead of peanut butter? A: Any nut or seed butter will work well here.
Q: Can I make a bigger batch? A: You can easily double the recipe for a crowd.
Q: Any fun add-ins? A: Try a tiny sprinkle of sea salt on top before freezing.
Fun fact: Peanuts are not nuts! They are actually legumes, like beans and lentils.
Which tip will you try first?
A Little Note From My Kitchen
I hope you love making these sweet and salty bites. They always remind me of my grandchildren’s smiling faces. Sharing food made with love is one of life’s great joys.
I would be so happy to see your creations. You can share a picture with all of us. It makes my day to see your kitchen adventures.
Have you tried this recipe? Tag us on Pinterest!
Happy cooking! —Tessa Hammond.
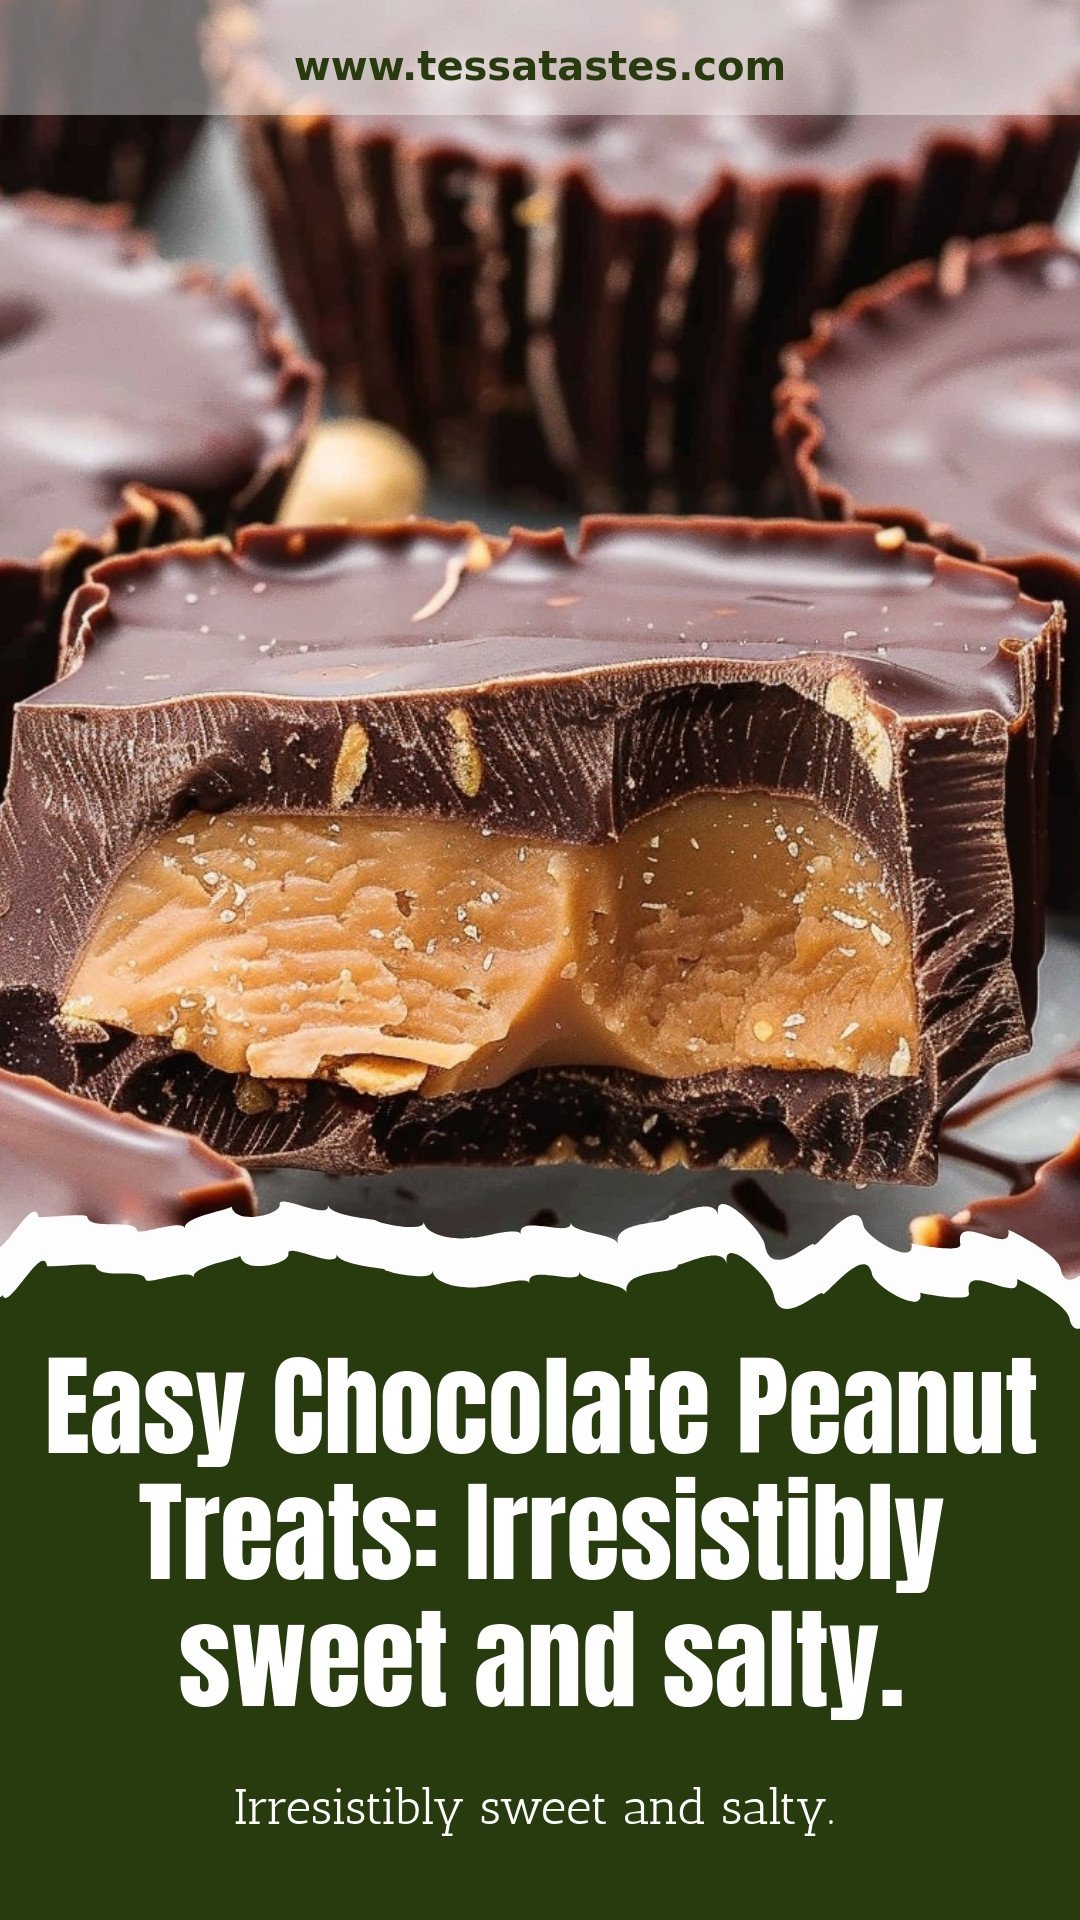
Easy Chocolate Peanut Treats: Irresistibly sweet and salty.: Irresistibly sweet and salty.
Description
Easy chocolate peanut treats are the perfect sweet and salty snack! Simple no-bake recipe for delicious homemade candy everyone will love.
Ingredients
Instructions
- Line 12 muffin cups with cupcake liners. Set aside.
- In a small microwave-safe bowl, place half of the chocolate. Melt the chocolate by heating in 30-second increments and stirring in between. This should take 30 to 60 seconds total. The chocolate should be smooth.
- Scoop about ½ tablespoon of melted chocolate into each cupcake liner. This can be done by scooping the chocolate with one spoon and scraping it off with another.
- Shake the pan periodically back and forth to help spread the chocolate so that it covers the bottom of the liner.
- Freeze for 15 minutes.
- While the chocolate is freezing, prepare the peanut butter filling. Measure peanut butter, powdered sugar, and butter into a medium mixing bowl. Using a hand mixer, mix until creamy.
- Put 1 tablespoon of the peanut butter filling on top of the chocolate layer, making sure the filling does not touch the sides of the cupcake liner.
- Freeze for 5 minutes.
- In a microwave-safe bowl (use the one from step 2), melt the remaining chocolate in the same way as explained in step 2.
- Cover the peanut butter layer with the melted chocolate.
- Freeze for 10 to 15 minutes or refrigerate for 15 to 20 minutes until hardened.
Notes
- Nutrition: Calories: 369kcal | Carbohydrates: 26g | Protein: 7g | Fat: 27g | Saturated Fat: 12g | Polyunsaturated Fat: 3g | Monounsaturated Fat: 10g | Trans Fat: 0.2g | Cholesterol: 12mg | Sodium: 126mg | Potassium: 310mg | Fiber: 4g | Sugar: 18g | Vitamin A: 133IU | Calcium: 32mg | Iron: 2mg


Leave a Reply