Is your dough too sticky? Do not add more flour. Just wet your hands with a little water. This stops the dough from sticking to you. I remember when my dough stuck to everything. Wet hands were my simple rescue.
Is the bread dense or tough? You probably mixed it too much. Mix just until the flour disappears. A shaggy dough is a good dough. This matters because gentle mixing keeps the bread soft and tender.
Did the bread not bake in the middle? Do not skip scoring the deep cross on top. That cut lets heat reach the center. Always check if it sounds hollow when tapped. Getting this right builds your baking confidence. Which of these problems have you run into before?
Your Quick Questions, Answered
Q: Can I make this ahead? A: Yes! Mix the dry ingredients the night before. Cover the bowl. In the morning, just add the wet ingredients.
Q: What other dried fruit can I use? A: Dried cranberries or chopped apricots are lovely. Chocolate chips are a fun swap too.
Q: Can I make a half batch? A: Absolutely. Just cut all the ingredients in half. Bake it in a smaller pan.
Q: Why the vinegar in the milk? A: It makes “buttermilk.” This helps the bread rise and adds a nice tang. *Fun fact: This trick is over a hundred years old!*
Q: Is the sugar necessary? A: It helps the crust brown. You can reduce it slightly if you prefer. Which tip will you try first?
From My Kitchen to Yours
I hope you love making this bread. It always makes my kitchen smell wonderful. I would be so happy to see your creation. Share a photo of your lovely loaf with me.
You can tag my blog on Pinterest. Let’s build a little collection of golden soda bread. I look at every single one. Have you tried this recipe? Tag us on Pinterest!
Happy cooking!
—Tessa Hammond.
Easy Gluten-Free Irish Soda Bread Recipe
Description
A simple, tender gluten-free soda bread perfect for any occasion. Made with pantry staples and ready in under an hour.
Ingredients
Instructions
- Preheat the oven to 425°F.
- In a large measuring cup, add the white vinegar to the milk and stir to combine. Let stand for 5 minutes in the refrigerator to stay cold. (homemade buttermilk).
- In a large bowl, mix together the gluten-free flour, sugar, baking powder, baking soda, and salt.
- Add the cold butter and cut it into the gluten-free flour mixture with a pastry cutter, a fork, or your fingers until it resembles small peas.
- Stir in the raisins. If you are not a fan of dried fruit, you can leave it out.
- Whisk the egg and homemade buttermilk (milk and vinegar mixture) together.
- Make a well in the center of the dry ingredients and pour the egg and buttermilk mixture into the flour mixture.
- Using a large spoon, mix the gluten-free flour mixture and milk mixture together to form a shaggy dough. The dough will be soft but not too sticky. Do not over-mix the dough, or you will end up with tough bread.
- Sprinkle 1 tablespoon of gluten-free flour onto parchment paper. Turn the dough onto the parchment paper and gently bring the dough together into a round, about 8-inches by 8-inches. If the dough is sticking to your hands, lightly wet your hands with water.
- Gently fold the dough over on itself 2 times. You do this by folding the dough in half on top of itself and then doing it a second time. Form the dough back into an 8-inch by 8-inch round.
- Place the round dough onto a greased baking cast iron skillet, baking sheet, or baking pan.
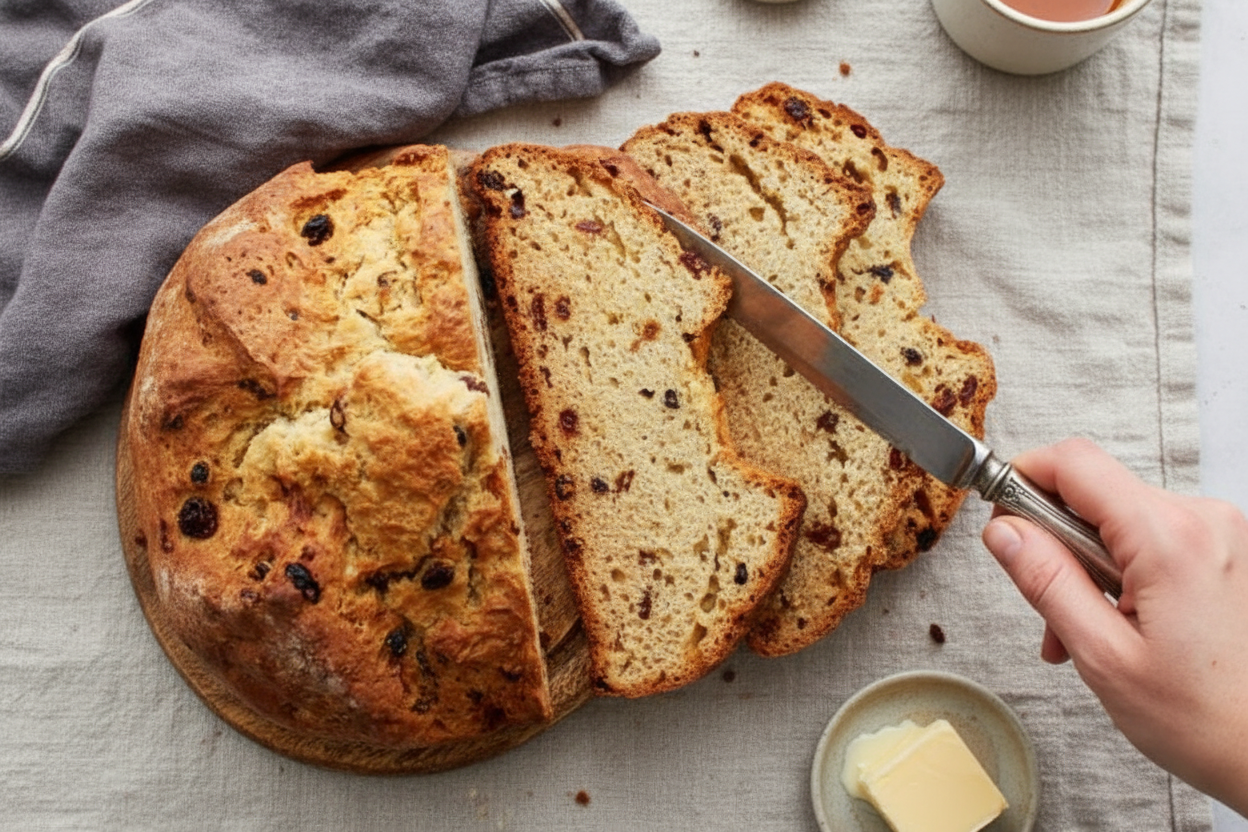
- Using a knife, score the bread with a deep cross on top. Do not skip this step because it helps the middle of the bread bake though.
- Bake for 15 minutes at 425°F, then turn down the oven to 400°F and bake for 30 minutes more. When done, the loaf will be golden brown and sound slightly hollow when tapped on the bottom.
- Allow the loaf to cool for a few minutes then, and then place it on a wire rack to cool.
Notes
- For best results, use the gluten-free flour blend recommended. Allow the bread to cool completely before slicing for cleaner cuts.
My First Soda Bread
I made my first soda bread at my Nana’s house. I was ten. I forgot the baking soda. The loaf came out like a brick. We still fed it to the birds. I still laugh at that.
This recipe is much friendlier. It uses simple things from your pantry. The vinegar and milk make a quick buttermilk. Doesn’t that smell amazing when you mix it? This matters because anyone can make it. You don’t need any fancy skills.
Why We Score the Bread
See that step where you cut a cross on top? That’s not just for looks. It helps the heat reach the very center of the loaf. It lets the bread breathe and rise properly in the oven.
If you skip it, the middle might stay doughy. We don’t want that! *Fun fact: Some say the cross was to bless the bread or to let the fairies out!* Do you have a family baking tradition that seems a little bit magical?
Getting Your Hands in the Dough
This dough comes together fast. Use a spoon at first. Then, use your hands. It will feel soft and a bit shaggy. That’s perfect. Over-mixing makes tough bread.
Just gently fold it a couple times. Form it into a round. If it sticks, wet your hands. This matters because baking should be fun, not stressful. It’s okay if it’s not perfectly smooth. Are you a neat baker or a messy, hands-in baker like me?
A Note on Flour
Gluten-free flours are all different. I like Pillsbury’s blend for this. It already has xanthan gum in it. That gum helps hold the bread together like gluten would.
If you use another blend, your bread might be a little different. That’s okay. Baking is about learning. Have you found a gluten-free flour you really love for baking?
The Best Part: Eating It
Let the loaf cool on a rack. I know, the wait is hard! The smell is wonderful. When it’s just warm, slice a piece. Spread on some soft butter.
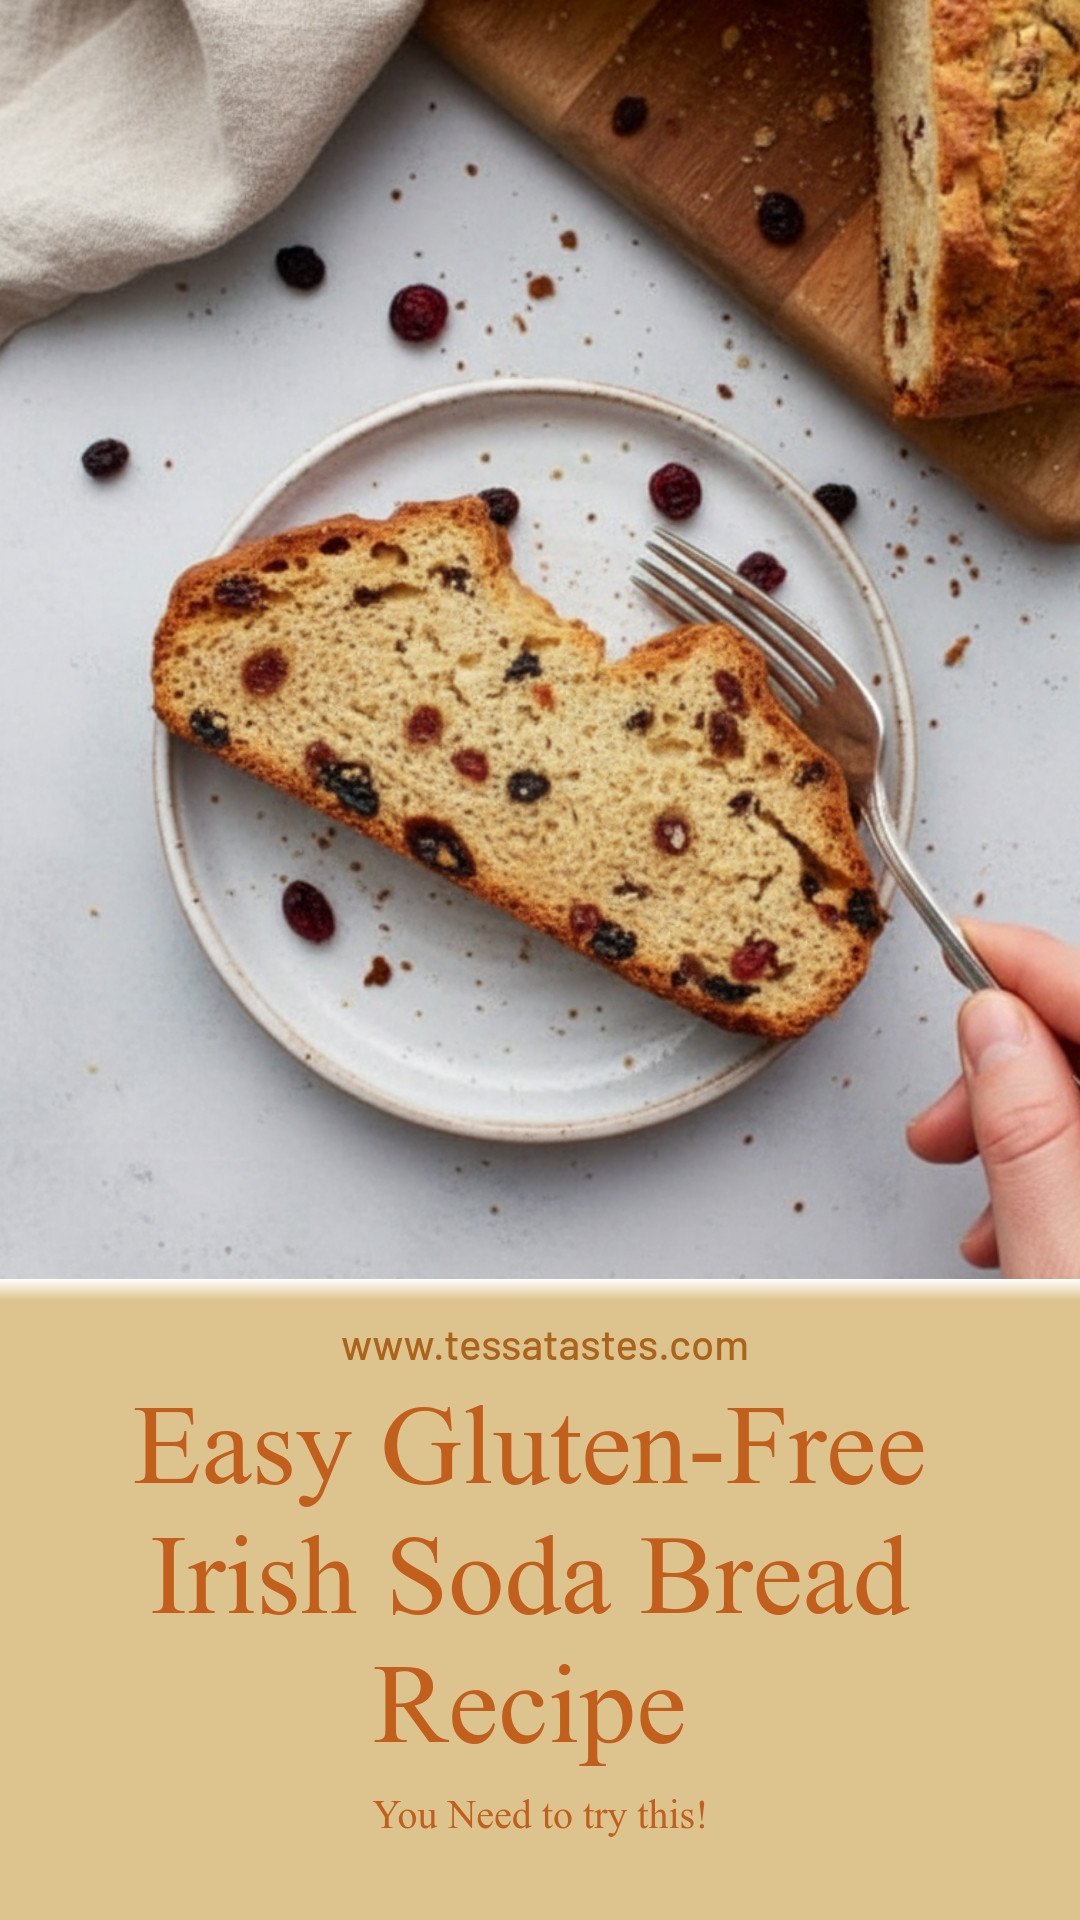
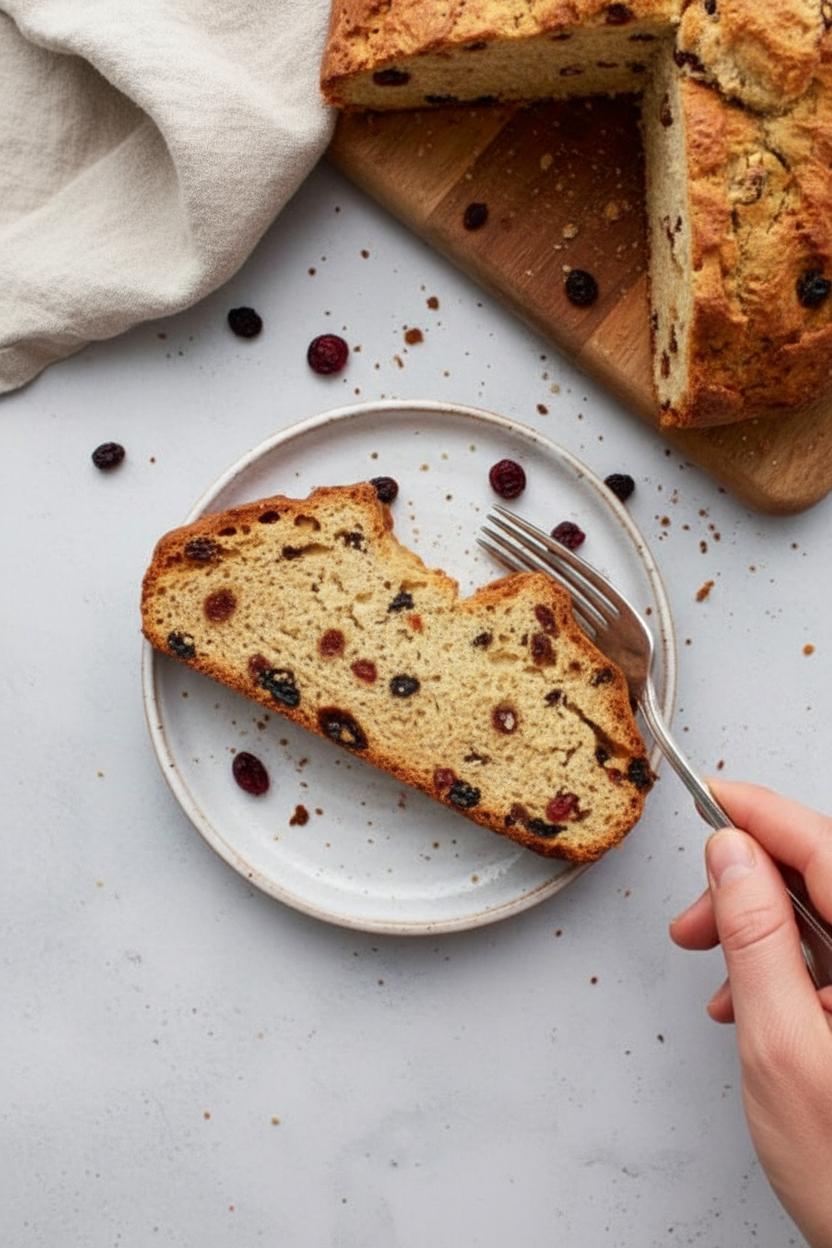
The crust is slightly crisp. The inside is tender and dotted with sweet fruit. It’s perfect with soup or just by itself. This bread tastes like home. I hope it becomes a favorite in your home too.
Ingredients:
| Ingredient | Amount | Notes |
|---|---|---|
| Gluten-free all-purpose flour (with xanthan gum) | 4 cups | I like Pillsbury. Not all gluten-free flours are created equal; results may vary. |
| Granulated sugar | 1/2 cup | |
| Baking powder | 1 tablespoon | |
| Baking soda | 1 teaspoon | |
| Salt | 1 teaspoon | |
| Unsalted butter, cold and chopped | 4 tablespoons | For dairy-free, use Smart Balance butter. |
| Raisins, currants, or dried cranberries | 1 cup | You can also leave it out. |
| Milk | 1 3/4 cups | For dairy-free, use unsweetened almond milk. |
| White vinegar | 1 1/2 tablespoons | You can substitute lemon juice. |
| Large egg | 1 | For egg-free, use Bob’s Red Mill gluten-free egg replacer. |
My Cozy Kitchen’s Gluten-Free Irish Soda Bread
Hello, my dear! Come sit a spell. The oven is warming up. Today, we’re baking a special bread. It’s my Gluten-Free Irish Soda Bread. This recipe is a dear friend of mine. It never needs yeast or long waiting. Isn’t that wonderful? I remember making this with my granddaughter. We got flour everywhere! I still laugh at that. Let’s make some new memories together.
This bread is soft and just a little sweet. It’s perfect with a dab of butter. You can add raisins or leave them out. I use dried cranberries sometimes for a cheerful color. The trick is a simple homemade buttermilk. It makes the bread so tender. Are you ready? Let’s begin.
Step 1: First, let’s make our “buttermilk.” Pour the milk into a big cup. Add the white vinegar and give it a stir. Pop it in the fridge for five minutes. This magic mix will make our bread rise. (Hard-learned tip: Keep it cold! This helps the bread get tall and proud.)
Step 2: Now, grab a large bowl. Mix your flour, sugar, baking powder, baking soda, and salt. Stir them all together like old friends. Next, add the cold butter. Use your fingers to rub it into the flour. You want little pea-sized bits. This makes the bread lovely and flaky.
Step 3: Toss in your raisins or cranberries if you’re using them. Stir them around gently. In another bowl, whisk the egg and your cold buttermilk. Doesn’t that smell amazing? Make a little well in your dry ingredients. Pour the wet mix right into the center.
Step 4: Use a big spoon to mix it. Stop when it just comes together. The dough will look shaggy and rough. That’s perfect! Over-mixing makes tough bread. Turn the dough onto a floured parchment paper. Gently shape it into a round, about 8 inches wide.
Step 5: Here’s a secret step. Fold the dough over on itself twice. Just like folding a letter. Then shape it back into a round. This gives you nice layers. Place the round into your greased pan. Now, take a knife. Score a deep cross on top. This lets the fairies out, my grandma would say! Why do you think we score the bread? Share below!
Step 6: Bake it! First at 425°F for 15 minutes. Then lower the heat to 400°F for 30 more. Your kitchen will smell like heaven. The loaf is done when it’s golden and sounds hollow. Let it cool on a rack. I know, waiting is the hardest part!
Cook Time: 45 minutes
Total Time: 1 hour
Yield: 1 loaf
Category: Bread, Baking
Three Fun Twists to Try
This bread is like a blank canvas. You can paint it with so many flavors. Here are a few of my favorite ideas. They make each loaf a little adventure.
Savory Herb: Skip the sugar and dried fruit. Add two tablespoons of fresh rosemary. A sprinkle of garlic powder is nice too.
Sunshine Citrus: Add the zest of one whole orange to the dry ingredients. Use dried cranberries. It tastes like a bright morning.
Seedy Crunch: Mix in a big handful of sunflower and pumpkin seeds. They give a wonderful crunch in every bite.
Which one would you try first? Comment below!
Serving It Up With Love
A warm slice of this bread is a hug on a plate. For breakfast, slather it with jam or honey. At dinner, serve it alongside a big bowl of soup. It soaks up the broth beautifully. You could even toast a slice for afternoon tea. Top it with soft cheese and a sprinkle of chives.
What to drink? A hot cup of Irish breakfast tea is my go-to. For a special treat, a glass of sweet cider pairs wonderfully. Which would you choose tonight?
Keeping Your Soda Bread Fresh
This bread is best eaten the day it’s made. But I always make two loaves. To store, let it cool completely first. Then wrap it tightly in plastic wrap. It will keep on the counter for 2 days.
For longer storage, freeze it. Slice the loaf first. This way you can pull out one piece at a time. Wrap the slices well and freeze for up to 3 months. I once forgot to slice a whole loaf before freezing. Thawing it was a funny, difficult puzzle!
To reheat, toast a slice straight from the freezer. A toaster or warm oven works perfectly. Batch cooking like this saves you time later. It means a warm, homemade treat is always minutes away. Have you ever tried storing it this way? Share below!
Simple Fixes for Common Troubles
Is your dough too sticky? Do not add more flour. Just wet your hands with a little water. This stops the dough from sticking to you. I remember when my dough stuck to everything. Wet hands were my simple rescue.
Is the bread dense or tough? You probably mixed it too much. Mix just until the flour disappears. A shaggy dough is a good dough. This matters because gentle mixing keeps the bread soft and tender.
Did the bread not bake in the middle? Do not skip scoring the deep cross on top. That cut lets heat reach the center. Always check if it sounds hollow when tapped. Getting this right builds your baking confidence. Which of these problems have you run into before?
Your Quick Questions, Answered
Q: Can I make this ahead? A: Yes! Mix the dry ingredients the night before. Cover the bowl. In the morning, just add the wet ingredients.
Q: What other dried fruit can I use? A: Dried cranberries or chopped apricots are lovely. Chocolate chips are a fun swap too.
Q: Can I make a half batch? A: Absolutely. Just cut all the ingredients in half. Bake it in a smaller pan.
Q: Why the vinegar in the milk? A: It makes “buttermilk.” This helps the bread rise and adds a nice tang. *Fun fact: This trick is over a hundred years old!*
Q: Is the sugar necessary? A: It helps the crust brown. You can reduce it slightly if you prefer. Which tip will you try first?
From My Kitchen to Yours
I hope you love making this bread. It always makes my kitchen smell wonderful. I would be so happy to see your creation. Share a photo of your lovely loaf with me.
You can tag my blog on Pinterest. Let’s build a little collection of golden soda bread. I look at every single one. Have you tried this recipe? Tag us on Pinterest!
Happy cooking!
—Tessa Hammond.


Leave a Reply