My First Biscuit Flop
I once made biscuits as hard as hockey pucks. I was so sad. I had over-mixed the dough. My grandson tried to be nice. He said they were good for playing street hockey. I still laugh at that.
This matters because gentle hands make tender biscuits. You want little bits of cold butter in your dough. When the oven heats them, they create steam. That steam makes fluffy layers. Isn’t that clever?
Getting Your Dough Just Right
Our dough will be sticky. That is okay. Do not fight it. Just fold it gently on your floured parchment paper. Fold it over itself twice. This builds those soft layers inside.
Please do not roll it out. Press it with your hands. Make a round about an inch thick. This gives them room to rise up tall and proud. What’s your favorite kitchen tool to use with your hands?
The Magic of Cold Butter
Cut your butter into little pieces. Then pop them in the freezer for ten minutes. This step is a secret. Cold butter is the heart of a good biscuit.
You mix it into the flour until it looks like small peas. This matters because those cold bits melt in the hot oven. They leave little pockets of air. That makes the biscuit light and flaky. Doesn’t that smell amazing just thinking about it?
Easy Buttermilk, Any Way You Like
No buttermilk in the fridge? No problem. Add one tablespoon of vinegar to a cup of milk. Let it sit for five minutes. It gets tangy and thick. You just made buttermilk.
You can use regular milk or almond milk. It works the same. *Fun fact: this is called “clabbering” the milk. Old farmers did it all the time. Do you usually buy buttermilk or make your own?
Cutting and Baking with Love
Use a glass or biscuit cutter to cut your rounds. Press straight down. Do not twist. Twisting seals the edges. Then your biscuit can’t rise well.
Bake them hot and fast. Watch them after 15 minutes. All ovens are different. You want tops of golden brown. I always brush mine with melted butter when they come out. It gives them a lovely glow. What do you like to eat with a warm biscuit? Tell me your favorite way.
Ingredients:
| Ingredient | Amount | Notes |
|---|---|---|
| gluten-free all-purpose flour | 2 cups | I like Pillsbury gluten-free. Not all gluten-free flours are created equal. Results may vary by blend. |
| xanthan gum | ½ tsp | Leave out if your flour already contains it. |
| gluten-free baking powder | 1 tbsp | |
| salt | 1 tsp | |
| granulated sugar | 2 tbsp | |
| buttermilk | 1 cup | Make your own by adding 1 tbsp white vinegar or lemon juice to milk. For dairy-free, use almond, cashew, or coconut milk. |
| unsalted butter | 6 tbsp | For dairy-free/Vegan use Smart Balance, shortening, or Earth Balance butter. |
| large egg | 1 | For egg-free/Vegan use Bob’s Red Mill Egg Replacer. |
| gluten-free all-purpose flour (for dusting) | 2 tbsp |
My Fluffy Gluten-Free Biscuit Secret
Hello, my dear. Come sit a spell. Let’s talk biscuits. My grandson, Jamie, needs gluten-free food. I wanted to make him my famous biscuits. I tried so many recipes. Some were like little rocks. We still laugh at that.
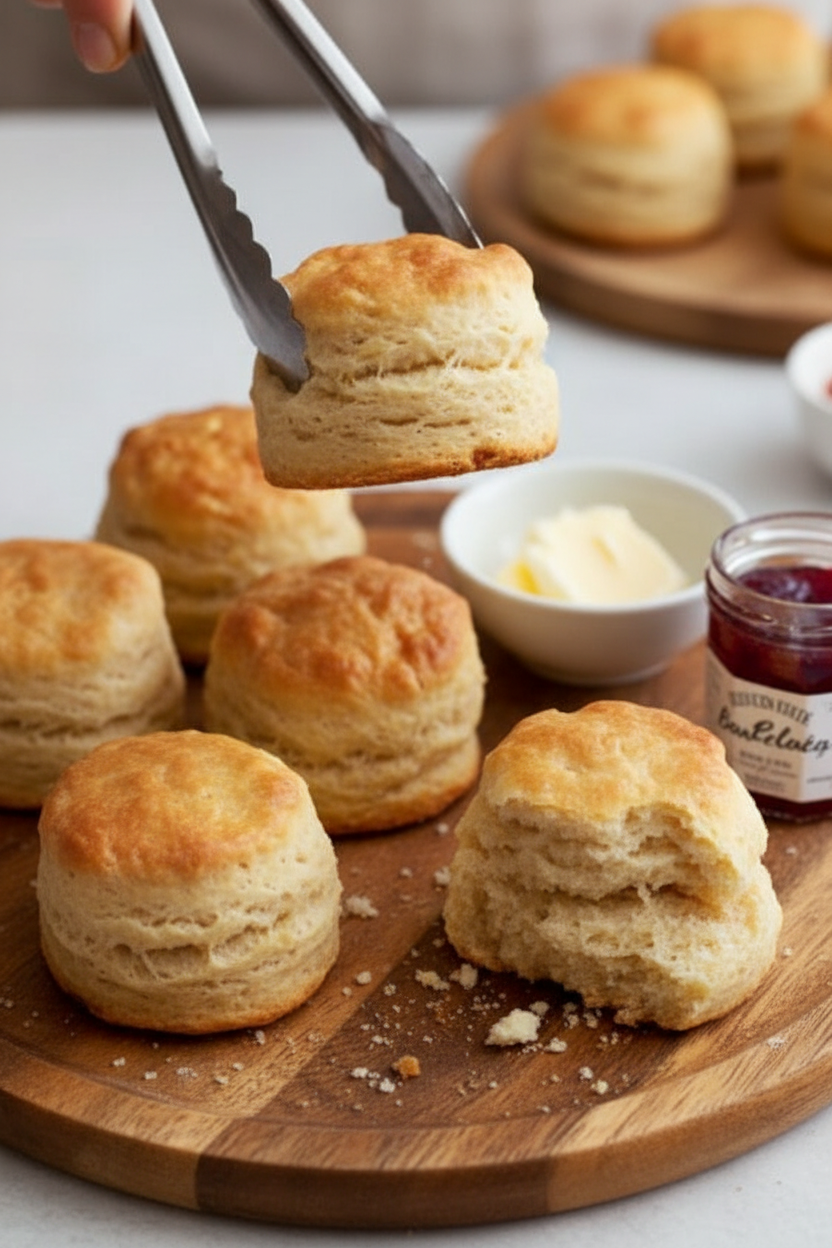
Then I found this way. It makes biscuits so light and fluffy. They rise up so tall in the oven. Doesn’t that smell amazing? The secret is in the gentle hands. I will show you now. You can do this.
Step 1: First, get your oven very hot. Set it to 450°F. Now, grab a big bowl. Put your flour, baking powder, salt, and sugar inside. Give it a good whisk. This makes everything friends. (A hard-learned tip: Check your flour blend. Some already have xanthan gum. If it does, don’t add more!)
Step 2: Cut your butter into little pieces. Pop them in the freezer for 10 minutes. Cold butter is magic for flaky layers. While you wait, make your buttermilk. Just add a spoon of vinegar to your milk. Let it sit in the fridge. It will get a little tangy and thick.
Step 3: Time for the fun part. Get your cold butter. Use a fork or pastry cutter. Mix it into the flour until it looks like tiny peas. This takes a minute. I think of it as making a sandy, buttery beach. My hands remember my own grandma doing this.
Step 4: Whisk your egg right into the buttermilk. Now pour it into your flour bowl. Stir it just until a soft, sticky dough forms. Stop right away. Over-mixing makes tough biscuits. What’s the key to tender biscuits? Share below!
Step 5: This step is different. Do not roll the dough. Sprinkle flour on parchment paper. Plop your sticky dough on top. Dust the top with more flour. Gently fold the dough in half. Then do it one more time. This makes layers for rising.
Step 6: Now, use your hands. Pat the dough into a circle. Make it about an inch thick. Too flat means flat biscuits. Use a glass to cut out rounds. Don’t twist it. Just press straight down. Gather the scraps and pat them out again.
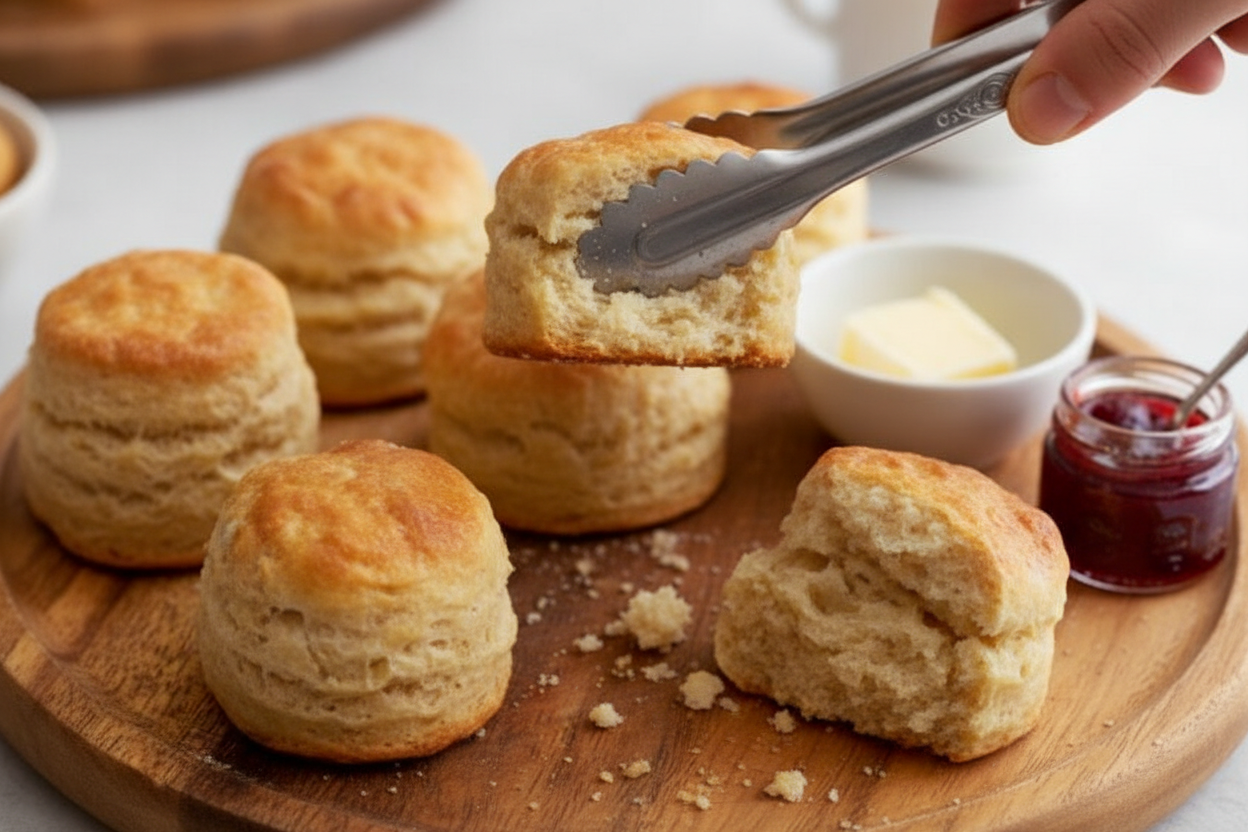
Step 7: Place your biscuits on a pan. They can be close together. Bake for 15-20 minutes. Watch them like a hawk at the end. All ovens are different. When they’re golden, take them out. Brush the tops with melted butter. Oh, that smell is pure love.
Cook Time: 15-20 minutes
Total Time: 40 minutes
Yield: 12 biscuits
Category: Bread, Breakfast
Three Tasty Twists to Try
These biscuits are a perfect blank canvas. You can add little surprises inside. Jamie loves when I mix things in. It makes breakfast an adventure. Here are three of our favorite ways to play.
Cheesy Herb: Stir a handful of shredded cheddar and a teaspoon of dried rosemary into the flour. So savory and good with soup.
Cinnamon Sugar Swirl: Pat the dough out. Sprinkle it with cinnamon and sugar. Fold it up, then pat and cut. Tastes like a sweet morning hug.
Everything Bagel: Before baking, brush tops with milk. Sprinkle on “everything bagel” seasoning. So crunchy and full of flavor.
Which one would you try first? Comment below!
How to Serve Your Masterpiece
A warm biscuit is a happy thing. For breakfast, split one open. Slather it with jam or honey. For dinner, serve them next to a big bowl of stew. They are perfect for sopping up gravy. You could even make a little sandwich with ham and cheese.
What to drink? On a cozy morning, I love a glass of cold apple cider. It’s sweet and tangy. In the evening, a cup of hot tea with lemon feels just right. Or a glass of chilled white wine with a savory biscuit. So lovely.
Which would you choose tonight?
Keeping Your Biscuits Happy and Fresh
Fresh biscuits are the best. But they keep well too. Let them cool completely first. Then store them in a sealed container.
They will stay soft on the counter for two days. For longer, freeze them. I wrap each biscuit in plastic wrap. Then I put them all in a freezer bag.
To reheat, warm frozen biscuits in a 350°F oven. It takes about 10 minutes. I once microwaved one and it got rubbery. The oven is always better.
Batch cooking saves busy mornings. Making a double batch is easy. You get a ready-made breakfast for later. This matters because good food should be simple.
Have you ever tried storing biscuits this way? Share below!
Biscuit Troubles and Easy Fixes
Sometimes biscuits don’t rise. This is often from over-mixing. Stir the dough just until it comes together. A sticky dough is a good dough.
Flat, hard biscuits happen too. I remember when my first batch was like hockey pucks. The dough was too thin. Keep it one inch thick for fluffiness.
Twisting the cutter can seal the edges. This stops the rise. Press straight down and lift straight up. This simple fix gives you tall, beautiful biscuits.
Getting this right builds your confidence. It also makes your food taste better. A light, fluffy biscuit is a joy to eat. You deserve that joy.
Which of these problems have you run into before?
Your Biscuit Questions, Answered
Q: Can I make the dough ahead? A: Yes! Mix the dry and wet parts separately. Combine them right before baking.
Q: What if I don’t have buttermilk? A: Make your own. Add one tablespoon of vinegar to a cup of milk. Let it sit for five minutes.
Q: Can I use a different gluten-free flour? A: You can, but results change. I like Pillsbury blend for this. *Fun fact: Not all gluten-free flours are created equal!*
Q: Can I make bigger biscuits? A: I don’t recommend it. Larger biscuits often bake flat. The two-inch size is just right.
Q: Is the egg necessary? A: It helps with structure. For egg-free, use a store-bought replacer. It works very well.
Which tip will you try first?
From My Kitchen to Yours
I hope you love these biscuits. They remind me of sunny weekend mornings. My kitchen always smells like butter and warmth.
I would love to see your baking results. Share a picture of your golden-brown biscuits. It makes me so happy to see your creations.
Have you tried this recipe? Tag us on Pinterest! Thank you for baking with me today. Happy cooking!
—Tessa Hammond.
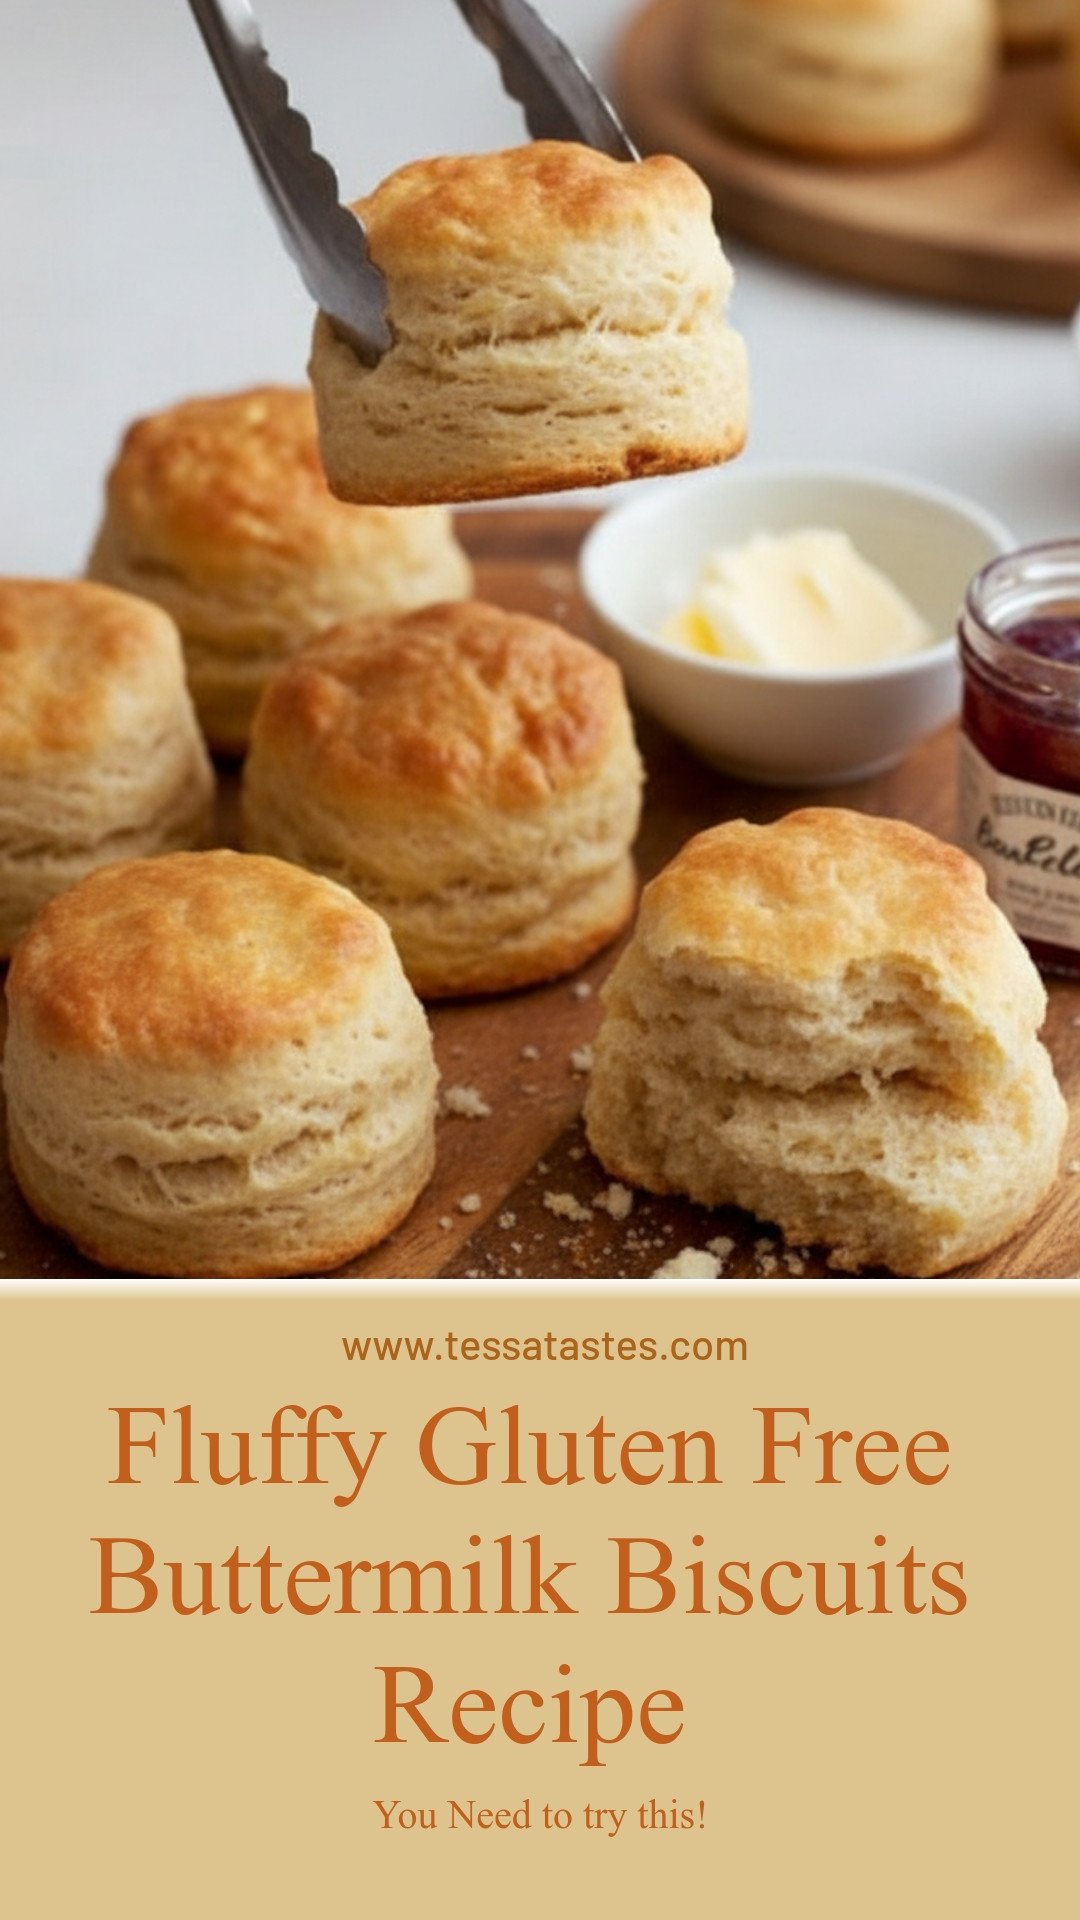
Fluffy Gluten Free Buttermilk Biscuits Recipe
Description
Light, fluffy, and tender gluten-free buttermilk biscuits that are easy to make and perfect for any meal.
Ingredients
Instructions
- Preheat oven to 450°F (232°C).
- In a large bowl add the gluten-free flour, baking powder, salt, sugar, and give it a quick whisk or stir to combine the ingredients.
- Cut the butter into small pieces and put in the freezer for 10 minutes. If you do not have buttermilk make your own buttermilk by adding 1 tablespoon of white vinegar or lemon juice to the cup of milk and let stand 5-10 minutes in the refrigerator to keep cold. You can also make buttermilk out of dairy-free milk.
- Cut in butter (or shortening for dairy-free) into the flour with a pastry cutter or fork until it looks like the size of small peas.
- Add in the buttermilk and the whisked egg (or egg replacer) and stir until a soft dough forms. (I whisk the egg right in the buttermilk) The key is to not over mix because over-mixing causes the dough to yield tough biscuits. The dough will be sticky.
- Add one tablespoon of flour to a large piece of parchment paper. PLEASE DO NOT ROLL OUT THE DOUGH.
- Place the dough on top of the floured parchment paper. Dust the top of the dough with 1 tablespoon of flour and gently fold dough over on itself 2 times. You do this by folding the dough in half on top of itself and then doing it a second time.
- With your hands form a dough round that is about 7 inches in diameter and 1 inch thick. If you make it any larger or flatter you will end up with hard, flat biscuits.
- Cut out 2-inch biscuits using a biscuit cutter, the mouth of a glass or the lid of a mason jar. Do not twist cutter when cutting; this will crimp the edges of the biscuit causing it not to rise well. Reform the dough scraps into a dough round and cut out more biscuits. Put the biscuits on a greased large cast iron pan or baking sheet. You will have 12 biscuits to bake.
- Bake the biscuits for 15-20 minutes at 450°F (232°C). At the 15-minute point please check your biscuits to see if they are golden brown. Please watch your biscuits because all ovens are different.
- I like to brush melted butter on top of the warm biscuits. Serve warm and enjoy!
Notes
- For best results, ensure all ingredients are cold before mixing. Handle the dough as little as possible to keep the biscuits tender.


Leave a Reply