My First Garlic Twist Disaster
I tried making these for my book club years ago. I was so nervous. I used way too much flour on the counter.
The dough stuck to everything. My first twist looked like a sad little rock. I still laugh at that. But you know what? My friends ate every last one. They did not care one bit.
Why These Twists Matter
Sharing food is about more than eating. It is about making people feel welcome. These twists are a warm, buttery hello.
Making them teaches you patience. You have to roll and fold carefully. It is a small lesson in doing things with love. What is a food that makes you feel happy and welcome?
Let’s Get Our Hands Dirty
First, melt your butter. Mix in the garlic salt and Italian seasoning. Doesn’t that smell amazing? It is the heart of the whole recipe.
Now, press two crescent triangles together. Roll them out into a rectangle. Do not worry if it is not perfect. My rectangles are always a little lopsided. It adds character.
The Fun Part: Stuffing and Tying
Brush that garlic butter all over the dough. Then, sprinkle the parmesan and that lovely cheese blend. The cheese is the best surprise inside.
Fold the dough over and pinch it tight. Now, just tie it into a loose knot. It is like tying your shoe. Did you have fun tying your knots? I always do.
A Little Secret for You
Fun fact The reason we brush butter on at the end is a good one. It gives the twists a gorgeous, shiny look. It also makes the garlic flavor pop even more.
When they come out of the oven golden brown, do not wait. Brush on that last bit of butter right away. Then sprinkle a little extra parmesan. This is the step that makes them special.
Your Turn in the Kitchen
I love seeing what everyone creates. It makes my day. Will you be having these with spaghetti soup or just by themselves?
Cooking is a way to show you care. These twists are a simple, delicious way to start. Tell me, what is the first thing you ever learned to bake?
Ingredients:
| Ingredient | Amount | Notes |
|---|---|---|
| unsalted butter | 4 tablespoons | melted |
| garlic salt | ¾ teaspoons | Lawry’s brand |
| Italian seasoning | ½ teaspoon | |
| crescent rolls | 12 ounces | 8 count |
| grated parmesan cheese | ⅓ cup | divided |
| shredded mozzarella & provolone cheese blend | 1 to 1½ cups | Sargento brand, divided |
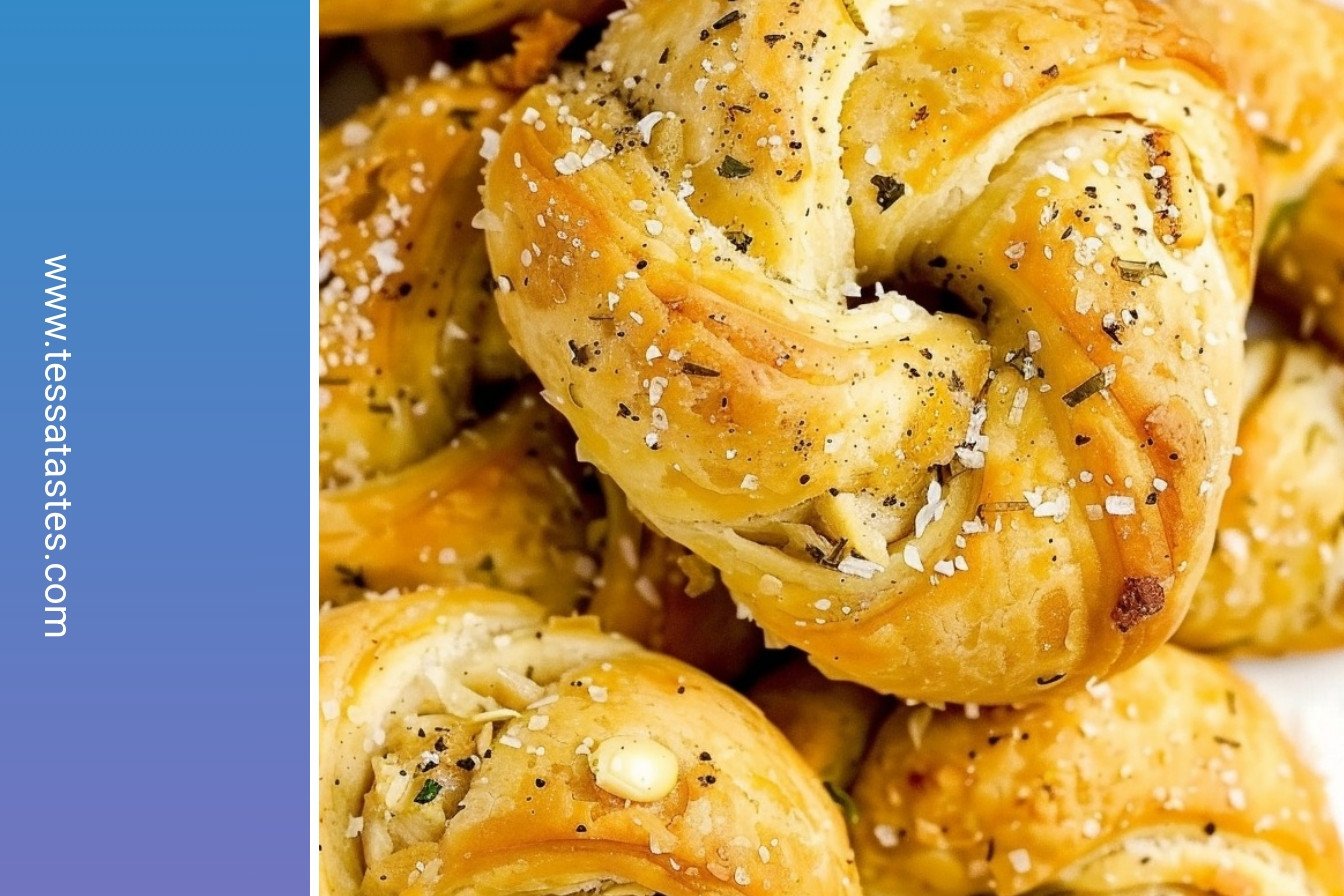
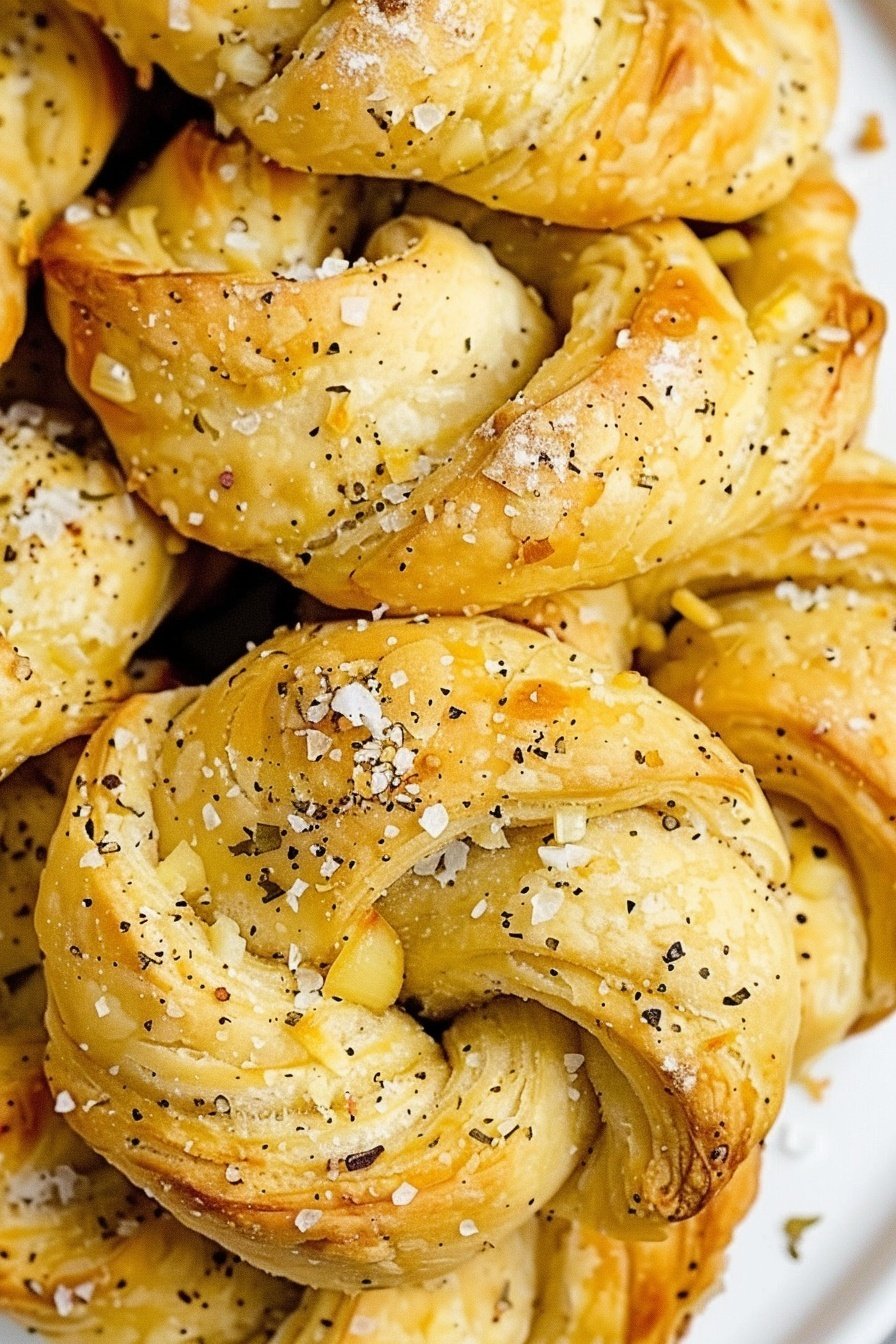
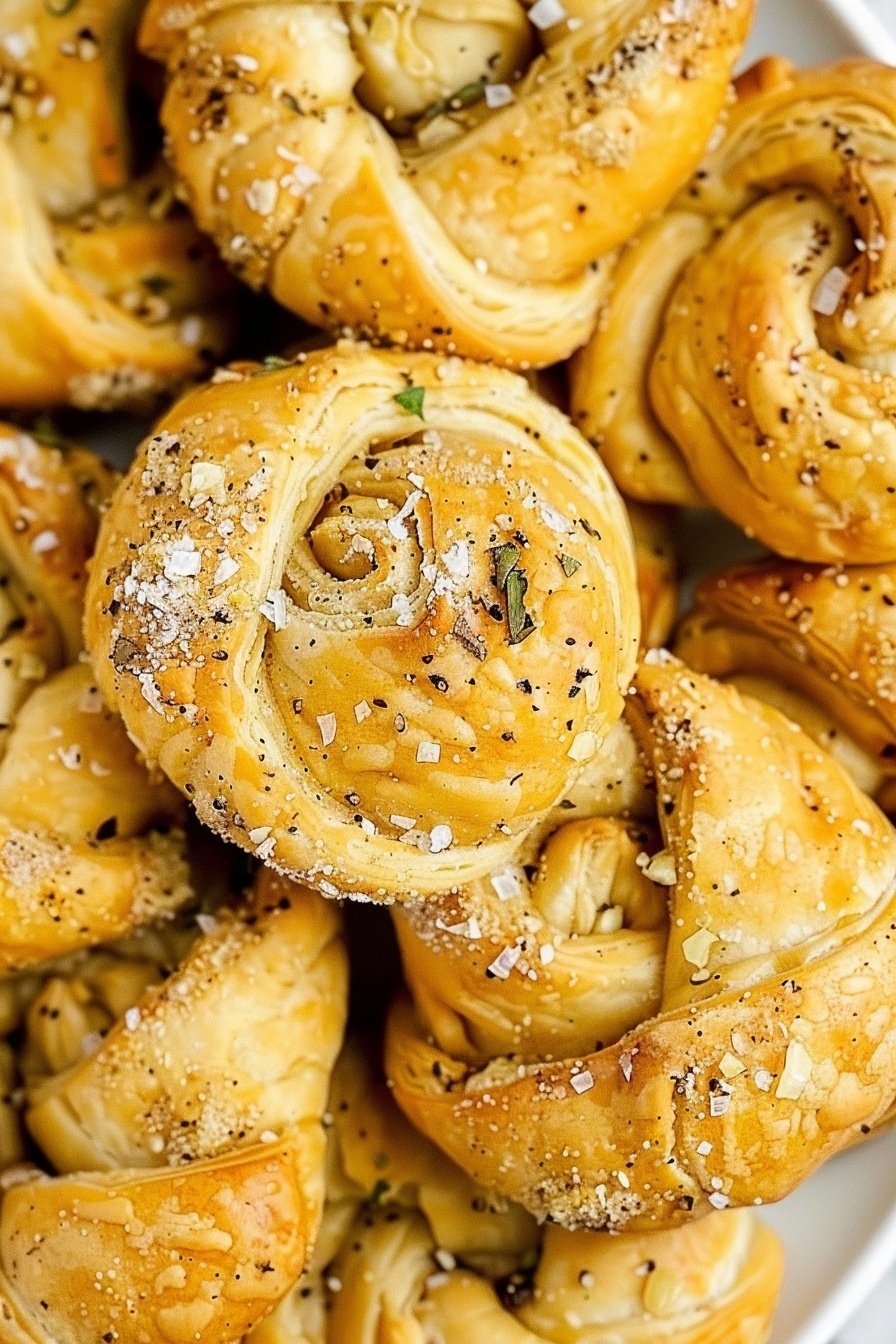
My Garlic Crescent Twists: A Buttery, Cheesy Hug
Hello, my dear! Let’s make some magic with a tube of crescent rolls. I call these my Garlic Crescent Twists. They are buttery, garlicky, and full of cheesy goodness. My grandkids go wild for them. They remind me of the soft breadsticks at our old local pizza place.
We are just going to twist and tuck some dough. It is easier than it looks, I promise. I still laugh at the first time I tried this. I got cheese everywhere! But that is part of the fun. Are you ready? Let’s get our hands a little dusty with flour.
Ingredients & Tools
- 1 can (8 oz) refrigerated crescent roll dough
- 4 tablespoons unsalted butter
- 1 teaspoon garlic salt
- 1 teaspoon Italian seasoning
- 1/4 cup grated Parmesan cheese, plus more for topping
- 1/2 cup shredded mozzarella cheese blend
- Parchment paper
- Rolling pin
- Pastry brush
Instructions
Step 1: First, get your oven warming up to 350°F. Line your baking sheet with parchment paper. This little trick saves so much scrubbing later. Now, melt your butter in a small bowl. Stir in the garlic salt and Italian seasoning. Doesn’t that smell amazing already?
Step 2: Unroll your crescent dough. Press two triangles together to make a rectangle. Pinch that seam in the middle really well. Then, gently roll it out with a rolling pin. (A hard-learned tip: keep the other dough triangles in the fridge. Cold dough is much easier to work with!)
Step 3: Cut your rectangle in half, so you have two long strips. Brush them with that lovely garlic butter. Now for the best part! Sprinkle parmesan and the mozzarella blend down the middle. Do you like your twists extra cheesy or just a little? Share below!
Step 4: Fold the dough over the cheese to make a long rope. Pinch it shut tightly. Now, just tie it into a loose knot. Do not worry if it is not perfect. Place it on your baking sheet. Repeat with the rest of the dough.
Step 5: Bake them for about 15 minutes. They are done when they turn a beautiful golden brown. As soon as they come out, give them another brush of butter. Sprinkle on a little extra parmesan. This makes them glisten and taste incredible.
| Cook Time | 13–16 minutes |
| Total Time | 28 minutes |
| Yield | 8 twists |
| Category | Appetizer, Snack |
Three Tasty Twists on the Classic
Once you master the basic twist, you can have so much fun. Try one of these ideas next time. They are all wonderful in their own way.
- Pizza Twist: Add a spoonful of pizza sauce and some pepperoni with the cheese.
- Everything Bagel Twist: Swap the Italian seasoning for an everything bagel sprinkle.
- Herb Garden Twist: Use fresh chopped parsley and chives from the garden instead of dried herbs.
Which one would you try first? Comment below!
How to Serve Your Beautiful Twists
These twists are so friendly. They go with almost anything. I love to dip them in warm marinara sauce. They are also perfect next to a big, cozy bowl of soup. For a party, just pile them high on a wooden board.
What should you drink? A cold glass of milk is always a classic with these. For the grown-ups, a crisp Italian Prosecco is a lovely treat. It cuts through the richness so nicely.
Which would you choose tonight?
Keeping Your Twists Tasty
Let’s talk about keeping these garlic twists yummy. You can store them in the fridge for three days. Just put them in an airtight container.
They freeze beautifully for a happy future snack. Let the twists cool completely first. Then pop them into a freezer bag.
I once put warm twists in a container. The next day, they were soggy. Now I always let them cool on the rack.
To reheat, use your oven or toaster oven. This brings back their crispy outside. A microwave will make them soft and chewy.
Batch cooking saves you time on a busy day. It means a warm, homemade treat is always close. That is a wonderful feeling.
Have you ever tried storing it this way? Share below!
Simple Fixes for Perfect Twists
Sometimes the dough can be tricky. If it gets too warm, it becomes sticky. Just put it back in the fridge for ten minutes.
I remember when my cheese spilled out everywhere. I was so disappointed. The key is to not overfill the dough rope.
Seal the edges very tightly. Press the dough together with your fingers. This keeps all that cheesy goodness inside while baking.
If your knots are not golden brown, they need more time. Ovens can be different from each other. Trust your eyes more than the clock.
Getting the seal right builds your cooking confidence. A good seal also makes the flavor burst in your mouth. Both are so important.
Which of these problems have you run into before?
Your Garlic Twist Questions
Q: Can I make these gluten-free?
A: Yes! Use a gluten-free crescent roll dough. The method stays exactly the same.
Q: Can I make them ahead of time?
A: You can shape the knots and chill them. Bake them right before your guests arrive.
Q: What if I don’t have Italian seasoning?
A: A mix of dried basil and oregano works great. Use what you have in your cupboard.
Q: Can I double this recipe?
A: Absolutely. Just use two baking sheets. You might need to bake them a little longer.
Q: Any extra tips?
A: Let them cool for five minutes before eating. *The cheese will be very hot!*
Which tip will you try first?
From My Kitchen to Yours
I hope you love making these buttery twists. They always make my kitchen smell like heaven. I know yours will too.
It brings me so much joy to share this with you. Cooking is about making memories. It is about sharing food with people you love.
I would be thrilled to see your creations. Your beautiful, golden twists will make my day.
Have you tried this recipe? Tag us on Pinterest!
Happy cooking!
—Tessa Hammond.
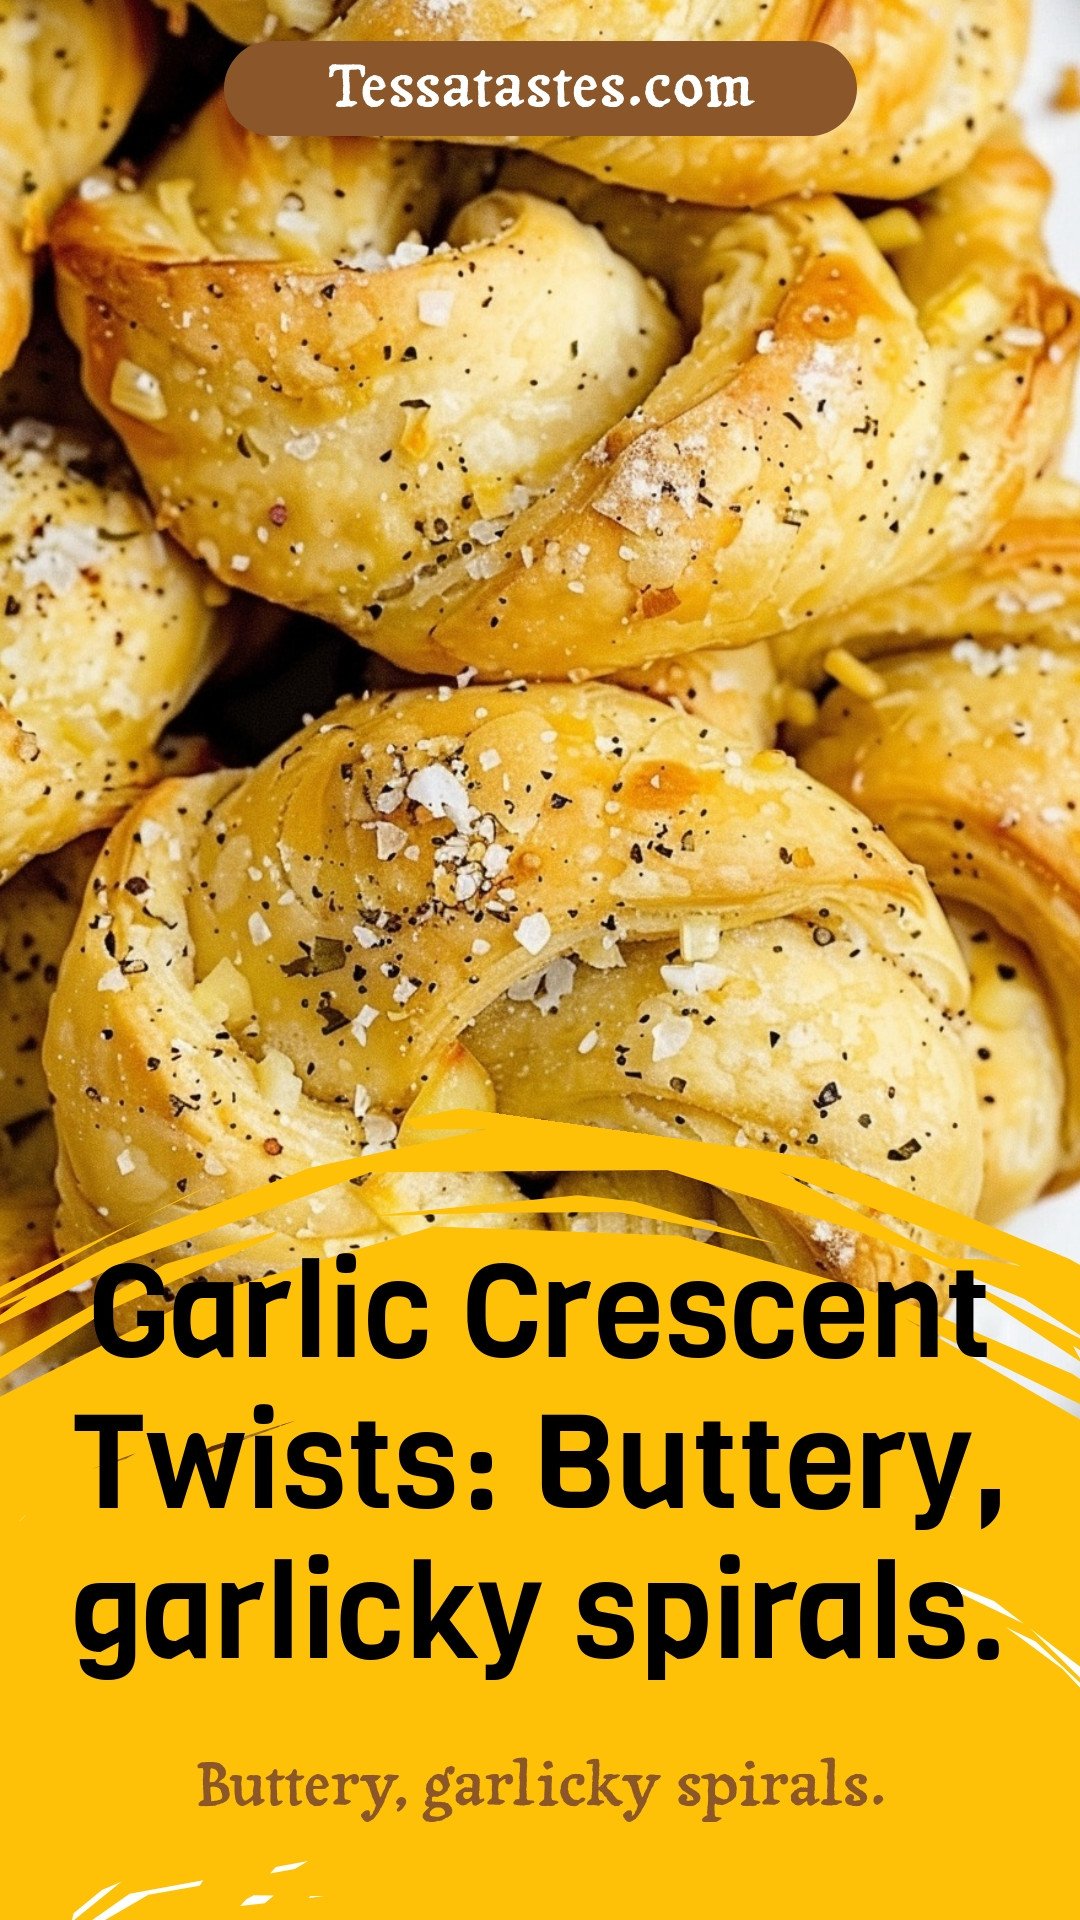
Garlic Crescent Twists
Description
These buttery, garlicky crescent spirals are the ultimate easy appetizer or side dish. Perfectly flaky and so addictive!
Ingredients
Instructions
- Preheat oven to 350°F. Line a large baking sheet with a piece of parchment paper. Set aside.
- In a small bowl, stir together the melted unsalted butter, garlic salt, and Italian seasoning. Set aside.
- On a large pastry mat, place two crescent triangles together to form a rectangle. Pinch together the seam. Using a rolling pin, roll out the rectangle (being sure to keep the center seam pressed together) into a 6×9-inch rectangle. You can place the extra crescent triangles into the refrigerator to stay cold while you are working with the first set to make knots.
- Using a pastry cutter, cut a straight line down the center of the large rectangle giving you two thinner rectangles.
- Using a pastry brush, lightly brush the entire surface of both rectangles with the melted butter mixture. You should have about ⅓ to ½ of your melted butter mixture remaining after you have brushed the inside of each knot. You will use this reserved amount to brush onto the top of the hot baked garlic knots once they are removed from the oven.
- Sprinkle about 1½ teaspoons of the grated parmesan cheese down the center of each crescent rectangle, followed by approximately 1½ tablespoons of the shredded mozzarella & provolone cheese blend down the center of each crescent rectangle as well.
- Gently fold over (from the longer side) the crescent dough, tucking the cheese inside the dough to form a long rope. Be sure to seal the ends and sides of the rope as tight as possible.
- Carefully tie each rope into a loose knot. Place the knot onto the parchment-lined baking sheet.
- Repeat steps 3 to 8 until you have all 8 knots formed and placed 2 inches apart on the prepared baking sheet.
- Bake for 13 to 16 minutes or until the knots are golden brown.
- As soon as the garlic knots come out of the oven, brush them with the remaining melted butter mixture and sprinkle them with a little of the extra grated parmesan cheese.
Notes
- Easy crescent roll recipes, garlic bread twists, quick party appetizers, homemade garlic butter, puff pastry snacks.


Leave a Reply