My First Apple Pie
My first pie was a mess. I was ten. I used way too many apples. The filling bubbled over in the oven. My mom’s kitchen smelled like burnt sugar for a week. I still laugh at that.
But that smell! It was sweet and cozy. It felt like a hug. That’s why I still love making pie. It turns your kitchen into a happy place. What’s your first kitchen memory? Was it messy or perfect?
Why This Recipe Works
This pie is a little healthier. We use coconut sugar. It tastes like brown sugar but is less processed. The oats in the topping add a nice chew. It still feels like a treat.
*Fun fact*: Granny Smith apples are perfect for pie. They are tart and firm. They don’t turn to mush when baked. This matters because you want slices, not applesauce, in your pie!
The Heart of the Pie
Let’s talk filling. Toss those apple slices gently. Coat them well with the lemon and sugar. The lemon keeps them bright. The cornstarch thickens all the yummy juices.
Mound the apples high in the middle. They will sink as they cook. This makes a nice, full pie. Doesn’t that smell amazing already? What’s your favorite apple for snacking? Mine is a crisp Honeycrisp.
Getting Your Hands Dirty
The topping is the best part. Use your fingers to mix the butter in. You want little crumbles. It should look like wet sand. This is my favorite step. It feels like playing in mud, but tastier!
Sprinkle it all over the apples. Be generous. That crispy topping is pure gold. This matters because texture is everything. You want soft apples and a crunchy, sweet top.
The Waiting Game
Bake your pie. Put a tray underneath. Trust me, it saves a big cleanup. The hardest part comes next. You must let the pie cool.
I know, it’s hard to wait. But if you cut it hot, the filling will run. Letting it set makes neat slices. Serve it with cold ice cream. The hot and cold together is magic. Do you prefer ice cream or whipped cream on your pie? I can never decide!
Ingredients:
| Ingredient | Amount | Notes |
|---|---|---|
| Pie crust | 1 (9-inch) | Store-bought or homemade |
| Granny Smith apples | 8 cups | Peeled and sliced ¼-inch thick |
| Fresh lemon juice | 1 Tablespoon | |
| Coconut sugar | ¼ cup | For the filling |
| Ground cinnamon | 1 teaspoon | For the filling |
| Cornstarch or arrowroot flour | 2 Tablespoons | |
| Salt | ¼ teaspoon | |
| All-purpose flour | ½ cup | Or whole wheat pastry/gluten-free flour (for topping) |
| Rolled oats | ½ cup | |
| Coconut sugar | ½ cup | For the topping |
| Ground cinnamon | ½ teaspoon | For the topping |
| Butter or coconut oil | 6 Tablespoons | Softened |
| Vanilla ice cream or whipped cream | For serving | Optional |
My Cozy Dutch Apple Pie Adventure
Hello, my dear. Come sit at the kitchen table. I want to tell you about my favorite apple pie. It’s a Dutch apple pie. That means it has a wonderful, crumbly topping. It reminds me of autumn leaves crunching underfoot. We’ll make it a bit healthier today. But I promise, it’s just as delicious. Doesn’t that smell amazing already?
We’ll use coconut sugar and whole grains. They add a lovely, warm flavor. The apples get all soft and bubbly underneath. The topping stays crisp and sweet. I still laugh at the first time I made it. I was so proud. Then I realized I forgot to peel the apples! Let’s avoid that little adventure, shall we?
Step 1: First, turn your oven on to 375 degrees. Grease your pie pan lightly. Now, gently lay your pie crust inside. Press it into the corners. Crimp the edges with your fingers to make it pretty. I like to think of it as giving the crust a little hug.
Step 2: Let’s prepare the apples. Peel and slice them nice and thin. Toss them in a big bowl. Add the lemon juice, sugar, cinnamon, cornstarch, and salt. Mix until every slice is coated. This keeps the apples from turning brown. (A hard-learned tip: slice the apples evenly. This way they all cook at the same time.)
Step 3: Time for the fun part—the crumble! In another bowl, mix the flour, oats, sugar, and cinnamon. Add the soft butter. Now use your clean hands to mix it. Squish it between your fingers until it looks like wet sand. This is my grandson’s favorite job. Do you like a big crumble or a small one? Share below!
Step 4: Pour your apple filling into the crust. Pile them a bit higher in the middle. Now, sprinkle your crumble topping all over the apples. Cover them like a cozy, sugary blanket. Place the pie on a baking sheet. This catches any juicy spills. It saves a big mess in your oven!
Step 5: Bake your pie for 45 to 60 minutes. Peek at it a few times. The crust should be golden. The apples should be bubbling. If the top browns too fast, lay a piece of foil over it. The hardest part is next. You must let the pie cool completely. This lets the filling set. Then you can cut a perfect slice.
Cook Time: 45–60 minutes
Total Time: About 1 hour 30 minutes
Yield: 8 lovely slices
Category: Dessert, Baking
Three Fun Twists to Try
This pie is like a good friend. It’s happy to change its outfit. Here are a few fun ideas for your next bake. They make the kitchen smell even better.
The Berry Buddy: Add a cup of fresh cranberries to the apples. It gives a wonderful tart little pop.
The Nutty Crunch: Stir a handful of chopped pecans into your crumble topping. It adds a nice, toasty crunch.
The Ginger Zing: Add a teaspoon of grated fresh ginger with the apples. It feels so warm and cozy inside.
Which one would you try first? Comment below! I’d love to hear your pick.
Serving It Up With Style
A warm slice of pie is a joy. But a few little touches make it a celebration. Always serve it with a scoop of vanilla ice cream. Watching it melt is half the fun. A dollop of whipped cream is lovely too. For a pretty plate, add a few thin apple slices on the side.
What to drink? A cold glass of milk is my classic choice. It’s perfect for a young helper. For the grown-ups, a small cup of hot coffee is wonderful. The bitter taste pairs so nicely with the sweet pie. Which would you choose tonight? I think I’d have both!
Keeping Your Apple Pie Cozy
Let’s talk about storing your beautiful pie. Once it’s cool, cover it with foil. It will be happy on the counter for two days. For longer stays, the fridge is best. Wrap it well and it keeps for four days.
You can freeze this pie too. Wrap the whole cooled pie tightly. Or, freeze individual slices for a quick treat. Thaw it in the fridge overnight when you’re ready.
To reheat, warm a slice in the oven. This keeps the topping crisp. I once microwaved a slice and the topping got soft. The oven is much better for texture.
Batch cooking saves so much time. Make two pies and freeze one. A ready-made dessert is a gift to your future self. It means you can share joy on a busy day. Have you ever tried storing it this way? Share below!
Pie Problems? Simple Fixes!
Is your filling too runny? The apples release lots of juice. Make sure your cornstarch coats every slice well. Let the pie cool completely before cutting. This lets the filling set properly.
Is your topping browning too fast? Ovens can be tricky. I remember when my topping got too dark. Just lay a piece of foil loosely over the top. This will shield it while the apples finish cooking.
Is your bottom crust soggy? Use a glass or ceramic pie plate. These help the crust get crisp. Placing the pie on a baking sheet helps too. It catches drips and gives even heat.
Fixing these small issues builds your confidence. You learn how your oven works. It also makes sure every bite is delicious. A perfect slice is a wonderful reward. Which of these problems have you run into before?
Your Apple Pie Questions, Answered
Q: Can I make this gluten-free? A: Yes! Use a gluten-free pie crust. Also use gluten-free flour for the topping.
Q: Can I make it ahead? A: Absolutely. Assemble the pie the night before. Keep it covered in the fridge until baking.
Q: What if I don’t have coconut sugar? A: Brown sugar works just fine. It will taste a little different but still sweet.
Q: Can I double the recipe? A: You can make two pies. I don’t recommend making one deep-dish pie. The apples might not cook evenly.
Q: Any optional tips? A: Add a pinch of nutmeg to the apples. *Fun fact: nutmeg and apples are old friends.* It adds a warm, cozy flavor. Which tip will you try first?
From My Kitchen to Yours
I hope you love making this pie. The smell of baking apples is pure happiness. It always reminds me of my own grandma’s kitchen.
I would love to see your creation. Sharing food stories connects us all. Please show me your beautiful, crumbly-topped pies.
Have you tried this recipe? Tag us on Pinterest! You can find me at Tessa’s Kitchen Table. I can’t wait to see what you bake.
Happy cooking!
—Tessa Hammond.


Healthy Dutch Apple Pie: Healthy Dutch Apple Pie Recipe
Description
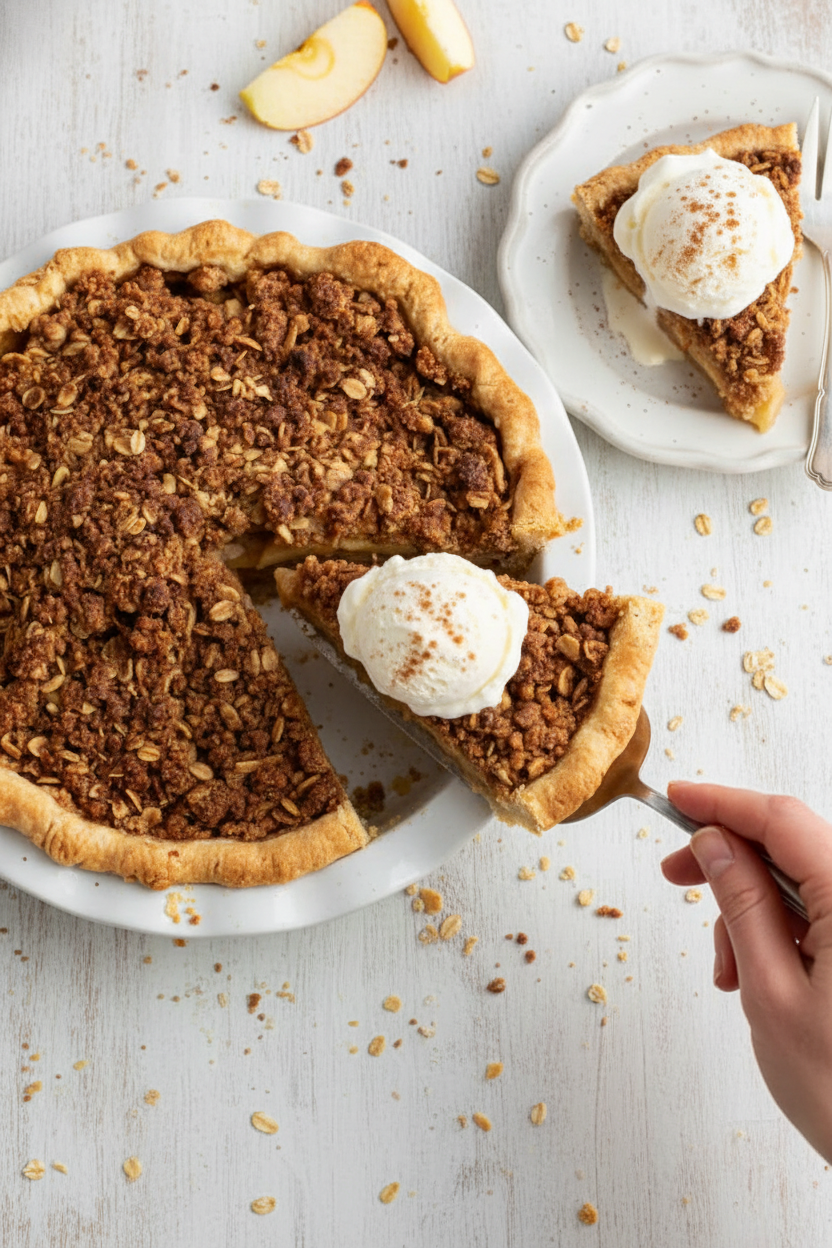
Enjoy a healthier twist on a classic dessert with this Dutch Apple Pie, featuring a sweet apple filling and a spiced oat crumble topping.
Ingredients
Filling
Topping
Instructions
- Preheat oven to 375ºF and grease a 9-inch pie pan.
- Fit pie crust in pie plate, crimping the edges. Set aside.
- In a large bowl toss apple slices with lemon juice, coconut sugar, cinnamon, cornstarch (or arrowroot flour) and salt until evenly coated.
- In a medium mixing bowl stir together flour, rolled oats, coconut sugar and cinnamon. Add softened butter and use your hands or a fork to mix together until a crumble consistency forms.
- Pour apples into the pie crust, mounding them towards the center.
- Sprinkle the crumble topping evenly over apples.
- Place pie pan on a baking sheet to help prevent any spillage that may happen. Bake for 45-60 minutes or until crust is browned and apples are bubbling. Check the pie a few times while baking to make sure that the crust and topping aren’t browning too much. If that happens cover with tin foil.
- Remove from oven and let pie cool to room temperature before cutting so the filling has time to set.
- Serve with a scoop of vanilla ice cream or dollop of whipped cream and enjoy!
Notes
- For a vegan version, use coconut oil in the topping and serve with dairy-free ice cream or whipped cream.


Leave a Reply