The Best Kind of Messy
Hello, my dear. Come sit. Let’s talk about caramel apples. They are a sticky, happy mess. I love making them every fall. The kitchen smells like sweet butter and sugar. Doesn’t that smell amazing?
I remember making these with my grandson. He got caramel on his nose. I still laugh at that. Making food with someone is the best part. This matters because shared joy is the real recipe. So, who will you make these with? Tell me their name.
A Little Story About Apples
We use Granny Smith apples here. They are tart and firm. The sour apple tastes perfect with sweet caramel. It’s a happy balance. Like life needs both sweet and sour days.
*Fun fact*: These green apples are named for a real person! Maria Ann Smith grew them in Australia long ago. Now, let me ask you. Do you like tart apples or sweet ones best?
The Heart of the Caramel
The caramel is simple. Butter, brown sugar, that sweet milk in a can. You stir and stir. It takes patience. Your arm might get tired. But watch the pot closely.
You need a candy thermometer. The temperature is very important. 248 degrees is the magic number. This matters because it makes the caramel set right. It will be chewy, not runny. Trust the thermometer. It’s your kitchen friend.
Time to Get Cozy
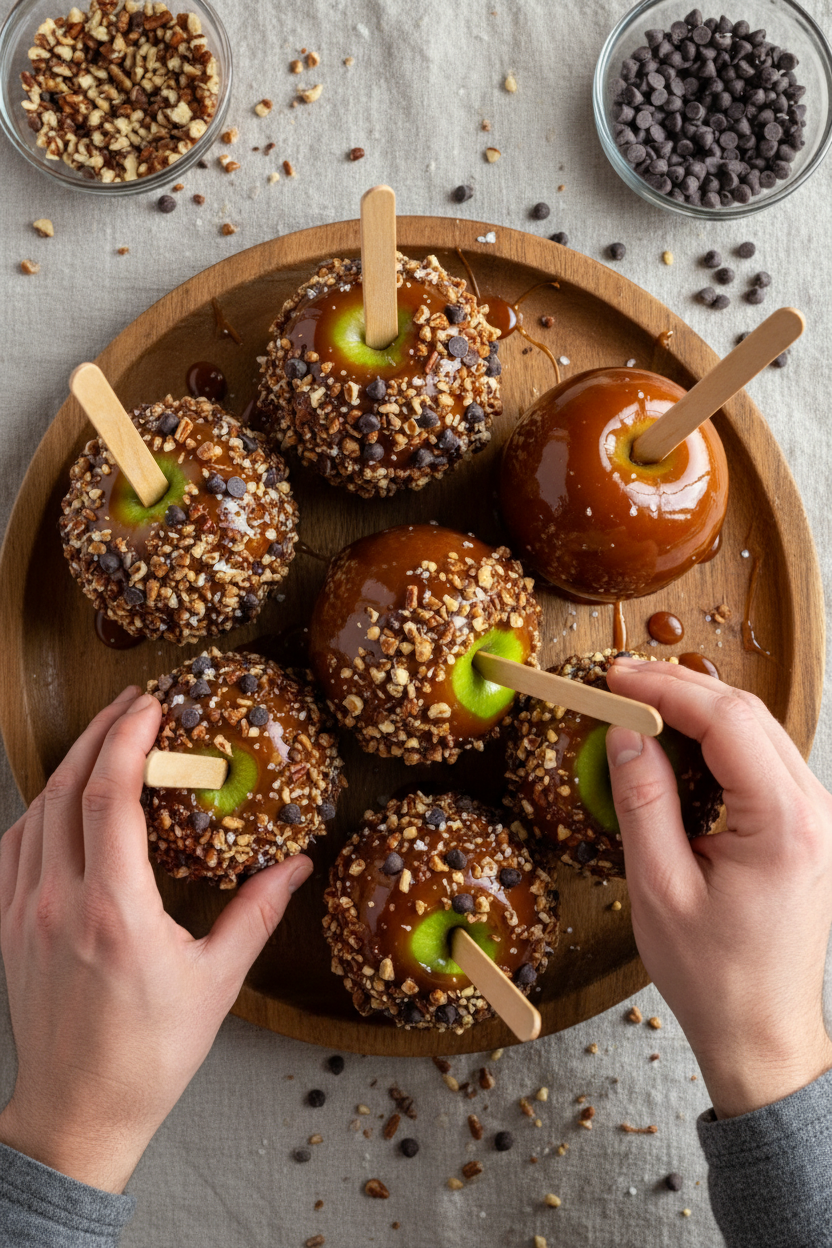
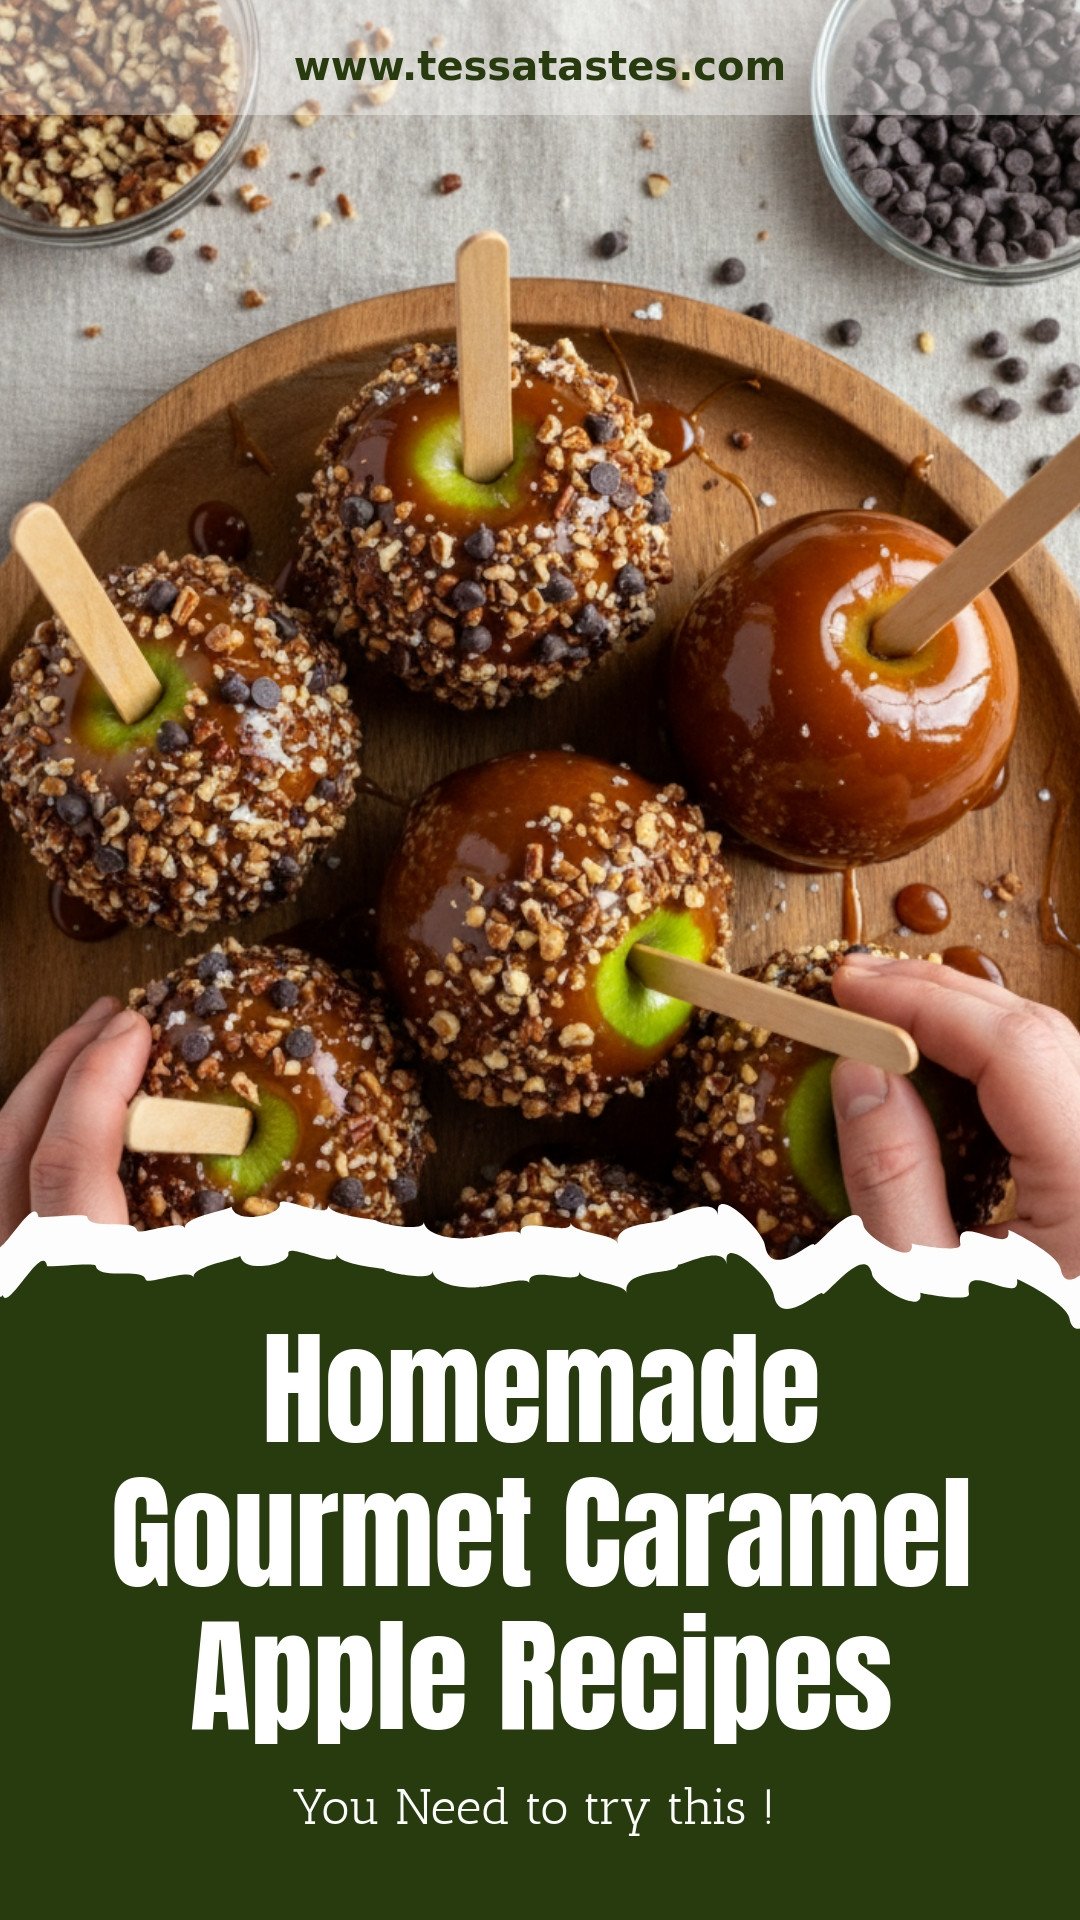
Now for the fun part. Dry your apples completely. Any water makes the caramel slide off. Push a stick in the top. It’s like giving your apple a handle.
Carefully dip and swirl each apple. Let the extra drip back. This is where you can get creative. Roll it in chopped nuts. Or press on chocolate chips. What sounds best to you? I love pecans myself.
The Hardest Part
You must let them cool. Set them on parchment paper. Wait a whole hour. I know, it’s the longest hour. But it makes the caramel perfect.
Use this time to clean your pot. Soak it in warm water. The caramel will melt right off. Then, gather everyone. Unwrap your treats. Hear the first crunchy bite. That sound is pure happiness. What is your favorite fall treat to make? I’d love to know.
Ingredients:
| Ingredient | Amount | Notes |
|---|---|---|
| Granny Smith apples | 6 large | |
| Unsalted butter | 1 cup | |
| Packed brown sugar | 2 cups | |
| Corn syrup | 1 cup | |
| Sweetened condensed milk | 1 can (14 ounces) | |
| Vanilla extract | 1 teaspoon | |
| Salt | 1⁄4 teaspoon | |
| Chopped nuts | 1 cup | Optional |
| Chocolate chips | 1 cup | Optional |
| Wooden skewers or popsicle sticks | 6 |
My Favorite Fall Treat: Homemade Caramel Apples
Hello, my dear. Come sit at the table. Let’s make something sweet. I always think of my grandkids when I make these. Their smiles are so big and sticky. We’re making gourmet caramel apples today. Doesn’t that sound fancy? But it’s really just fun. The secret is in the homemade caramel. It fills the whole kitchen with a warm, buttery smell. I still laugh at that one time I used wet apples. What a slippery mess that was. Let’s avoid that together.
First, find your six best Granny Smith apples. They are nice and tart. Wash them well, then dry them like you’re polishing treasure. Any water left will make the caramel slide right off. Push a popsicle stick firmly into the top of each one. Now they look like lollipops. Set them on a baking sheet with parchment paper. This makes clean-up so much easier later.
Step 1: Grab a big, heavy saucepan. Melt your butter in it over medium heat. It will bubble and sing a little. Stir in the brown sugar, corn syrup, and that whole can of sweetened condensed milk. Stir it until it all becomes one friendly, creamy mixture. This is the start of your magic caramel.
Step 2: Now, keep stirring. Bring the mixture to a gentle boil. Then turn the heat down just a bit. Let it simmer. You must stir constantly. This is the part where you chat with someone. It keeps you from getting bored. You need a candy thermometer here. Cook it until it hits 248°F. (My hard-learned tip: No thermometer? Drop a bit into a cup of cold water. It should form a firm, but not hard, ball.)
Step 3: When it reaches temperature, pull the pot off the heat. Stir in the vanilla and salt. That vanilla smell is heavenly. It makes all the difference. Be careful, the caramel is very hot. Let it cool for just a minute or two. It will thicken up a bit, which is perfect for coating.
Step 4: Time for the fun part. Hold an apple by its stick. Dip it right into the warm caramel. Turn it slowly to get it all covered. Lift it up and let the extra caramel drip off. Twirl it slowly over the pot. Do you twirl clockwise or counter-clockwise? Share below! Place it back on your baking sheet.
Step 5: If you want nuts or chocolate chips, now is the time. Roll your sticky apple in a bowl of them. Press them on gently. Then let all your apples cool and set. This takes about an hour. Try to be patient. The wait is always the hardest part for me.
Cook Time: 30 minutes
Total Time: 1 hour 45 minutes
Yield: 6 caramel apples
Category: Dessert, Snack
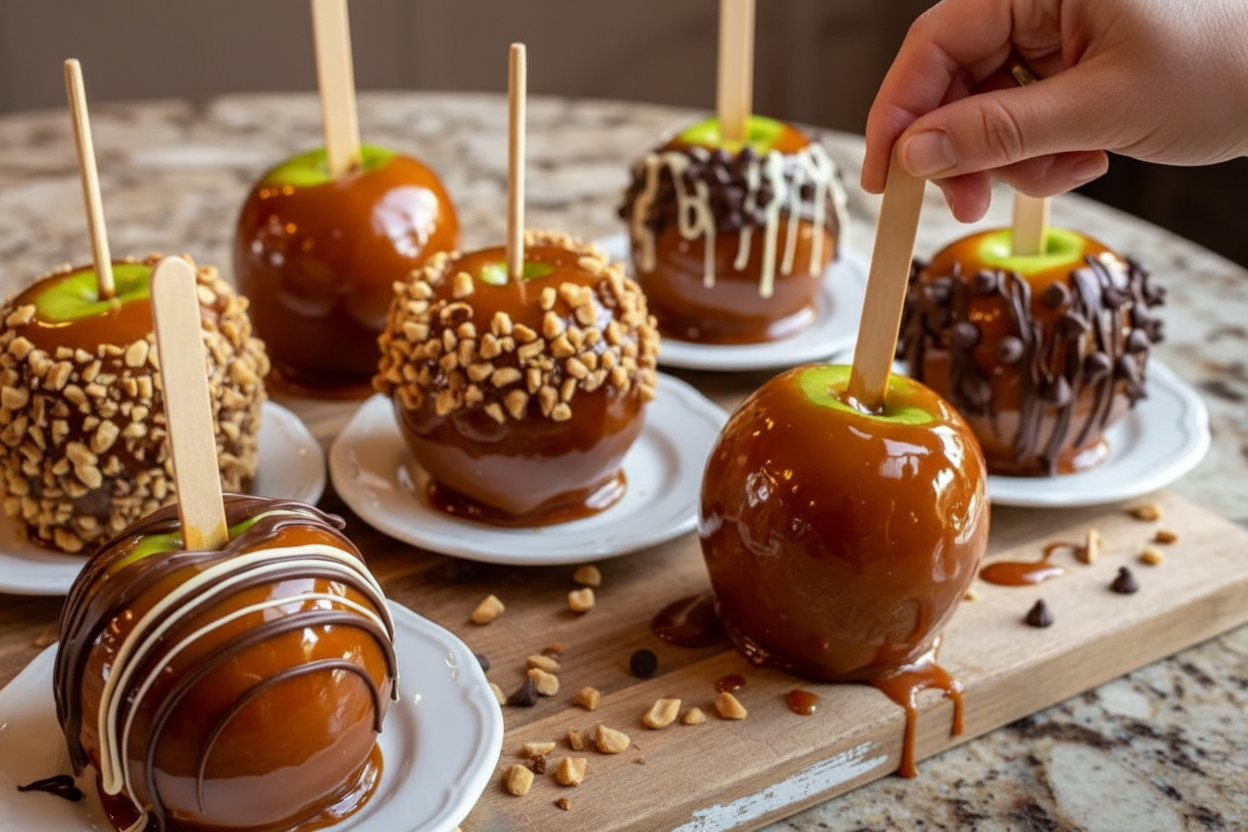
Three Fun Twists to Try
Once you master the classic, you can play. Here are my favorite ways to dress them up. They make wonderful gifts, too.
The Candy Shop Crunch: After dipping, roll your apple in crushed pretzels and mini M&M’s. Sweet and salty is the best combination.
The Autumn Spice: Add a pinch of cinnamon to your caramel with the vanilla. Then roll the finished apple in crushed gingersnap cookies. It tastes like a cozy sweater.
The Midnight Swirl: Let your caramel apple set. Then melt some chocolate chips and drizzle it all over in pretty stripes. So elegant and delicious.
Which one would you try first? Comment below!
Serving Your Sweet Creations
These apples are a show all by themselves. But I love making a little event of it. For a party, stand them in a tall vase filled with sugar or popcorn kernels. It looks so cheerful on the table. You could also slice them into wedges for sharing. Less messy that way.
What to drink? For the grown-ups, a small glass of chilled apple cider with a splash of bourbon is lovely. It echoes the apple flavor. For everyone else, a frosty glass of cold milk is the perfect partner. It cuts through the sweetness just right.
Which would you choose tonight?
Keeping Your Caramel Apples Perfect
These treats are best enjoyed the day you make them. But you can store them. Just put them in the fridge on their tray. They will keep for about three days.
I do not recommend freezing them. The caramel gets too hard and the apple turns mushy. I learned this the hard way. I once froze one for my grandson’s visit. It was a sad, soft mess when it thawed.
Batch cooking is a great idea for parties. Make a double batch of the caramel. Then you can dip many apples quickly. This saves you time and stress. Have you ever tried storing it this way? Share below!
Storing them right matters. It keeps your hard work from going to waste. It also means you can make treats ahead for a special day.
Caramel Apple Troubleshooting
Is your caramel sliding right off the apple? Your apples were not dry enough. Water and hot caramel are not friends. Dry them with a towel very well.
Is the caramel too thin or too thick? The temperature is key. Use a candy thermometer. I remember when I didn’t have one. My caramel was always runny. Getting the right temp gives you perfect, chewy caramel.
Are your toppings not sticking? Roll the apple right after dipping. The caramel must still be warm and sticky. This makes your apple look pretty and taste great. Which of these problems have you run into before?
Fixing these small issues builds your confidence. You learn that candy-making is not magic. It also makes sure every bite is delicious. That is the real goal.
Your Caramel Apple Questions, Answered
Q: Is this recipe gluten-free? A: Yes, all the ingredients listed are naturally gluten-free. Just check your vanilla extract label to be sure.
Q: Can I make these ahead? A: You can make them a day ahead. Store them in the refrigerator until you are ready to serve.
Q: What can I use instead of corn syrup? A: You can use golden syrup or honey. The flavor and texture will change a little, but it will work.
Q: Can I make a smaller batch? A: Absolutely. Just cut all the ingredients in half. You can make three lovely apples.
Q: Any fun topping ideas? A: Try crushed pretzels, sprinkles, or mini marshmallows. *Fun fact: The first caramel apples were made in the 1950s by a Kraft Foods employee.* Which tip will you try first?
From My Kitchen to Yours
I hope you have fun making these sweet treats. They always make me think of autumn fairs and happy children. I would love to see your creations.
Share a picture of your gourmet apples. You can show off your favorite topping combination. Have you tried this recipe? Tag us on Pinterest!
It brings me so much joy to share these kitchen stories with you. Happy cooking!
—Tessa Hammond.
Homemade Gourmet Caramel Apples: Homemade Gourmet Caramel Apple Recipes
Description
Enjoy the perfect blend of sweet, tart, and crunchy with these homemade gourmet caramel apples. A classic fall treat made with simple ingredients.
Ingredients
Instructions
- Wash and thoroughly dry the apples. Remove the stems and insert a wooden skewer into the top of each apple. Set them aside on a lined baking sheet.
- In a heavy saucepan, melt the butter over medium heat. Stir in the brown sugar, corn syrup, and sweetened condensed milk.
- Continue to stir the mixture until it reaches a boil. Reduce the heat slightly and allow the mixture to simmer, stirring constantly, until it reaches a temperature of 248°F (use a candy thermometer to check).
- Once the caramel reaches the desired temperature, remove it from the heat and stir in the vanilla extract and salt.
- Carefully dip each apple into the caramel, turning them to coat evenly. Allow any excess caramel to drip back into the saucepan.
- If desired, roll the freshly coated caramel apples in nuts or chocolate chips for added flavor and texture.
- Place the caramel apples back on the lined baking sheet to cool and set completely, approximately 1 hour.
Notes
- For best results, ensure apples are completely dry before dipping. Store finished caramel apples in a cool place, but not the refrigerator, as it can cause the caramel to soften.


Leave a Reply