My First Arepa
My friend Maria taught me this recipe. We were in her sunny kitchen. She showed me how to mix the cornmeal and water. I was nervous my dough would be too sticky.
Hers looked perfect. Mine looked lumpy. I still laugh at that. But she said, “Just wait, Tessa.” After five minutes of resting, the dough was soft and easy. That rest matters. It lets the cornmeal drink up the water.
Why Dough Needs a Nap
That five-minute rest is not a silly step. It is the most important part. The dry cornmeal needs time to get friendly with the water. This makes it soft and happy.
If you skip it, your dough will crack. It will be hard to shape. Good food needs a little patience. Always let your dough rest. What’s a recipe step you used to skip but now never do?
The Magic of Hot Pan & Wet Hands
Here is my best tip. Keep a bowl of water nearby. Wet your hands before you grab the dough. This keeps it from sticking to you. It makes shaping so much easier.
Then, get your pan nice and hot. A hot pan gives you a beautiful, golden crust. *Fun fact: The cornmeal for arepas is pre-cooked. That’s why it’s called “masarepa” or “pre-cooked cornmeal.”* It cooks fast in the pan. Doesn’t that smell amazing when it starts to fry?
Fill Them With Love
An arepa is like a warm, cornbread pocket. You can slice it open and fill it with anything. I love scrambled eggs and cheese for breakfast. For dinner, shredded chicken or black beans are perfect.
This is why the recipe matters. It is a simple, humble food. But it can hold so much goodness inside. It feeds a family without costing much. What would you put inside your dream arepa? Tell me, I’m always looking for ideas!
Your Turn to Make Memories
Do not worry if your first arepa is not round. My first one looked like a little map of Florida. It still tasted wonderful. The important thing is to try.
Cooking connects us. It connects us to friends like Maria. It connects us to our own kitchens. Will you try making arepas this week? I would love to hear how it goes. Share your story with me.
Ingredients:
| Ingredient | Amount | Notes |
|---|---|---|
| Warm water | 2 ½ cups | |
| Salt | 1 teaspoon | |
| Pre-cooked white cornmeal | 2 cups | |
| Cooking oil | 1 tablespoon | For greasing the cooking surface |
My Kitchen Table Arepas
Hello, my dear. Come sit with me. Let’s make arepas. They are simple corn cakes from Venezuela. My friend Maria taught me years ago. We laughed so much that first time. My dough was too wet. Hers was perfect. Now, I want to share them with you. They are warm, golden, and so comforting. You can fill them with anything you like. Doesn’t that sound wonderful? Let’s begin.
Step 1: Get your biggest bowl. Pour in the warm water. It should feel nice on your wrist. Add the salt and swirl it with your fingers. Watch the salt crystals disappear. This is where the flavor starts. (Hard-learned tip: If the water is too hot, it will cook the cornmeal. We don’t want that!)
Step 2: Now, add the cornmeal slowly. I use my hands to mix. It feels like soft, wet sand. Keep mixing until no dry spots remain. The dough will come together. Cover the bowl with a cloth. Let it rest for five minutes. This lets the cornmeal drink up the water. It makes the dough happy and soft.
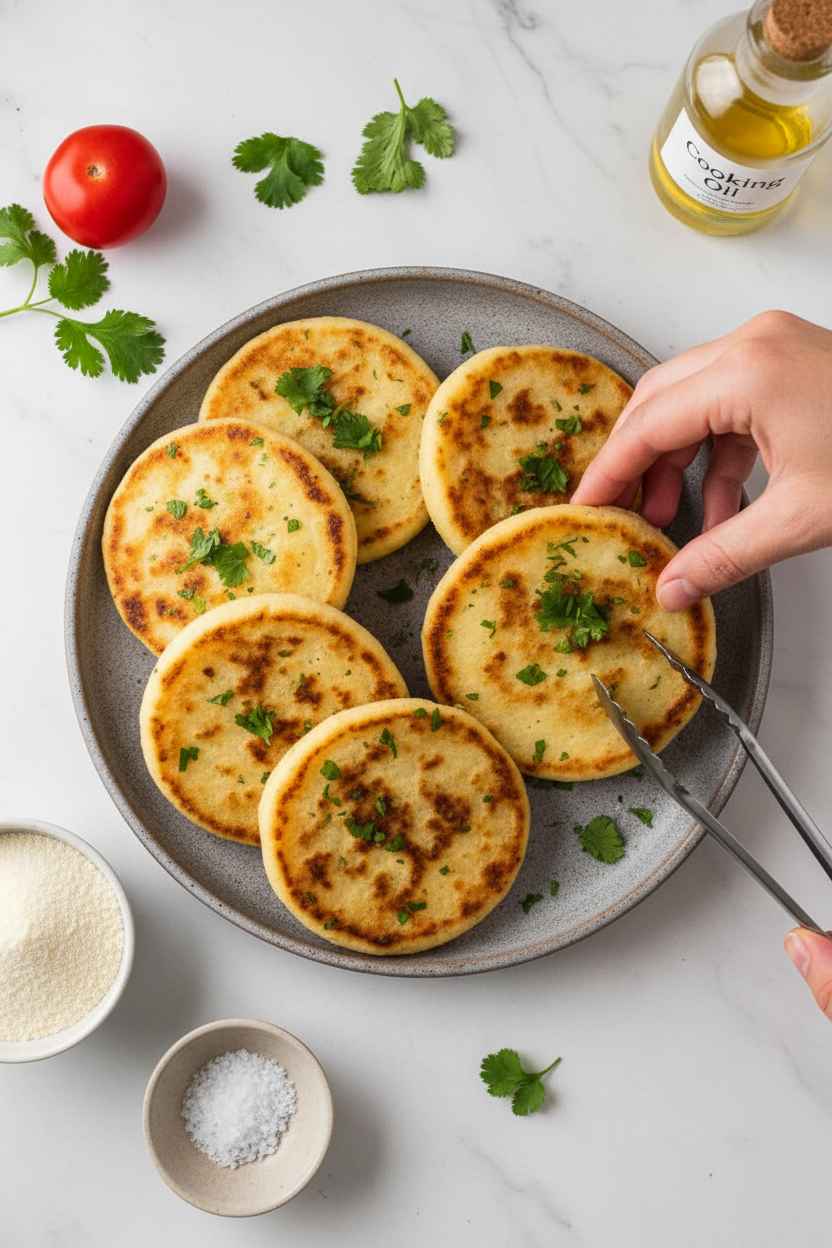
Step 3: While it rests, heat your pan. A cast iron skillet is my favorite. Put a little bowl of water next to you. Wet hands stop the dough from sticking. I still laugh at my first arepa shapes. They looked like little islands! Do you like cooking with your hands or a spoon? Share below!
Step 4: Time to shape! Wet your hands well. Grab a fist of dough. Roll it into a smooth ball. Then, gently press it into a disc. Make the edges nice and smooth. Aim for the size of your palm. Don’t worry if it’s not perfect. Each one has its own character.
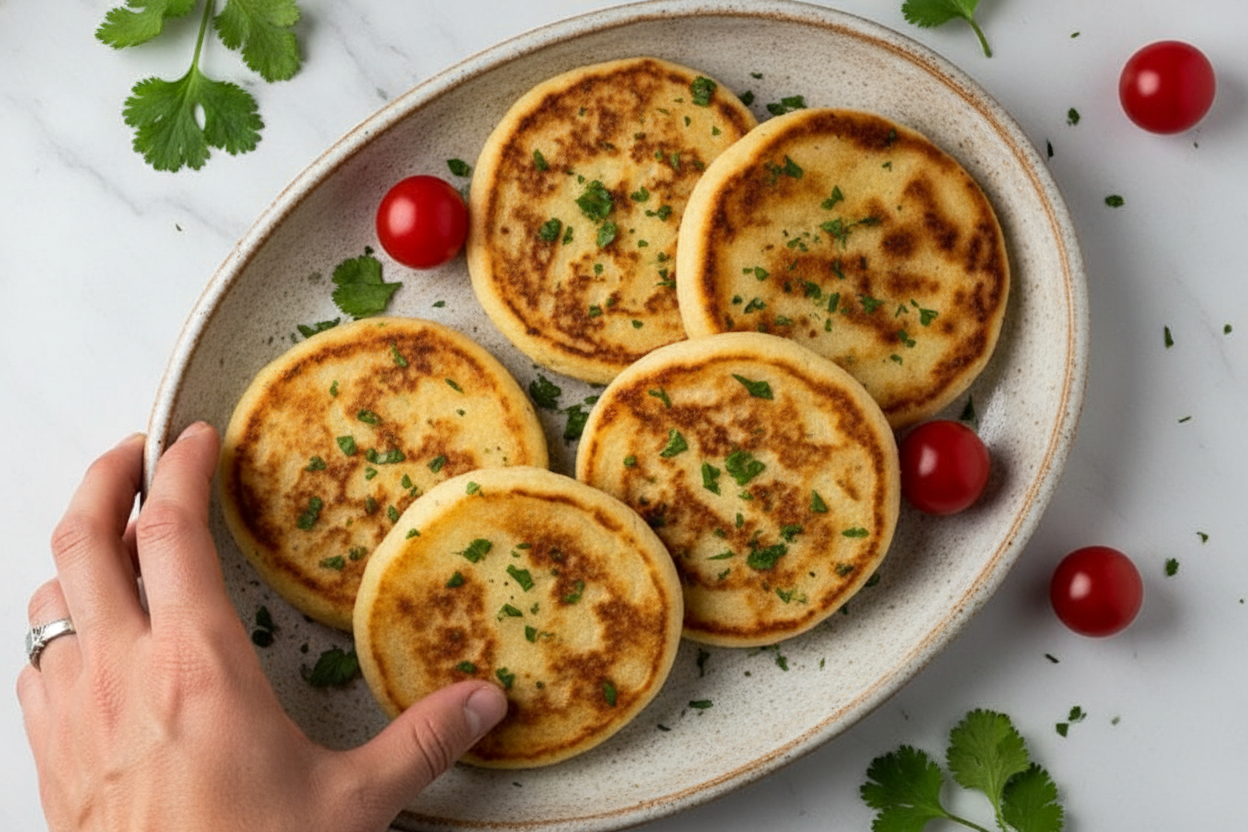
Step 5: Add a tiny bit of oil to your hot pan. Place your arepas in gently. You should hear a soft sizzle. Cook them until they are golden brown. Then, flip them over. They will get a little puffy. That smell is amazing, isn’t it? It means they are ready for you.
Cook Time: 10–14 minutes
Total Time: 20 minutes
Yield: 8 arepas
Category: Bread, Snack
Three Fun Twists to Try
Once you master the basic arepa, you can play! Here are my favorite little twists. They make every bite a surprise.
The Cheesy Sunshine: Mix a handful of shredded cheese right into the dough. It melts and makes golden, crispy edges.
The Garden Patch: Fold in some sweet corn kernels and chopped cilantro. It tastes like a summer afternoon.
The Sweet Tooth: Add a spoon of sugar and a dash of cinnamon. Cook it and drizzle with honey. Perfect for breakfast.
Which one would you try first? Comment below!
Serving Them Up Right
A hot arepa is a blank canvas. Slice it open like a pita pocket. The steam comes out, all warm and cozy. Now, fill it up! I love shredded chicken with avocado. Black beans and cheese are another winner. For a fresh side, a simple tomato salad is perfect.
What to drink? A cold glass of homemade lemonade is my go-to. It cuts through the richness. For a grown-up treat, a light, crisp beer pairs beautifully. It just feels like a celebration. Which would you choose tonight?
Keeping Your Arepas Happy for Later
Let’s talk about storing these golden treats. Cool them completely first. Then, they can live in your fridge for three days. Just wrap them in a clean kitchen towel.
For the freezer, wrap each arepa in plastic. Pop them all in a freezer bag. They will keep for two months. This is perfect for busy weeks.
To reheat, use your toaster or oven. I love my toaster for a fast, crispy lunch. My first frozen arepa came out perfectly! It felt like a little kitchen victory.
Batch cooking matters. It means a homemade meal is always minutes away. It saves you time and money. Have you ever tried storing it this way? Share below!
Arepa Troubles? Easy Fixes Right Here
Is your dough too sticky? Just wet your hands. The dampness stops the dough from clinging. Your hands stay clean and the dough shapes easily.
Are they cracking on the edges? The dough needs more water. Add a spoonful and knead it in. I remember when mine cracked like a dry riverbed. A little water fixed it!
Not getting that golden color? Your pan might be too hot. Turn it down to medium. Let them cook slowly. This patience gives you a crispy outside and soft inside.
Fixing these issues builds your cooking confidence. It also makes your food taste so much better. Which of these problems have you run into before?
Your Quick Arepa Questions, Answered
Q: Are arepas gluten-free? A: Yes! The cornmeal is naturally gluten-free. Just check your brand’s label to be sure.
Q: Can I make the dough ahead? A: You can. Keep it covered in the fridge for one day. Shape and cook when ready.
Q: What if I don’t have that cornmeal? A: You must use pre-cooked white cornmeal. It is often called “masarepa” or “harina pan.”
Q: Can I double the recipe? A: Absolutely. Just use a bigger bowl. The dough is very easy to scale up.
Q: Any fun extra tip? A: Try adding a little butter to the dough. *It makes them extra tender and rich.* Which tip will you try first?
From My Kitchen to Yours
I hope you love making arepas as much as I do. They are simple, hearty, and full of love. Cooking is about sharing stories and full bellies.
I would be so thrilled to see your creations. Share a photo of your golden arepas with me. Have you tried this recipe? Tag us on Pinterest! Let’s fill that board with deliciousness.
Happy cooking!
—Tessa Hammond.

Arepas: Master the Art of Making Arepas at Home
Description
Master the art of making delicious, golden-brown arepas at home with this simple recipe. Perfect for any meal, these versatile cornmeal cakes are a staple of Latin American cuisine.
Ingredients
Instructions
- In a large bowl, add your warm water and salt and gently mix until the salt dissolves.
- To that bowl, begin slowly adding your cornmeal, mixing as you do either with your hands or with a wooden spoon until all the cornmeal is added.
- Continue mixing until there are no lumps of dry cornmeal, then cover it and set it aside to rest for 5 minutes. This step will help the cornmeal absorb the moisture and become soft and hydrated.
- While the dough is resting, heat a griddle, cast iron, or non-stick pan to medium heat, and fill a small bowl with water for wetting your hands. Oil your pan just before beginning to work with the dough.
- Once done resting, use damp hands to grab a fist-sized amount of dough (about 3 tablespoons) and shape it into a ball before flattening out into a disc, being careful to keep the edges smooth as you do so. You want your arepas to be about 3-4 inches in diameter.
- Fry your arepas, flipping halfway, until they are golden brown and puffy, about 5-7 minutes per side.
- Serve hot and enjoy!
Notes
- Arepas are incredibly versatile. Slice them open and fill with cheese, shredded meats, beans, avocado, or eggs for a complete meal.


Leave a Reply