The Secret is in the Scoop
Let’s talk about cookie scoops. My grandson calls them “dough ice cream scoops.” I still laugh at that. For these cookies, you scoop once. Then you scoop again. You stack that second scoop right on top of the first.
This little trick matters. It gives the cookie height. It makes it thick and soft inside. That bakery-style look starts right here. Do you have a favorite kitchen tool that makes baking more fun?
Butter and Sugar, Best Friends
Creaming butter and sugar is my favorite step. You beat them until they are fluffy and pale. It should look like sweet, creamy sand. Doesn’t that smell amazing already?
This step matters so much. It adds tiny air pockets to the dough. Those pockets make the cookie tender. They help it rise just right in the oven. *Fun fact*: This is why room-temperature butter is key. Cold butter just won’t get as fluffy!
A Little Round-Up After Baking
Here is my mini-anecdote. I once took cookies out and thought they looked messy. My friend Edna saw me sigh. She grabbed a small bowl. She gently swirled it over a warm cookie. It became a perfect circle!
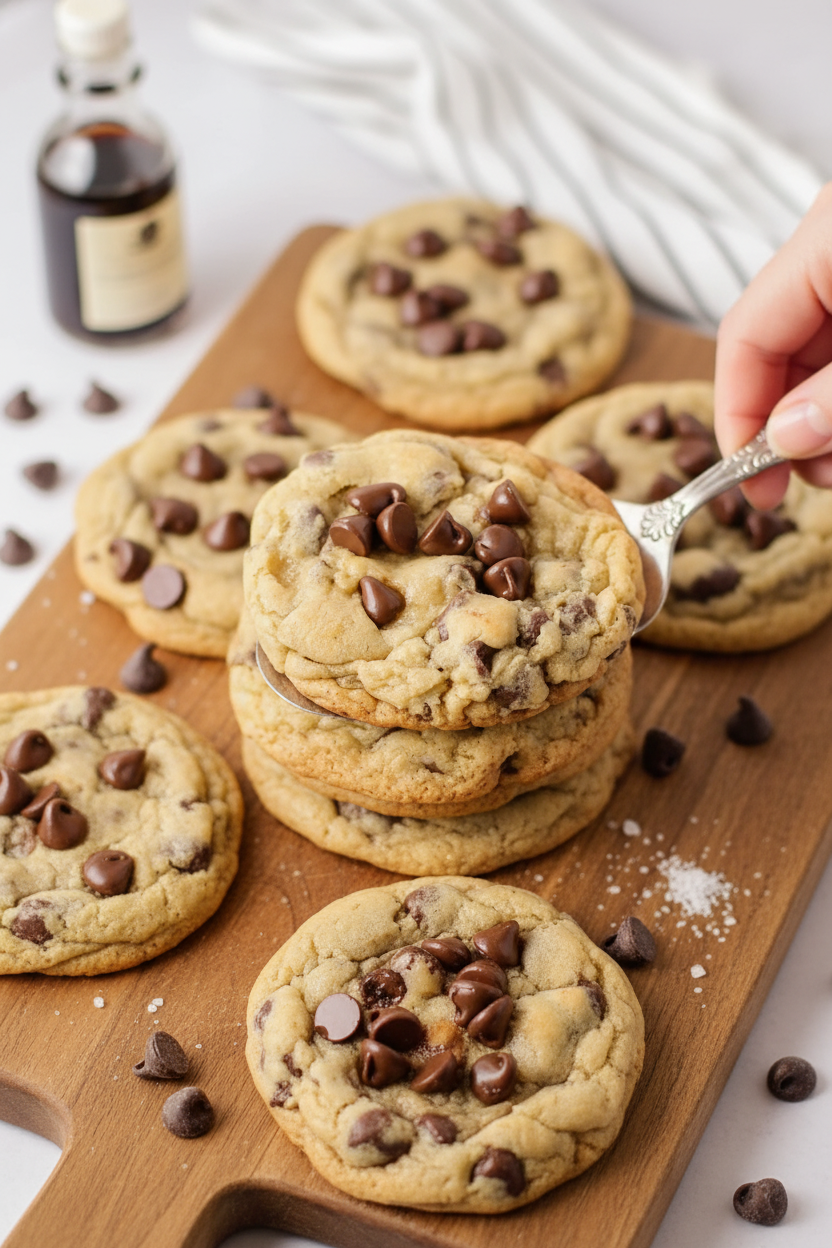
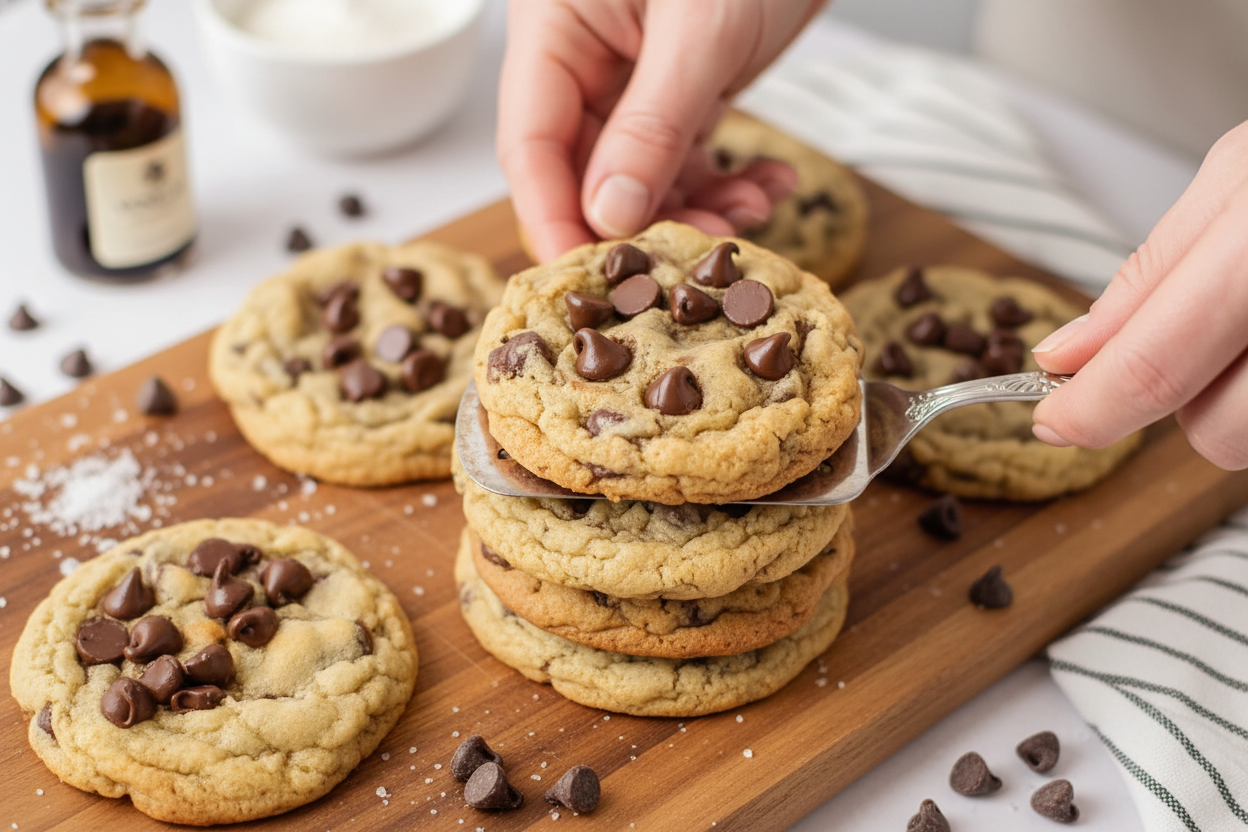
So, bake your cookies for 10-12 minutes. They will look a bit puffy and soft. Take them out. Immediately use a small bowl to round their edges. Press a few extra chocolate chips into the top, too. It makes them look just like a bakery made them.
Choosing Your Chocolate Chips
The recipe says two cups. I say, make it your own! I love a mix of semisweet and milk chocolate. My neighbor’s boy, Leo, only wants dark chocolate chips. What’s your perfect mix?
Folding them in is a gentle job. You don’t want to over-mix. Just stir until you see no more dry flour. Then stop. The dough will be thick and full of chips. That’s how you know it’s right.
The Waiting is the Hardest Part
You must let the cookies sit on the hot pan. I know, it’s tough! But this step lets them finish setting up. If you move them too soon, they might fall apart.
After a few minutes, move them to a rack. Let them cool completely. This makes the outside slightly crisp. The inside stays wonderfully soft. Tell me, do you like your cookies warm and gooey, or cool and set?
Ingredients:
| Ingredient | Amount | Notes |
|---|---|---|
| unsalted butter, softened | 1 cup | |
| packed brown sugar | 1 cup | |
| sugar | 1 cup | |
| eggs | 2 | |
| all-purpose flour | 3 cups | |
| baking soda | 1 teaspoon | |
| baking powder | 1 teaspoon | |
| salt | 1 teaspoon | |
| vanilla extract | 1 teaspoon | |
| chocolate chips (semisweet, milk, dark or a mix) | 2 cups |
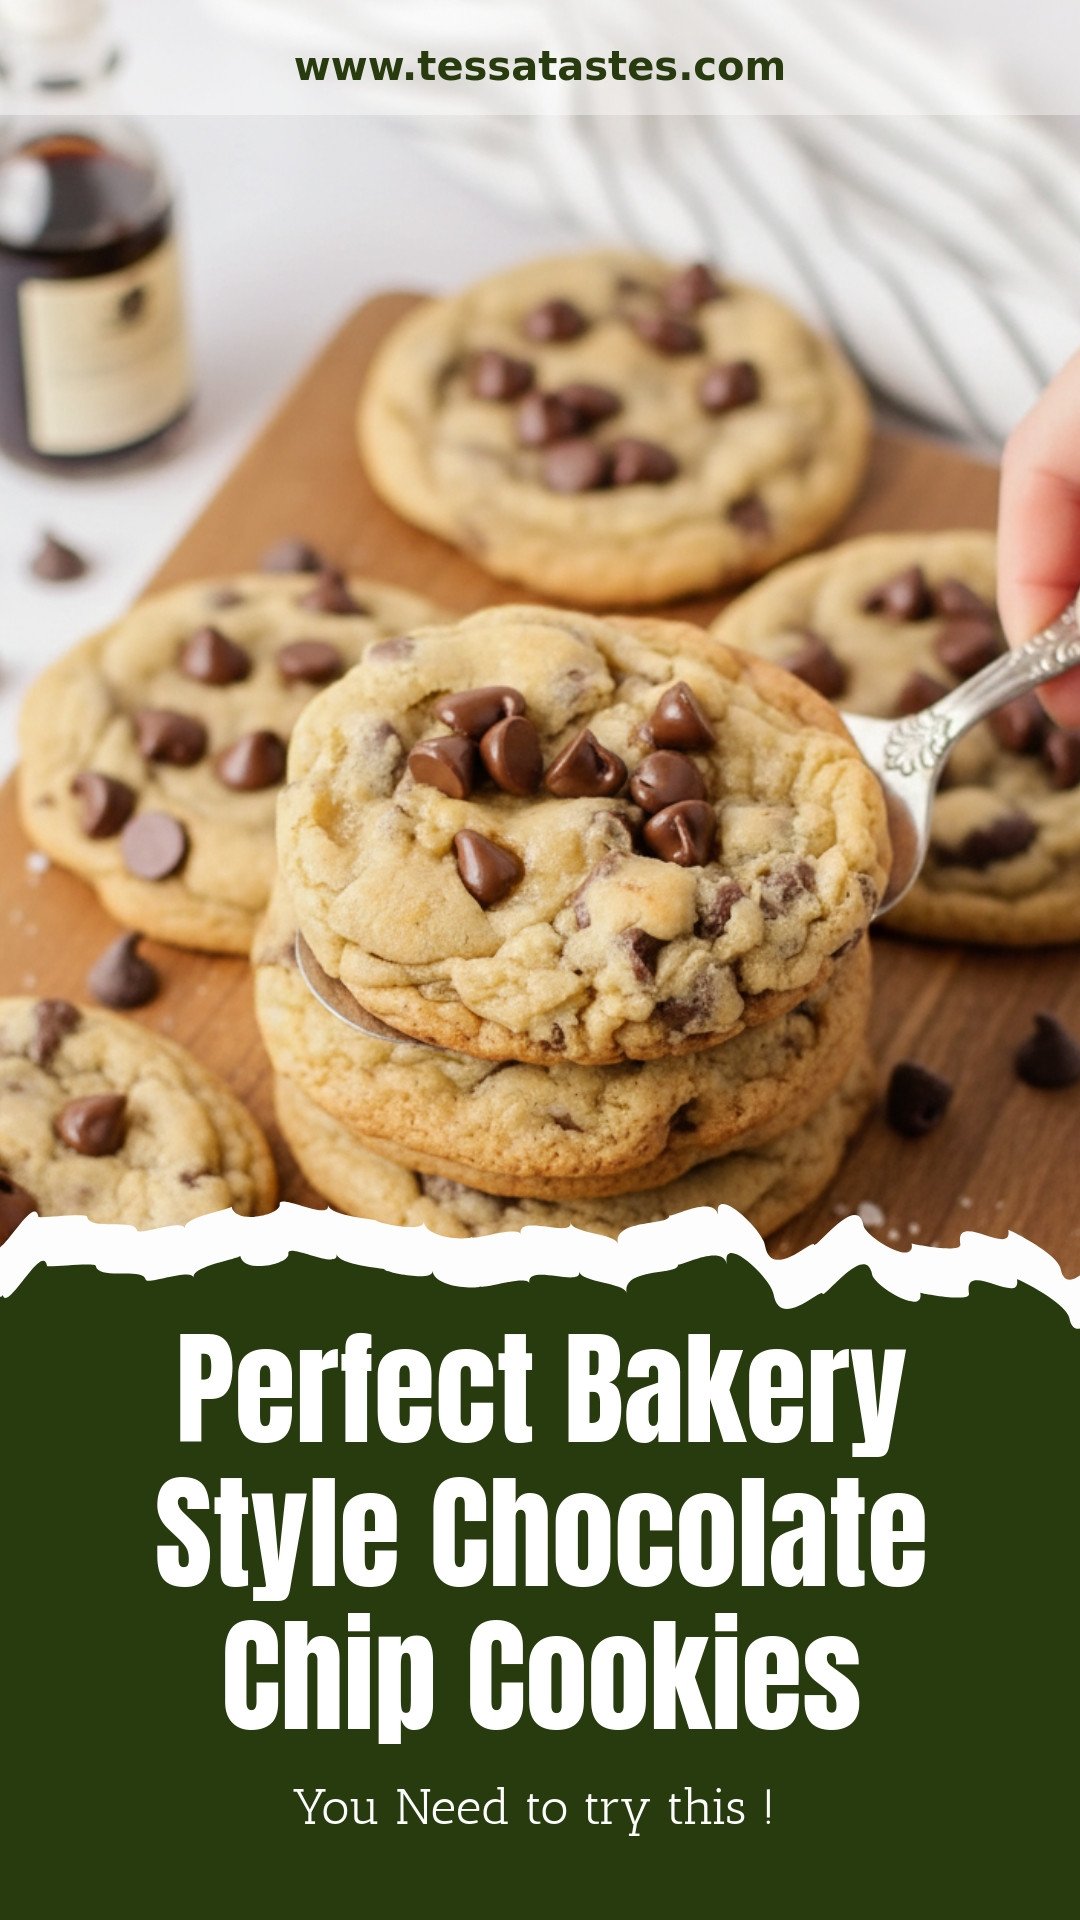
My Bakery-Style Chocolate Chip Cookie Secret
Hello, dear! It’s Tessa. Come sit at my kitchen table. I want to share my favorite cookie recipe. These are the big, soft, chewy kind. They taste just like from a fancy bakery window. My grandson calls them “cloud cookies.” I still laugh at that. Making them is a little story in itself. Let’s begin.
Step 1: First, heat your oven to 350°F. Now, let’s cream the butter and sugars. Use your mixer for this. It should look light and fluffy. This step puts air in the dough. Doesn’t that smell amazing already? (My hard-learned tip: Your butter must be just soft, not melted. Poke it. It should give gently.)
Step 2: Crack in the two eggs. Mix them in well. Add your vanilla too. That vanilla is like a warm hug for your cookies. See how the mixture gets even fluffier? That’s the sign you’re doing it right. This is the heart of your dough.
Step 3: Time for the dry team! Add your flour, baking soda, baking powder, and salt. Mix until it just comes together. Don’t over-mix, now. We want tender cookies, not tough ones. Quick quiz: What makes cookies rise, baking soda or baking powder? Share below!
Step 4: My favorite part. Fold in those chocolate chips. Use a big spoon and be gentle. I like to use a mix of dark and milk chocolate. The dough will be thick and glorious. This is when my grandkids try to sneak a taste!
Step 5: Here’s the bakery-style secret. Scoop a ball of dough. Place another right on top! This makes them tall and lovely. Bake for 10 to 12 minutes. They will look a little underdone. That’s perfect.
Step 6: Out of the oven! Act fast. Use a small bowl to swirl each cookie into a perfect circle. Press a few extra chips into the top. Let them rest on the sheet. This finishes the cooking. Then, move them to a rack. Try to wait until they cool. I know it’s hard.
Cook Time: 12 minutes per batch
Total Time: About 30 minutes
Yield: 18 large cookies
Category: Dessert, Cookies
Three Fun Twists to Try
Once you master the classic, play a little! I love changing things up. It keeps baking exciting. Here are three of my favorite twists. They are all simple and wonderful.
Sea Salt Sparkle: Sprinkle a tiny pinch of flaky sea salt on each dough ball before baking. It makes the chocolate taste even deeper.
Peanut Butter Pocket: Hide a small spoonful of peanut butter inside the dough ball. It’s a gooey, happy surprise in every bite.
Everything But The Kitchen Sink: Add 1/2 cup of rolled oats and 1/2 cup of chopped pretzels with the chips. Crunchy, chewy, and sweet all at once.
Which one would you try first? Comment below!
Serving Them Up Right
These cookies are stars on their own. But presentation is fun! For a party, stack them high on a vintage cake stand. It looks so cheerful. You can also sandwich a scoop of vanilla ice cream between two warm cookies. Oh my. That is a memory-maker.
What to drink? With milk, of course! A tall, cold glass is the classic choice. For the grown-ups, a small glass of tawny port wine is lovely. It sips like liquid raisins. It pairs so nicely with the dark chocolate. Which would you choose tonight?
Keeping Your Cookies Happy
Fresh cookies are a special treat. But what about later? Let’s keep them soft. Store cooled cookies in a tight tin. Add a piece of plain bread. The bread gets hard, cookies stay soft. It’s a little kitchen magic.
You can freeze the dough, too. Scoop balls onto a tray. Freeze them solid, then bag them up. Bake straight from the freezer, just add a minute. I once forgot a bag in my freezer for months. They baked up perfectly for a surprise guest!
Batch cooking like this saves the day. It means a warm cookie is always minutes away. That matters for busy days or happy surprises. Have you ever tried storing it this way? Share below!
Cookie Troubles? Easy Fixes!
Sometimes cookies don’t turn out right. That’s okay. Here are simple fixes. First, flat cookies. Your butter was likely too soft. Use butter that is cool but leaves a dent. I remember when my cookies spread into one big sheet. Now I check my butter first.
Second, tough cookies. You probably mixed in too much flour. Spoon flour into your cup, don’t scoop. Level it off with a knife. This gives the right amount. Getting this right builds your cooking confidence.
Third, not sweet enough? Check your brown sugar. Pack it firmly into the cup. Loose sugar means less flavor. Good flavor makes everyone smile. Which of these problems have you run into before?
Your Cookie Questions, Answered
Q: Can I make these gluten-free?
A: Yes! Use a good gluten-free flour blend. Add 1/4 teaspoon xanthan gum too.
Q: Can I make the dough ahead?
A: Absolutely. Chill it in the fridge for up to 3 days. The flavor gets even better.
Q: What can I swap for chocolate chips?
A: Try chopped nuts or dried fruit. My grandkids love M&M’s in theirs. *Fun fact: The first chocolate chip cookie was an accident in 1938!*
Q: Can I make a half batch?
A: You can. Just divide all the ingredients in half. It works perfectly.
Q: Any optional tips?
A: Sprinkle a little sea salt on top before baking. It makes the chocolate taste amazing. Which tip will you try first?
From My Kitchen to Yours
I hope you bake a batch soon. Fill your kitchen with that wonderful smell. Share them with someone you love. It’s a simple way to make a day brighter.
I would love to see your cookies. Show me your stacked scoops or gooey centers. Have you tried this recipe? Tag us on Pinterest! You can find me at @TessasKitchenNook. Thank you for baking with me.
Happy cooking!
—Tessa Hammond.
Perfect Bakery Style Chocolate Chip Cookies
Description
Classic, soft, and chewy bakery-style chocolate chip cookies loaded with chocolate chips.
Ingredients
Instructions
- Preheat the oven to 350°F.
- In a stand mixer (or with a hand mixer in a large bowl), cream butter and both sugars. Add eggs and beat until fluffy.
- Add flour, baking soda, baking powder, salt, and vanilla, and mix until incorporated.
- Fold in chocolate chips. Use a medium cookie scoop to scoop dough and place it onto a lightly greased cookie sheet. Make another cookie scoop and place it on top of the first scoop.
- Bake for 10 – 12 minutes.
- Remove cookies from the oven and round them out with the bottom of a small bowl and add additional chocolate chips to the center of each cookie.
- Let cookies sit on the cookie sheet for a few minutes, then remove them to a rack to cool.
Notes
- Nutrition per serving (1 cookie): Calories: 364kcal, Carbohydrates: 53g, Protein: 4g, Fat: 16g, Saturated Fat: 10g, Polyunsaturated Fat: 1g, Monounsaturated Fat: 3g, Trans Fat: 0.5g, Cholesterol: 48mg, Sodium: 216mg, Potassium: 71mg, Fiber: 1g, Sugar: 36g, Vitamin A: 386IU, Vitamin C: 0.1mg, Calcium: 52mg, Iron: 1mg.


Leave a Reply