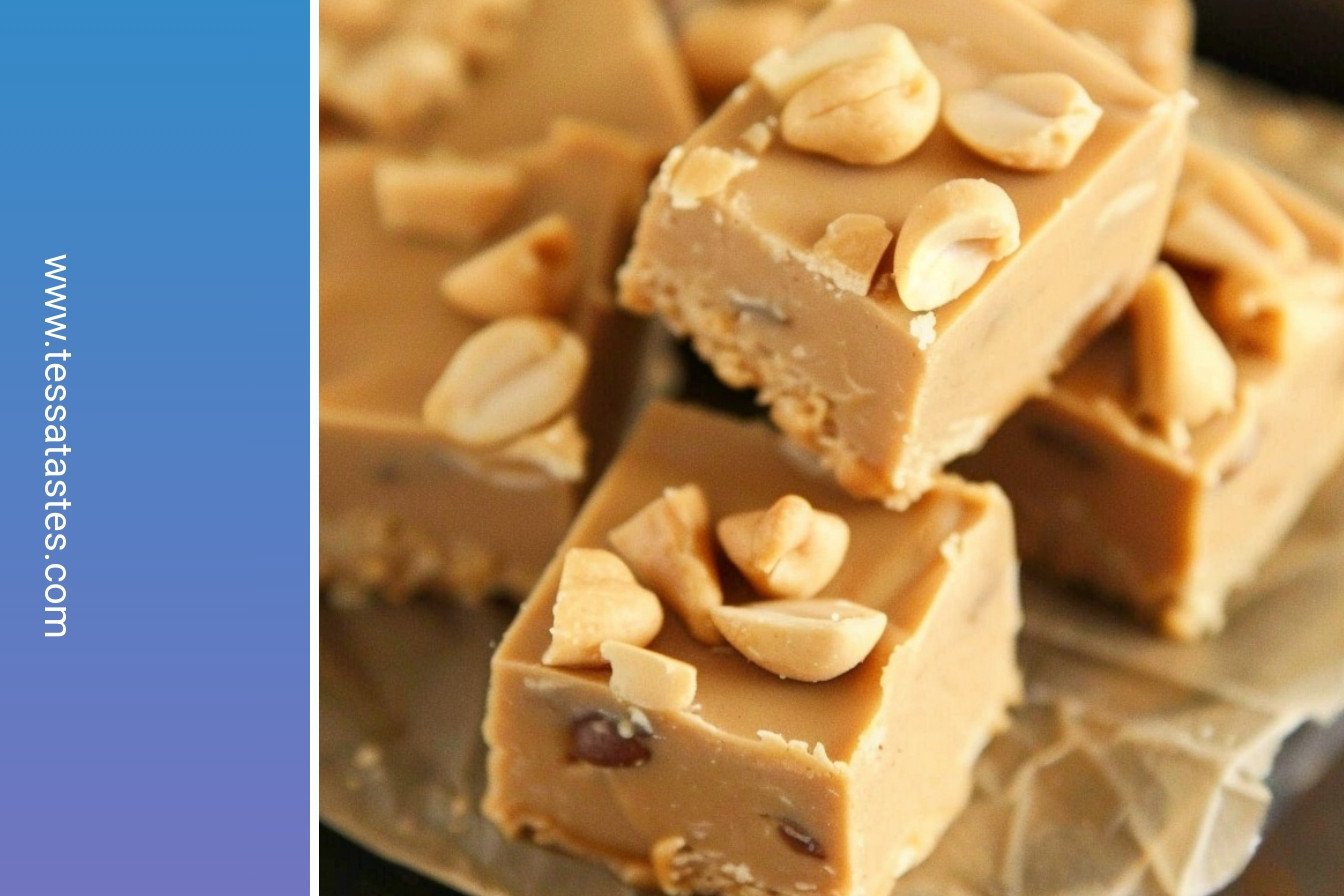
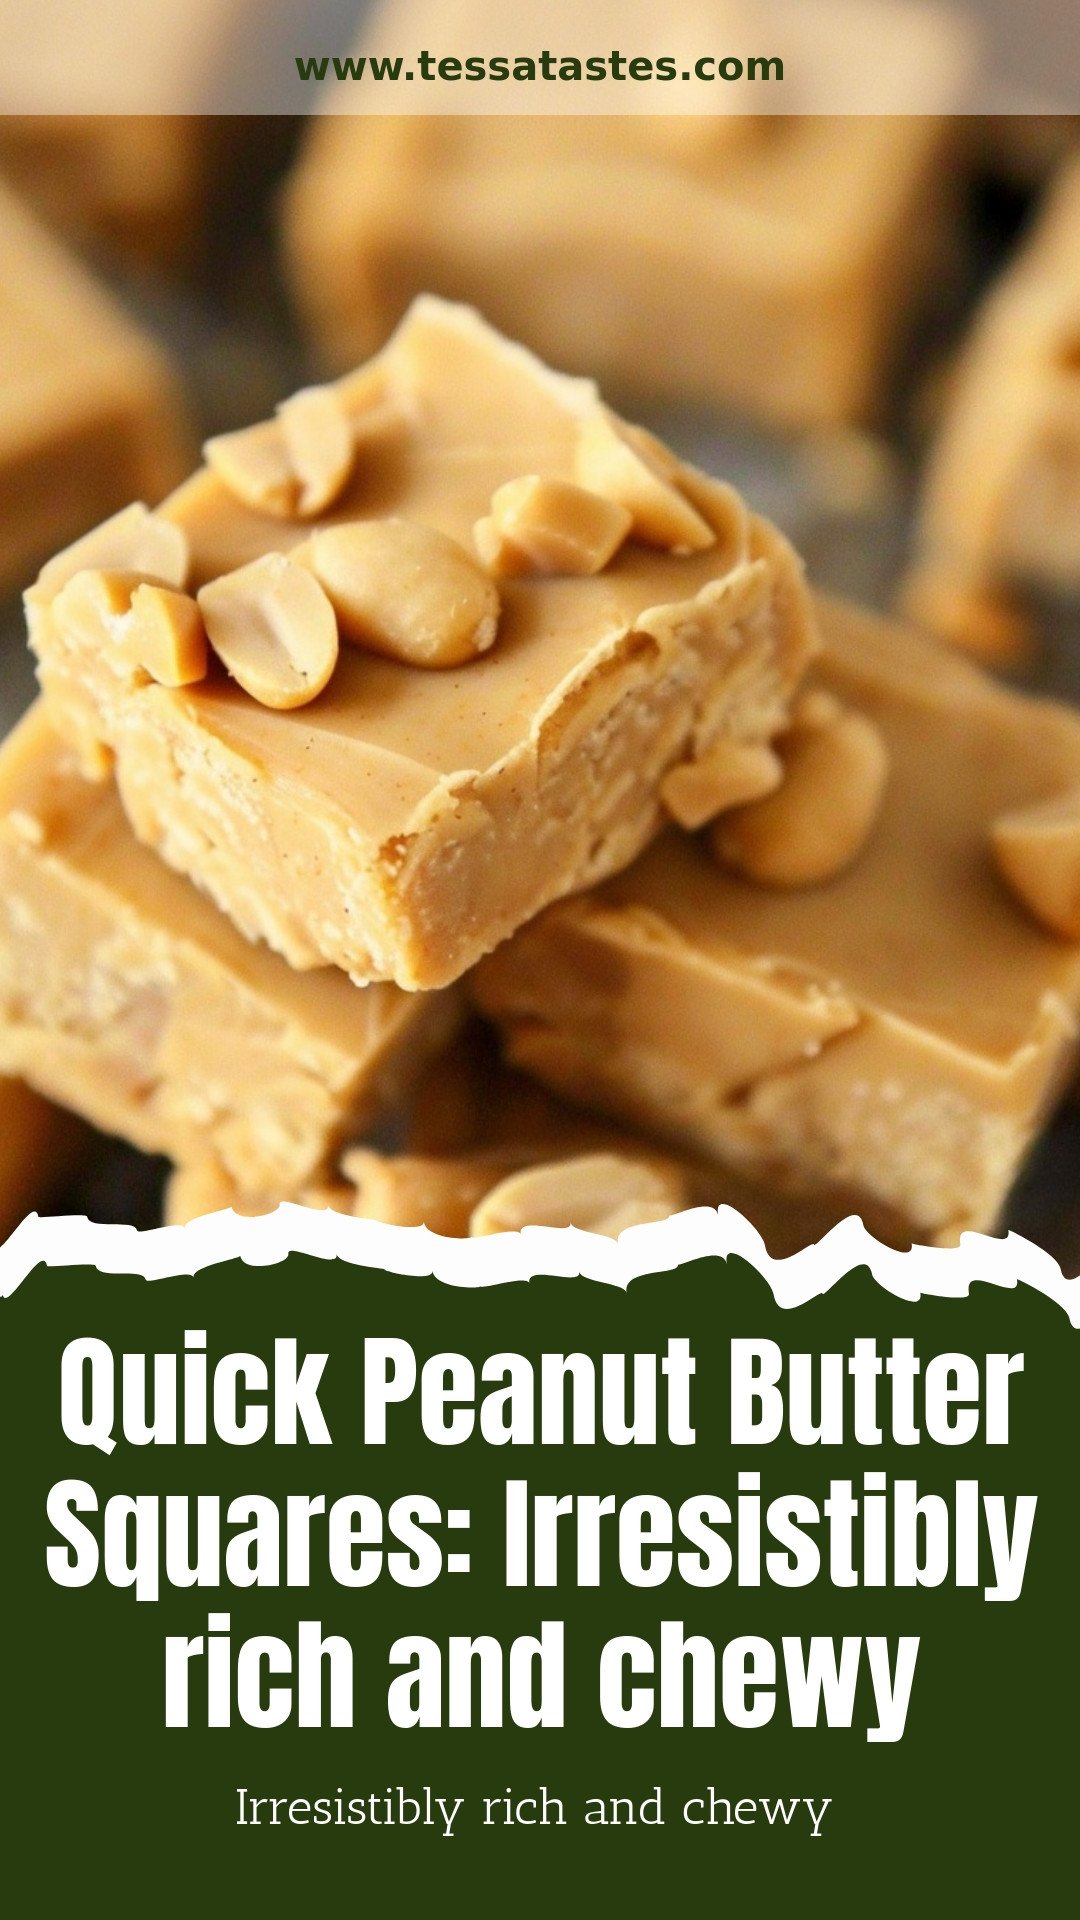
A Sweet Start
My grandson calls these peanut butter squares his “happy food.” I think that’s just right. They are so rich and chewy. Making them fills my kitchen with a wonderful, sweet smell.
This recipe is a fun one to make together. It comes together quickly on the stove. I love how simple it is. What’s your favorite “happy food” to make or eat?
A Little Kitchen Story
The first time I made these, I was in a hurry. I didn’t stir the pot enough. The sugar stuck to the bottom! I still laugh at that.
It taught me a good lesson. Cooking asks for our patience. Giving a recipe your full attention matters. It turns ingredients into something special. That’s why I stir constantly now.
The Magic of Melting
Watching the sugar, milk, and butter melt is my favorite part. It starts as separate things. Then it becomes one smooth, bubbling pot. Doesn’t that smell amazing?
You need a good, heavy pot for this. It keeps the heat even. That helps prevent any burnt spots. Your arm might get tired from stirring, but it’s worth it!
Fun Fact & Flavor
Fun fact: Marshmallow creme was invented a long time ago. Doctors used it to soothe sore throats! Now we use it for sweet treats.
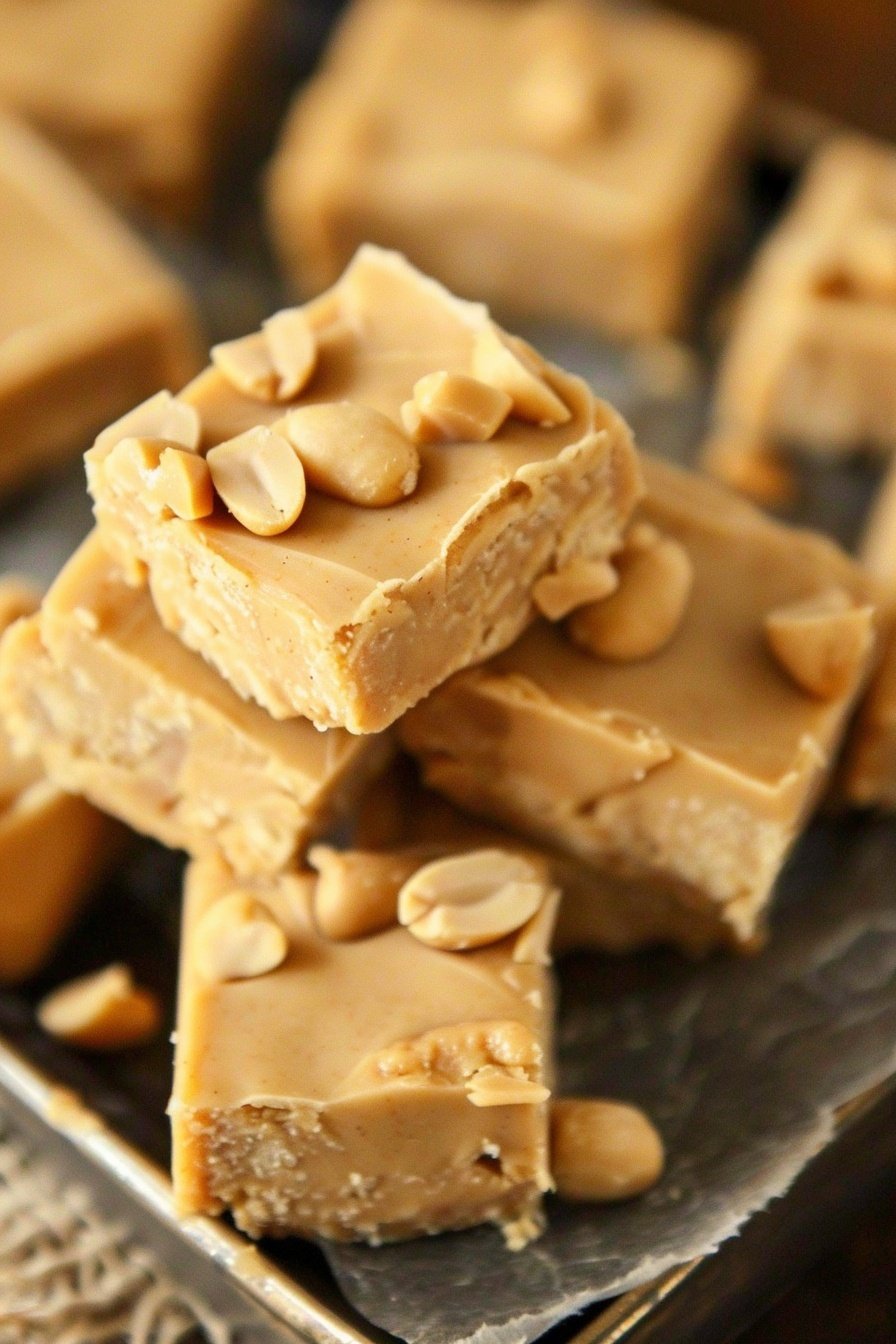
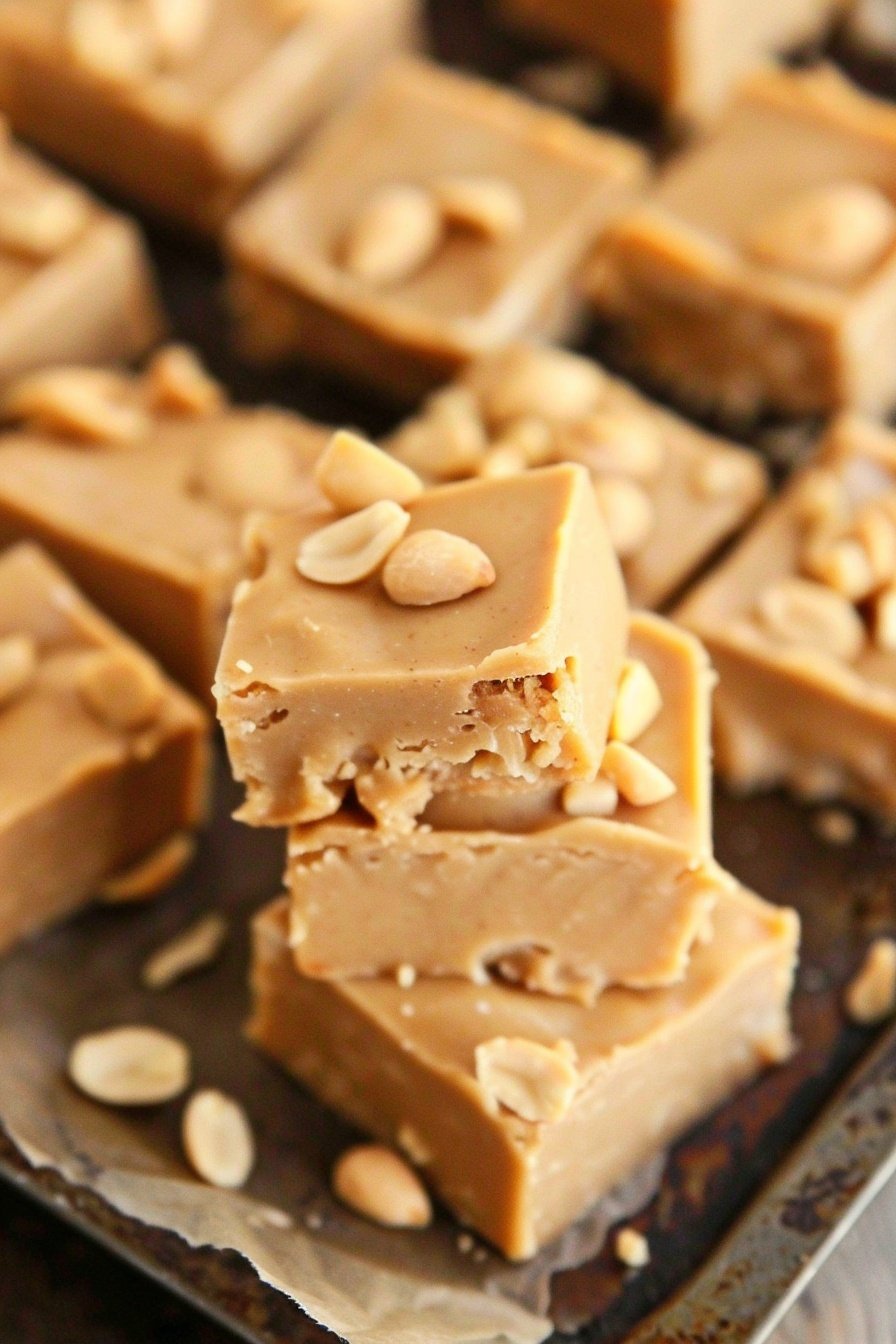
When you stir in the marshmallow creme and peanut butter chips, magic happens. The mixture gets so creamy. I always add the salted peanuts for a little crunch. Do you like crunchy or smooth peanut butter better in your treats?
Sharing the Sweetness
The hardest part is waiting for the squares to cool. I have to shoo away little fingers! But waiting makes the cutting easier.
I love cutting them into small pieces. It means there’s more to share with neighbors and friends. Food tastes better when we share it. What’s the last sweet treat you shared with someone?
Ingredients:
| Ingredient | Amount | Notes |
|---|---|---|
| granulated sugar | 3 cups | |
| evaporated milk | 1 (5-ounce) can (about 2/3 cup) | |
| unsalted butter | 3/4 cup (12 tablespoons) | |
| peanut butter | 1/3 cup | creamy or crunchy |
| peanut butter chips | 1 (10-ounce) package | |
| marshmallow creme | 1 (7-ounce) jar | |
| salted peanuts | 1/4 cup | optional |
My Quick Peanut Butter Squares
Hello, my dear! Come sit with me. I want to share my recipe for peanut butter squares. They are my grandson’s absolute favorite. He asks for them every time he visits. I love how quick and easy they are to make. You get a rich, chewy treat without any fuss. Doesn’t that sound wonderful?
Let’s get our pan ready first. You will need an 8×8-inch baking dish. Give it a good coating of butter or spray. This little step is so important. It makes sure our squares don’t stick. I learned that the hard way once! Now, let’s start cooking.
Step 1: Grab a good, heavy pot. Put the sugar, evaporated milk, and butter inside. Turn the heat to medium. You must stir this frequently as it heats up. We want it to come to a gentle boil. I always think this part smells so sweet and promising.
Step 2: Once it’s boiling, set a timer for 5 minutes. You need to stir constantly now. This is where your arm gets a little workout! A candy thermometer is your best friend here. Wait for it to reach 235°F. (My tip: If you don’t have one, drop a bit into cold water. It should form a soft ball you can squish).
Step 3: Take the pot off the heat right away. Now for the fun part! Stir in the peanut butter, peanut butter chips, and marshmallow creme. Watch it turn creamy and dreamy. If you like a little crunch, add those salted peanuts now. I still laugh at how my daughter would pick out the nuts as a child.
Step 4: Pour your mixture into the prepared pan. Spread it out quickly before it sets. You can sprinkle a few extra peanuts on top for looks. Then, you must be patient. Let it cool completely before you cut it. What’s your favorite sweet treat to share with friends? Share below!
Cook Time: 20 minutes
Total Time: 30 minutes
Yield: 24 servings
Category: Dessert, Snack
Three Fun Twists to Try
Once you master the basic recipe, you can play with it! I love adding little changes. It keeps things exciting in the kitchen. Here are a few ideas my family enjoys. They are all so simple and delicious.
Chocolate Drizzle: Melt some chocolate chips and drizzle it over the top. It looks so fancy but is so easy.
Pretzel Crunch: Mix in crushed pretzel pieces instead of peanuts. You get a lovely salty and sweet combo.
Jelly Swirl: Drop little spoonfuls of grape jelly on top before it cools. Swirl it with a knife for a pretty effect.
Which one would you try first? Comment below!
Serving Your Sweet Creations
These squares are perfect all on their own. But I like to make them feel extra special sometimes. For a party, cut them into tiny, bite-sized pieces. Everyone can have a little taste without guilt. You could also place one on a small plate with a fresh strawberry. The red looks so pretty next to the peanut butter color.
What should we drink with them? A tall, ice-cold glass of milk is the classic choice. It just feels right. For the grown-ups, a cup of strong black coffee is wonderful. It cuts through the sweetness so nicely. Which would you choose tonight?
Keeping Your Peanut Butter Squares Perfect
These squares stay fresh for a week in the fridge. Just cover the dish with a lid. You can also freeze them for a month. Wrap each square tightly in plastic wrap. This keeps them from getting freezer burn.
I once left a whole batch on the counter. They became too soft and sticky. Now I always pop them in the fridge. This helps them keep their perfect chewy texture.
Making a double batch is a great idea. You can have a treat ready for surprise guests. Storing food well means less waste and more joy. Have you ever tried storing it this way? Share below!
Easy Fixes for Common Problems
Is your mixture not getting thick? You may not have boiled it long enough. Use a candy thermometer for the right temperature. This ensures your squares will be chewy, not gooey.
I remember when my first batch was too soft. I did not stir enough while it boiled. Now I stir constantly for five full minutes. Getting the texture right builds your cooking confidence. It also makes the flavor so much better.
Are the squares too hard to cut? Let them cool completely first. A warm knife can also help. Just run it under hot water and dry it. Which of these problems have you run into before?
Your Quick Questions, Answered
Q: Can I make this gluten-free? A: Yes! This recipe is naturally gluten-free. Just check your marshmallow creme label to be sure.
Q: Can I make it ahead? A: Absolutely. They are even better the next day. The flavors have more time to settle.
Q: What if I don’t have peanut butter chips? A: You can use more regular peanut butter. The texture will be a little different but still good.
Q: Can I double the recipe? A: For sure. Use a 9×13-inch pan for a double batch. Fun fact: A double batch was always my grandson’s special request.
Q: Are the nuts important? A: They are optional. They just add a nice little crunch. Which tip will you try first?
From My Kitchen to Yours
I hope you love making these sweet treats. They always fill my kitchen with happy memories. I would love to see your creations.
Share a picture of your peanut butter squares with me. It makes me so happy to see your baking adventures. Have you tried this recipe? Tag us on Pinterest!
Happy cooking!
—Tessa Hammond.
Quick Peanut Butter Squares
Description
The easiest no-bake dessert! These rich and chewy peanut butter squares are irresistibly simple with only 5 ingredients. Ready in minutes.
Ingredients
Instructions
- Butter an 8×8-inch baking dish or spray it with nonstick cooking spray and set aside. Combine the sugar, milk, and butter in a medium-sized, heavy pot and cook on medium heat until the mixture comes to a boil. Be sure to stir frequently.
- Once it has reached the boiling point, boil for about 5 minutes. Stir constantly. Use a candy thermometer to get the mixture to the soft ball temp of 235°F.
- Remove from the heat and stir in the peanut butter, peanut butter chips, and marshmallow creme. Stir until mixture is creamy and smooth. If using, add the chopped nuts (reserving a few to sprinkle on the top) and mix well.
- Immediately pour into the prepared baking dish. Cool completely and cut as desired. Store in an airtight container.


Leave a Reply