My First Sourdough Pizza
I tried sourdough pizza years ago. My grandson dared me. I thought it would be too fussy. But that first bite changed my mind. The crust had such a happy, tangy flavor. It was crisp and chewy all at once. I still laugh at that. I was so wrong.
This recipe is for that special pizza. It takes time, but not much work. The dough does most of the job itself. You just need to plan ahead. Trust me, the wait is worth it. What’s the first food you remember changing your mind about?
Your Dough’s Best Friend
Your starter must be awake and bubbly. This matters because it’s the engine of your dough. A sleepy starter makes flat pizza. Feed it 4 to 6 hours before you start. It should look lively and doubled in size. Doesn’t that smell amazing? That sour, yeasty smell means it’s ready.
The Magic of Waiting
Mix your flour, salt, water, and starter. Then let it rest for 30 minutes. This rest is called autolyse. It lets the flour drink up the water. Your dough will become smoother and easier to work with. After a short knead, let it proof for hours.
This slow proof is the second secret. It matters because flavor builds over time. Rushing it with heat makes bland dough. Let it rise at room temperature. Be patient. The dough will grow about half its size. Do you prefer slow food or fast food on a cozy weekend?
A Good Night’s Sleep
Next, we fold and tuck the dough. Fold each piece like closing a book. Do this eight times. It builds strength. Then shape it into a ball and put it in a bowl. Now comes the long rest. Pop it in the fridge overnight.
The cold fridge sleep is magic. It develops that wonderful sourdough tang. It also makes the dough easier to shape later. You can keep it in there for up to a week. That means pizza any night you want! What toppings would you put on your dream pizza?
Shaping Your Masterpiece
Take the dough out 30 minutes before baking. This lets it relax. Now, be gentle. Flatten it with your fingertips. Move the bubbles to the edge. Do not pop them! Those bubbles make a great crust.
Lift the dough over your hands. Use your knuckles to stretch it from the center out. Keep turning it. You’ll get a nice circle with a puffy edge. Lay it on a peel dusted with semolina. A little shake tells you it’s not stuck. Then you’re ready for toppings.
Time to Bake
Use a hot oven. A pizza stone is best. Get it screaming hot. Put your toppings on lightly. Too much makes the crust soggy. Give the peel another shake. Then slide the pizza onto the stone.
In about ten minutes, it’s done. The crust will be golden. The bubbles will be scorched in spots. That means it’s crisp. Let it cool for just a minute. Then slice and enjoy your homemade victory. It’s a beautiful thing.
Ingredients:
| Ingredient | Amount | Notes |
|---|---|---|
| 00 flour (or all-purpose or bread flour) | 500 grams (approx. 4.17 cups) | Plus more for dusting |
| Fine sea salt | 12 grams (2 tsp) | |
| Water, filtered, room temperature | 335 grams (approx. 1.4 cups) | |
| Active sourdough starter | 100 grams (approx. 1/2 cup) | |
| Semolina flour | To dust the pizza peel | For handling |
My Sourdough Pizza Dough Story
Hello, dear! It’s Tessa. Let’s make pizza dough together. I love this recipe. It reminds me of my grandkids. They always want pizza on Friday nights. This dough is special. It uses our sourdough starter. That starter is like a family pet. You have to feed it and care for it. The pizza crust gets so flavorful and crisp. It just takes a little patience. I still laugh at my first try. My pizza was shaped like a continent! Yours will be beautiful. Let’s begin.
Step 1: Wake Up Your Starter
First, wake up your starter. Feed it 4 to 6 hours before. You need it bubbly and happy. It should look like it doubled in size. Doesn’t that smell amazing? It’s alive and ready to work. (My hard-learned tip: Use a rubber band on the jar. Mark where it starts. Then you can see it grow!).
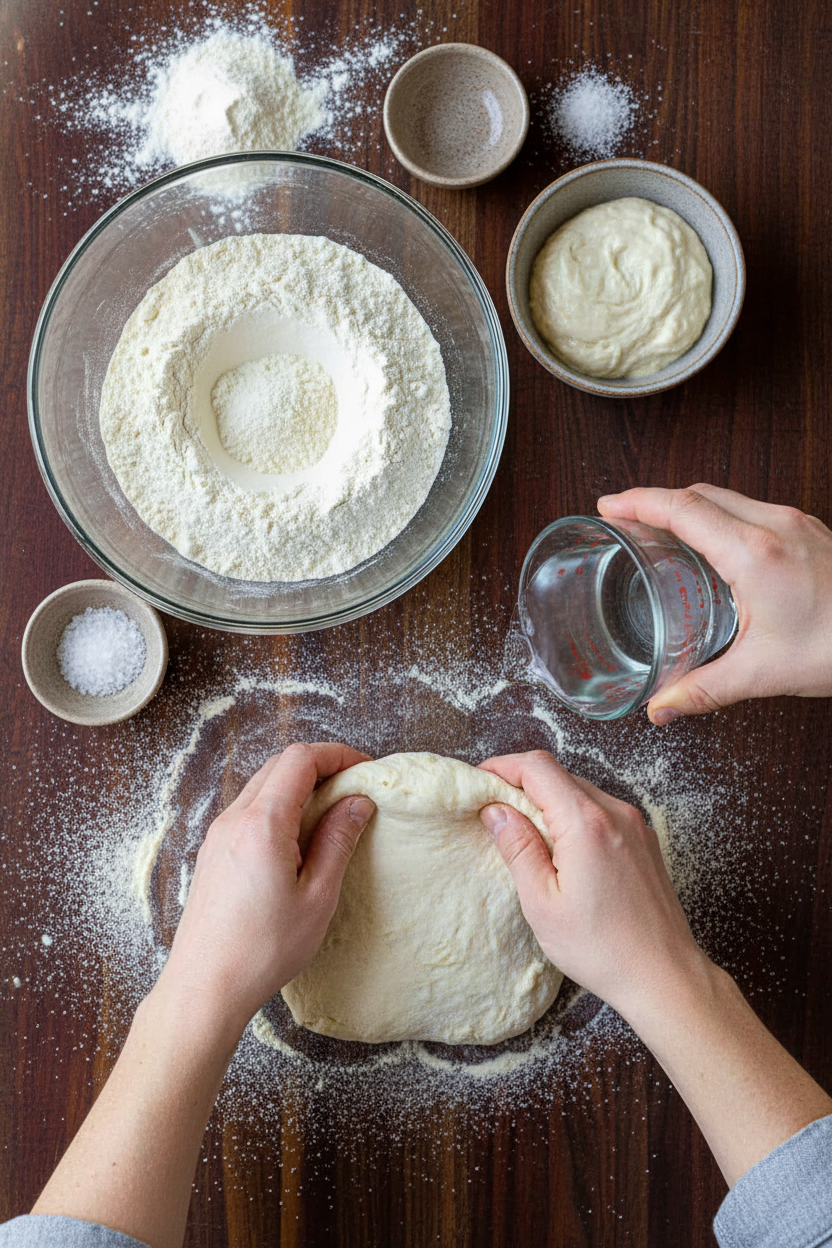
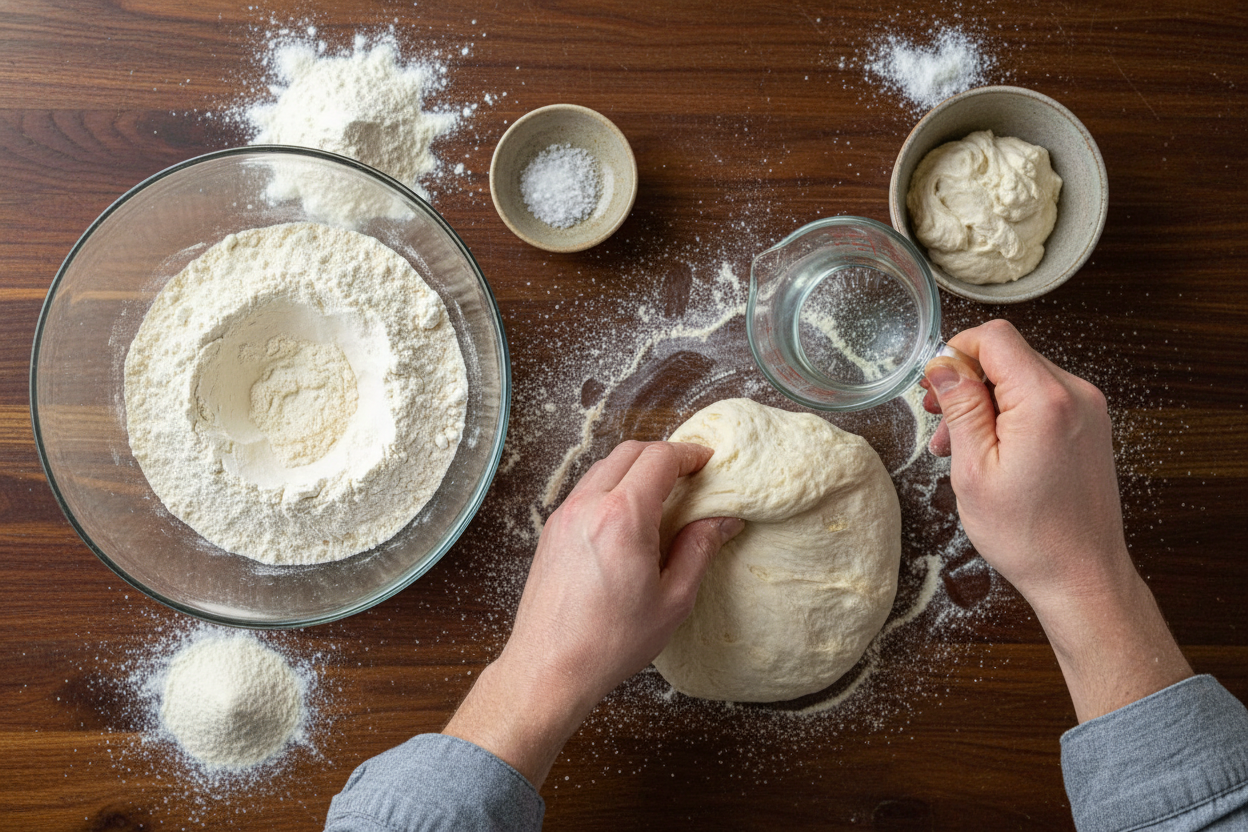
Step 2: Mix Your Dough
Now, mix your dough. Whisk the flour and salt in a big bowl. Add the water and that bubbly starter. Mix it with a spatula first. Then get your hands in there. Pinch and mix until it’s all combined. It will be shaggy. That’s just fine. Cover the bowl and let it rest for 30 minutes. The flour needs a drink of water.
Step 3: Knead and Rise
Time to knead. Just knead the dough for 2 minutes. You can do it right in the bowl. Then put it in an oiled bowl. Cover it with a cloth. Let it sit for 4 to 5 hours. It should grow about half its size. Keep it at room temperature. Don’t rush it. Good dough takes its time. What does your starter smell like? Share below!
Step 4: Fold, Shape, and Chill
Next, we fold and rest. Put the dough on a floured surface. Cut it into four equal pieces. Now, fold each piece. Fold it in half eight times, like closing a book. Then shape it into a smooth ball. Place each ball in an oiled bowl. The seam side goes down. Cover the bowls. Now, put them in the fridge. They can stay there overnight or for a week. This makes the flavor wonderful.
Step 5: Bake Your Pizza
Baking day! Take a dough ball out 30 minutes early. Heat your oven very hot. Put a pizza stone inside to heat up too. Gently shape your crust with your hands. Stretch it over your knuckles. Leave a nice puffy edge. Lay it on a peel dusted with semolina. Add your toppings lightly. Shake the peel to make sure it slides. Then slide it onto the hot stone. Bake until golden and bubbly. I love that smell filling the kitchen.
| Cook Time | 8-10 minutes |
| Total Time | 24+ hours (mostly resting) |
| Yield | 4 personal pizzas (8 servings) |
| Category | Dinner, Bread |
Three Tasty Twists to Try
This dough is a perfect canvas. You can top it with anything. Here are my favorite ideas. They make pizza night extra fun.
Garden Fairy
Use pesto instead of red sauce. Top with mozzarella, zucchini ribbons, and peas. Finish with lemon zest.
Spicy Honey Bee
Keep it simple with cheese. After baking, drizzle with hot honey. Add slices of spicy pepperoni.
Harvest Apple
A fall treat. Use a white garlic sauce. Add sharp cheddar, sliced apples, and chopped rosemary.
Which one would you try first? Comment below!
Serving Your Masterpiece
Pizza is a whole meal. But a little side makes it perfect. I love a simple, crisp salad. Toss greens with a lemony dressing. It cuts through the rich cheese. You could also serve roasted broccoli. Its little crispy bits are so good. For drinks, I have two choices. A chilled Italian red wine is lovely for grown-ups. For everyone, try sparkling water with a squeeze of orange. It feels so festive. Which would you choose tonight?
Storing Your Sourdough Pizza Dough
This dough is a wonderful friend. It waits patiently in your fridge. You can keep it there for up to one week. That is my favorite part.
I love batch cooking. I make all four dough balls on Sunday. Then pizza night can be any night! It makes weeknights feel special. I remember my first time. I was so nervous to leave dough for days.
But it was even better on day three! The flavor gets deeper and more interesting. That slow fermentation matters. It builds a tasty, complex crust your family will love. Have you ever tried storing it this way? Share below!
Fixing Common Pizza Dough Problems
Is your dough too sticky? Do not add more flour right away. Just let it rest for ten minutes. The flour will drink up the water. I once added too much flour. My pizza crust was tough like a cracker!
Is your dough not rising? Your starter might be sleepy. It must be bubbly and active before you start. A lively starter matters. It gives your dough the power to grow and become light.
Does your pizza stick to the peel? Use semolina flour for dusting. It acts like tiny ball bearings. Your pizza will slide right off. This simple step builds confidence. It saves your beautiful pizza from sticking to the pan. Which of these problems have you run into before?
Your Sourdough Pizza Questions, Answered
Q: Can I use gluten-free flour? A: Yes, use a good 1-to-1 gluten-free blend. The texture will be different but still tasty.
Q: How far ahead can I make it? A: The dough balls last a whole week in the fridge. This is perfect for planning.
Q: I don’t have 00 flour. A: All-purpose or bread flour works just fine. Your pizza will still be wonderful.
Q: Can I make a bigger batch? A: Absolutely! Just double all the ingredients. Your mixing bowl will need to be bigger.
Q: Any special tip? A: Do not pop the bubbles when shaping. Those bubbles make the best crispy, chewy crust. Which tip will you try first?
From My Kitchen to Yours
I hope you love this recipe. Making something from scratch is a gift. It is a gift for you and for your table. The waiting makes the eating even sweeter.
I would be so delighted to see your creation. Show me your bubbly, golden crusts and your favorite toppings. Have you tried this recipe? Tag us on Pinterest! Let’s share the joy of homemade pizza.
Happy cooking!
—Tessa Hammond.

Sourdough Pizza Dough Recipe Video Tutorial
Description
Learn to make authentic sourdough pizza dough with this detailed video tutorial. Perfect for a crispy, flavorful homemade pizza crust.
Ingredients
Instructions
- Feed your sourdough starter 4 to 6 hours before you start making the pizza dough. You must start with an active and bubbly starter that has more than doubled in size.
- Make the Dough – Whisk together flour and salt. Add water and starter and mix with a firm spatula then use your hands to pinch the dough and mix until really well combined. Cover and rest for 30 minutes.
- Knead and Proof – Knead the dough in the bowl or on a clean work surface for 2 minutes then transfer to a bowl coated with olive oil. Cover and proof for 4-5 hours or until the dough has risen at least 50% in volume. Do not speed up the process but proof at room temperature 70-75 ̊F.
- Fold dough and Refrigerate– Transfer dough to a floured surface and turn to coat lightly in flour so it isn’t sticky. Use a bench scraper to divide the dough into 4 equal-sized pieces. Fold each piece of dough in half 8 times, gently pulling the sides over the center like closing a book, turning the dough each time and repeating for 8 folds. Form a ball in your hands and transfer each piece of dough to a lightly oiled bowl seam-side-down, cover and refrigerate overnight (18 hours) or up to 1 week.
- PREP: Remove the dough 15-30 minutes before using it to let it relax while preheating the oven or pizza oven. For oven baking: Place a pizza stone or inverted baking sheet onto the center rack of the oven and preheat to 550 ̊F. Lightly flour a pizza peel and prep toppings.
- Shape the Crust: Transfer 1 piece of dough to a lightly floured surface, turning to lightly coat in flour. Flatten the dough gently with your fingertips, moving the bubbles to the edges. DO NOT pop any bubbles. Lift the dough over the backs of your hands and roll your knuckles under the center of the dough, working outward as you rotate the dough along your knuckles, leaving a slightly thicker edge. Continue working the dough until a 10-12” pizza has formed. It will shrink slightly when you set it down. Place the dough down on a semolina-dusted pizza peel. Give the pizza peel a little shake to make sure the pizza slides over it and is not sticking.
- Add Toppings: Spread on a light coating of pizza sauce and toppings. Give the pizza another shake to make sure it slides on the pizza peel (to ensure it doesn’t stick while transferring to the hot pizza stone). Slide the pizza onto the preheated pizza stone and bake at 550 ̊F for 8-10 minutes or until the crust is golden brown and some of the larger bubbles on the crust are lightly scorched to ensure a crisp crust.
Notes
- Nutrition Per Serving (1 of 8 servings): Calories: 239, Total Fat: 1g, Saturated Fat: 0.1g, Polyunsaturated Fat: 0.3g, Monounsaturated Fat: 0.1g, Sodium: 585mg, Potassium: 67mg, Total Carbohydrates: 50g, Dietary Fiber: 2g, Sugars: 0.2g, Protein: 7g, Calcium: 11mg, Iron: 3mg.


Leave a Reply