A Little Story About My First Coconut Pie
I made my first coconut pie for a summer picnic. I was so nervous. But everyone loved it.
I still laugh at that. I almost forgot to toast the coconut. That toasty flavor makes all the difference. It reminds me of sunny beaches, even on a cloudy day.
Why This Simple Pie is So Special
This pie is more than just a dessert. It is a little escape. The creamy filling feels like a sweet hug.
Sharing food we make is a way to show we care. That is why this matters. It is a simple act of love. What is your favorite dessert to share with people you love?
Let’s Talk About That Toasty Coconut
Toasting the coconut is my favorite step. Doesn’t that smell amazing? It fills the whole kitchen with a warm, nutty scent.
You have to watch it closely. It can go from golden to burnt very fast. Stir it often and use your nose. You will know when it is ready.
The Magic of Folding It All Together
Now for the fun part. We mix the pudding with the Cool Whip. You must fold it gently. Do not stir it hard.
Folding keeps it light and airy. It is like tucking the ingredients together for a nap. This is why the pie stays so dreamy and soft. Do you like stirring or folding better when you cook?
The Hardest Part: Waiting
The pie must chill for at least six hours. I know, it is a long wait. But this step really matters.
The waiting time lets the flavors become friends. The crust gets soft. The filling gets firm. Fun fact: The graham cracker crust was invented for a picnic because it traveled well. What do you do to pass the time when a recipe needs to chill?
Ingredients:
| Ingredient | Amount | Notes |
|---|---|---|
| pre-made graham cracker crust | 1 (6-ounce/9-inch) | |
| sweetened shredded coconut | ⅓ cup | |
| coconut cream instant pudding | 6.8 ounces | packets |
| whole milk | 2 cups | very cold |
| coconut extract | 1½ teaspoons | |
| extra creamy Cool Whip whipped topping | 8 ounces | thawed and divided in half |
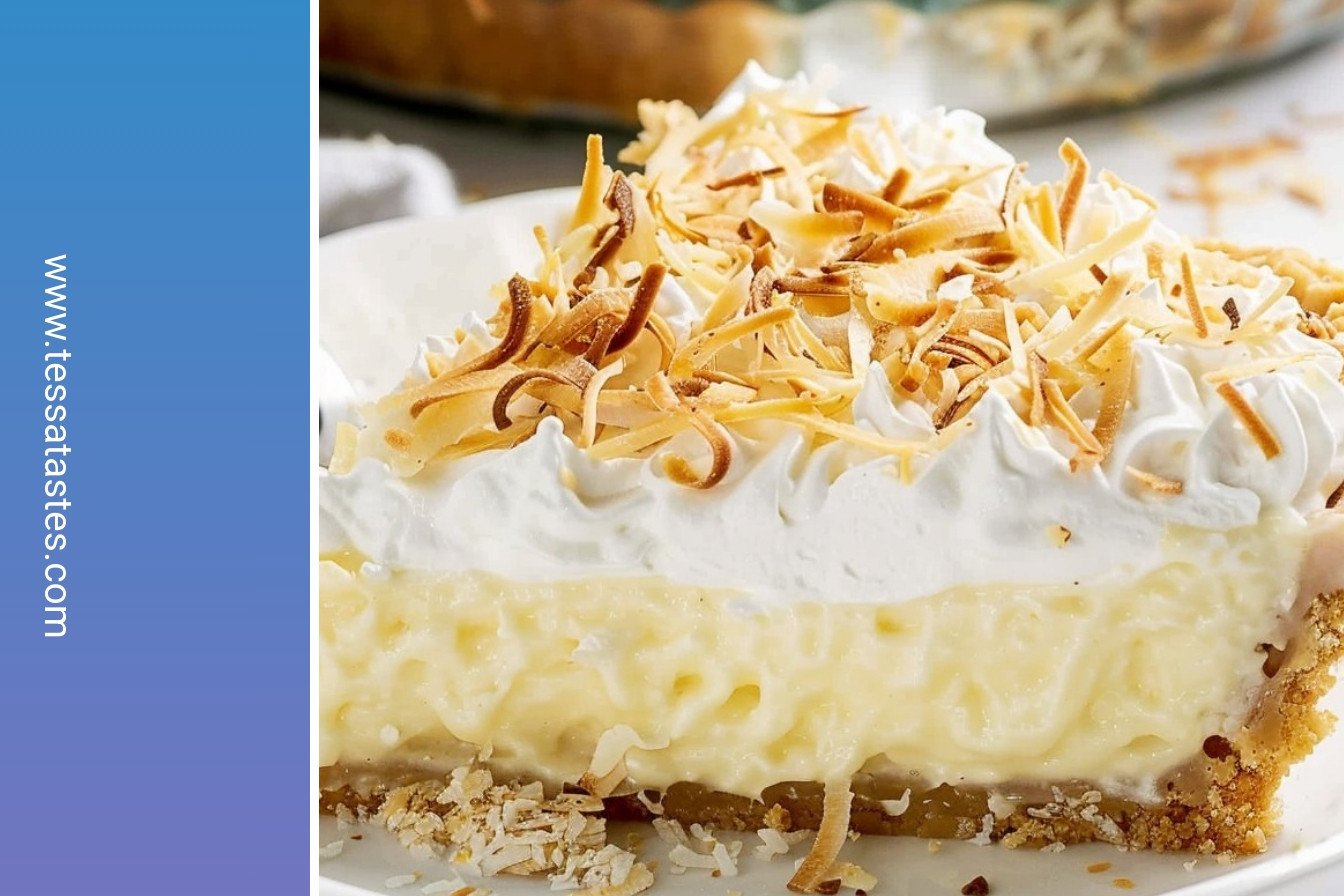
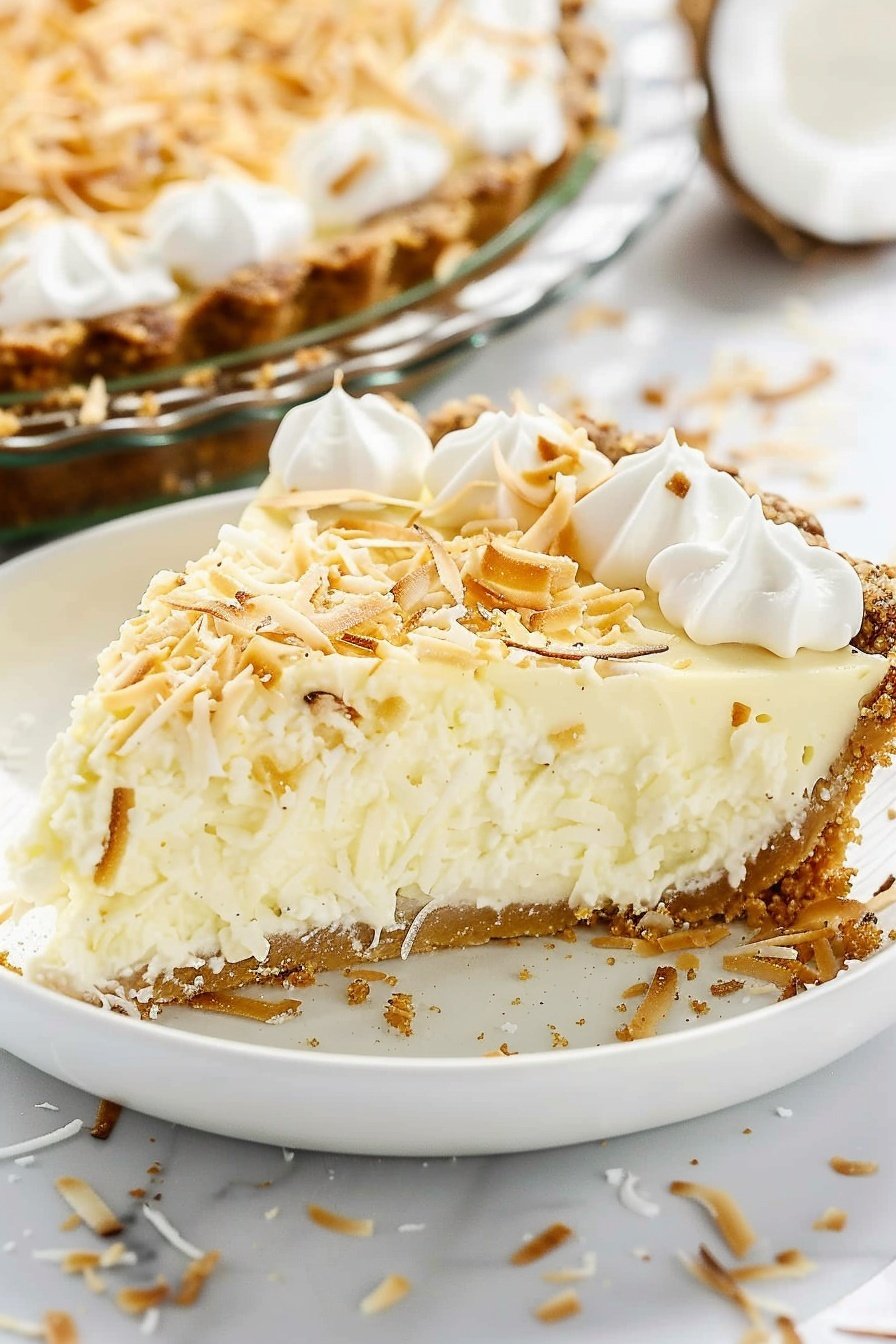
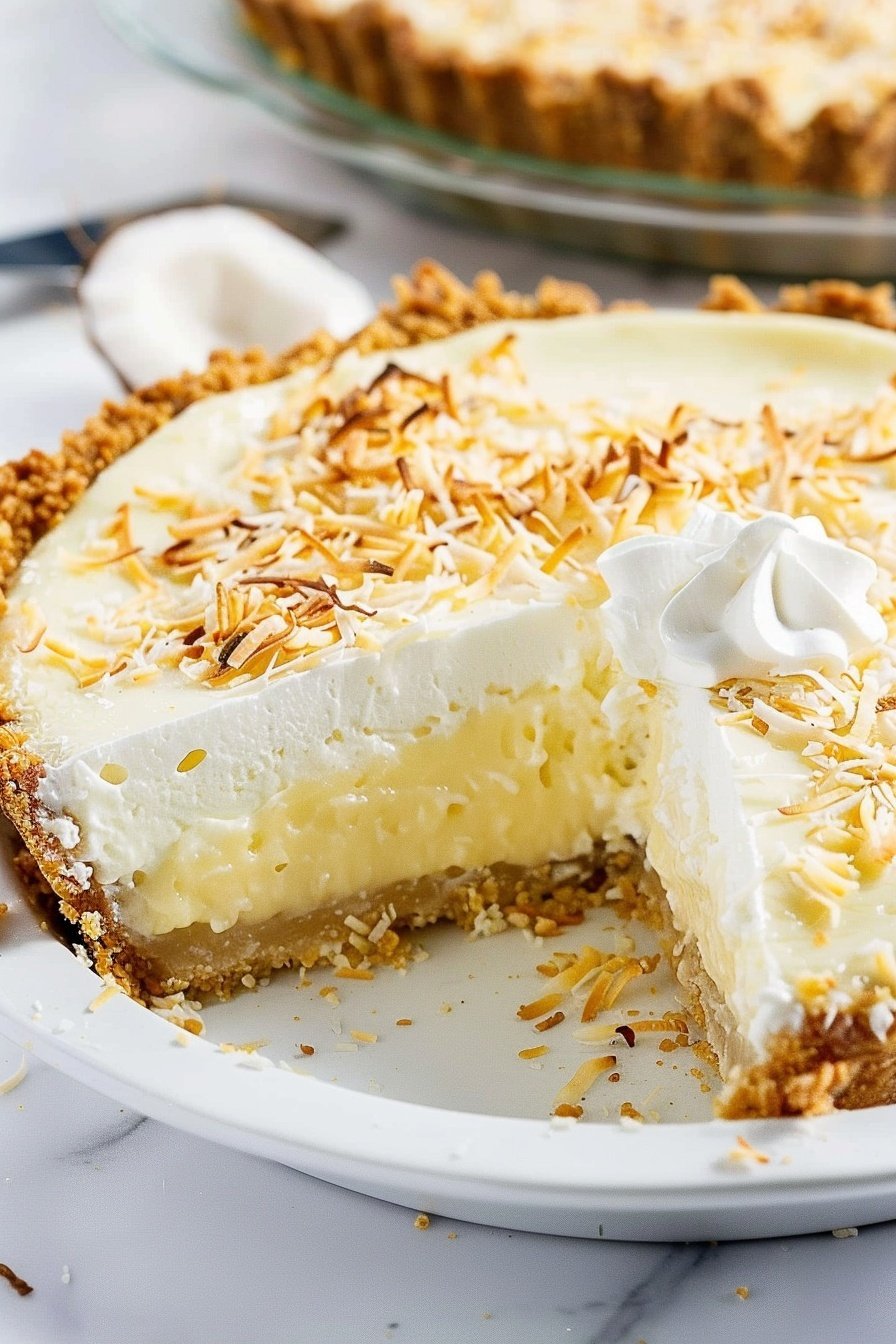
My Tropical Coconut Dream Pie
Oh, this pie brings back such happy memories. I first made it for a summer picnic years ago. The sun was shining, and everyone needed a cool, sweet treat. This pie was the star of the show. It’s so creamy and full of coconut flavor. It always feels like a little vacation on a plate.
It’s one of the easiest desserts you’ll ever make. You don’t even need to turn on your oven. Just a little mixing and folding. The hardest part is waiting for it to chill. I promise you, the wait is absolutely worth it. Let’s get started, shall we?
- Step 1: First, take your graham cracker crust out of the box. Peel off that plastic lid. I always place the whole pie tin on a big plate right away. This is a little trick I learned the hard way. (A hard-learned tip: This makes it so much easier to carry to the fridge later. No wobbly pie!)
- Step 2: Now, let’s toast the coconut. Put your shredded coconut in a small, dry pan. Turn the heat to medium-high. Stir it often for about four minutes. Watch it closely! It can go from golden to burnt in a blink. I still laugh at the time I got distracted by a squirrel. We had to start over.
- Step 3: When your coconut is a pretty golden color, pour it onto a clean plate. Let it cool down completely. This little step adds a wonderful nutty flavor. It makes the whole pie taste extra special. Doesn’t that smell amazing?
- Step 4: Grab a big mixing bowl. Pour in both packets of coconut pudding mix. Add the very cold milk and the coconut extract. Now, whisk it all together for two whole minutes. You’ll see it start to thicken up nicely. It’s like magic happening right in your bowl.
- Step 5: Scoop half of the tub of Cool Whip into the pudding. Gently fold them together. Just keep turning the mixture over until it’s one creamy dream. Be gentle, so it stays light and fluffy. What’s your favorite part of baking? Is it the mixing or the tasting? Share below!
- Step 6: Pour this beautiful creamy filling into your crust. Smooth the top with a spoon. Then, spread the rest of the Cool Whip over the top. Make it look pretty. Finally, sprinkle on all that lovely toasted coconut you made.
- Step 7: The final step is patience. Carefully place your pie in the refrigerator. Let it chill for at least six hours, or even overnight. This wait makes the filling perfectly sliceable. I know it’s hard, but don’t peek!
Cook Time: 4–6 minutes (for toasting)
Total Time: 6 hours 10 minutes
Yield: 9 servings
Category: Dessert, No-Bake
Dreamy Twists on Our Pie
This pie is a wonderful blank canvas. You can dress it up so many fun ways. I love getting creative in the kitchen. It’s how new family favorites are born. Here are a few ideas I’ve tried and loved over the years.
- Chocolate Island Twist: Sprinkle mini chocolate chips on the bottom of the crust before adding the filling. It’s a lovely surprise.
- Tropical Fruit Fiesta: Top your pie with fresh pineapple chunks and sliced bananas right before serving. So fruity!
- Toasty Nut Crunch: Mix some chopped macadamia nuts in with the coconut when you toast it. It adds a wonderful crunch.
Each one gives the pie a whole new personality. Which one would you try first? Comment below!
Serving Your Slice of Sunshine
Now, how should we serve this dreamy pie? A simple slice is always perfect. But sometimes, I like to make it feel extra special. It turns a simple dessert into a tiny celebration. Here are a few of my favorite ways to present it.
For a pretty plate, add a few fresh raspberries on the side. Their tartness is lovely with the sweet coconut. You could also add a little dollop of whipped cream. For a drink, a cup of strong coffee is my go-to. It balances the sweetness so well. If you don’t drink coffee, a tall glass of cold milk is the perfect partner.
For the grown-ups, a small glass of chilled rum or a piña colada makes it feel tropical. For everyone else, a fizzy pineapple soda is just the thing. Which would you choose tonight?
Keeping Your Tropical Coconut Dream Pie Perfect
This pie loves a cool fridge. Just cover it with plastic wrap. It will stay dreamy for three days. You can also freeze it for a month. Wrap the whole pie tightly in foil first.
Thaw it overnight in your refrigerator before serving. I once tried to freeze a slice for a quick treat. It was like eating a coconut ice pop, which was a fun surprise. Making two pies is a great idea for busy weeks.
This matters because a ready-made dessert saves time. It means you are always ready for guests. Have you ever tried storing it this way? Share below!
Easy Fixes for Common Pie Problems
Is your pudding too runny? Make sure your milk is very cold. Cold milk helps the pudding set faster. I remember when I used warm milk once. My filling was soupy.
Did your toasted coconut burn? Always stir it in the pan. Keep a close eye on it. This matters because toasting brings out a wonderful nutty flavor. It makes your pie taste special.
Is the Cool Whip hard to fold in? Let it thaw on the counter first. A soft topping mixes in smoothly. This matters for a light, fluffy pie. Which of these problems have you run into before?
Your Coconut Pie Questions Answered
Q: Can I make this gluten-free? A: Yes! Just use a gluten-free graham cracker crust from the store.
Q: How far ahead can I make it? A: You can make it the night before. The long chill time makes it even better.
Q: What if I don’t have coconut extract? A: You can use vanilla extract instead. The flavor will be a little different but still good.
Q: Can I double the recipe? A: Absolutely. Make two pies in two crusts. It is perfect for a party.
Q: Any extra tips? A: A little grated chocolate on top is a nice touch. Fun fact: The coconut is actually a fruit, not a nut! Which tip will you try first?
A Little Note From My Kitchen
I hope you love making this pie. It always brings a smile to my table. Sharing food is one of life’s sweetest joys.
I would love to see your beautiful creations. Have you tried this recipe? Tag us on Pinterest! Your photos make my day.
Happy cooking!
—Tessa Hammond.
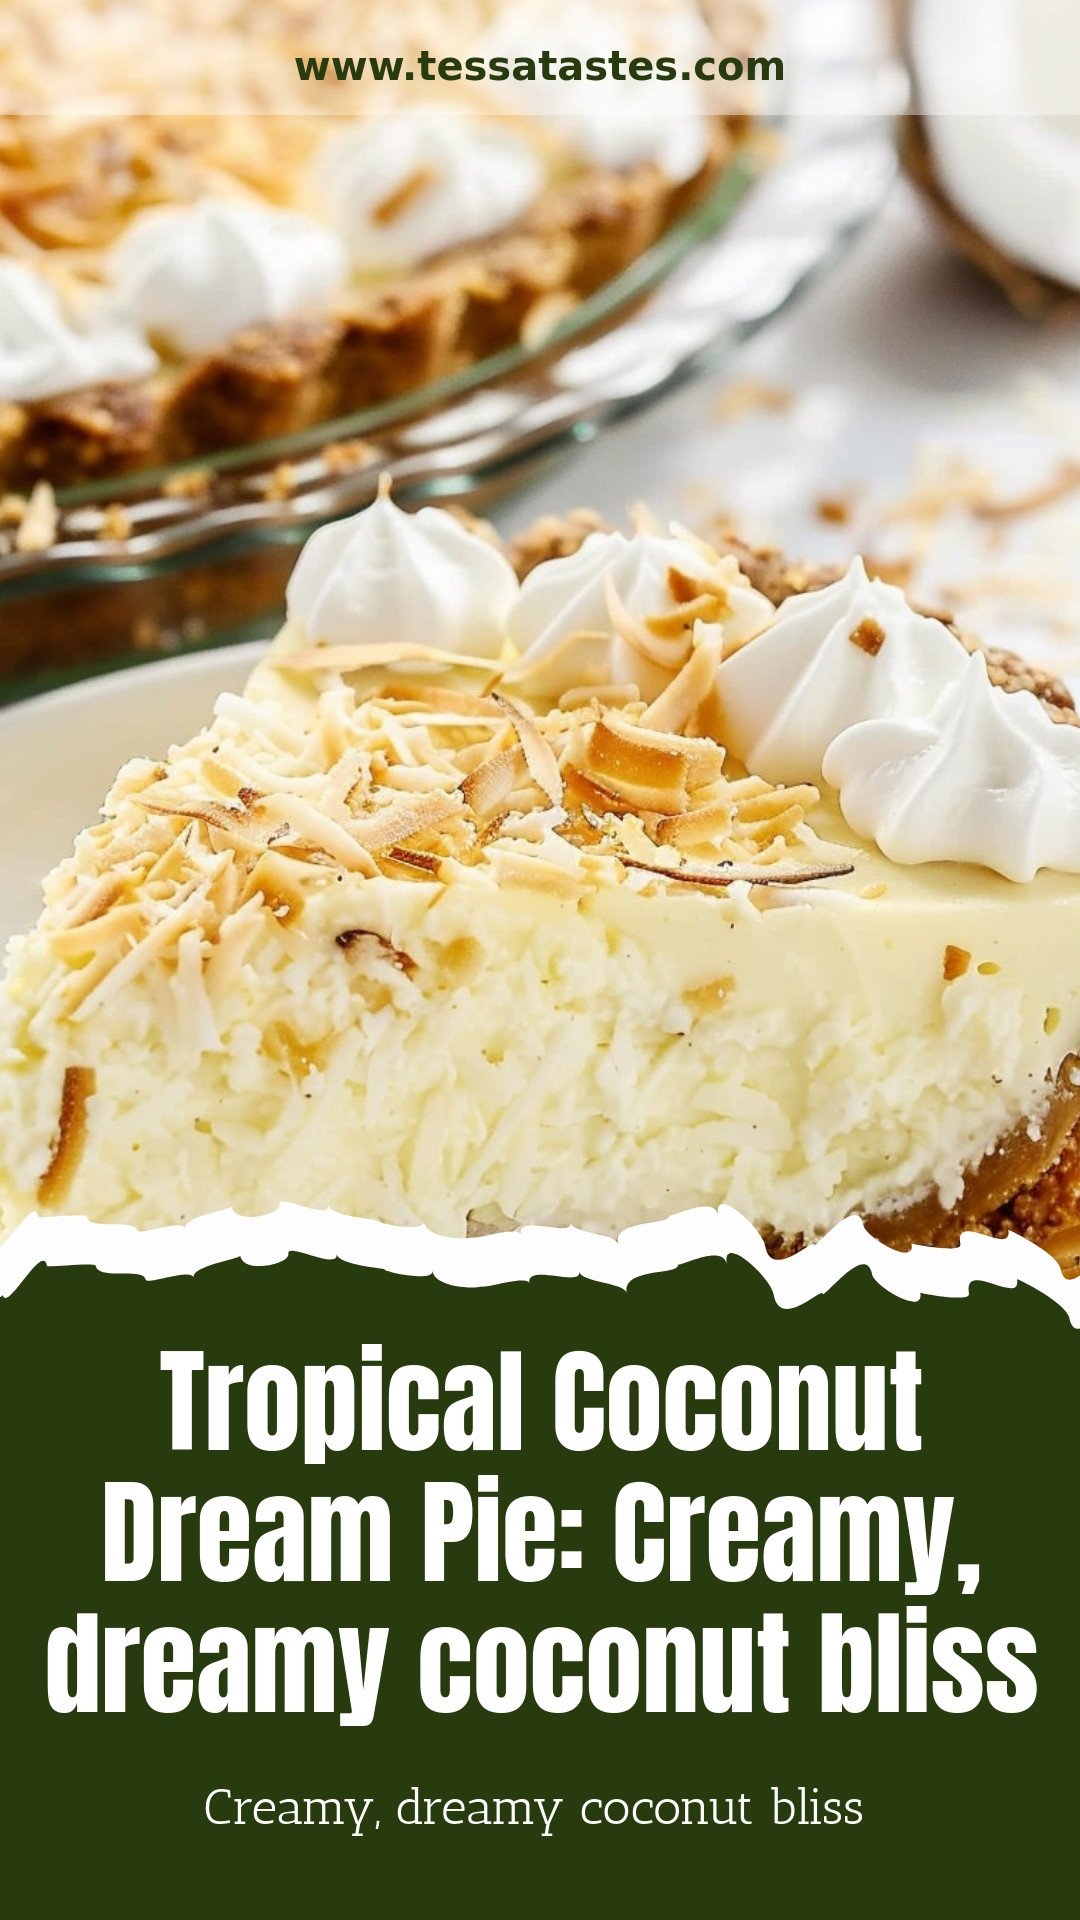
Tropical Coconut Dream Pie: Creamy, dreamy coconut bliss
Description
Indulge in this no-bake Tropical Coconut Dream Pie! A creamy, dreamy coconut filling in a buttery crust. Easy recipe for the ultimate summer dessert.
Ingredients
Instructions
- Remove the plastic lid to the pre-made graham cracker crust and place the crust (still inside the metal tray) onto a large plate. Once assembled, this will support the pie for transport to and from the refrigerator. Set aside.
- In a small clean skillet, on medium-high heat, add the sweetened shredded coconut. Toast for 3 to 4 minutes, stirring often, so the coconut does not burn.
- Remove the toasted, sweetened, shredded coconut to a plate to cool while assembling the rest of the pie.
- In a large mixing bowl, add the contents of both the packets of coconut cream instant pudding, whole milk, and coconut extract. Whisk for 2 minutes or until the pudding is soft set.
- To the coconut cream pudding, add 4 ounces (half of an 8-ounce tub) of extra creamy Cool Whip whipped topping that has been thawed.
- Fold together the pudding and thawed whipped topping until completely incorporated with each other.
- Transfer the coconut cream pie mixture to the pre-made graham cracker crust and smooth out the top.
- With the remaining 4 ounces of the extra creamy whipped topping, spread it over the entire top of the coconut cream pie filling in a smooth layer.
- Garnish the top of your no-bake coconut cream pie with the cooled toasted sweetened shredded coconut.
- Refrigerate your pie for a minimum of 6 hours, or up to overnight, before slicing and serving.
Notes
- Nutrition per serving: Calories: 203kcal | Carbohydrates: 22g | Protein: 4g | Fat: 11g | Saturated Fat: 6g | Polyunsaturated Fat: 0.5g | Monounsaturated Fat: 4g | Cholesterol: 7mg | Sodium: 137mg | Potassium: 141mg | Fiber: 1g | Sugar: 14g | Vitamin A: 107IU | Vitamin C: 0.02mg | Calcium: 91mg | Iron: 1mg


Leave a Reply