My First Witch Hat Disaster
Let me tell you about my first try at these cookies. I was so excited. I used the icing right from the fridge. It was too cold and thick. My first witch hat looked like a messy blob. I still laugh at that.
But you know what? It tasted wonderful. That’s the first why this matters. The fun is in the making, not just how it looks. Have you ever had a kitchen mess turn out okay? I’d love to hear your story.
Why We Make Treats Together
This recipe is perfect for little hands. It’s simple and safe. The kitchen fills with giggles. Doesn’t that smell amazing? Chocolate and sugar, what a pair.
This brings me to the second why this matters. Sharing a recipe creates memories. You remember the laughter, not just the cookie. Those memories are the sweetest ingredient of all.
Your Witch Hat Workshop
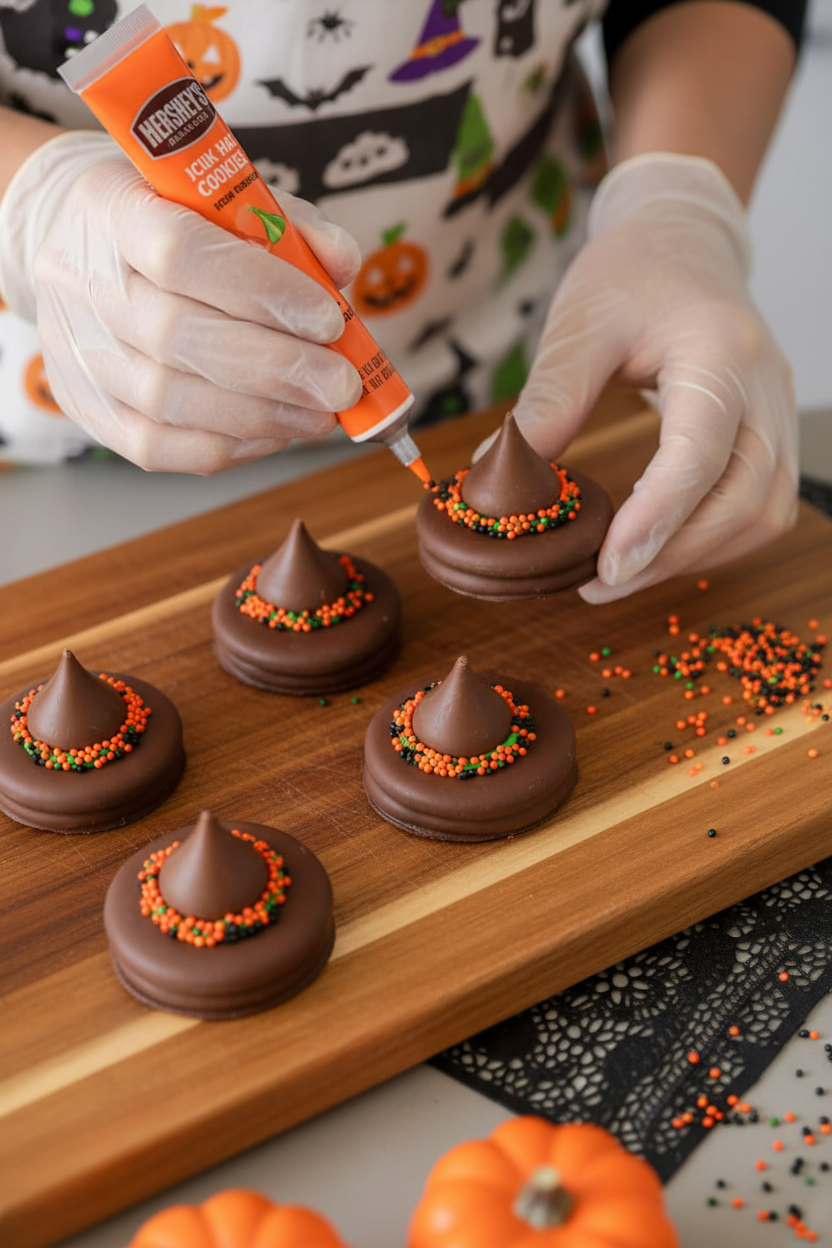
Gather your Oreos, Kisses, icing, and sprinkles. Unwrap all the chocolate kisses first. Trust me, it makes things easier. Now, put a dot of icing on a Kiss. Stick it to the middle of an Oreo. Press gently.
Next, draw a line of icing around the base of the Kiss. This is the hat’s ribbon. Quickly add your sprinkles! The icing dries fast. What color sprinkles will you choose? Tell me your favorite combination.
A Little Chocolate History
I love thinking about where our food comes from. That Hershey’s Kiss has a story. Fun fact: The paper plume sticking out is called a niggly wiggly. Isn’t that a funny name?
Milton Hershey wanted to make chocolate for everyone. He did. Now we get to use his little kisses for magic. It connects us to a bigger story. I like that.
Share Your Spooky Creations
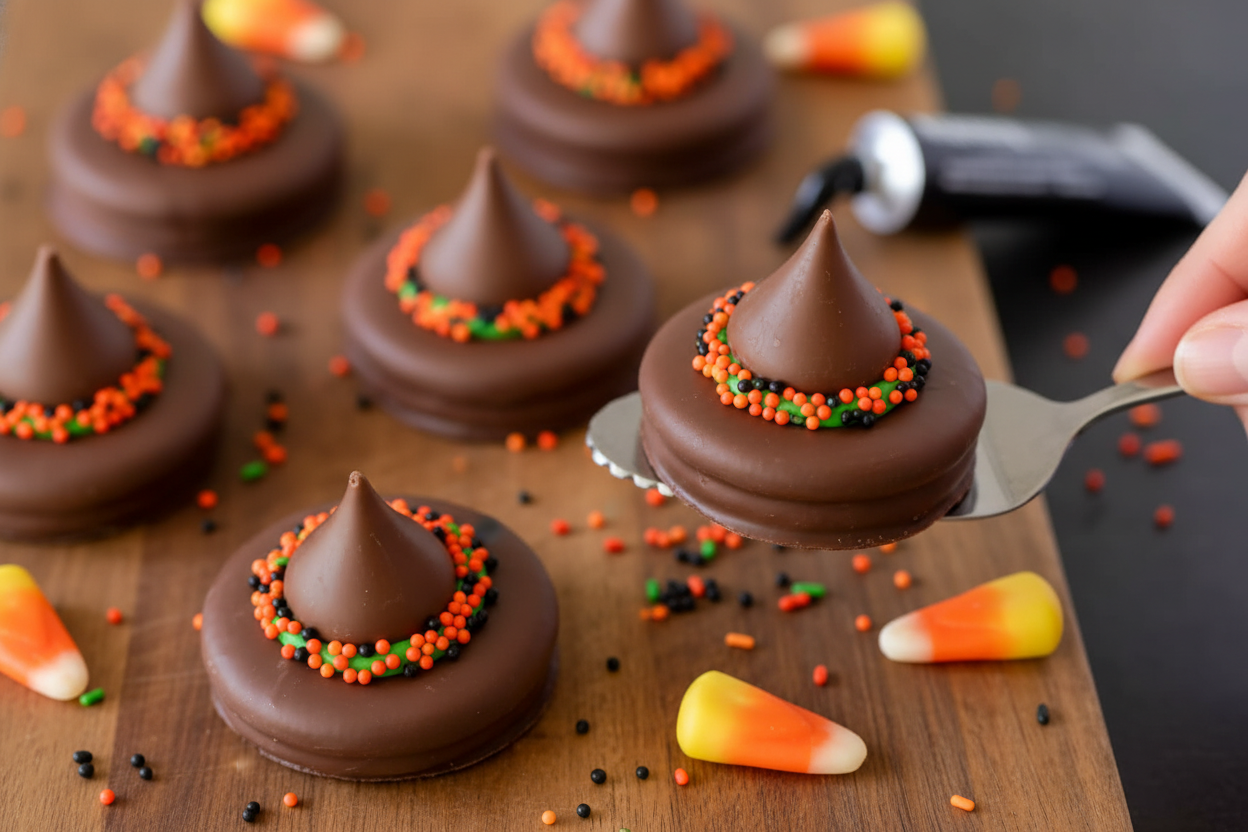
Now your witch hats are done. They look so clever on a plate. Maybe add them to a Halloween party table. Or pack a few for a friend.
This is the best part. You made something. You created a little bit of magic. If you take a picture, who will you share it with first? I always share mine with my grandson.
Ingredients:
| Ingredient | Amount | Notes |
|---|---|---|
| Oreo Fudge Covered Chocolate Sandwich Cookies | 1 box (12 cookies) | |
| Hershey Milk Chocolate Kisses | 12 pieces | |
| Wilton Icing Writer Decorating Tubes | 1 box | |
| Halloween sprinkles (e.g., black & orange nonpareils) | As needed | For decoration |
My Magical Witch Hat Cookies
Hello, my dear! Come sit at my kitchen table. I want to show you something fun. We are making witch hats for Halloween. They are not made from felt, but from cookies! This recipe always makes me smile. I first made these with my grandson, Leo. He got more sprinkles on his nose than on the cookies. I still laugh at that.
These little hats are so simple to put together. You only need four things from the store. The best part is there is no baking! We just assemble and decorate. It’s perfect for a chilly October afternoon. Doesn’t that sound like a cozy bit of magic?
Let’s get our hands busy. I’ll walk you through each step. Remember, cooking is about joy, not perfection. If a hat looks a little wobbly, it just has more character! (My hard-learned tip: unwrap all the chocolate kisses first. It saves you from sticky fingers later!).
Step 1: First, open your box of fudge-covered Oreos. Lay them all out on your counter. See how shiny they are? They are the perfect base for our witch hats. Now, unwrap your Hershey’s Kisses. Put them in a little bowl. This keeps them from rolling away!
Step 2: Take your tube of icing. Squeeze a small dot onto the very center of a cookie. Now, press a chocolate kiss onto that dot. Hold it for a second. This makes the pointy hat! Let it set while you do the others. Do you think the kiss looks more like a hat or a wizard’s tower? Share below!
Step 3: Time for the magic touch! Use your icing to draw a line around the base of the kiss. This is the hat’s ribbon. Do it quickly before the icing dries. Now, here comes the fun part. Shake your sprinkles over the wet icing. Cover that ribbon completely. Doesn’t that look festive?
Step 4: Let your decorated hats sit for a bit. The icing needs to harden. This takes about 15 minutes. Use this time to clean up your sprinkles. Or, just admire your spooky creation! Then, they are ready to eat or share. I always sneak one with a glass of milk.
Cook Time: 0 minutes
Total Time: 20 minutes
Yield: 12 cookies
Category: Dessert, No-Bake
Brew Up Your Own Twist
Once you know the basic spell, you can change it! Try different decorations. It makes each batch a new surprise. Here are three ideas I love.
Peanut Butter Cauldrons: Use peanut butter cups instead of kisses. They look like little pots!
Sparkly Midnight Hats: Use purple or green icing. Then add edible glitter sprinkles. So magical.
Candy Corn Band: Skip the nonpareils. Use tiny candy corn pieces for the hat’s ribbon. Very classic Halloween.
Making food your own is the best part. Which one would you try first? Comment below! I might try your idea next time.
Serving Your Spellbinding Treats
These cookies are stars all on their own. But you can make them extra special. Place them on a dark plate. Scatter a few extra sprinkles around like fairy dust. It looks wonderful.
For a party, stack them on a cake stand. They become a centerpiece! You could also put each in a little paper cup. Then guests can grab one easily. No fuss at all.
What to drink? For grown-ups, a creamy pumpkin ale is nice. It tastes like autumn. For everyone, hot apple cider is my favorite. The cinnamon smell fills the whole house. Which would you choose tonight? I think I’ll have the cider.
Keeping Your Witch Hats Spooky and Fresh
These cookies are best enjoyed the day you make them, as the icing can get soft. But you can store them for a day or two. Just place them in a single layer in a container at room temperature. Do not put them in the fridge, as the fridge makes the cookies soggy. I learned this the hard way with my first batch—they lost their cute, crisp shape.
You can make the parts ahead, though. This is a great batch-cooking tip: unwrap your kisses and have your sprinkles ready. Why does this matter? Being prepared makes kitchen time fun, not frantic, so you can focus on the decorating magic. Have you ever tried storing them this way? Share below!
Fixing Little Kitchen Spells Gone Wrong
First, the kiss won’t stick to the cookie. Your icing might be too thin. Just hold the kiss in place for a ten-count and let it set before you add the sprinkles. I remember when my first hat fell apart—patience is a secret ingredient.
Second, your sprinkles might not stick. Make sure your icing line is thick enough. You can also roll the kiss gently in a bowl of sprinkles.
Third, the cookie might crack. Be gentle when you press the kiss. These are treats, not tools, so handle them with care.
Fixing small problems builds your cooking confidence and makes your food look as good as it tastes. Which of these problems have you run into before?
Your Witch Hat Cookie Questions, Answered
Q: Can I make these gluten-free?
A: Yes! Use gluten-free fudge-covered cookies. Check all your labels carefully.
Q: Can I make them ahead?
A: You can assemble them a few hours before your party, but don’t make them a full day early.
Q: What if I don’t have an icing writer?
A: Use any store-bought frosting in a tube, or melt chocolate chips for glue.
Q: Can I double the recipe?
A: Absolutely. Just work in small batches to keep your workspace from getting too messy.
Q: Any optional tips?
A: Try different sprinkle colors! Purple and green are very witchy. Fun fact: The first chocolate kisses were hand-wrapped in 1907. Which tip will you try first?
Share Your Spooky Creations!
I hope you have a wonderful time making these. The best part is sharing them with friends and family.
I would love to see your creepy cookie creations—your kitchen magic makes me so happy. Please show me what you made. Have you tried this recipe? Tag us on Pinterest using our handle @TessasKitchenNook. I can’t wait to see your photos.
Thank you for baking with me today. Remember, the mess is part of the memory. Happy cooking!
—Tessa Hammond
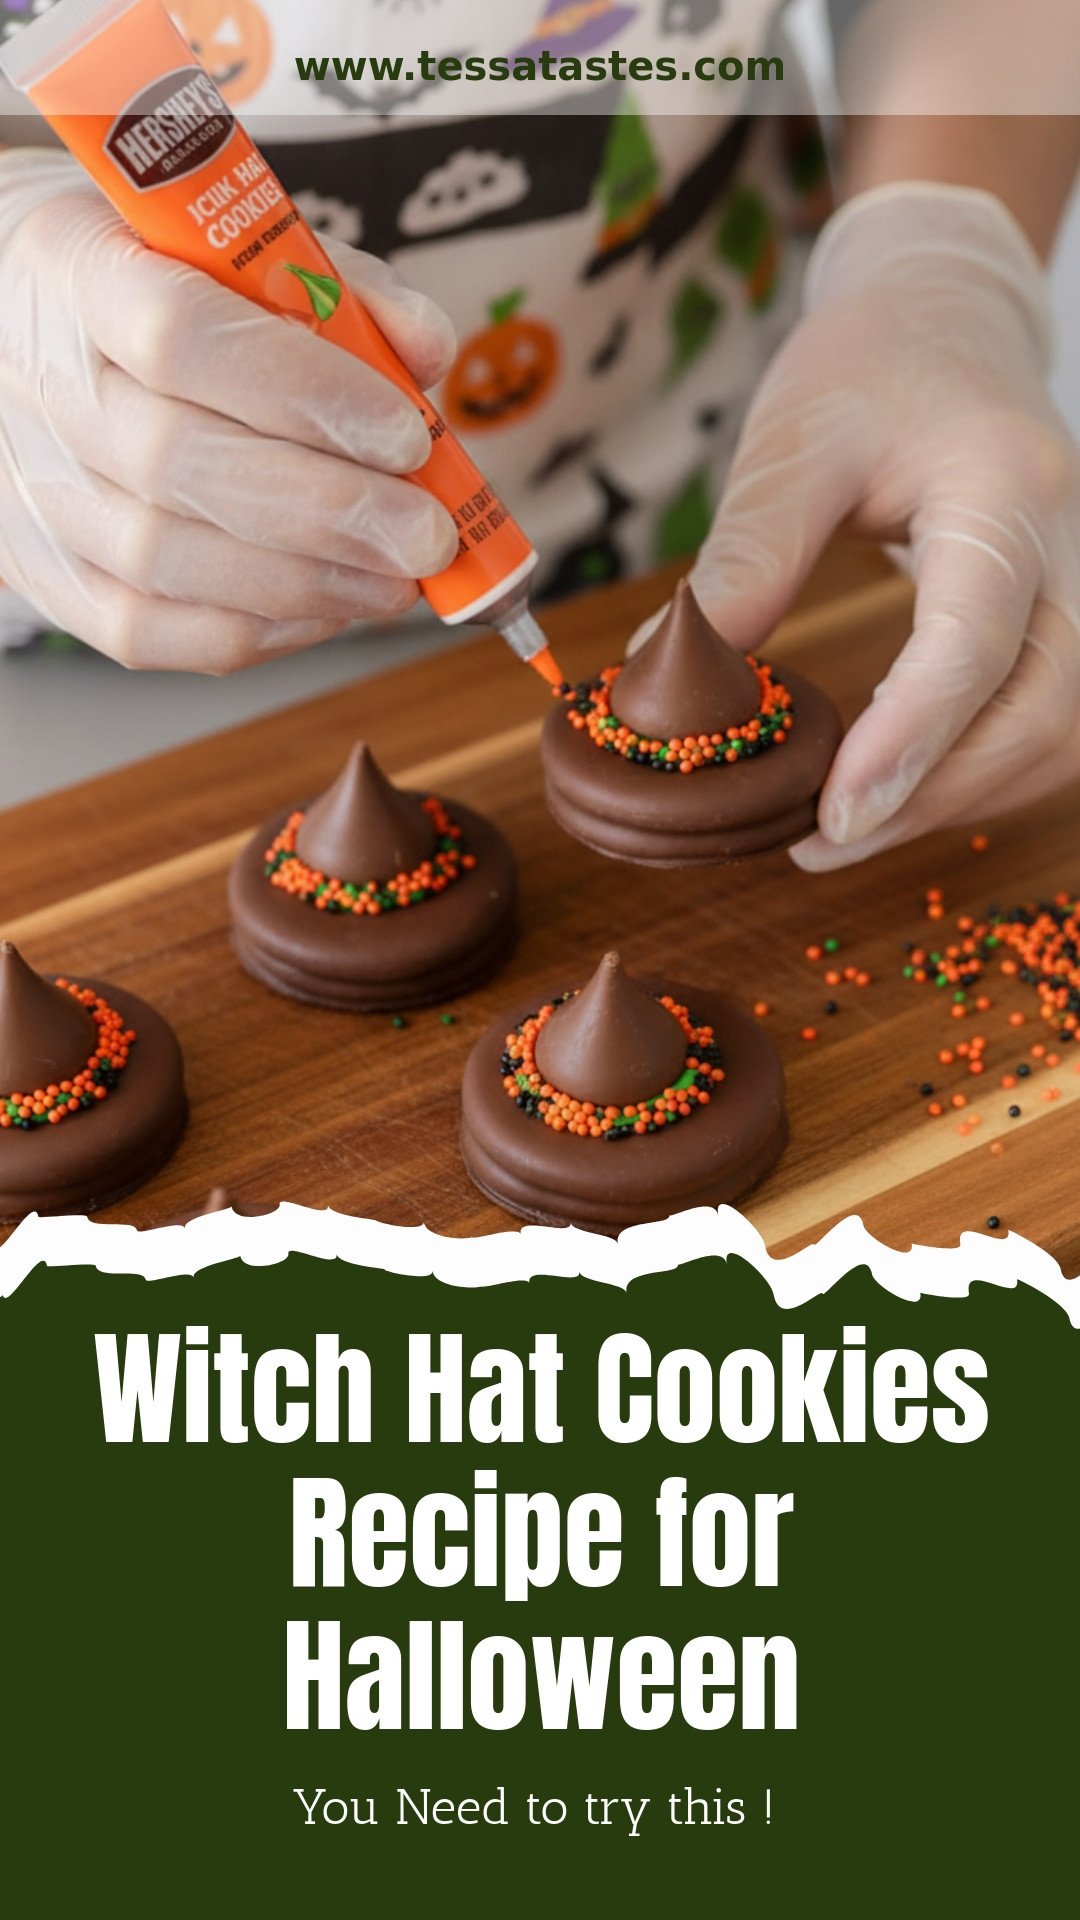
Witch Hat Cookies Recipe for Halloween
Description
Easy and festive no-bake Witch Hat Cookies made with Oreos, Hershey Kisses, and icing, perfect for Halloween.
Ingredients
Instructions
- Using the icing, attach an unwrapped Hershey Kiss onto the top center of each fudge covered Oreo.
- To decorate, ice a line around each Hershey Kiss (so the icing is visible) and cover with Halloween sprinkles. (I used black and orange nonpareils).
Notes
- Nutrition per serving (12g): Calories: 132kcal, Carbohydrates: 10g, Protein: 1g, Fat: 3g, Saturated Fat: 1g, Polyunsaturated Fat: 1g, Monounsaturated Fat: 1g, Trans Fat: 0.01g, Cholesterol: 0.2mg, Sodium: 48mg, Potassium: 27mg, Fiber: 0.4g, Sugar: 6g, Vitamin A: 0.2IU, Calcium: 4mg, Iron: 1mg.


Leave a Reply