A Kitchen Counter Confession
I have a little secret. I do not always feel like baking. Some days, I just want a quick treat. One that makes me feel good.
That is how these bars were born. I wanted chocolate. I wanted something hearty. But I did not want a big mess. So I stirred things up in one bowl. I still laugh at that easy victory.
Why These Bars Matter
Food is more than taste. It is fuel for our adventures. These bars pack good nuts and protein. They give you lasting energy.
That matters because food should help you play longer. It should help you think clearer. A good snack is a quiet friend. It supports you all afternoon.
The Magic of Just One Bowl
You only need one bowl for this. Really! Melt your chocolate and nut butter together. Doesn’t that smell amazing? Then stir in everything else.
My grandson calls it “mud mixing.” He loves to do it. The less we wash, the more we can chat. What is your favorite one-bowl recipe? Tell me in the comments.
A Crunchy Little Story
I used to buy cashews for special occasions. They seemed fancy. Then my friend Jo told me to just use them. “Life is the special occasion,” she said.
Now I keep them in my pantry. They make everyday snacks feel celebratory. *Fun fact: Cashews grow on the bottom of a fruit called a cashew apple!* Isn’t that wild?
Make It Your Own
This recipe is a perfect canvas. Love coconut? Throw some in! Prefer almonds? Use them instead. The best recipes are the ones you tweak.
Would you add dried fruit or keep it classic? I am curious. Let me know what you try. Sharing ideas is how we all learn.
The Second Big Reason
Knowing what is in your food matters. You can say each ingredient’s name. There is nothing scary or unpronounceable here.
When you make it yourself, you control the sweetness. You control the love. That is a powerful feeling. It builds confidence, one simple bar at a time.
Ingredients:
| Ingredient | Amount | Notes |
|---|---|---|
| Rolled Oats | 1 cup | Quick oats also work |
| Cashew Butter | 1/2 cup | Can substitute almond butter |
| Vanilla Protein Powder | 1/2 cup | Whey or plant-based |
| Maple Syrup | 1/3 cup | Or honey |
| Dark Chocolate Chips | 1/3 cup | Plus extra for topping if desired |
| Ground Flaxseed | 2 tbsp | Optional, for extra fiber |
| Pinch of Salt | 1/4 tsp | Enhances flavor |
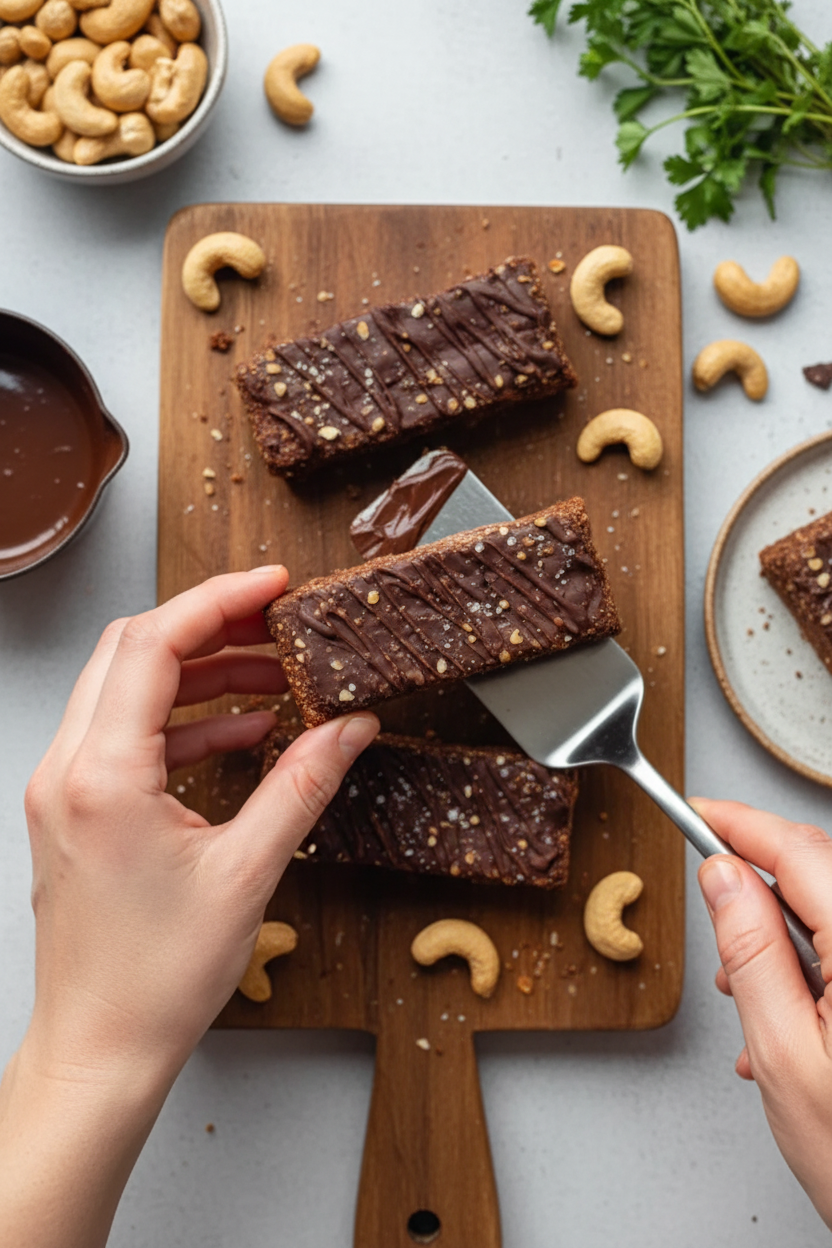
My No-Bake Chocolate Cashew Protein Bars
Hello, my dear! Come sit at the counter. Let’s make a snack together. These bars are my little secret for energy. They taste like a treat but feel like a hug. I always keep some in my old cookie tin. My grandson calls them “power squares.” Doesn’t that sound fun?
We’ll mix everything right in one bowl. No oven needed! I love recipes like that. They remind me of making mud pies as a child. But these taste much, much better. The smell of chocolate and cashews is simply wonderful. Are you ready? Let’s begin.
Step 1: First, grab your food processor. Add the raw cashews and oats. Pulse them until they look like coarse sand. You’ll hear a funny crunching sound. I still laugh at that. It reminds me of gravel under boots. Just don’t turn it into dust! We want a little texture.
Step 2: Now, pour that mixture into a big bowl. Add the protein powder and cocoa. Stir it all with a wooden spoon. Get every last bit of cocoa mixed in. It will look like dark, delicious dirt. (My hard-learned tip: Sift the cocoa first! It stops those pesky little lumps.)
Step 3: Time for the sticky stuff! Warm your nut butter and honey in a small pot. Just until it melts together. Doesn’t that smell amazing? Pour this warm, gooey river into your dry mix. Stir fast! It will become thick and fudgy. This is the best part.
Step 4: Press the dough into your lined pan. Use your clean hands or a cup. Press it down firmly and evenly. This step is very important. It keeps the bars from crumbling later. What kitchen tool makes the best presser: the bottom of a cup or your fingers? Share below!
Step 5: Finally, let them rest in the fridge. They need a good, long nap. About four hours will do. I know, waiting is hard! But it makes them slice perfectly. Then you can cut them into neat bars. Wrap each one for a quick grab-and-go treat.
Cook Time: 4–6 hours (chilling)
Total Time: 4 hours 15 minutes
Yield: 8 bars
Category: Snack, No-Bake
Three Fun Twists to Try
Once you know the basic recipe, you can play! Here are my favorite little changes. They make each batch a new adventure.
Salty Pretzel Crunch: Swap half the cashews for crushed pretzels. It gives a wonderful salty kick.
Berry Blast: Add a handful of dried cherries or cranberries. They look like little red jewels in the chocolate.
Cookie Dough Dream: Use vanilla protein powder. Then stir in mini chocolate chips at the very end. Yum!
Which one would you try first? Comment below!
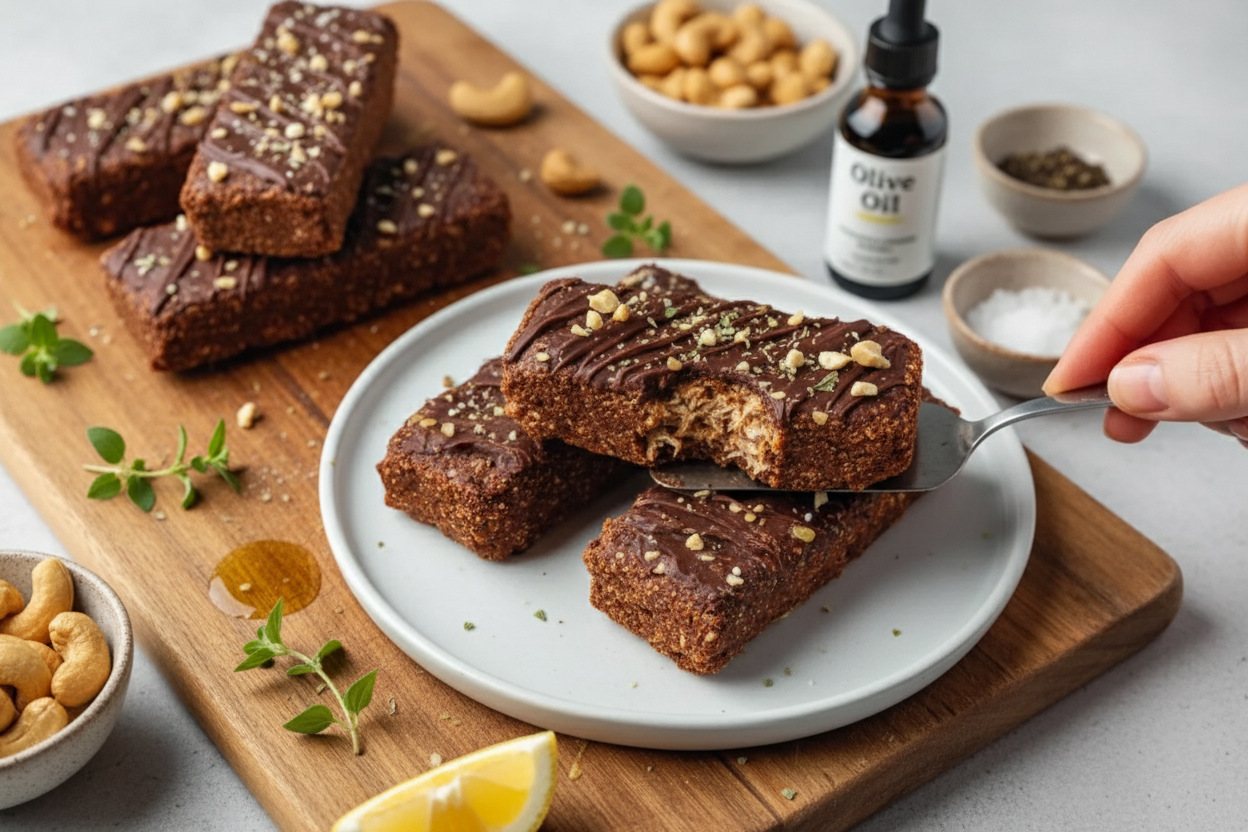
Serving Them Up With Style
These bars are perfect all on their own. But sometimes, I like to dress them up. For a fancy snack plate, cut one into small squares. Serve them with orange slices and a few almonds. The colors look so pretty together.
For a real treat, crumble a bar over vanilla yogurt. It’s like a sundae for breakfast! What to drink? A cold glass of milk is always my first choice. It’s the classic partner for chocolate. For the grown-ups, a cup of strong black coffee is lovely. It cuts through the sweetness just right.
Which would you choose tonight?
Keeping Your Chocolate Cashew Bars Fresh
Let’s talk about storing these tasty bars. They keep well in the fridge for a week. Just wrap them tightly in plastic wrap.
For longer storage, the freezer is your friend. I wrap each bar individually. Then I pop them all in a freezer bag.
No need to reheat! They thaw on the counter in minutes. I remember my first batch. I left them out uncovered and they dried out.
Batch cooking saves so much time. Making a double batch means treats are always ready. This matters because good food should be easy to enjoy.
Have you ever tried storing it this way? Share below!
Fixing Common Little Problems
Sometimes the mixture seems too dry and crumbly. If this happens, add a tiny bit more maple syrup. Mix it in with your hands.
Other times, the bars won’t hold their shape. Press the mixture into the pan very firmly. Use the bottom of a cup to press it down hard.
The chocolate might not melt smoothly. Always chop it finely first. I once burned chocolate by rushing this step.
Fixing small issues builds your cooking confidence. It also makes sure every bite tastes wonderful. That is what matters most.
Which of these problems have you run into before?
Your Quick Questions, Answered
Q: Can I make these gluten-free?
A: Yes! Just use certified gluten-free oats. That is all you need to change.
Q: Can I make them ahead?
A: Absolutely. They are perfect for make-ahead snacks. I make them every Sunday.
Q: What can I swap for cashews?
A: Almonds or peanuts work great too. Use what you have in your pantry.
Q: Can I double the recipe?
A> You sure can. Use a bigger pan or make two batches.
Q: Any optional tips?
A: A pinch of sea salt on top is lovely. *Fun fact: Salt makes chocolate taste even more chocolatey!*
Which tip will you try first?
From My Kitchen to Yours
I hope you love making these bars. They remind me of baking with my grandkids. The kitchen is always full of laughter.
I would love to see your creations. Sharing food connects us all. It is my favorite thing about cooking.
Have you tried this recipe? Tag us on Pinterest! You can find me at @TessasKitchen. I always look for your photos.
Happy cooking!
—Tessa Hammond.
Chocolate Cashew Protein Bars: Chocolate Cashew Protein Bars Recipe
Description
Experience the delightful contrast of textures and flavors with this Tuna Avocado Crispy Rice Bowl, featuring crispy rice base, fresh tuna, and avocado.
Ingredients
Instructions
- Cook 1 cup of sushi rice with 1.5 cups of water until tender. Let it sit covered for 10 minutes, then fluff with a fork and spread on a tray to cool.
- Heat the olive oil in a pan over medium heat. Press cooled rice into small patties and fry until golden and crisp, about 3 minutes per side. Drain on paper towels.
- Slice avocado and fresh tuna into thin pieces. Top the crispy rice with avocado slices and tuna, then drizzle with soy sauce and sesame oil. Sprinkle sesame seeds on top.
Notes
- For added flavor, top with spicy Sriracha mayo, mango salsa, or use marinated tofu for a vegetarian option.


Leave a Reply