A Sweet Memory
Let me tell you about my grandson, Leo. He once tried to make a banana and peanut butter boat. It was a mess! I still laugh at that. So we made these pops instead. They were perfect for his little hands.
This matters because cooking should be fun, not fussy. These pops let you play with your food. What was your first kitchen mess? I’d love to hear your story.
Why This Works
You might wonder why we freeze the bananas first. A frozen banana is like a tasty stick. It holds everything together. The chocolate sets fast on the cold fruit.
This matters because a good trick makes cooking easier. The peanut butter acts like glue. It keeps your sandwich from sliding apart. Isn’t that clever?
Let’s Get Making
Grab your bananas. Slice them nice and thick. Now, spread that peanut butter. Doesn’t that smell amazing? Make little sandwiches. Gently push a stick in the side.
Pop them in the freezer for an hour. This is the secret step. Be patient. Use this time to clean your spoon. I always lick mine.
The Magic Dip
Now for the chocolate. Melt it with a bit of coconut oil. *Fun fact: The oil makes the chocolate shiny and helps it harden.* Stir it until it’s smooth as a pond.
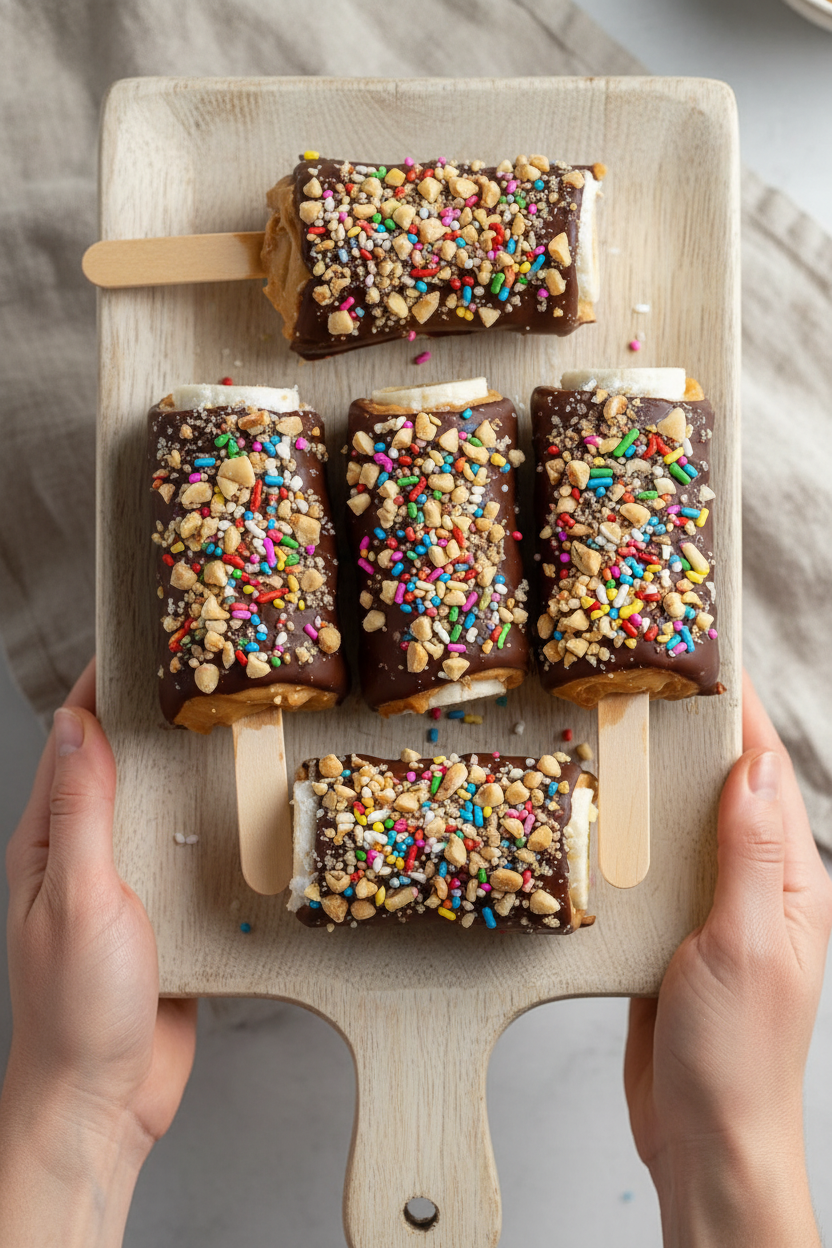
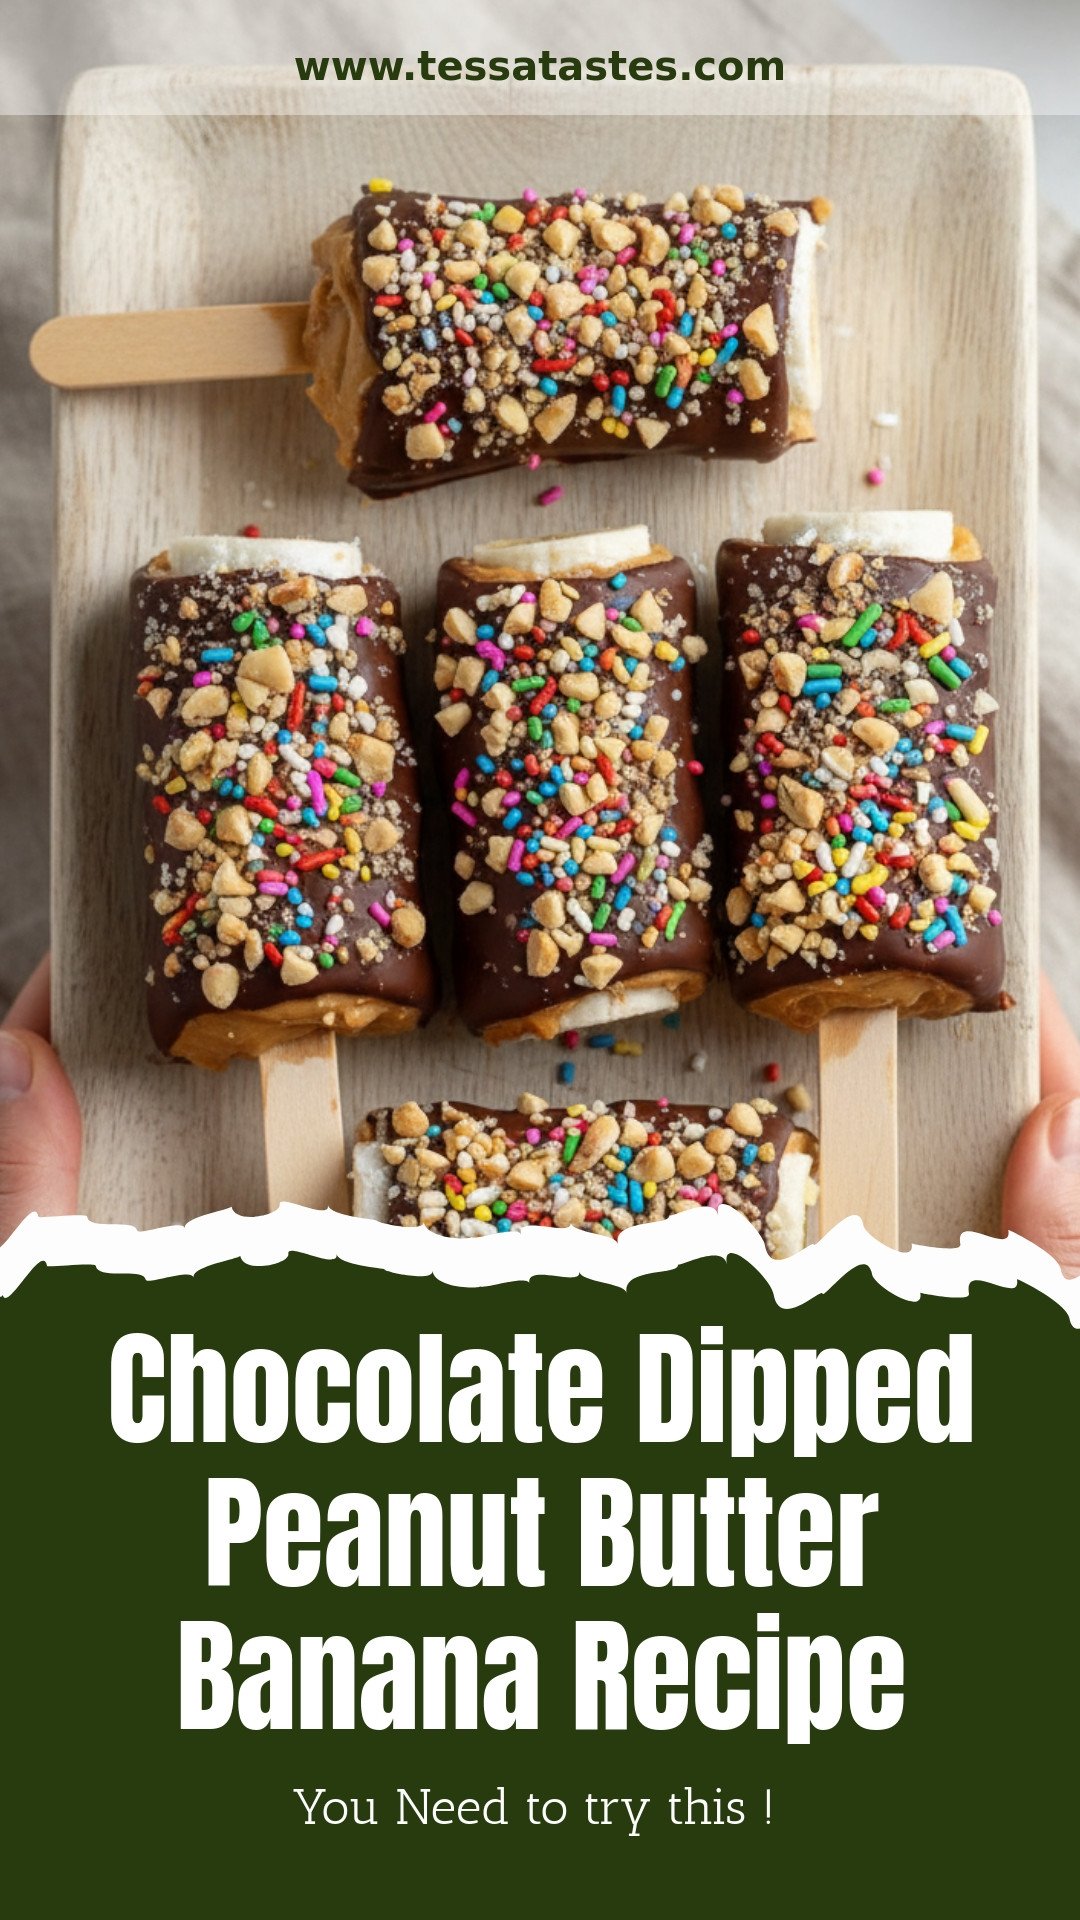
Dip each frozen pop. Twirl it a bit. Let the extra drip off. Then, roll it in your topping. Do you like nuts or sprinkles more? I can never decide.
Time to Share
Freeze them one more hour. Then they’re ready. The crunch of chocolate gives way to creamy banana. It’s a happy surprise in every bite.
These are best eaten cold. Share them with a friend. What other toppings would you try? Crushed cookies or mini marshmallows? Tell me your best idea.
Ingredients:
| Ingredient | Amount | Notes |
|---|---|---|
| Ripe bananas | 2 large | |
| Creamy peanut butter | 1/3 cup | |
| Semi-sweet chocolate chips | 1 cup | |
| Coconut oil | 1 tablespoon | For chocolate coating |
| Chopped roasted peanuts | 1/4 cup | Optional topping |
| Sprinkles | 1/4 cup | Optional topping |
My Favorite Frozen Treat: Chocolate Peanut Butter Banana Pops
Hello, my dear! Let’s make a fun treat today. It reminds me of my grandkids. They love these on a hot summer day. We call them “magic banana coins.” They are so simple and joyful to make. You just need bananas, peanut butter, and chocolate. Doesn’t that sound wonderful?
I love how cold and creamy they get. The chocolate makes a perfect little shell. It’s like a secret handshake between flavors. I still laugh at how fast they disappear. My grandson Sam once ate three before I could even blink! Let’s get our ingredients ready. We are about to make some sweet memories.
Step 1: First, line a baking sheet with parchment paper. This is our treat’s landing pad. It keeps everything from sticking. I always tear off a big piece. It makes clean-up so much easier later.
Step 2: Now, peel your two ripe bananas. Slice them into thick rounds. Aim for about half an inch thick. You should get about 16 slices from each banana. They look like little golden wheels, don’t they?
Step 3: Time to make sandwiches! Spread peanut butter on half the slices. Use about half a teaspoon each. Then press a plain slice on top. Gently press them together. (A hard-learned tip: don’t spread the peanut butter all the way to the edge. It will squish out less!)
Step 4: Carefully push a popsicle stick into each sandwich. Place them on your lined sheet. Now, the first freeze! Pop the whole tray into the freezer. Let them get firm for about an hour. This step is very important for a good chocolate dip.
Step 5: While they freeze, melt your chocolate. Put chips and coconut oil in a bowl. Microwave for 20 seconds, then stir. Repeat until it’s smooth and shiny. Doesn’t that smell amazing? Be patient and stir well each time.
Step 6: Take your frozen banana pops out. Dip each one into the melted chocolate. Let the extra drip back into the bowl. Immediately add your toppings! Try chopped peanuts or colorful sprinkles. Which topping do you like best? Share below!
Step 7: Back to the freezer they go! Let them freeze again for another hour. This sets the chocolate into a perfect shell. Then, they are ready to eat straight from the cold. The mix of textures is just magical.
Cook Time: 2 hours (mostly freezing)
Total Time: 2 hours 15 minutes
Yield: About 16 pops
Category: Dessert, Snack
Three Fun Twists to Try
Once you master the basic recipe, you can play! Here are three of my favorite twists. They make the treat feel brand new every time.
Sunshine Twist: Use sunflower seed butter instead of peanut butter. It has a lovely, nutty taste. Perfect for friends with allergies.
Cookie Crunch Twist: Roll the chocolate-dipped pop in crushed graham crackers. It tastes just like a s’more! My grandkids invented this one.
Double Chocolate Twist: Add a teaspoon of cocoa powder to the peanut butter. Mix it well before spreading. It’s a chocolate lover’s dream.
Which one would you try first? Comment below!
Serving Them Up With Style
These pops are stars on their own. But you can make them extra special. For a party, stick them upright in a big watermelon. It makes a fun, edible centerpiece. Or lay them on a platter with fresh berries. The colors look so pretty together.
What to drink? A cold glass of milk is the classic choice. It’s so comforting. For the grown-ups, a little glass of coffee liqueur over ice is nice. The flavors dance together beautifully.
Which would you choose tonight?
Keeping Your Banana Pops Perfect
These treats are best kept frozen. Store them in a single layer on that baking sheet. Once the chocolate is hard, you can move them. I put them in a freezer bag or container. They will keep for about two weeks.
Do not store them in the fridge. They will get too soft and messy. Always serve them straight from the freezer. This keeps the chocolate nice and snappy. I learned this the hard way with a melty mess!
You can make a whole batch at once. It saves so much time later. Having a sweet treat ready is a lovely gift to yourself. It matters because life gets busy. A little prepared joy is priceless. Have you ever tried storing it this way? Share below!
Simple Fixes for Common Hiccups
Is your peanut butter sliding off? Your bananas might be too warm. Make sure they are cool before you spread. I once tried with just-bought bananas. It was a slippery puzzle! Chilling the slices first helps a lot.
Is the chocolate coating too thick? Add a tiny bit more coconut oil. This makes it dip smoothly. Is it not sticking to the banana? Your banana pops must be fully frozen. A firm, cold pop is the secret.
Fixing these small issues builds your kitchen confidence. You learn how ingredients behave. It also makes the final treat taste and look better. A smooth coat means more chocolate in every bite! Which of these problems have you run into before?
Your Quick Questions, Answered
Q: Is this recipe gluten-free? A: Yes, if you use gluten-free sprinkles. Always check your peanut butter label too.
Q: Can I make these ahead? A: Absolutely! They are perfect for making ahead. Just freeze them as directed.
Q: What can I use instead of peanut butter? A: Try sunflower seed butter. It works just the same for allergies.
Q: Can I double the recipe? A: You sure can. Just use two baking sheets. Give them space in the freezer.
Q: Any other topping ideas? A: Crushed pretzels are delicious. So is shredded coconut. *A fun fact: Bananas are berries, but strawberries are not!* Which tip will you try first?
From My Kitchen to Yours
I hope you love making these fun pops. They always remind me of my grandkids. They love helping in the kitchen. Cooking together makes the sweetest memories.
I would be thrilled to see your creations. Show me your chocolate-dipped masterpieces. Share a picture with your family or friends. Have you tried this recipe? Tag us on Pinterest!
Thank you for spending time with me today. Keep things simple and enjoy the process. Happy cooking! —Tessa Hammond.

Chocolate Dipped Peanut Butter Banana: Chocolate Dipped Peanut Butter Banana Recipe
Description
A fun and easy frozen treat! Creamy peanut butter banana sandwiches are dipped in rich chocolate and topped with crunchy peanuts or sprinkles.
Ingredients
Fruits
Spreads
Chocolate Coating
Optional Toppings
Instructions
- Prepare Lined Baking Sheet: Line a baking sheet with parchment paper.
- Slice Bananas: Peel bananas and cut into 1/2-inch thick rounds, yielding approximately 16 slices per banana.
- Assemble Sandwiches: Spread about 1/2 teaspoon peanut butter onto half of the banana slices, then top each with a second slice to form a sandwich.
- Insert Sticks: Gently insert a popsicle or lollipop stick into each banana sandwich and arrange on the prepared sheet.
- First Freeze: Place the baking sheet in the freezer for 1 hour or until banana pops are firm.
- Melt Chocolate Coating: Combine chocolate chips and coconut oil in a microwave-safe bowl. Heat in the microwave in 20-second intervals, stirring between each, until smooth and fully melted.
- Dip Pops and Add Toppings: Dip each frozen banana pop into the melted chocolate, allowing excess to drip off. Immediately sprinkle with roasted peanuts or sprinkles as desired.
- Final Freeze: Return chocolate-dipped pops to the baking sheet and freeze for an additional hour or until chocolate is set.
- Serve: Serve the banana pops directly from the freezer for optimal texture.
Notes
- For a nut-free version, use sunflower seed butter and omit the peanut topping. Store pops in an airtight container in the freezer for up to 2 weeks.


Leave a Reply