My First Donut Disaster
Let me tell you about my first time making yeast donuts. I was so excited. I skipped the long wait in the fridge. Big mistake! My donuts turned into lumpy, oily rocks. I still laugh at that.
That taught me a big lesson. Good things need a little patience. This matters because gluten-free flour needs time to drink up the milk and egg. That waiting time makes the dough behave. Have you ever had a kitchen disaster that taught you something?
The Secret is in the Wait
Our recipe has two waiting times. First, the dough chills in the fridge. This is the cool proof. It makes the dough strong. Then, the cut donuts rise in a warm spot. They get puffy and light.
This matters for gluten-free baking. The flour needs that time to become friendly. Rushing makes tough donuts. Waiting makes magic. *Fun fact: The nutmeg isn’t just for flavor. It helps make the donuts taste extra cozy and warm.
Frying Without Fear
Frying can feel scary. But a candy thermometer is your best friend. It tells you the oil is just right. Too hot burns them. Too cold makes greasy blobs.
I fry one donut first as a test. It gives me courage. You watch it turn a perfect golden brown. Doesn’t that smell amazing? What’s your favorite smell from the kitchen?
The Sweet Finish
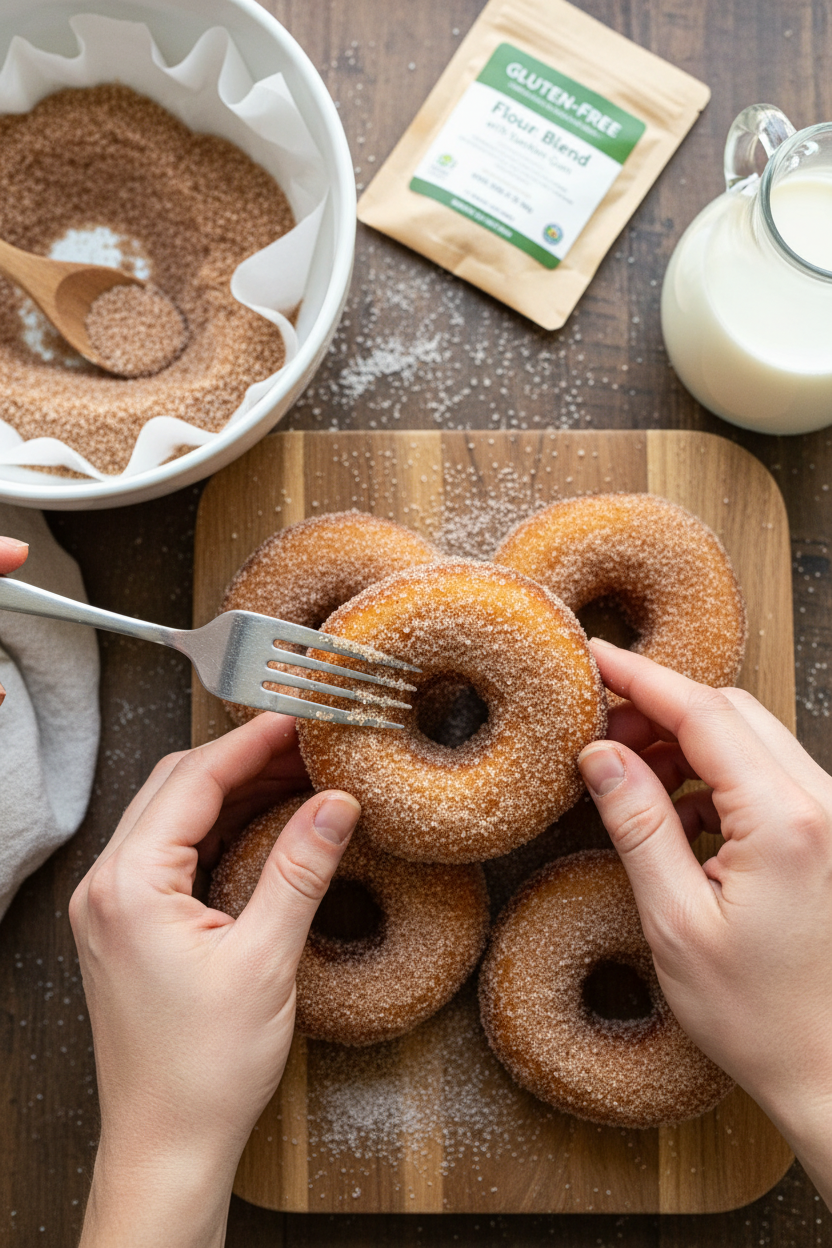
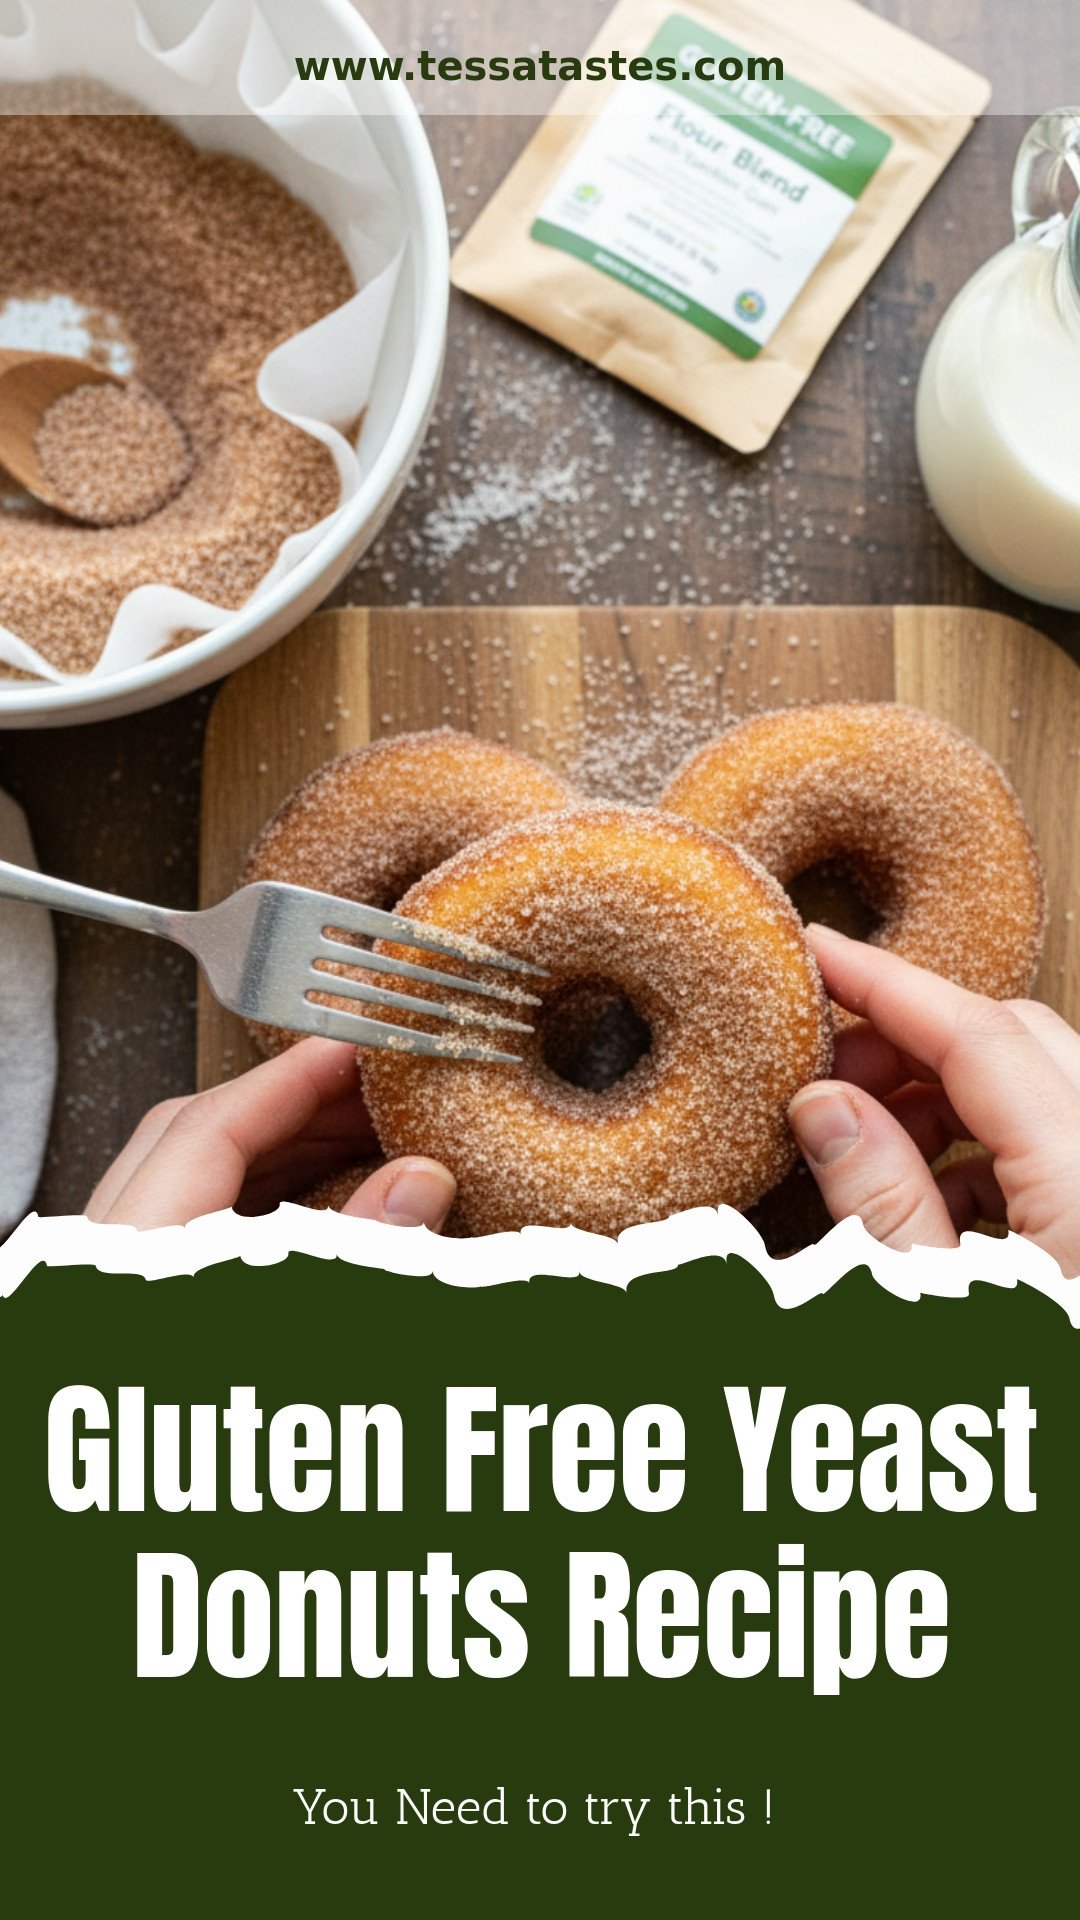
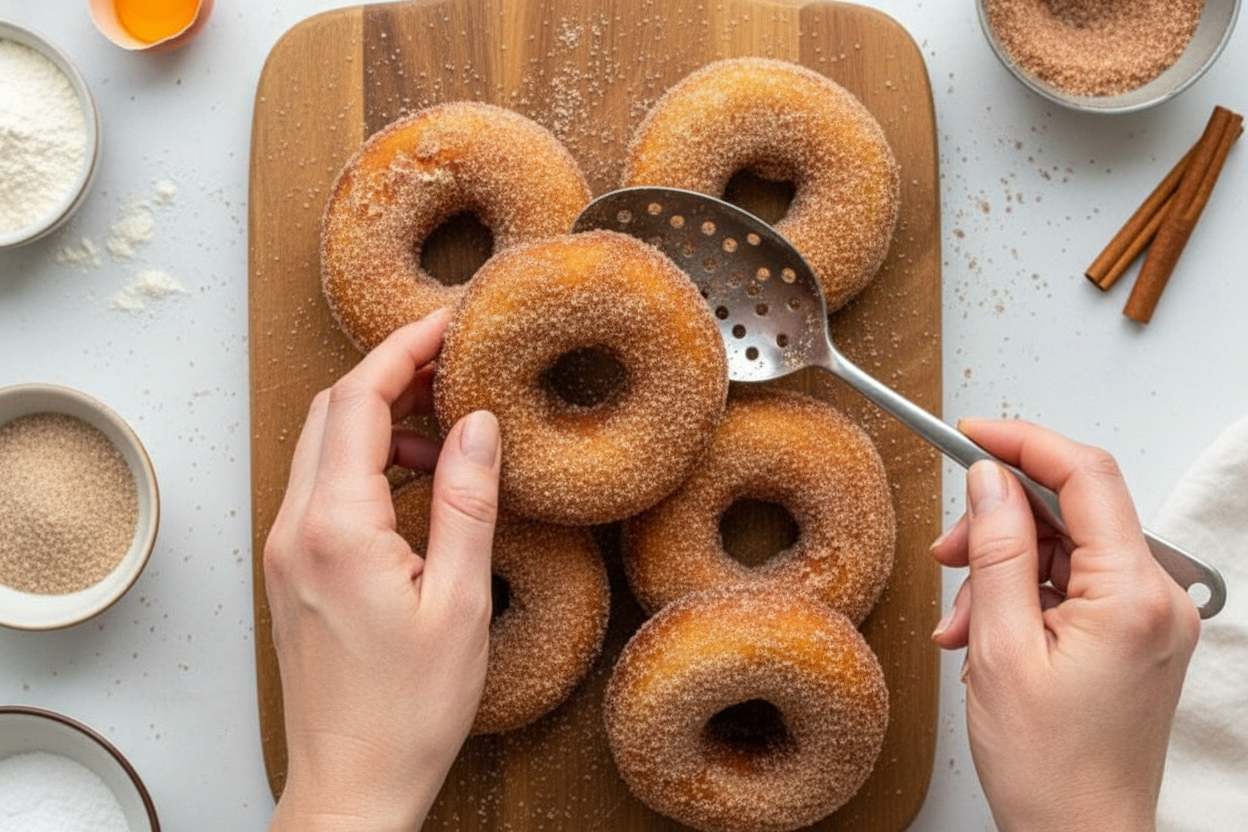
Now for the fun part! You can glaze or roll them in cinnamon-sugar. For glaze, just stir powdered sugar and milk. Dip the warm donut tops. So shiny!
For cinnamon-sugar, do it while donuts are warm. The sugar sticks like a hug. Which team are you on: team glaze or team cinnamon-sugar? I can never choose.
Your Turn in the Kitchen
Making these donuts is a little project. It’s not a race. Enjoy the process. The waiting, the frying, the dipping. It all builds a memory.
Share them with someone you love. That first bite is the best reward. Tell me, what’s the first thing you like to bake when you want to make someone smile?
Ingredients:
| Ingredient | Amount | Notes |
|---|---|---|
| Gluten-Free Flour with Xanthan Gum | 2½ cups | Recommended for yeast baking (e.g., Pillsbury or Better Batter Brand) |
| Granulated sugar | ¼ cup | |
| Baking powder | 2 teaspoons | |
| Instant yeast (rapid rise) | 2 teaspoons | |
| Cream of tartar | ½ teaspoon | |
| Ground nutmeg | ½ teaspoon | |
| Salt | ¼ teaspoon | |
| Whole milk | ¾ cup | Room temperature or lukewarm |
| Egg | 1 large | |
| Unsalted butter | ¼ cup | Melted but not hot |
| Vegetable oil | As needed | For frying |
| Confectioner’s sugar (for glaze) | 2 cups | |
| Whole milk (for glaze) | ⅓ cup | |
| Granulated sugar (for cinnamon-sugar) | ⅓ cup | |
| Ground cinnamon (for cinnamon-sugar) | 1 teaspoon |
My Gluten-Free Donuts: A Little Pocket of Joy
Hello, my dear. Come sit at the counter. I want to tell you about my donuts. My grandson, Liam, can’t have gluten. I saw his little face at the bakery once. It was so sad. So, I got to work in my kitchen. After many tries, we found our winner. This recipe is our special secret. The nutmeg makes the whole house smell like a hug. Doesn’t that smell amazing? Let’s make some magic together.
Step 1: Grab your big mixing bowl. Put all your dry friends in it. That’s the flour, sugar, baking powder, yeast, cream of tartar, nutmeg, and salt. Give them a good stir with a spoon. You want everyone to be best buddies. Now, pour in the milk and crack in the egg. My chicken, Henrietta, gives us the best eggs. They make the dough so happy.
Step 2: Time for your mixer with the dough hook. Let it knead on low for five whole minutes. It will look messy at first. That’s okay. Scrape the bowl with a spatula. Keep it going. You’ll see it become a soft, sticky dough. Now, drizzle in that melted butter. Let the mixer run for one more minute. (Hard-learned tip: Your butter must be melted but cool. Hot butter will upset the yeast!)
Step 3: Here’s the secret step. Spray a bowl and plop your dough in. Cover it tight with plastic wrap. Tuck it into the fridge for at least two hours. I often do this before bed. The flour needs a long, cold drink. This makes the dough strong. In the morning, it’s ready for us. Why do we let gluten-free dough rest in the fridge? Share below!
Step 4: Lightly flour your counter and rolling pin. Roll the dough out thick, about ¾ of an inch. Use your donut cutter. Press down firmly and give it a little wiggle. Gently place the rings on a parchment-lined tray. Leave them space to grow. Cover the tray and let them rise in a warm spot. This takes about two hours. They will get nice and puffy. I watch them like little clouds.
Step 5: Now, we fry. Heat 2 inches of oil in a deep pot. You need a candy thermometer. This is your best friend. Get the oil to 330°F. Too hot, and they burn. Too cool, and they get greasy. Gently slide a donut in. It should sizzle softly. Cook for less than a minute per side until golden. Use tongs to flip it. I still laugh at my first one. It was a funny shape, but so tasty!
Step 6: Lift the donut out with a slotted spoon. Let it drain on a paper towel. Let them all cool for about ten minutes. Now, the fun part! For glaze, just whisk powdered sugar and milk. For cinnamon-sugar, mix them in a shallow bowl. Dip your warm donuts. The sugar will stick like glitter. Then, the hardest part. Let them sit a minute before you take a bite. I know, it’s tough to wait!
Cook Time: 20 minutes frying
Total Time: 4 hours (includes chilling & rising)
Yield: About 10 donuts
Category: Baking, Treats
Let’s Get Creative With Your Donuts
Once you know the basic recipe, you can play. I love adding little twists. It makes an ordinary morning feel like a party. Here are three of my favorite ideas. They are all so simple.
Lemon Sunshine: Add two teaspoons of lemon zest to the dry ingredients. Top with a lemon glaze. Just add a little lemon juice instead of some milk.
Chocolate Pocket: Before frying, press a few chocolate chips into each donut ring. They melt inside into a gooey surprise.
Apple Pie Spice: Swap the nutmeg for apple pie spice. Roll the warm donuts in cinnamon-sugar. It tastes like autumn in every bite.
Which one would you try first? Comment below!
The Perfect Way to Serve Them
Donuts are a celebration all by themselves. But I love making a little moment of it. For a real treat, pile them high on a cake stand. Dust them with a little extra powdered sugar. It looks like snow. Serve them with fresh berries on the side. The tartness is perfect with the sweet dough.
What to drink? For a cozy morning, a big glass of cold milk is classic. For the grown-ups, a hot cup of coffee with cream is just right. The bitter coffee and sweet donut are old friends. Which would you choose tonight?
Keeping Your Donuts Fresh and Happy
Let’s talk about keeping these treats tasty. First, cool them completely. Then store them in a sealed container. They are best eaten within two days.
You can freeze them for later, too. Place them in a single layer on a tray. Once frozen, pop them into a freezer bag. They keep for about a month.
To reheat, just warm them in the oven. I set mine to 300 degrees for five minutes. It brings back that fresh-made magic. I once reheated one in the microwave. It got a bit soggy, so I stick to the oven now.
Batch cooking saves time for busy mornings. Mix and cut the dough the night before. Let it rise in the fridge overnight. Fry them fresh in the morning for a special breakfast.
This matters because good food shouldn’t be rushed. A little planning means a sweet reward later. Have you ever tried storing it this way? Share below!
Donut Troubles? Let’s Fix Them Together
Sometimes cooking doesn’t go as planned. That’s okay. Here are three common bumps and their easy fixes.
First, dough too sticky? Gluten-free flour can be tricky. Just add one more tablespoon of flour. Knead it in gently until it feels better.
Second, donuts not rising enough? The yeast might be old. Always check the date on your yeast jar. I remember when my donuts stayed flat. Fresh yeast fixed it the next time.
Third, oil temperature is key. If it’s too cool, the donuts soak up oil. If too hot, they burn outside. A candy thermometer is your best friend here.
Getting this right builds your kitchen confidence. It also makes sure every bite is perfectly fluffy and golden. Which of these problems have you run into before?
Your Quick Donut Questions, Answered
Q: Can I make these ahead? A: Yes! The dough loves a slow, cold rise in the fridge overnight.
Q: What if I don’t have nutmeg? A: You can skip it. A dash of vanilla in the dough is lovely instead.
Q: Can I double the recipe? A: Absolutely. Just use a bigger bowl. Mix everything well so it’s even.
Q: Why the cream of tartar? A: It helps the dough rise. *Fun fact: It’s also what gives snickerdoodles their tang!*
Q: Any other toppings? A: Try a simple chocolate glaze. Just melt chocolate chips with a little butter. Which tip will you try first?
From My Kitchen to Yours
I hope you have fun making these. The smell of frying donuts is pure joy. It reminds me of my own grandma’s kitchen.
I would love to see your creations. Sharing food stories connects us all. Your kitchen adventures make me smile.
Have you tried this recipe? Tag us on Pinterest! I can’t wait to see your golden, glazed masterpieces. Happy cooking!
—Tessa Hammond.
Gluten-Free Yeast Donuts
Description
Light, fluffy, and perfectly sweet, these gluten-free yeast donuts are fried to golden perfection and finished with a classic glaze or cinnamon-sugar coating.
Ingredients
For Glazed Donuts
For Cinnamon-Sugar Donuts
Instructions
- In a large bowl, combine gluten-free flour, granulated sugar, baking powder, instant yeast, cream of tartar, nutmeg and salt. Stir together until well combined.
- Add milk and egg into the flour mixture. Use an electric mixer with a dough hook and knead on low-medium speed for 5 minutes. Use a spatula to blend in any dry ingredients that have settled at the bottom of the bowl. Keep kneading with the dough hook for the full 5 minutes and the dough will start to come together better into smoother dough.
- Knead the butter in, using the dough hook on low-medium speed, until it is well combined (about 1 minute).
- Spray a medium bowl with non-stick cooking spray and place the dough into the bowl. Cover the bowl with food-safe plastic wrap and place the dough into the fridge for at least 2 hours. This can also sit overnight in the fridge. Gluten-free flour needs this time to hydrate so don’t skip this cooled proofing time.
- Line a large baking sheet with parchment paper. Set aside for now.
- Lightly flour your work surface, your rolling pin, and your donut cutter with gluten-free flour then place your dough down on that lightly floured work surface. Roll the dough out to about ¾” thickness then use a donut cutter to cut out the donut shapes. The size of the donut cutter I used is 3” in diameter.
- Gently place the raw donuts onto the prepared baking sheet. Space the donuts out at least 2 inches from each other. Wrap this tray well with food-safe plastic wrap then place in a warm area of your kitchen to rise for 1½ to 2 hours (until about 50% larger in size).
- Heat oil in a pot that’s big enough to have at least 2 inches of oil in it without spilling over the edges. Oil should be heated to a temperature between 320°F to 330°F. Use a candy thermometer to measure the temperature of the oil. Too hot of oil will burn the outside of the donut while the middle remains raw. Oil that isn’t hot enough will result in your donut turning into a lump of dough and not holding its shape. A candy thermometer is essential as the temperature of your oil will make or break your donuts.
- While your oil is heating up, prepare your work space by lining a wire rack with paper towels (to soak up oil after removing the donut from the pot). You’ll also need metal tongs for turning your donuts over while frying plus a slotted spoon for removing the donut from the oil and placing on the paper towel to cool.
- If this is your first time deep frying donuts, start with frying one donut at a time. This will give you a better idea of how long you’ll want to keep your donut in the oil. At a temperature of 330°F, I cook the donuts for less than a minute on each side. You’re looking for a golden color but not too brown as that will lead to a burnt outer layer.
- Use the metal tongs to flip donuts over in the oil during baking.
- Use a slotted spoon to scoop donuts out of the oil and place on the paper towel lined wire rack.
- Let the donuts cool slightly (about 10 minutes) before adding toppings.
- For glazed donuts, stir the confectioner’s sugar and milk together until smooth. Dip donuts as desired (either fully dipping them or just dipping the tops). Can add gel food coloring if you’d like.
- For cinnamon-sugar donuts, Stir the sugar and cinnamon together. Dip both sides of warm donut into the mixture and gently shake off excess sugar. This needs to be done while the donuts are warm or the sugar mixture won’t stick to the donut.
Notes
- For best results, use a gluten-free flour blend specifically recommended for yeast baking (like Pillsbury or Better Batter). The chilled proofing time is essential for the gluten-free flour to hydrate properly. A candy thermometer is highly recommended to ensure the oil is at the correct temperature for frying.


Leave a Reply