The Day I Burned the Milk
I still laugh at the first time I tried to make hot chocolate from scratch. I was about your age, standing on a little step stool in my grandmother’s kitchen. I put the milk on high heat and walked away to find a book. When I came back, the pot was smoking and the milk looked like a crusty, brown rock. The whole house smelled like burnt cereal for two days. Grandma just laughed, scraped the pot, and said, “Well, now you know.” That’s why this recipe is so special. It’s the one she taught me after that mess. It’s almost impossible to ruin if you stay close and keep stirring. Does that sound like something you or your family has ever done?The Silent Heat Rule
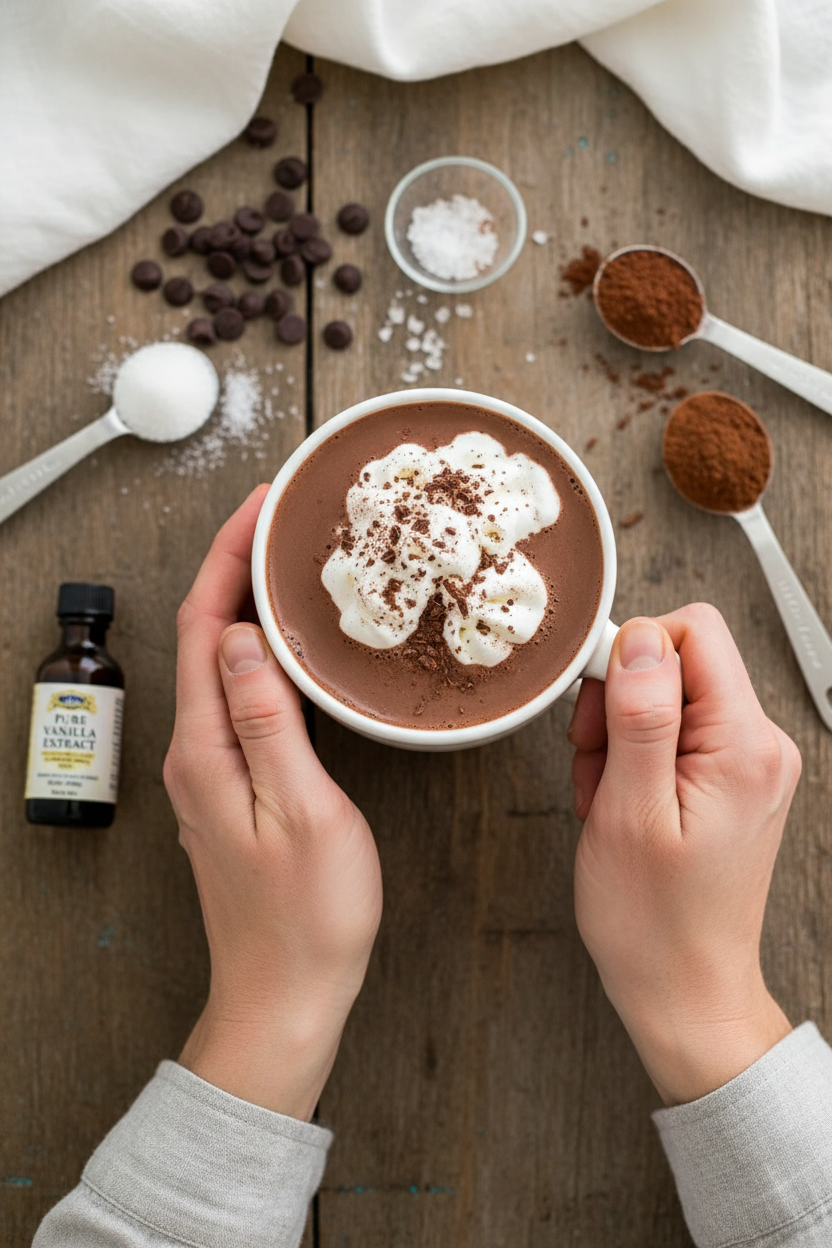
The trick to silky, smooth hot chocolate is patience. You put the milk, cocoa powder, and sugar in the pot while it is still cold. Whisk it all together first, before you even turn on the stove. If you add the powder to hot milk, you get clumps. Nobody wants a lumpy drink. This is the first secret to making it taste like a fancy cafe version at home. You set the heat to medium-low. That means the flame is small and gentle. You swirl the whisk the whole time, feeling the milk get warm against your hand. Stop before it boils. A boil will ruin the smoothness. Why this matters: Low heat lets the sugar melt slowly and the milk stay creamy. It’s the difference between a sip that comforts and one that burns your tongue.The Melting Moment
Once the milk is warm and steamy, you drop in the chocolate chips. This is the most magical part. Watch them disappear into the dark color as you stir. Use bittersweet or semisweet chips. Quality matters here because cheap chips have waxy stuff that doesn’t melt nicely. You want a glossy, mirror-like liquid. I always feel like a wizard when it turns shiny. Doesn’t that smell amazing? The chocolate hits the air and the whole kitchen starts to feel like a winter hug. I know some people save the chips for on top, but melting them in is what makes the body of the drink rich. *Fun fact: Chocolate chips were invented in 1937 by a woman named Ruth Wakefield. She ran out of baker’s chocolate and broke up a sweet chocolate bar instead. Mistakes can become wonderful.*What the Salt Does
Now comes the part that surprises most kids. You add a tiny pinch of sea salt. Just a pinch. Not enough to taste salty. Salt wakes up the sweetness. It makes the chocolate taste deeper, like it has more layers. Think of it like turning up the volume on your favorite song instead of just playing it quiet. Why this matters: Our tongues have taste buds that get bored. A little salt makes them pay attention again. Have you ever tried putting a tiny bit of salt on a brownie or a caramel? It does the same trick here. If you skip it, the drink is still good. But if you add it, you might never go back.The Vanilla Whisper
Right at the end, you pour in the vanilla extract. Just a quarter teaspoon. You whisk it in quickly and then take the pot off the heat immediately. Vanilla is like a friend who makes everything more fun. It doesn’t shout. It just makes the chocolate smell rounder and happier. Pour it into your favorite mug right away. This drink waits for nobody. I always pour mine into a thick ceramic mug that holds the warmth. Do you have a special mug you like to use? Maybe one with a silly saying or a chipped handle that feels familiar? Tell me about your favorite cup.When to Share It
This recipe is best on a rainy afternoon or a snowy evening when you’ve been playing outside. You serve it with a tiny spoon on the saucer, just in case the marshmallows need some help sinking. I like to top mine with a small cloud of whipped cream or a scattering of mini marshmallows. Sometimes I grate a little dark chocolate on top for fancy company. But the real beauty is that it tastes amazing plain. Take a poll in your house: who likes marshmallows and who likes whipped cream? I bet there’s a strong opinion on both sides. My grandson insists on the mini ones that turn into a white puddle on top. It’s a family argument I never get tired of hearing.The Leftover Lesson
If you have any leftover hot chocolate, you can store it in the fridge. It will get a skin on top, but you can just whisk it back in when you reheat it gently. Or, you can do what my grandma did. She poured leftovers into a popsicle mold and froze them. Chocolate milk popsicles are a secret summer treat that nobody expects. That’s another idea for you. I would love to hear: what is the best thing you have ever made in the kitchen, even if it went a little wrong? Share your story with me. Every messy pot has a good story behind it.Ingredients:
| Ingredient | Amount | Notes |
|---|---|---|
| Whole milk (or 2%) | 4 cups | Creates silky texture |
| Unsweetened cocoa powder | ¼ cup | Dutch-processed preferred |
| Granulated sugar | ¼ cup | Adjust to taste |
| Chocolate chips (bittersweet or semisweet) | ½ cup | Quality matters here |
| Pure vanilla extract | ¼ teaspoon | Enhances chocolate flavor |
| Sea salt | Pinch | Optional but recommended |
Little Memories in a Mug
I remember the first time I made hot chocolate from scratch. My grandma winked at me and said, “Store-bought packets don’t know how to hug you back.” She was right. This recipe feels like a warm blanket on a chilly afternoon. Doesn’t that smell amazing already?
You only need one small saucepan and a good whisk. No fancy tools. I once tried using a fork in a hurry—what a mess! Trust me, a whisk is your best friend here. Let’s start stirring up some coziness.
How to Make the Ultimate Hot Chocolate
Step 1: Pour 4 cups of whole milk into your saucepan. Add ¼ cup of unsweetened cocoa powder and ¼ cup of granulated sugar. Whisk them all together before you turn on the heat. This stops lumps from forming. I learned this the hard way after one lumpy cup that looked like mud.
Step 2: Turn the burner to medium-low and whisk often. You want it warm, not boiling—think bath water, not soup. Keep stirring gently as the milk heats up. (Hard-learned tip: If it boils, the milk can scorch and taste sad. Go slow.)
Step 3: Once the milk is steaming, toss in ½ cup of chocolate chips. Use bittersweet or semisweet—good chocolate makes this sing. Whisk constantly until the chips melt into a glossy, dark river. This is the moment I always peek into the pot with a little grin.
Step 4: Take the pan off the heat. Stir in ¼ teaspoon of pure vanilla extract and a pinch of sea salt. The salt doesn’t make it salty—it makes the chocolate taste deeper. Pour it into your favorite mug right away. What’s your go-to mug for cozy drinks? Share below!
Cook Time: 8–10 minutes
Total Time: 12 minutes
Yield: 4 servings
Category: Drinks, Dessert
Three Fun Twists to Try
Peppermint Dream: Add a drop of peppermint extract at the end. Top with a crushed candy cane for crunch.
Spicy Aztec: Stir in a pinch of cinnamon and a tiny pinch of cayenne pepper. It warms you from the inside out.
Orange Kiss: Swap the vanilla for ½ teaspoon of orange zest. It tastes like a chocolate orange bar in a mug.
Which one would you try first? Comment below!
Serving It Up Right
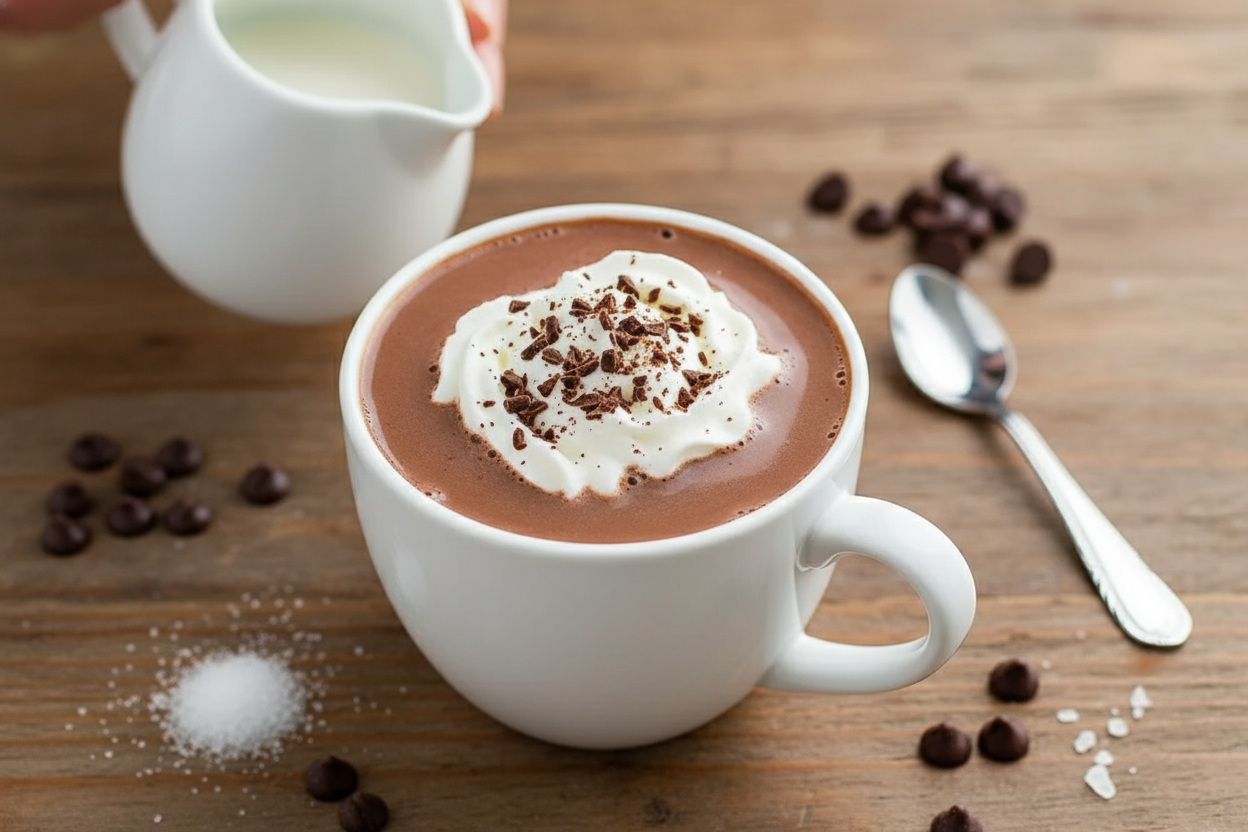
Pour your hot chocolate into a big mug and top with a cloud of whipped cream. A few chocolate shavings on top make it look fancy. Serve with a crispy butter cookie for dipping—my grandkids fight over the last one.
For a grown-up pairing, a tiny splash of bourbon or dark rum works wonders (ask a parent first). Kids and grown-ups alike love it with a cold glass of milk on the side. Which would you choose tonight?
Storing Your Hot Chocolate for Later
You can make a big batch of this hot chocolate and keep it in the fridge. It stays good for up to three days. Just let it cool first, then pour it into a jar with a lid. I once stored some in a glass bottle and forgot about it for two days. When I reheated it, it tasted just as rich and smooth.
To reheat, pour the cold mix into a saucepan. Warm it gently over low heat while stirring. Do not let it boil. You can also reheat single servings in the microwave. Use short bursts of 20 seconds and stir in between. Why does this matter? Batch cooking saves you time on busy mornings. You get a cozy cup in just minutes. Have you ever tried storing it this way? Share below!
Fixing Common Hot Chocolate Problems
Sometimes your hot chocolate comes out lumpy. This happens if you skip whisking before heating. Always whisk the dry cocoa and sugar into the cold milk first. That stops clumps from forming. I remember when I first made this, I forgot the whisk and got little dry bits. It was still tasty, but not as smooth.
Another issue is a watery taste. That means you used too much milk or not enough chocolate chips. Stick to the amounts in the recipe. Quality chocolate chips make a big difference here. Why does this matter? Fixing these small problems builds your cooking confidence. You learn to trust the recipe and your own hands. Which of these problems have you run into before?
One more problem is scorching. Hot milk burns easily if you heat it too fast. Keep the flame on medium-low and stir often. Patience makes the texture silky and sweet.
Your Hot Chocolate Questions, Answered
Q: Is this recipe gluten-free? A: Yes, all the ingredients are naturally gluten-free. Just double-check your chocolate chips.
Q: Can I make it ahead of time? A: Absolutely. Follow the storing tips above and reheat when ready.
Q: What if I don’t have chocolate chips? A: Use chopped baking chocolate or even a chopped chocolate bar. Dark chocolate works best.
Q: How do I double the recipe? A: Just multiply every ingredient by two. Use a bigger pot and keep the heat low.
Q: Can I add a pinch of cinnamon? A: Yes, a little cinnamon or even a drop of peppermint extract makes it special. Which tip will you try first?
My Warm Goodbye to You
I hope this recipe brings you warmth and comfort. There is nothing like a mug of homemade hot chocolate on a chilly day. It is simple enough for a beginner and rich enough for a cold evening. *Fun fact: Dutch-processed cocoa is less acidic, so it tastes smoother and darker.* Please share your photos with me. Have you tried this recipe? Tag us on Pinterest! Happy cooking!
—Tessa Hammond.
Ultimate Homemade Hot Chocolate Recipe Guide
Description
The ultimate guide to making the perfect homemade hot chocolate with a rich, silky chocolate base.
Ingredients
Instructions
- Place milk, cocoa powder, and sugar in a small saucepan. Whisk together before heating to prevent clumping.
- Heat gently over medium-low while whisking frequently. Stop before boiling.
- Add chocolate chips and whisk constantly until smooth and glossy.
- Whisk in vanilla extract and a pinch of sea salt. Serve immediately for best texture.
Notes
- For best results, use high-quality chocolate chips and Dutch-processed cocoa powder. Adjust sugar to your sweetness preference.


Leave a Reply